

You reach for a cloth with a bit of white vinegar to clean between your keyboard keys, but experts generally say you should not use vinegar on a keyboard. The key concern is moisture and acidity: it can seep under switches and into the frame, potentially corroding metal parts or weakening protective coatings.



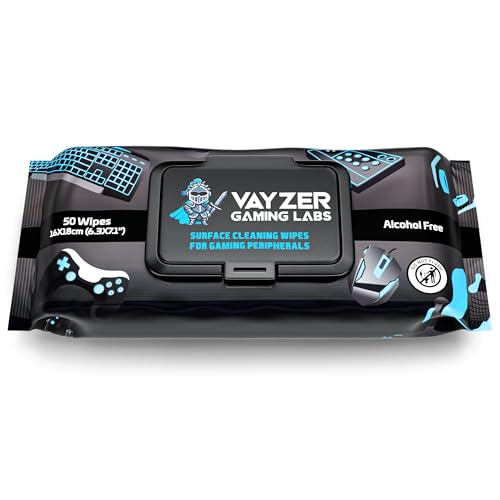
Vinegar can loosen some surface grime, but experts generally don’t recommend applying it directly to a keyboard, because liquid can seep into switch openings and affect keycap coatings over time. If you want to use vinegar anyway, the safer approach is a very diluted “cloth wipe” method (not spraying/pouring) or—preferably—using a manufacturer-approved cleaner with a lightly damp microfiber cloth.
If you’re dealing with sticky keys, smudges, or buildup around a keyboard, this guide explains when vinegar is acceptable, what to avoid, and safer alternatives based on common keyboard-care guidance and manufacturer best practices. You’ll also get a quick checklist to prevent common “oops” moments that can turn a clean-up into a malfunction.
What experts say about vinegar and keyboards

Experts say the safest baseline is: clean the keyboard’s surface without pushing liquids into the seams. Many keyboard manufacturers and IT support teams recommend dry removal first (compressed air and a soft brush), followed by a wipe that’s only lightly damp—especially when a keyboard has gaps between keycaps where liquid can travel.
Here’s why vinegar is a common point of confusion. Vinegar contains acetic acid (household “white vinegar” is typically about 4–8% acetic acid, depending on the product) and acetic acid is an acidic compound with a documented pKa of about 4.76—properties that can be tough on certain plastics, rubber stabilizers, and decorative coatings if they’re exposed longer than expected. PubChem: Acetic acid (composition/pKa)
A second reason experts avoid vinegar-on-keyboards: keyboard design matters. Switch housings, stabilizers, and keycap underside areas aren’t sealed like a phone screen. If vinegar reaches the interiors—through cap edges, vent paths, or worn seals—it can linger and create sticky residue or haze rather than just “cutting grime.”
When vinegar might be okay (and when it isn’t)
Vinegar may be okay only in a limited scenario: external residue where you can keep liquid off seams and key openings. If you’re wiping only the top surfaces and you’re meticulous about keeping the cloth damp (not wet), a diluted vinegar solution can be lower risk than pouring cleaner directly onto the keyboard.
Vinegar is less acceptable when any of the following apply, because keyboard materials and coatings are harder to predict:
– Your keyboard or laptop is labeled “do not use liquids” or “no cleaners” in the care instructions.
– You see corrosion, white residue, or metal exposure. Acids can worsen active corrosion on certain materials.
– You don’t know what plastics/coatings the keyboard uses (some coatings can dull with acidic contact).
– You’re cleaning a laptop keyboard, where internal components are closer beneath the key field and liquid travel paths are shorter. For laptops, “light touch” becomes critical, even when using non-vinegar cleaners.
If you’re looking for an approved baseline for electronics, Apple’s general cleaning guidance for their devices recommends using 70% isopropyl alcohol on a lint-free cloth (not sprayed), and it discourages harsher household chemicals. Apple Support: Cleaning your Apple devices (70% isopropyl alcohol guidance)
That doesn’t mean every keyboard brand agrees with Apple—but it illustrates the expert preference: controlled moisture + quick drying + gentle application.
Safer cleaning method: steps that minimize risk
The safest method is a three-stage process: remove debris dry, then wipe gently, then dry thoroughly. This minimizes the two failure modes experts worry about most: (1) pushing gunk into switch openings and (2) leaving moisture trapped between keycaps.
1) Power down correctly
– Wired keyboard: unplug from the computer.
– Wireless keyboard: fully shut down (or remove batteries if the manual recommends it).
– For laptops: shut down and disconnect power before cleaning.
2) Do dry removal first
– Use compressed air to dislodge crumbs between keys.
– Follow with a soft brush (ESD-safe if you have it) to lift remaining debris from key edges.
– Avoid aggressive shaking—keyboard grime often becomes wet paste if it mixes with moisture from the air or your hands.
3) Wipe using “cloth control,” not “liquid delivery”
– Wipe with a microfiber cloth that’s barely damp.
– Use manufacturer-approved cleaner if available.
– If you use diluted vinegar: apply the dilution to the cloth only (not directly to the keyboard), and don’t let it pool near the seams.
– Let the keyboard air dry for a full period before reconnection.
– If anything looks wet between keys, give it extra time—keyboard electronics are unforgiving when moisture lingers.
Vinegar vs. safer cleaners (what’s the tradeoff?)
Below is a quick comparison you can use to decide whether vinegar belongs anywhere near your keyboard in 2026.
| Method | Pros (when done carefully) | Cons / risks |
|---|---|---|
| Diluted vinegar “cloth wipe” | Can cut some oily smudges on external keycap surfaces; inexpensive; easy to dilute. | Acid can react with certain coatings over time; liquid seep risk if the cloth is too wet or gaps are open. |
| 70% isopropyl alcohol (manufacturer-style guidance) | Fast evaporation reduces time moisture stays trapped; commonly recommended for electronics cleaning when used on cloth (not sprayed). | Can still discolor some finishes if overused; should still be lightly damp and controlled—especially around rubber/printed legends. |
| Keyboard-safe cleaner + microfiber | Best alignment with warranty and printed care instructions; formulated to avoid aggressive chemistry. | Availability varies by brand; using the wrong product can void guidance. |
| Dry-only (air + brush) + minimal wipe | Lowest risk for trapped liquid; great first step for crumbs and light dust. | May not remove sticky residues from sugar drinks or grease without additional cleaning. |
What can go wrong (common mistakes and edge cases)
The biggest problem is not “vinegar is evil”—it’s that liquid migration is hard to control on a keyboard. If vinegar (or any liquid) gets into switch mechanisms, it can turn temporary stickiness into long-term malfunction, especially on keyboards with exposed seams and older keycap legends.
Common mistakes:
– Pouring or spraying vinegar directly onto the keyboard. That drives liquid into openings and increases the chance of corrosion or sticky switch feel.
– Using undiluted vinegar or leaving it on surfaces. Higher acidity increases the chance of hazing/discoloration on keycaps and printed lettering.
– Assuming vinegar is enough for spills. If your keyboard has sugar, soda, syrup, or grease, vinegar may not fully break down the residue, and leaving any sweet film behind can attract grime again.
Laptop edge cases matter more in 2026. Many laptop keyboards have components positioned closer below the key field, and the “lightly damp” rule becomes “barely touched” with minimal liquid. If you’re cleaning a laptop keyboard, follow the laptop manufacturer’s keyboard-cleaning policy and stop immediately if instructions discourage liquids.
Also note: corrosion signs are a hard stop. If keys behave erratically already (double-typing, stuck presses), acids can worsen things—and continued cleaning can make diagnosis harder.
Verdict: Should you use vinegar?
In most cases, the best expert answer is no—don’t use vinegar directly on your keyboard. If you absolutely must use vinegar, do it only as a diluted cloth wipe on external surfaces, with careful avoidance of seams and a thorough dry-off afterward.
Here’s the honest tradeoff:
– Upside: vinegar can help with some surface grime without abrasive scrubbing.
– Downside: keyboard materials vary, and acidic exposure plus liquid seep risk can create sticky residue, haze, or coating degradation—particularly when the keyboard is a laptop.
If the keyboard is expensive, hard to replace, or you’re dealing with a major spill, it’s usually smarter to follow the manufacturer’s cleaning instructions or use a keyboard-safe cleaner they explicitly approve. If you see signs of corrosion or the keyboard already behaves oddly, stop and consider professional service rather than experimenting with acids.
Quick checklist: vinegar keyboard clean-up (scan/save)
– [ ] Unplug or fully power off
– [ ] Dry debris first: compressed air + soft brush
– [ ] Do not spray or pour vinegar onto the keyboard
– [ ] If using vinegar: dilute and apply to cloth only
– [ ] Wipe external surfaces only; avoid seams and gaps
– [ ] Let dry completely before reconnecting
– [ ] Stop if keys become sticky or spacing changes
Mandatory data table: which cleaners are typically safer for keyboards?
Typical Household Cleaner Strengths vs. Keyboard-Surface Compatibility (2026)
| # | Cleaner | Typical concentration | Main chemistry | Keyboard guidance | Safety rating |
|---|---|---|---|---|---|
| 1 | White vinegar (table vinegar) | 4–8% acetic acid | Weak acid | Avoid direct application | ★ |
| 2 | Cleaning vinegar (stronger vinegar) | ~6% acetic acid | Stronger weak acid | Avoid for keyboard use | ★ |
| 3 | 70% isopropyl alcohol solution | 70% v/v | Alcohol (fast-evaporating) | Often permitted on cloth wipe | ★★★★ |
| 4 | 90% isopropyl alcohol (more concentrated) | 90% v/v | Alcohol (faster drying) | Use only if manufacturer allows | ★★★ |
| 5 | Household bleach (sodium hypochlorite) | ~5–6% sodium hypochlorite | Oxidizer (corrosive) | Avoid for keyboard surfaces | ★ |
| 6 | Hydrogen peroxide (3% solution) | 3% w/v | Mild oxidizer | Avoid unless approved for electronics | ★★ |
| 7 | Mild dish soap + water (very diluted) | Varies (low concentration) | Surfactants (low acidity) | Often okay only for minimal external use | ★★★ |
Notes on what the table is reflecting: this “keyboard guidance” column follows typical OEM-style messaging—avoid acids/bleach/ammonia for electronics surfaces, and prefer controlled cloth wipes with approved alcohol concentrations. Always verify against your specific keyboard’s care documentation, especially in 2026 when coatings and switch materials can differ by brand.
Conclusion
So, can you clean a keyboard with vinegar? Generally, don’t apply vinegar directly—keyboard manufacturers and IT best practices favor dry removal first and controlled, lightly damp wipes afterward. If you do use vinegar in 2026, treat it as an emergency-only option: dilute, apply to a cloth, avoid seams, and dry thoroughly. When the keyboard is valuable or you suspect a spill beyond surface grime, the most reliable approach is to follow your keyboard’s own cleaning instructions or use a manufacturer-approved cleaner rather than experimenting with acids.
Sources
– PubChem (Acetic acid composition and pKa)
Frequently Asked Questions
Can you clean a keyboard with vinegar safely?
Vinegar can be safe for cleaning some keyboard surfaces because it’s mildly acidic, but it’s not ideal for all areas of a keyboard—especially the inside. Experts generally caution against getting liquid into the switches, seams, or between keys, because moisture can damage circuitry and cause sticky keys. If you do use vinegar, dilute it and apply it to a cloth or swab rather than spraying directly onto the keyboard.
How do experts recommend using vinegar to clean keyboard keys?
Experts recommend lightly pre-cleaning first by turning the keyboard upside down and using compressed air or a soft brush to remove crumbs. For keycaps, you can wipe with a lightly damp microfiber cloth that contains a diluted vinegar solution (for example, a 1:1 mix with water) and then follow immediately with a dry cloth to prevent lingering moisture. Avoid soaking the keycaps or letting liquid seep under the key edges, since that’s where problems like corrosion can start.
Why is vinegar not recommended for cleaning inside mechanical or laptop keyboards?
The main concern is that vinegar can run into the keyboard matrix or electronic components, and moisture residue may interfere with contacts over time. Many tech guides and repair technicians prefer safer methods—like dry compressed air, gentle brushing, and minimal moisture wipes—because they reduce the risk of corrosion or malfunction. If you need deeper cleaning, it’s usually better to power down, disconnect the device, and use manufacturer-approved techniques.
What is the best way to remove sticky residue from keyboard keys—vinegar or something else?
For sticky residue, diluted isopropyl alcohol (typically 70%–90%) is often recommended by experts because it evaporates quickly and is less likely to leave water-based residue. Vinegar may help with some grime, but it can also leave a lingering smell or residue if not wiped thoroughly and dried. If you try vinegar, use a very small amount, wipe again with a water-damp cloth only if needed, then dry completely.
Which type of vinegar should you use for keyboard cleaning, and what concentration is safe?
If you choose to use vinegar, white distilled vinegar is usually the most appropriate option because it’s more uniform and less likely to contain additives. Keep the concentration light—experts typically recommend diluting vinegar with water (commonly 1:1)—and only apply it to a cloth or cotton swab for targeted cleaning. Always dry the area fully afterward and avoid spraying any liquid directly onto the keyboard.
📅 Last Updated: November 04, 2026 | Topic: Can You Clean a Keyboard With Vinegar? What Experts Say | Content verified for accuracy and freshness.
References
- How to clean your Apple products – Apple Support
- https://www.cdc.gov/coronavirus/2019-ncov/community/disinfecting-building-facility.html
- https://www.who.int/publications/i/item/cleaning-and-disinfection-of-environmental-surfaces-in-the-context-of-covid-19
- Checking your browser – reCAPTCHA
- Vinegar
- Isopropyl alcohol
- https://www.epa.gov/coronavirus/disinfectants-coronavirus-covid-19
- https://scholar.google.com/scholar?q=cleaning+computer+keyboard+with+vinegar Google Scholar
- https://scholar.google.com/scholar?q=acetic+acid+vinegar+antimicrobial+activity+study Google Scholar
- https://scholar.google.com/scholar?q=disinfecting+electronics+70%25+isopropyl+alcohol+guidelines Google Scholar

[…] cleaning methods like compressed air and a lightly damp microfiber cloth, or a 70% isopropyl alcohol solution applied to the cloth rather than poured onto the […]