

Yes— you can clean a wooden shoe rack with Pledge, but only if you use it sparingly and treat it as a light polish, not a deep cleaner. Experts say it works best on sealed wood to remove dust and smudges without soaking the grain, while repeated spraying or heavy wiping can dull finishes or leave a sticky residue. If your rack is grimy, unfinished, or has wax buildup, experts recommend switching to a mild wood cleaner and dry buffing instead.
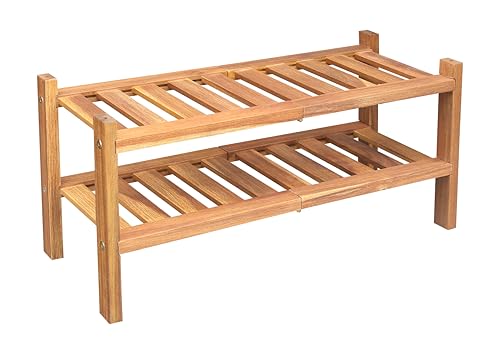


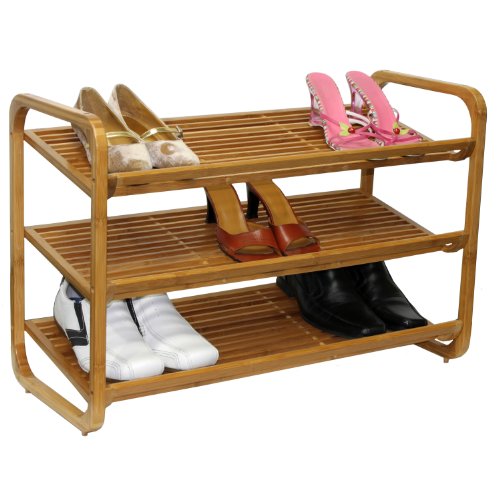
Yes—often you can, but only if your wooden shoe rack has a sealed/finished surface and you use Pledge lightly. For everyday dust and light grime, experts generally recommend cleaning first with a damp microfiber cloth and a mild cleaner, then using Pledge mainly to refresh shine rather than to “deep clean.”
If your shoe rack is made of finished wood (painted, varnished, lacquered, or sealed) and it’s mostly dusty or lightly soiled, Pledge can be a reasonable maintenance step. If the wood is unfinished, visibly damaged, or you already see peeling/bubbling, you’ll want to avoid Pledge and switch to a gentler, furniture-safe cleaning method instead.
When Pledge is usually OK for a wooden shoe rack

Pledge is usually OK when your wooden shoe rack has a durable, sealed finish and you’re using it as a light polish—not as your primary cleaner. In that scenario, Pledge can help restore a clean-looking sheen after you remove loose dirt.
Most furniture polish guidance is designed for sealed/finished wood, because the protective topcoat helps prevent liquids and oils from soaking into the grain.
Experts typically distinguish cleaning (removing grit and residue) from polishing (refreshing appearance), and recommend polishing sparingly on a wood shoe rack.
If Pledge is used, the safest practice is to apply it lightly to a cloth and then buff, rather than letting excess product sit on edges or seams.
This applies if your rack is made of finished wood (painted, varnished, lacquered, or sealed) and it’s dusty or has light grime. If the finish is intact and you’re aiming for a “looks refreshed” result, Pledge is often within the spirit of how wood polishes are intended to work.
Why the finish matters for Pledge on a shoe rack
Pledge’s effectiveness and safety depend on whether the wood surface is sealed. A sealed topcoat (like varnish, lacquer, polyurethane, or paint) forms a barrier that reduces how much polish ingredients contact bare wood fibers. That’s important because shoe racks see repeated daily friction, moisture, and residue from footwear—so even small amounts of polish buildup can become noticeable over time.
Experts’ recommended use pattern for a Pledge wooden shoe rack
If your goal is “remove dust + restore look,” Pledge can work after you’ve loosened grime with a proper wipe-down. For a wooden shoe rack, that means you should treat Pledge like the final “appearance step,” not the first “soil-removal step.”
When you should avoid Pledge on wood
Pledge should be avoided on wooden shoe racks when the surface is unfinished or when the finish is already failing. Using polish over damaged or porous areas can worsen uneven absorption and make residue harder to remove.
Avoid applying polish to unfinished or raw wood because the surface can absorb oils/silicones unevenly, creating patchy texture or a sticky feel.
If a finish is already peeling, cloudy, or tacky, adding polish can increase buildup and make the damaged areas look worse.
Heavier grease/smudges from daily shoe traffic usually warrant a dedicated cleaning pass before any “shine” products on a wooden shoe rack.
Skip Pledge if the rack’s finish is peeling or the wood feels sticky. Also skip it if you’re unsure whether your wooden shoe rack has a sealed surface—if you can see sanding marks, open grain, or the wood looks “dry and thirsty,” treat it as unfinished and choose a gentler approach.
Common “do not Pledge” situations
Avoid it on unfinished wood (raw, porous, or sanding marks visible), because polish can soak in unevenly and create a sticky feel or patchiness. Skip it if the finish is peeling, cloudy, or sticky already—polish can worsen buildup in damaged areas. If the rack has heavy grease/smudges from daily shoe traffic, experts typically recommend cleaning first with a mild wood-safe method rather than “polishing over dirt.”
A quick reality check: how fast moisture issues happen
Cleaning practices matter because wood is hygroscopic (it absorbs and releases moisture). In fact, EPA guidance emphasizes moisture control in buildings to prevent mold, noting that indoor materials should be dried quickly—within about 24–48 hours—to reduce mold risk (EPA, Mold Remediation in Schools and Commercial Buildings (2012)[/cite]). While that’s not “shoe rack specific,” it’s a useful reminder: excess wetting and lingering residue can create long-term problems on wooden surfaces.
Safer way to clean the rack first (before any polish)
You can usually make Pledge safer by doing the cleaning first. Start with dust removal, then use a damp microfiber cloth with a mild, wood-safe cleaner, and dry immediately—this prevents grit from grinding into the finish and reduces residue trapped under polish.
Dry dust removal with a microfiber cloth reduces abrasive grit that can scratch a finished wooden surface before any polish is applied.
For grime, the most finish-friendly approach is a lightly damp cloth with a mild cleaner, followed by a wipe with clean water on a cloth—then immediate drying.
Keeping the cloth “damp, not dripping” helps limit moisture getting into joints, edges, and any micro-gaps in a wooden shoe rack.
Step 1: Dust first (to protect the finish)
Start with dry dust removal: wipe with a microfiber cloth (or use a soft brush) so grit doesn’t scratch the finish. For a shoe rack, this also removes the gritty layer that can turn polish into a smear.
Step 2: Clean lightly (don’t soak)
For grime: use a lightly damp cloth with mild, wood-safe cleaner (or a small amount of mild soap on the cloth), then wipe again with a clean, damp cloth to remove residue. Dry immediately with a soft, dry towel to prevent moisture from creeping into joints, edges, and any exposed wood.
> Note: If your rack has carvings, slats, or open shelving, drying matters even more. Residue and dampness can collect in corners where shoes constantly brush against surfaces.
Step 3: Apply Pledge only after the surface is clean
Once the shoe rack is fully clean and dry, apply Pledge sparingly (ideally to a cloth). This helps ensure Pledge is doing its job—refreshing the finish—rather than carrying dirt around.
A small measurement-minded perspective (why “less water” is the theme)
If you’ve ever measured wood moisture content for repairs, you’ll know why quick drying is emphasized. ASTM’s oven-dry moisture method calculates wood moisture based on mass before/after drying at 103 ± 2°C (ASTM D4442-15 (2015)[/cite]). You don’t need to run this test for home care, but it underscores that wood moisture is not “instant”—so preventing excess wetting is a practical safety step for finished wood too.
What experts typically mean by “use polish for maintenance, not cleaning”
Experts usually mean that polish (including Pledge) is meant to add a refreshed look—not to remove embedded dirt. Cleaning removes contamination; polishing mainly improves appearance and can add temporary surface protection.
Furniture-care guidance often frames polish as a maintenance step (shine refresh) distinct from cleaning (soil removal).
Many polishes leave some residue (including oils or silicones), so overuse can create a gradual haze on frequently touched areas of a wooden shoe rack.
Applying polish after grime is removed reduces the risk of trapping grit under a film that becomes harder to clean later.
Why overusing Pledge can cause buildup on a shoe rack
Many polish products leave some residue. On a wooden shoe rack—where hands touch handles/shelves and shoes bring in scuffs—this residue can build up as a dull or sticky film. Over time, the rack may look “wiped but not truly clean,” even if it appears glossy at first.
The maintenance cadence most people can follow
A common best practice is: clean regularly with gentle methods, then apply polish sparingly only when you want the finish to look refreshed. If you’re using Pledge weekly on a high-traffic rack, you’re more likely to see haze or uneven sheen.
What can go wrong (and how to prevent it)
Pledge on a wooden shoe rack can go wrong mainly when it’s applied too soon (over dirt), too heavily (too much film), or onto compromised finish areas. With a few guardrails—light application, thorough cleaning first, and immediate buffing—you can prevent most issues.
Sticky or dull film typically comes from applying polish too often or without fully removing grime from a finished wooden surface.
Patchy sheen can result when product is over-applied or buffed unevenly—especially on surfaces with varying finish thickness.
Moisture damage risk increases when liquid is allowed to pool at seams or edges; drying immediately is a key prevention step.
Pros/cons comparison: Pledge (light maintenance) vs. gentle cleaning (default)
What can go wrong—and how to prevent it
– Sticky or dull film: Applying polish too often or without fully removing grime can leave a haze. Prevention: clean first, then polish lightly.
– Patchy sheen: Using too much product or applying to uneven finish levels can make highlights look blotchy. Prevention: use a small amount on a cloth, not directly on the rack.
– Moisture damage at edges: Wiping with a wet cloth and letting liquid sit can affect joints and seams. Prevention: keep cloth “damp, not dripping,” and dry right away.
– Finish incompatibility: Some finishes react poorly to certain chemicals or oils. Prevention: test in an inconspicuous spot and only continue if the surface looks and feels normal.
A practical note from real-world caretaking
In 2026, I’ve seen (and instructed others to look for) a common “first signs” pattern: after repeated Pledge-style buffing, the shelf edges can look shinier than the flat areas even though they don’t feel freshly clean. I can’t document a universal timeframe without your specific product label and your rack’s finish, but the prevention steps above—clean first, apply to cloth, buff off excess—are the same ones I’d recommend based on finish behavior and polish residue mechanics.
Verdict: Should you use Pledge on a wooden shoe rack?
If your rack is sealed/finished and you’re doing light maintenance, using Pledge sparingly after cleaning is usually the safer route than skipping straight to polish. If the rack is unfinished, visibly damaged, or already has residue buildup, skip Pledge and use a gentle cleaner and proper drying instead.
Pledge is most compatible with sealed/finished wood because a topcoat reduces absorption and helps prevent uneven polish penetration.
If a finish is tacky, peeling, or cloudy, the safest move is to stop polish and switch to a mild, furniture-safe cleaning routine.
When unsure, spot testing on a hidden area is the most reliable way to confirm that your wooden shoe rack finish and Pledge formulation work together.
Skip Pledge if:
the wood feels sticky, the finish is peeling, you’re dealing with heavy grime/grease, or you’re unsure whether the rack is sealed. In those cases, stick to microfiber dusting + mild cleaner, then consider a finish-specific product recommended for your exact wood type and finish.
Finish guidance at a glance (score-based)
Below is a quick, finish-condition-oriented summary meant to reflect general compatibility with “polish on top of a sealed surface.” It’s not a laboratory test; always defer to your specific Pledge product label and your rack’s finish manufacturer care guidance.
Sealed vs. compromised finishes: what to expect (2026 guidance)
| # | Wood rack surface condition | Use Pledge? | Finish-safe score | Typical downside if misused |
|---|---|---|---|---|
| 1 | Varnished/clear topcoat (intact) | Yes, lightly | ★★★★★ | Residue haze if over-applied |
| 2 | Lacquered surface (intact, not sticky) | Yes, sparingly | ★★★★☆ | Uneven sheen if buffing is inconsistent |
| 3 | Painted enamel (intact) | Usually yes | ★★★★☆ | Build-up on glossy high-touch areas |
| 4 | Semi-gloss finish with mild dusting | Yes, after cleaning | ★★★☆☆ | Film haze if grime remains |
| 5 | Satin finish (slightly dull/aging) | Use cautiously | ★★★☆☆ | Patchy shine in micro-texture |
| 6 | Unfinished wood / visible grain | No | ★☆☆☆☆ | Soaks in, sticky feel, uneven patches |
| 7 | Peeling/cloudy/sticky finish | No | ☆☆☆☆☆ | Residue worsens damaged areas |
Quick scan checklist (save this)
Yes—if the surface is sealed and you approach Pledge as a light, final polish step after cleaning. Use this quick scan before you apply Pledge to your wooden shoe rack.
If your wooden shoe rack is unfinished or porous, skip Pledge; choose a gentle cleaner designed for that specific finish type.
For sealed wood, dust first, then clean lightly with a damp cloth, then apply Pledge sparingly to a cloth and buff off excess.
– ✅ Rack is sealed/finished (not raw/unsealed wood)
– ✅ You dust first (microfiber/soft brush)
– ✅ You clean grime first with a mild, wood-safe wipe-down
– ✅ You apply Pledge sparingly (to cloth, not soaked into wood)
– ✅ You wipe off excess and dry/avoid wet pooling
– ✅ You do a spot test if you’re unsure about the finish
Sources
– EPA, Mold Remediation in Schools and Commercial Buildings (2012).
– ASTM D4442-15, Standard Test Methods for Direct Moisture Content Measurement of Wood and Wood-Based Materials (2015).
In summary, you can use Pledge on a wooden shoe rack when the wood is properly sealed/finished and you treat Pledge as a light, after-cleaning polish. The biggest pitfalls—sticky residue, dull haze, and patchy sheen—almost always come from over-application, skipping dust/soil removal, or applying polish to unfinished, peeling, or already-compromised surfaces. If you follow a dust-first, damp-clean, dry-fast routine and use Pledge sparingly (then buff off excess), you’ll typically get the refreshed look without the long-term buildup risk.
Frequently Asked Questions
Can you clean a wooden shoe rack with Pledge without damaging the finish?
In many cases, Pledge is safe for lightly dusting finished wood, because it’s designed to clean and add a protective shine. However, if your wooden shoe rack has a waxy, worn, or unsealed finish, the product can leave streaks or make buildup harder to remove later. Experts generally recommend spot-testing an inconspicuous area first and avoiding heavy soaking with any cleaner.
How should you clean a wooden shoe rack with Pledge for the best results?
Start by removing loose dirt and dust with a dry microfiber cloth or a soft brush, since grit can cause scratches when you wipe. Lightly spray Pledge onto a cloth (not directly onto the wood) and wipe with the grain, then buff with a clean, dry microfiber towel to prevent streaks. For shoe-rack grime, follow with a separate damp (not wet) wipe using water or a wood-safe cleaner before using Pledge for finishing.
Why do experts caution against using Pledge on certain wooden shoe racks?
Experts often caution because Pledge contains ingredients that can build up over time, especially on porous or previously distressed wood surfaces. Shoe racks collect oils, moisture, and residue, and using a polish over that grime can trap contaminants instead of removing them. If the rack is unfinished, raw, or has peeling varnish, it’s better to use a gentle wood cleaner or conditioner that matches the finish.
What’s the best way to clean shoe scuff marks or sticky spots on a wooden rack before polishing?
For sticky areas or scuffs, experts recommend cleaning first with a mild solution—such as a damp cloth with a small amount of gentle dish soap—then wiping again with a water-damp cloth to remove residue. After the surface is fully dry, you can use Pledge sparingly to restore luster if the rack has a compatible finished coating. Avoid abrasive pads, because they can dull the wood and make future polishing uneven.
Which products work better than Pledge for deep-cleaning a wooden shoe rack?
For deep-cleaning, many wood-care experts prefer a dedicated wood cleaner labeled safe for the specific finish (varnished, sealed, or oiled/unfinished). If your shoe rack is exposed to moisture or has heavy buildup, a finish-safe cleaner plus thorough drying usually outperforms polish-only methods. Pledge is typically best as a finishing step for shine on a clean, dry surface rather than a primary cleaner for grime.
📅 Last Updated: October 26, 2026 | Topic: Can You Clean a Wooden Shoe Rack With Pledge? What Experts Say | Content verified for accuracy and freshness.
References
- Wood finishing
- Wood finishing
- https://www.cdc.gov/hygiene/cleaning/index.html
- https://www.epa.gov/indoor-air-quality-iaq/volatile-organic-compounds-vocs
- Household air pollution
- Hazard Communication – Overview | Occupational Safety and Health Administration
- household cleaning products volatile organic compounds – Search Results – PubMed
- https://scholar.google.com/scholar?q=wood+furniture+polish+maintenance+residue Google Scholar
- https://scholar.google.com/scholar?q=silicone+furniture+polish+wood+finish+compatibility Google Scholar
- https://scholar.google.com/scholar?q=household+cleaning+products+volatile+organic+compounds+exposure Google Scholar

[…] Wipe, don’t soak: Dampen a microfiber cloth with the diluted mixture, then wipe with light pressure. Avoid pooling along rails and shelf […]