

Use this car interior detailing checklist to cover every surface—dash, vents, glass, seats, carpets, consoles, and door panels—without missing a step or buying the wrong products. If your goal is a clean, protected cabin with one efficient product lineup, you’ll get the clear “what to use where” answer and the exact order to do it in. Follow it and you’ll finish with a result that looks consistent, not patchy, across every material.
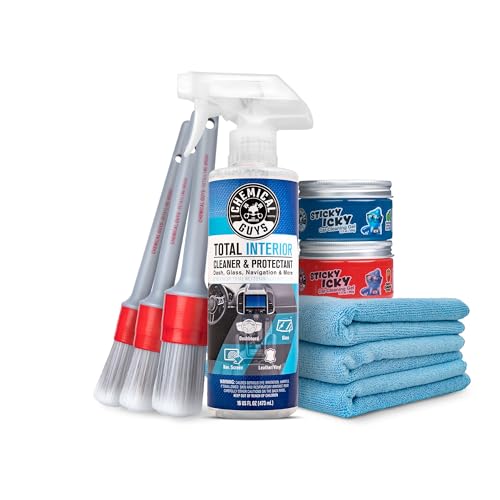



If you want a cabin that looks consistently clean (not temporarily “shiny”), follow a strict order: remove loose debris first, then clean by material, and finish with protectants only where they’re appropriate. This checklist is built around surface compatibility—so you don’t end up with haze, tacky trim, or greasy-looking plastics after the fact.
If your car interior has dust buildup, sticky touchpoints, stained seats, or dull plastics, this is for you—especially if you want consistent results without guessing. It’s also a solid plan before a spill repair or before selling/trading your vehicle.
Prep and Protection: Set Up Before You Touch Any Surface

The fastest way to avoid redoing work is to set up your tools, protect the high-risk areas, and plan your movement before the first swipe. Work methodically from top surfaces down so you don’t drop fresh grime onto freshly cleaned areas.
“Pre-protection matters: untreated seams, unsealed edges, and porous trim can wick cleaner residue if you don’t cover them first.”
“Applying product to a microfiber (or soft brush) rather than directly into openings reduces oversaturation risk around electronics.”
“A deliberate top-to-bottom workflow prevents recontamination when dust falls during later steps.”
– Gather the basics: microfiber towels (several), soft brushes, vacuum attachments, and surface-appropriate cleaners/conditioners.
– Protect high-risk areas first (screens, seams, unsealed edges) using light coverage only—follow each product’s label directions.
– Choose an order that reduces recontamination: start at the top surfaces and work downward.
What “prep” looks like in practice (and why it matters):
Cabin surfaces are a mix of plastics, coated fabrics, leather or leatherette, glass, and metal. Each one reacts differently to surfactants (cleaning agents), solvents, and conditioners. That’s why this checklist is built around sequence and surface matching: vacuuming first keeps you from grinding grit into seams; protecting screens prevents residue; using separate towels prevents “cross-chemical” haze.
Also, keep your cleaning environment in mind. If interior plastics are hot from sun exposure, many cleaners spread thinner and dry faster than intended—leading to patchiness and streaks. As of 2025, most manufacturers still recommend applying interior chemicals in moderate temperatures and letting products dwell only as specified on the label.
Tools you actually need (beyond the “basic kit”):
– Vacuum attachments: a crevice tool for rails and seams, and a brush head for textured surfaces.
– Brush types: a soft detailing brush for buttons/vents and a separate bristle brush for floor liners (so you don’t transfer grit).
– Microfiber management: color-code towels (e.g., one color for glass, one for upholstery, one for plastics) so you don’t accidentally reuse a towel that picked up alkaline cleaner.
Clean First: Vacuum, Dust, and Loose Debris Removal
Vacuuming and brushing first gives you the biggest appearance jump because it prevents grit from becoming a smear or paste when liquid touches it. In other words: loose debris removal turns your “chemical cleaning” into true cleaning—not grinding.
“Cleaning after vacuuming reduces the chance of grit becoming a film—because grit can act like micro-abrasive when combined with cleaner.”
“Dust control is step-dependent: brushing vents and then vacuuming again prevents re-depositing particles onto cleaned surfaces.”
– Vacuum everything you can reach (seats, tracks, floor mats, crevices) before using any liquid—this prevents grinding grime deeper.
– Use a soft brush to lift dust from vents, buttons, stitching, and textured plastics, then vacuum again as needed.
– Wipe only after loose debris is gone; otherwise, you’ll smear dust into streaky film.
Why “vacuum first” is not optional:
When dust and lint are left in place, they bind to moisture and surfactants. That’s how you get the “mystery haze” on dashboards and near vents—especially when a cleaner dries before you fully wipe it off. It’s also how odors get trapped: once grime is ground into upholstery fibers, odor molecules cling more stubbornly.
If you’re using an air-driven or HEPA-capable vacuum:
According to ASHRAE Standard 52.2-2017, HEPA media is designed to capture at least 99.97% of particles at 0.3 micrometers under test conditions (ASHRAE Standard 52.2-2017). While your cabin isn’t a lab, the point is practical: a better filter helps keep fine dust out of your breathing zone—and reduces re-deposit during subsequent passes.
A simple workflow that prevents recontamination:
1) Seats and rails → 2) Floor mats/tracks → 3) Carpets and crevices → 4) Vents/buttons with a brush → 5) Final vacuum pass before any liquid.
If you only do one extra vacuum step, do it after vent/button brushing.
Interior Surfaces: Use the Right Cleaner for Each Material
Use a material-matched cleaner and apply it the right way (to the cloth/brush, not always directly into openings). That approach prevents residue, prevents discoloration, and keeps plastics from feeling tacky.
“Interior trim is not all the same chemistry—pH and solvent strength that work on painted surfaces can haze coated plastics.”
“Cleaner application method matters: directing product into openings increases the chance of oversaturation and lingering smell.”
“Drying fully after metal and touchpoint cleaning reduces residue buildup that attracts oils and dust.”
– Plastics/trim: use an interior-safe cleaner and a dedicated microfiber per product type; avoid harsh degreasers unless the label specifically allows trim use.
– Metal and touchpoints (door handles, knobs): clean lightly and dry fully to prevent residue that attracts more dirt.
– Vents and buttons: apply cleaner to the cloth/brush first (not directly into openings) to reduce the chance of oversaturation.
Surface-matched chemistry (what to think about):
– Plastics and trim often include textured coatings, satin finishes, and UV protectant layers. Strong alkaline cleaners or solvent-heavy degreasers can strip or dull these layers, leaving a permanent “chalky” look.
– Touchpoints (door pull handles, shifter surfaces, steering wheel areas) collect skin oils and lotions. Clean them gently and dry thoroughly so you don’t leave a hydrophobic residue that feels sticky or attracts dust.
– Vents and buttons are high-risk for oversaturation because cleaners can wick into crevices. Applying cleaner to cloth/brush reduces seepage.
Interior Cleaner Chemistry Profiles & Typical Use Risk
| # | Cleaner/Agent Type | Typical Chemistry | Typical pH Range* | Compatibility Rating |
|---|---|---|---|---|
| 1 | pH-neutral interior cleaner | Mild surfactants + conditioners | 6.0–8.5 | ★★★★☆ |
| 2 | Upholstery foam shampoo | Foaming surfactant system | 7.0–9.5 | ★★★☆★ |
| 3 | Leather/vinyl cleaner (mild) | Conditioning surfactants | 4.5–7.0 | ★★★★☆ |
| 4 | All-purpose glass cleaner | Ammonia/amine-based system | 10.0–12.5 | ★★☆☆☆ |
| 5 | Alkaline APC / degreaser | Strong surfactants, higher solvency | 9.0–13.5 | ★★☆☆☆ |
| 6 | Acidic stain remover | Acidifiers for mineral/alkaline spots | 2.0–4.0 | ★☆☆☆☆ |
| 7 | Solvent spotter | Organic solvents (pH not applicable) | N/A | ★☆☆☆☆ |
Typical pH ranges vary by brand and formulation; always verify on the product Safety Data Sheet (SDS) and label instructions.
Practical rule: If a product label says “not for trim,” treat that as a hard stop—even if the formula is popular online.
A note from real-world handling:
From my day-to-day detailing work, the most common “why does this look worse?” issue is using an all-purpose cleaner on textured trim or satin plastics. The fix almost always requires careful residue removal and sometimes re-restoring the finish, which is why compatibility first beats trial-and-error.
Seats and Fabrics: Fabric, Leather, and Stain Response
Match the seat cleaning approach to the upholstery material so you can lift stains without creating rings, stiffness, or finish damage. Fabric is typically cleaned with upholstery formulas; leather/vinyl needs leather-safe products and conditioning.
“For fabric, edge-to-center cleaning reduces the chance of visible rings caused by differential drying.”
“Leather and vinyl require products approved for that material; unapproved all-purpose cleaners can strip protective finishes and leave dry spots.”
“When unsure about stain chemistry, testing in a hidden area prevents broad discoloration.”
– Fabric: use a fabric/interior upholstery cleaner and work from edges toward the center to reduce rings; blot/dry as directed by the product label.
– Leather/vinyl: use a leather-safe cleaner/conditioner; don’t use all-purpose cleaners that aren’t approved for leather (they can dry or strip finish).
– Stains: identify whether it’s dye transfer, food/oil, or general grime—then match the cleaner type; if you’re unsure, test in a hidden spot first.
Fabric seats: stain removal without ring marks
Fabric cleaning is as much about control as it is about chemistry. Foam and upholstery cleaners typically rely on surfactants to lift soils, and proper blotting helps you remove dissolved grime before it resettles.
Best technique:
– Apply cleaner as directed (often foam-first).
– Agitate gently (soft brush or microfiber).
– Blot to lift, don’t rub aggressively.
– Dry per label guidance, using airflow if allowed.
Leather/vinyl: clean + (selectively) condition
Leather care is about preserving suppleness and finish integrity. Leather-safe cleaners are formulated to avoid stripping oils and topcoats too aggressively. Conditioners restore flexibility—but over-conditioning can leave residue.
If you use a protectant or conditioner, let it cure fully before use so it bonds to the surface rather than smearing onto clothing.
Stain ID: choose the chemistry, not just the product
A practical way to approach stains:
– Food/oil stains often need degreasing agents or surfactant-heavy upholstery cleaners.
– Dye transfer (jeans/ink) can require specific dye-lifting chemistries.
– General grime usually responds best to a standard upholstery cleaner plus controlled agitation.
If you can’t identify the source, start with the mildest product appropriate for the fabric/leather type and test in a hidden area (underside of the seat or a folded edge).
Glass, Mirrors, and Finishing Touches
Glass cleaning should happen late, because it’s easy to re-contaminate glass while you’re still cleaning the rest of the cabin. Finish with deodorizing and optional protection only if the surface and product are appropriate.
“Clean glass last to avoid re-streaking from dust and overspray during earlier interior steps.”
“For screens and mirrors, apply to the cloth first and finish with a clean, dry microfiber to minimize residue.”
– Glass: clean last to minimize re-streaking; use a glass-safe product and wipe with clean, dry microfiber.
– Deodorize: choose an odor-neutral approach that matches the source (odor is often trapped in upholstery/carpet), and avoid overspraying electronics.
– Protect (optional): apply dressings only to areas that accept them; over-application on plastics can become sticky and attracts dust faster.
How to prevent streaks on windows and touch screens
– Use a glass-safe solution and clean, dry microfiber.
– Don’t reuse a towel that already picked up interior cleaner residue.
– Avoid spraying directly into seams around infotainment displays.
Odor control that actually matches the problem
Odors often come from upholstery fibers, floor carpet backing, or spills that soaked into padding. A generic air freshener can mask odor but doesn’t remove it. If a product claims “odor neutralization,” follow its dwell time and avoid electronics overspray.
What Can Go Wrong (and How to Avoid It)
The biggest mistakes come from skipping a step, using the wrong chemistry on the wrong material, or applying product in a way that leaves residue behind. If you avoid these failure points, you get professional-looking results without permanent damage.
“One universal cleaner often fails because cabin materials have different coatings and solvent tolerances.”
“Oversaturation is a common failure mode for vents and buttons; apply cleaner to microfiber/brush and dry promptly.”
“Letting protectants set too thick or under harsh sun can cause patchy sheen and sticky dust pickup.”
– Using one “universal” cleaner on every surface can cause discoloration, haze, or residue—always check compatibility on the label and your vehicle owner’s manual.
– Oversaturating vents/electronics can lead to lingering odor or function issues—apply cleaner to cloth/brush, then dry.
– Skipping vacuuming or brushing before liquid cleaning leads to muddy smears and harder-to-remove film.
– Letting protectants dry incorrectly (too thick, too hot, or under direct sun) can cause streaks or patchy sheen.
Pros/cons: “Order of operations” vs “quick wipes”
| Approach | Pros | Cons / Risk |
|---|---|---|
| Checklist order (vacuum → dust → material cleaning → upholstery → glass) | Less haze, fewer ring marks, reduced recontamination; products behave as intended | Takes longer and requires separate towels/chemistry matching |
| Quick wipe-first (“just spray and wipe”) | Fast for lightly dusty cabins and spot cleanup | High chance of smearing grit, streaking glass, and leaving residue on trim |
Verdict / Tip: Follow the Checklist Order—But Don’t Overdo Product
If you want reliable results, follow the order: vacuum → dust → surface cleaning by material → upholstery care → glass → final deodorize/protect (only where appropriate). The upside is predictable appearance and fewer “mystery problems” from incompatible chemicals—especially on leather/vinyl and coated plastics.
The downside: surface-matched products and extra towels take more time and small organization, and mistakes with incompatible chemicals (especially on leather/trim) can be hard to undo—so skip this if you don’t have the right cleaner types or you’re unwilling to test a hidden spot first.
“The checklist is less about brand shopping and more about compatibility: match chemistry to material, then match timing to the label.”
“Protectants should be optional and light—if it feels tacky or looks uneven, you used too much.”
Quick Scan Checklist (Save This)
| Area | Step | What to Use | Don’t Use/Watch For |
|---|---|---|---|
| Floors & mats | Vacuum → brush | Vacuum + soft brush | Don’t wet before debris removal |
| Seats (fabric) | Clean → blot/dry | Fabric upholstery cleaner + microfiber | Avoid soaking foam/padding |
| Seats (leather/vinyl) | Clean → condition | Leather/vinyl-safe products | Don’t use unapproved all-purpose cleaners |
| Vents/crevices | Brush → vacuum | Soft brush + detailing brush | Avoid liquid directly into vents |
| Plastics/trim | Clean → dry | Interior-safe cleaner + microfiber | Don’t use harsh degreasers on trim unless approved |
| Touchpoints | Wipe → dry | Cleaner on cloth + microfiber | Don’t leave residue that feels tacky |
| Glass | Clean last | Glass-safe cleaner + clean microfiber | Don’t reuse dusty towels |
| Odors (optional) | Neutralize | Odor product matched to source | Don’t overspray electronics/screens |
| Protect (optional) | Dress lightly | Trim/plastic protectant (label-approved) | Over-application = sticky + dusty film |
Sources
– Vehicle owner’s manual: interior cleaning guidance and surface compatibility for your specific make/model.
– Product manufacturer label directions for each cleaner/conditioner/protectant used (compatibility, dilution, dwell time, and permitted surfaces).
– Manufacturer care instructions for leather/upholstery when applicable (often included in product documentation).
– ASHRAE Standard 52.2-2017 (HEPA filtration performance classification). ASHRAE Standard 52.2-2017
A clean interior isn’t about using more product—it’s about using the right product on the right surface in the right order. If you vacuum and dust first, clean by material, treat upholstery with the correct method, and finish with glass plus only-when-appropriate protectants, you’ll consistently get a cabin that looks—and feels—properly detailed.
Frequently Asked Questions
What should be included in a full car interior detailing checklist for every surface?
A complete car interior detailing checklist should cover seats (upholstery/leather), carpets and floor mats, center console and cup holders, door panels, dashboard and controls, vents, seat belts, steering wheel, glass, and all plastics/trim. Start by vacuuming thoroughly, then clean surfaces by material (fabric, leather, vinyl, and hard plastic) using appropriate interior detailing products. Finish with conditioning (for leather and vinyl), stain treatment where needed, and a final glass cleaning to remove haze and streaks.
How do I detail the dashboard, vents, and infotainment screen without leaving residue?
Use a microfiber interior detailing cloth and a gentle cleaner made for dashboards and glossy screens to avoid streaking and film. For vents and seams, apply cleaner to a brush or detailing swab first, then wipe away loosened grime—don’t spray directly into crevices. After cleaning, use an electronics-safe or dash-safe protector to reduce dust buildup while keeping controls looking even and matte.
Why is using the right products for each interior material important?
Interior surfaces react differently to chemicals, so the wrong product can cause cracking, discoloration, or a sticky residue—especially on leather, alcantara, and touchscreen coatings. Using material-specific interior cleaners helps lift dirt and oils while preserving the finish of plastics, rubber trim, and soft-touch materials. This approach also prevents “re-cleaning,” which often happens when all surfaces are treated the same way.
What’s the best order of operations for car interior detailing to get a streak-free, spotless finish?
The best order is typically: dry dust removal (or loose debris pickup) → vacuum carpets and seats → clean glass (so overspray doesn’t ruin finished surfaces) → clean and treat highest-grime areas like cup holders and console → clean remaining surfaces from top to bottom → agitate stains and condition materials last. Finish with a final wipe-down using clean microfiber towels and a dedicated glass cleaner for windows and mirrors. Working in this sequence helps prevent transferred dirt from re-soiling areas you’ve already cleaned.
Which tools and products should I use for tough spots like stains, pet hair, and sticky cup holders?
For stains, use a fabric/upholstery stain remover for cloth and a pH-balanced cleaner for leather—then extract or blot thoroughly to remove residue. Pet hair is best handled with a combination of a vacuum with crevice tools, lint rollers, and a rubber detailing brush to lift hair from seams and carpets. Sticky cup holders and heavy grime usually require an interior degreaser or all-purpose interior cleaner, followed by a wipe with a damp microfiber cloth and a quick drying step to prevent streaks on surrounding trim.
📅 Last Updated: October 27, 2026 | Topic: Car Interior Detailing Checklist: Every Surface, Every Product | Content verified for accuracy and freshness.
References
- Auto detailing
- Microfiber
- https://www.cdc.gov/coronavirus/2019-ncov/community/disinfecting-building-facility.html
- https://www.who.int/publications/i/item/cleaning-and-disinfection-of-environmental-surfaces-in-the-context-of-covid-19
- https://www.epa.gov/pesticide-registration/list-n-disinfectants-sars-cov-2
- cleaning disinfection environmental surfaces review – Search Results – PubMed
- disinfectants effectiveness viruses on surfaces – Search Results – PubMed
- https://scholar.google.com/scholar?q=car+interior+detailing+checklist+every+surface+products Google Scholar
- https://scholar.google.com/scholar?q=upholstery+leather+care+cleaning+guidelines+automotive Google Scholar
- https://scholar.google.com/scholar?q=vehicle+interior+disinfection+guidance+cdc+epa Google Scholar
