Deep Cleaning Checklist for Grout
Start by inspecting your grout for cracks or mold, then gather supplies like a stiff brush, microfiber cloth, and a pH-neutral cleaner or baking soda paste. Clear the area, apply your chosen cleaner evenly, and scrub grout lines gently in circular motions. Rinse thoroughly to remove residue, then dry and ventilate the space to prevent moisture buildup. Regular cleaning helps maintain grout’s look and durability. Keep following for more detailed steps to fully restore your grout’s appearance.
Assessing the Condition of Your Grout
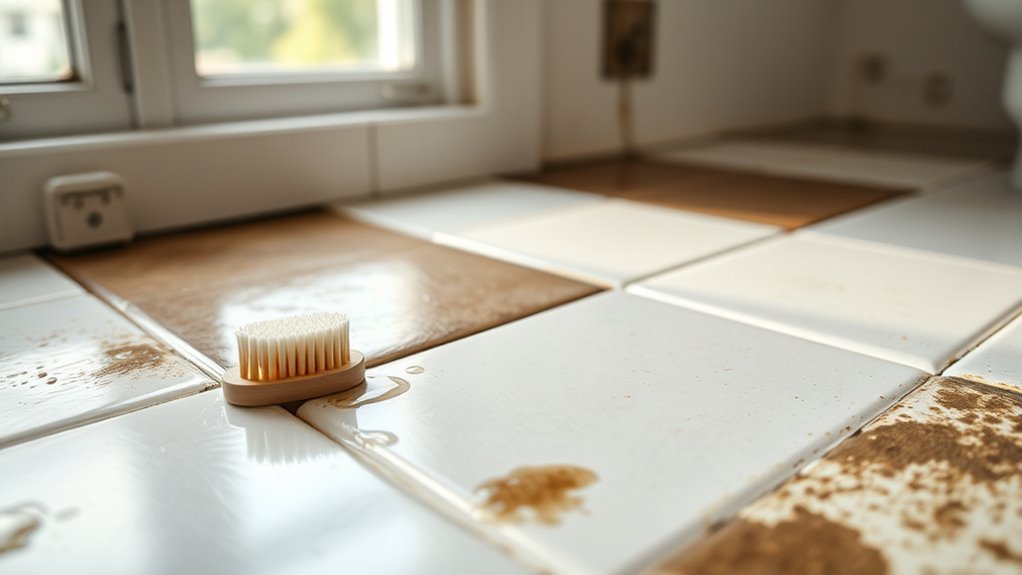
How do you know when your grout needs a deep cleaning? Start by closely examining the grout lines for signs of discoloration, which often signal dirt buildup or mold growth—common grout discoloration causes. Run your fingers along the grout; if it feels rough or crumbly, this indicates deterioration. You may also spot cracks or missing sections, which compromise the grout’s integrity. Identifying these issues early lets you explore grout repair options before damage worsens. Carefully evaluating the condition helps you decide whether a thorough cleaning suffices or if repair is necessary. Taking this methodical approach gives you control, ensuring your grout remains clean and durable without unnecessary work, freeing you to enjoy a fresh, well-maintained space. Knowing your grout type can also guide you in choosing the most effective cleaning and maintenance methods.
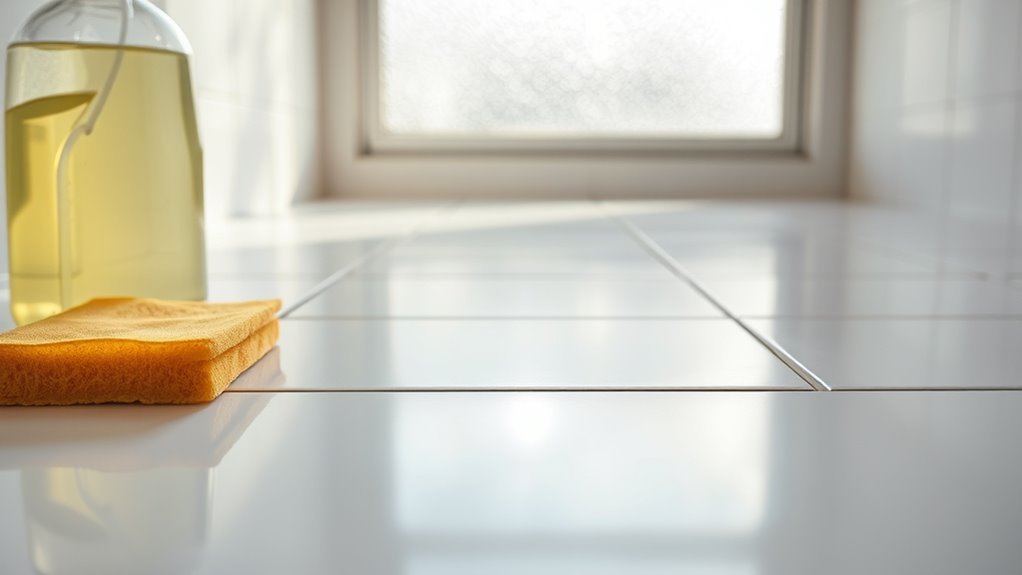
Gathering Essential Cleaning Supplies
Before you begin scrubbing, make sure you have the right tools on hand—think stiff-bristled brushes, microfiber cloths, and a reliable spray bottle. Choosing effective cleaning solutions is just as important; consider options like baking soda paste or a commercial grout cleaner suited for your grout type. Having these essentials ready will streamline the cleaning process and improve your results. Additionally, wearing protective gloves during cleaning will help shield your hands from harsh substances and enhance safety.
Must-Have Cleaning Tools
To tackle grout cleaning effectively, you’ll need a set of essential tools tailored for tough, detailed work. Start with quality grout brushes—these are designed with stiff bristles and narrow heads to reach deep into the grooves and corners where dirt hides. Avoid using regular sponges or cloths, as they won’t provide the scrubbing power or precision required. Next, have an assortment of cleaning solutions ready; while the specifics will follow later, make certain you have appropriate containers for application. Additionally, consider gloves to protect your hands and a spray bottle for even distribution of solutions. A small scrubber or an old toothbrush can supplement grout brushes for delicate spots. Preparing these tools upfront gives you the freedom to clean thoroughly and efficiently without interruptions.
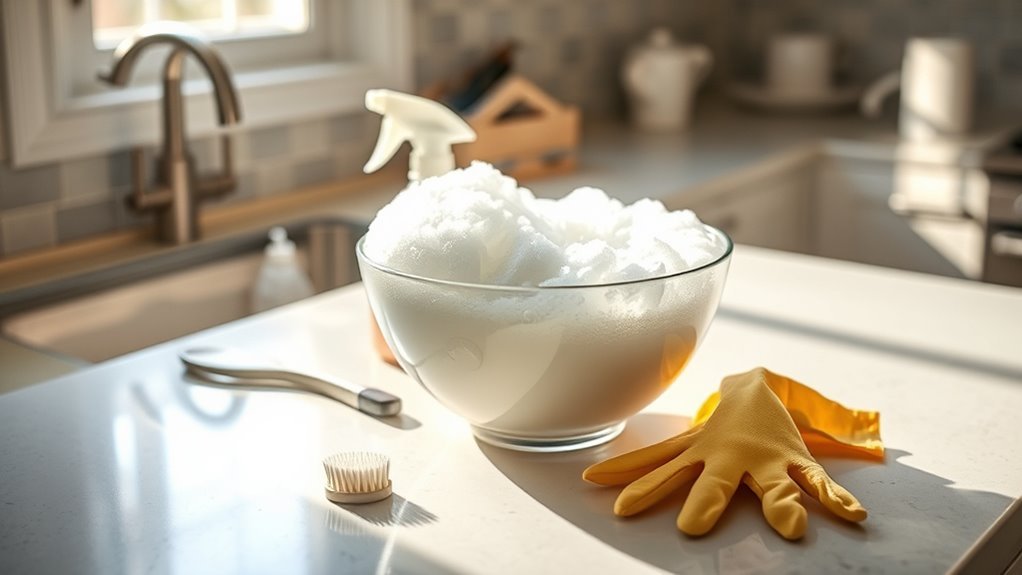
Effective Cleaning Solutions
With your cleaning tools ready, the next step is selecting the right solutions to break down grime and mildew in grout lines. Choosing between eco friendly solutions and commercial products depends on your preferences and the level of cleaning needed. Here’s a practical guide to help you gather essential cleaning supplies:
- Eco Friendly Solution: A mix of baking soda and vinegar or a plant-based cleaner offers a gentle yet effective approach, perfect for those wanting chemical-free freedom.
- Commercial Grout Cleaner: These are specially formulated to tackle tough stains and mold, providing powerful results with minimal effort.
- Hydrogen Peroxide: Often combined with baking soda, it brightens grout without harsh chemicals.
Preparing the Cleaning Solution
Although selecting the right cleaning solution might seem straightforward, it’s essential to tailor the mixture specifically for grout to confirm effective dirt removal without causing damage. Start by deciding between natural cleaning agents and chemical solutions based on your preference for safety and environmental impact. For natural cleaning, mix equal parts baking soda and water into a paste; it’s gentle yet effective. If you opt for chemical solutions, make sure they’re designed for grout and diluted according to the label to avoid weakening grout lines. Always prepare small batches to maintain potency and prevent waste. Use gloves to protect your skin and mix the solution in a well-ventilated area. Taking these precise steps gives you control, confirming your grout is cleaned deeply while preserving its integrity. Additionally, regular cleaning helps prevent grout discoloration and maintains the overall appearance of your tiled surfaces.
Pre-Cleaning Surface Preparation
Before applying any cleaning solution, you’ll want to ascertain the grout surface is free from loose dirt, dust, and debris that could interfere with deep cleaning. Taking this step guarantees your efforts aren’t wasted and the cleaning solution can work effectively across various surface types. Depending on your cleaning frequency, this prep might be more or less intensive.
Start with these steps:
- Sweep or vacuum the area to remove loose particles.
- Wipe the surface with a damp microfiber cloth to catch remaining dust.
- Inspect grout lines for any damage or discoloration needing special attention.
Ensuring the surface is properly prepared also helps prevent grime absorption into the porous grout during cleaning.
Applying the Cleaning Solution to Grout
You’ll want to start by selecting a cleaning solution that’s both effective and safe for your grout type. Next, apply the solution evenly using a small brush or sponge to guarantee it penetrates the grout lines thoroughly. Be sure to follow the manufacturer’s instructions on dwell time for the best results. Sealing the grout after cleaning helps protect it from future stains and makes maintenance easier, especially for sanded grout types.
Choosing Effective Cleaning Solutions
When selecting a cleaning solution for grout, it’s important to take into account the type of grout and the level of staining or buildup you’re dealing with. You want a product that’s effective yet safe to maintain your freedom from harsh chemicals. Consider these options:
- Natural alternatives like baking soda mixed with vinegar offer gentle, eco-friendly cleaning for light stains and regular upkeep.
- Commercial products formulated specifically for grout tackle tougher grime but require careful use to avoid damage or residue.
- Oxygen bleach solutions provide a balance, penetrating deep stains without harsh fumes, ideal for moderate buildup.
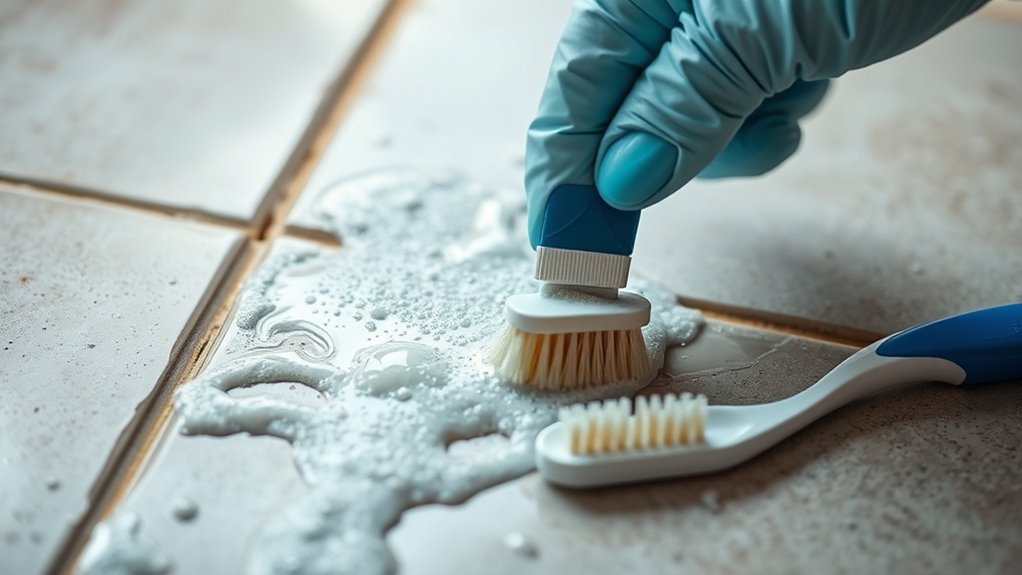
Proper Application Techniques
Applying the cleaning solution properly involves a few essential steps to guarantee it penetrates the grout without causing damage. First, apply the solution evenly using a small brush or sponge, focusing directly on grout lines to avoid excess on surrounding tiles. Avoid saturating the area, as too much moisture can lead to grout staining prevention issues later. Let the solution sit for the recommended time to loosen dirt and stains effectively. Then, gently scrub with a stiff-bristled brush, working in circular motions to aid grout color restoration without abrasive damage. Finally, rinse thoroughly with clean water to remove residues, preventing any discoloration or buildup. Following these precise steps assures a deep clean while preserving your grout’s original color and integrity.
Scrubbing Techniques for Effective Grout Cleaning
Although grout can trap dirt and grime stubbornly, mastering the right scrubbing techniques can make a significant difference in restoring its original brightness. To achieve thorough results, focus on these grout scrubbing techniques using effective cleaning methods:
Mastering grout scrubbing techniques is key to effectively restoring its original brightness and cleanliness.
- Use a stiff-bristled brush: Apply firm pressure and scrub in small, circular motions to break up embedded dirt without damaging the grout.
- Target grout lines: Concentrate your efforts strictly on grout, avoiding excess force on tiles, which preserves their integrity.
- Work in sections: Divide the area into manageable parts, scrubbing systematically to guarantee no spots are missed and the cleaning is consistent.
Additionally, using a pH-neutral cleaning solution helps prevent damage to grout and surrounding tiles during scrubbing.
Rinsing and Removing Residue
After scrubbing, you’ll want to rinse the grout thoroughly with clean water to prevent any cleaner buildup. Use a sponge or mop to gently wipe away loosened dirt and leftover residue, changing the water frequently. This step is essential to guarantee your grout stays clean and free from any film that can attract more dirt.
Effective Rinsing Techniques
To guarantee your grout stays spotless, you’ll need to rinse thoroughly to remove all cleaning residues that could attract dirt later. Choosing the right rinsing methods and water temperature is key to a flawless finish. Here’s a practical approach:
- Use lukewarm water—it dissolves and flushes away cleaner residues more effectively than cold or hot water.
- Employ a spray bottle or gentle stream from a faucet for controlled rinsing, preventing excess water buildup in grout lines.
- Wipe the surface with a microfiber cloth or sponge after rinsing to absorb remaining moisture and loosened debris.
Residue Removal Tips
Once you’ve rinsed your grout thoroughly, the next step is to guarantee all residues are completely removed to prevent future buildup. Start by wiping the grout lines with a microfiber cloth dampened in clean water, ensuring you reach every crevice. Avoid harsh scrubbing that can damage grout; instead, use gentle pressure to lift any remaining cleaner. After wiping, dry the area with a clean towel to prevent moisture retention, which contributes to residue buildup. Pay attention to corners and edges where residue tends to accumulate unnoticed. Maintaining a consistent cleaning frequency is essential—regularly removing residue prevents stubborn grime and prolongs grout’s lifespan. By following these steps, you’ll keep your grout pristine, giving you the freedom to enjoy a fresh, clean space without worrying about hidden residue.
Drying and Ventilating the Area
Although you’ve thoroughly cleaned the grout, drying and ventilating the area properly is essential to prevent mold and mildew buildup. Effective humidity control and improved air circulation are your best allies here. Follow these steps to guarantee your grout dries quickly and stays fresh:
- Open windows and doors to create a natural airflow that speeds up drying.
- Use fans directed toward the cleaned area to boost air circulation and reduce moisture.
- If possible, run a dehumidifier nearby to maintain ideal humidity levels and prevent dampness.
- Regularly cleaning grout with a pH-neutral cleaner also helps prevent moisture retention that can lead to mold growth.
Sealing the Grout for Protection
After ensuring your grout is completely dry and the area is well-ventilated, the next step is to protect your hard work by sealing the grout. Applying a high-quality sealer creates a barrier that repels moisture, dirt, and stains, which are common grout problems. The grout sealing benefits include extending the life of your grout, reducing cleaning time, and preventing mold growth. Use a small brush or applicator to evenly coat the grout lines without oversaturating. Allow the sealer to penetrate for the specified time, then wipe off excess residue. For ideal protection, follow the recommended sealing frequency—typically every one to two years depending on the area’s use. This routine keeps your grout looking fresh and helps maintain your freedom from constant cleaning. Regular grout cleaning and sealing are essential to prevent mold buildup and ensure the grout remains sealed and durable.
Maintaining Clean Grout Between Deep Cleanings
Even though you’ve sealed your grout to protect it, daily wear and environmental factors can still cause dirt and grime to accumulate. To keep your grout looking fresh between deep cleanings, adopt these grout maintenance tips through routine cleaning methods.
Sealing grout helps, but regular cleaning is key to preventing dirt buildup and keeping it fresh.
- Sweep and Vacuum Regularly: Remove loose dirt and debris that can embed in grout lines, preventing buildup.
- Use a Mild Cleaner and Soft Brush: Mix a gentle cleaner with water, then scrub grout with a soft brush to lift surface grime without damaging the seal.
- Wipe Spills Immediately: Addressing spills right away prevents stains from setting, maintaining grout’s appearance and integrity.
- Regular cleaning with gentle cleaners suited for surfaces helps preserve the grout’s condition and extends the time between deep cleans.
Frequently Asked Questions
Can I Use a Steam Cleaner on All Types of Grout?
Think of your grout like delicate fabric; not all steam cleaners suit every type. Steam cleaner compatibility depends on grout material—cement-based grout can handle steam, but epoxy grout may not respond well. You’ll want to test a small area first. For grout maintenance tips, regularly sealing and avoiding harsh chemicals helps preserve its integrity, giving you freedom to keep your tiles looking fresh without damage.
How Often Should Grout Be Professionally Cleaned?
You should schedule professional grout maintenance about once every 12 to 18 months, depending on your cleaning frequency and how much wear the grout endures. Regular at-home cleaning helps, but professionals can tackle deep stains and buildup you might miss. Staying on top of this keeps your grout looking fresh and extends its life, giving you the freedom to enjoy your space without worrying about stubborn grime or damage.
Are There Natural Alternatives to Chemical Grout Cleaners?
Did you know that over 60% of people prefer natural cleaning methods at home? If you want to avoid harsh chemicals, you can use a vinegar solution to tackle grout stains effectively. Just mix equal parts vinegar and water, spray it, then scrub with a baking soda paste for extra scrubbing power. This method is eco-friendly, economical, and gives you the freedom to clean safely without worrying about toxins.
What Causes Grout to Discolor Over Time?
Grout staining causes often stem from dirt, mold, mildew, and moisture seeping into porous grout lines. You’ll find that spills, oils, and harsh cleaners also contribute to discoloration over time. To keep grout looking fresh, focus on discoloration prevention by sealing grout regularly and cleaning spills immediately. Using gentle, natural cleaners helps maintain its appearance without damaging the surface, giving you freedom from constant scrubbing and chemical exposure.
Can Grout Damage Affect Tile Stability?
Think of grout as the glue holding a puzzle together; if its integrity falters, your tiles might start to loosen like pieces falling apart. When grout damage occurs, water can seep underneath, weakening the base and compromising tile stability. For effective tile maintenance, you need to routinely inspect and repair grout cracks. By preserving grout integrity, you guarantee your tiles stay firmly in place, giving you the freedom to enjoy your space without worry.


