DIY Cleaner for Air Fryer Surfaces
You can make a safe, effective DIY cleaner for your air fryer with common household ingredients like white vinegar, baking soda, lemon juice, and mild dish soap. This combo breaks down grease, neutralizes odors, and protects non-stick coatings without harsh chemicals. Use a soft cloth or sponge to apply, avoiding abrasive tools that can scratch surfaces. Regular, gentle cleaning keeps your air fryer performing well and smelling fresh. Keep exploring for detailed tips and best maintenance practices.
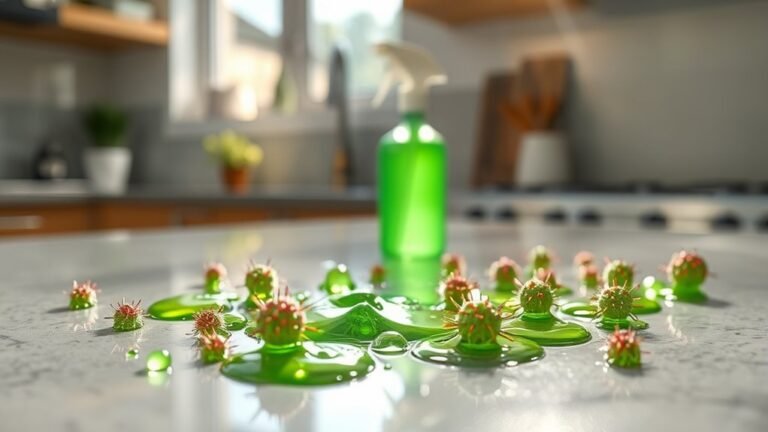
Understanding the Importance of Cleaning Your Air Fryer

Although it might seem tedious, regularly cleaning your air fryer is vital to maintain its performance and guarantee your food tastes fresh every time. Prioritizing air fryer hygiene prevents the buildup of grease and food particles, which can affect flavor and even pose health risks. You don’t want leftover residues compromising your meals or causing unpleasant odors. Establishing a consistent cleaning frequency—ideally after every use—ensures your appliance functions efficiently and extends its lifespan. Skipping this important step can lead to clogged vents and uneven cooking. By committing to thorough cleaning, you maintain not only the quality of your food but also your freedom to enjoy quick, healthy meals without worry. Cleanliness is key to revealing your air fryer’s full potential every time you cook.
Essential Ingredients for Your DIY Air Fryer Cleaner
Before you start cleaning your air fryer, it’s important to gather a few simple, effective ingredients that you probably already have at home. Choosing natural alternatives not only protects your appliance but also enhances cleaning efficiency without harsh chemicals. Here’s what you’ll need:
- White vinegar: A powerful degreaser that dissolves buildup effortlessly.
- Baking soda: Great for scrubbing and neutralizing odors safely.
- Lemon juice: Adds natural antibacterial properties and a fresh scent.
- Mild dish soap: Helps break down grease while being gentle on surfaces.
These ingredients combine to create a DIY cleaner that’s safe, economical, and eco-friendly. By using these natural alternatives, you maintain your air fryer’s longevity and enjoy a spotless, toxin-free cooking environment.
Step-by-Step Guide to Making the Cleaner

To make your DIY air fryer cleaner, start by combining half a cup of white vinegar with two tablespoons of baking soda in a small bowl. This reaction creates a natural fizz that helps break down grease. Next, add one cup of warm water and mix until the solution is uniform. Then, incorporate a few drops of liquid dish soap to boost the cleaner’s degreasing power. Stir gently to maintain the fizz’s effectiveness. These DIY ingredients are powerful yet safe for your appliance. Use a spray bottle to transfer the mixture for easy application. This method leverages proven cleaning techniques that free you from harsh chemicals while effectively tackling stubborn residues on your air fryer surfaces. Your freedom to clean efficiently starts with this simple, practical recipe.
How to Safely Apply the Cleaner to Different Surfaces
When applying your DIY cleaner, you’ll want to tailor your approach based on the specific surface you’re treating to avoid damage. Ensuring safe application means understanding surface compatibility to keep your air fryer in top shape.
Tailor your cleaning method to each surface to protect and preserve your air fryer’s finish.
- For non-stick baskets, use a soft cloth or sponge lightly dampened with the cleaner to prevent scratching.
- Stainless steel surfaces can handle a bit more scrubbing; apply the cleaner with a microfiber cloth in circular motions.
- Avoid soaking electrical components; instead, wipe them gently with a barely damp cloth.
- For glass surfaces, spray the cleaner on the cloth first, not directly on the glass, to prevent streaks and drips.
Tips for Removing Tough Grease and Stubborn Residue

Although tough grease and stubborn residue can seem challenging, you can effectively break them down with the right techniques and tools. Start by soaking removable parts in warm, soapy water to loosen grime. For grease removal, apply a paste made from baking soda and water directly onto affected areas—let it sit for 15 minutes before scrubbing gently with a non-abrasive sponge. The alkaline nature of baking soda aids in residue breakdown without damaging surfaces. For fixed parts, use a microfiber cloth dampened with white vinegar to dissolve grease buildup. Avoid harsh scrubbing that could scratch coatings. Consistently targeting grease removal this way guarantees your air fryer stays efficient and safe. By mastering these tips, you reclaim control over cleaning, making the task less challenging and more manageable.
Best Practices for Maintaining a Clean Air Fryer
To keep your air fryer functioning at its best, stick to a regular cleaning schedule using only safe, non-abrasive materials that won’t damage the coating. Make sure to thoroughly clean all removable parts after each use to prevent grease buildup and lingering odors. Taking these steps consistently will help you avoid tough residue and keep your air fryer fresh and efficient.
Regular Cleaning Schedule
Since grease and food particles can build up quickly, establishing a regular cleaning schedule is crucial to keep your air fryer performing efficiently and safely. You’ll want to set clear cleaning frequency guidelines tailored to your usage—daily for heavy use, weekly for moderate. Using schedule reminders on your phone or calendar guarantees you never miss a session. Here’s a straightforward plan to follow:
- Wipe down external surfaces after each use to prevent residue buildup.
- Clean the basket and pan thoroughly once a week to avoid grease accumulation.
- Inspect vents monthly to guarantee airflow isn’t obstructed.
- Deep clean the interior every 1-2 months, depending on usage intensity.
Safe Cleaning Materials
Choosing the right cleaning materials is essential for preserving your air fryer’s non-stick coating and ensuring safety during maintenance. You want to avoid harsh chemicals that can damage safe surfaces or leave harmful residues. Instead, opt for natural alternatives like a mixture of baking soda and water or white vinegar diluted with water—both effective and gentle. Use a soft sponge or microfiber cloth to prevent scratching, steering clear of abrasive pads. These choices protect your appliance while giving you the freedom to clean thoroughly without worry. Always rinse thoroughly to remove any cleaner remnants, preserving both the air fryer’s performance and your health. By selecting safe, natural materials, you maintain your air fryer’s longevity and enjoy hassle-free, eco-friendly upkeep.
Preventing Odor Build-up
Although your air fryer is designed for quick, convenient cooking, neglecting regular cleaning can lead to stubborn odors that affect the taste of your food. To prevent odor build-up, you need consistent care using effective odor absorption techniques and natural deodorizing agents. Here’s what you should do:
- Wipe the interior after every use with a vinegar-water solution to neutralize lingering smells.
- Use baking soda as a natural deodorizing agent; sprinkle it inside and let it sit overnight before wiping clean.
- Regularly remove and wash the basket and tray to avoid trapped grease causing odors.
- Leave the air fryer door open after cleaning to air it out and prevent moisture buildup.
Avoiding Damage: What Not to Use on Your Air Fryer
You should never use harsh chemicals like bleach or ammonia on your air fryer, as they can damage the non-stick coating and affect food safety. Avoid abrasive sponges or metal scrubbers that can scratch the surface and reduce the appliance’s lifespan. Instead, opt for gentle cleaning tools and mild detergents to keep your air fryer in top condition.
Harsh Chemicals to Avoid
Since air fryers have delicate non-stick coatings and electrical components, it is crucial to steer clear of harsh chemicals like bleach, ammonia, and oven cleaners when cleaning them. Using harsh solvents or abrasive materials can quickly damage the surface, reducing your air fryer’s lifespan and performance. To keep your appliance safe, avoid these:
- Bleach and ammonia-based cleaners that degrade coatings
- Oven cleaners with strong chemical formulas
- Harsh solvents such as acetone or paint thinners
- Abrasive materials like steel wool or scouring powders
Sticking to gentle, non-toxic DIY cleaners protects your air fryer’s integrity while giving you freedom from toxic residues. Always opt for mild solutions that clean without compromising your air fryer’s delicate parts.
Unsafe Cleaning Tools
Certain cleaning tools can cause serious damage to your air fryer’s non-stick surfaces and delicate components. Using unsafe materials like metal scrubbers or abrasive sponges can create scratches that compromise the coating, leading to peeling and reduced lifespan. Avoiding these cleaning hazards is essential if you want freedom from costly repairs or replacements.
| Unsafe Tool | Potential Damage |
|---|---|
| Steel Wool | Scratches and coating removal |
| Abrasive Scrub Pads | Surface abrasion and dullness |
| Sharp Metal Utensils | Punctures and component damage |
Stick to soft sponges or microfiber cloths instead. This way, you’ll keep your air fryer clean without risking damage from rough tools. Remember, protecting your appliance means avoiding unsafe materials that pose cleaning hazards.
Eco-Friendly Benefits of Using Homemade Cleaners
While commercial cleaners often contain harsh chemicals that can harm the environment, homemade cleaners offer a much gentler alternative that you can feel good about using. By choosing DIY solutions, you reduce your sustainability impact and enjoy notable health benefits. These natural cleaners avoid toxic fumes, protecting your indoor air quality and your well-being.
Here are four eco-friendly advantages you’ll appreciate:
- Reduced plastic waste through reusable containers
- Lower carbon footprint with simple, natural ingredients
- Decreased water pollution by avoiding synthetic chemicals
- Safer for your family, pets, and the planet
Frequently Asked Questions
Can This DIY Cleaner Be Used on Other Kitchen Appliances?
You can definitely use this DIY cleaner on other kitchen appliances, thanks to its versatile applications. Just make sure to test it on a small, hidden area first to avoid any damage. It’s formulated with kitchen safety in mind, so it’s gentle yet effective on various surfaces like stainless steel, glass, and plastic. This way, you maintain a clean, safe environment without relying on harsh chemicals, giving you more freedom in your cleaning routine.
How Often Should I Deep Clean My Air Fryer With This Cleaner?
Think of your air fryer as a well-oiled machine that needs regular TLC to perform its best. For ideal results, weekly maintenance is key—wipe down surfaces and remove crumbs to prevent buildup. Deep cleaning with your DIY cleaner should happen once a month to tackle stubborn grease and residue. Adjust your cleaning frequency based on usage; the more you cook, the more often it deserves a thorough scrub to keep it running smoothly and your freedom intact.
Is the DIY Cleaner Safe for Non-Stick Coatings?
You’ll want to prioritize non-stick safety when cleaning your air fryer surfaces. The DIY cleaner is designed to maintain cleaning effectiveness without damaging coatings. It uses gentle, natural ingredients that won’t scratch or degrade the non-stick layer, so you can confidently clean without worry. Always avoid abrasive scrubbing and rinse thoroughly to preserve the surface’s integrity. This approach guarantees your air fryer stays efficient and long-lasting while giving you cleaning freedom.
Can I Store the DIY Cleaner for Future Use?
Yes, you can store your DIY cleaner for future use, but keeping it fresh is key. Use an airtight container and store it in a cool, dark place to extend the cleaner lifespan. Avoid exposure to heat or sunlight, which can degrade its effectiveness. Label your container with the date you made it, so you know when it’s time to mix a fresh batch. Following these storing tips guarantees your cleaner stays ready whenever you need it.
What Should I Do if the Cleaner Causes an Allergic Reaction?
If you experience allergy symptoms like itching, redness, or swelling after using the cleaner, stop using it immediately. Rinse the affected area thoroughly with water to remove any residue. If symptoms worsen or you have difficulty breathing, seek emergency measures right away by calling emergency services or visiting the nearest hospital. It’s important to know your limits and protect your freedom by choosing safe, hypoallergenic alternatives in the future.