DIY Cleaner for Microwave
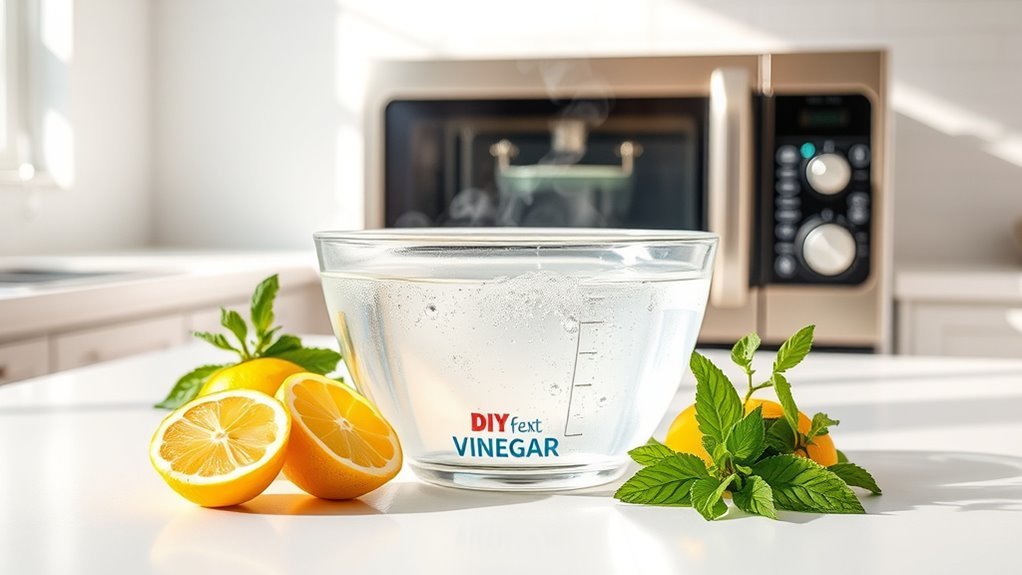
You can easily make a natural DIY microwave cleaner using simple ingredients like white vinegar, water, and baking soda. Just mix equal parts vinegar and water in a microwave-safe bowl, heat it to create steam, then wipe away grime with a soft cloth. This method avoids harsh chemicals, deodorizes, and loosens tough stains. It’s quick, eco-friendly, and keeps your microwave fresh. Keep going to discover tips for tackling stubborn stains and maintaining your microwave’s shine.
Why Clean Your Microwave Regularly
Although it might seem like a small task, cleaning your microwave regularly is important to keep it functioning well and hygienic. When you maintain good microwave hygiene, you prevent food splatters from hardening and causing unpleasant odors or even bacteria buildup. This means you’re not just keeping your appliance looking fresh—you’re protecting your health and preserving your freedom from unnecessary germs. Sticking to a consistent cleaning frequency, like once a week or after heavy use, guarantees your microwave stays reliable and safe. By taking charge of this simple routine, you avoid the hassle of tougher cleanups later and enjoy a kitchen environment that supports your independent lifestyle. Don’t let neglect limit your freedom—regular microwave cleaning keeps your space fresh and empowering.
Benefits of Using Natural Ingredients
Keeping your microwave clean doesn’t have to mean relying on harsh chemicals. When you choose natural cleaning, you’re embracing an easier, safer way to maintain your kitchen. Natural ingredients like vinegar, lemon, and baking soda offer powerful cleaning without the toxic fumes or residue. This means you’re protecting your health and the environment by using eco friendly solutions that break down grime effectively and safely. Plus, natural cleaning products are often more affordable and readily available, giving you the freedom to clean on your terms without worrying about harmful side effects. By opting for these simple, earth-friendly options, you reduce waste and chemical exposure, creating a healthier space for you and your loved ones while keeping your microwave spotless and fresh.
Essential Ingredients for Your DIY Microwave Cleaner

Three simple ingredients can transform your microwave cleaning routine into a quick, effective task. You’ll appreciate how these natural components work together to cut through grime and neutralize odors, all while respecting your desire for freedom from harsh chemicals.
Here’s what you’ll need:
- White vinegar – Its powerful acidity and natural antimicrobial vinegar properties make it perfect for loosening tough stains.
- Baking soda – Acts as a gentle abrasive and deodorizer, tackling stubborn spots without scratching surfaces.
- Water – Dilutes vinegar and creates steam to soften grime inside your microwave.
- Lemon juice (optional) – Adds a fresh scent and boosts cleaning power with natural acidity.
These ingredients are affordable, easy to find, and empower you to maintain a spotless microwave effortlessly.
Step-by-Step Guide to Making the Cleaner
Start by combining equal parts of white vinegar and water in a microwave-safe bowl or measuring cup. This simple mixture is your key to hassle-free microwave maintenance. Next, add a few drops of lemon juice or essential oil if you want a fresh scent, but it’s optional. Stir gently to blend the ingredients evenly.
Once your cleaner is ready, set it aside while you stick to a consistent cleaning schedule—this keeps your microwave in top shape without extra effort. Making this DIY cleaner takes less than five minutes, giving you freedom from harsh chemicals and pricey store-bought products. With this easy recipe, maintaining your microwave becomes a quick, eco-friendly routine that fits your lifestyle perfectly.
How to Use the DIY Cleaner Effectively
Regularly using your DIY cleaner is the easiest way to prevent stubborn microwave stains and odors from building up. To master effective cleaning techniques and guarantee lasting microwave maintenance, follow these steps:
- Spray the cleaner evenly inside the microwave, focusing on areas with visible grime.
- Let it sit for 5-10 minutes to loosen debris and neutralize odors.
- Wipe surfaces with a soft cloth or sponge, avoiding abrasive materials that could damage the interior.
- Rinse the cloth and give a final wipe to remove any residue, leaving your microwave fresh and spotless.
Tips for Removing Tough Microwave Stains
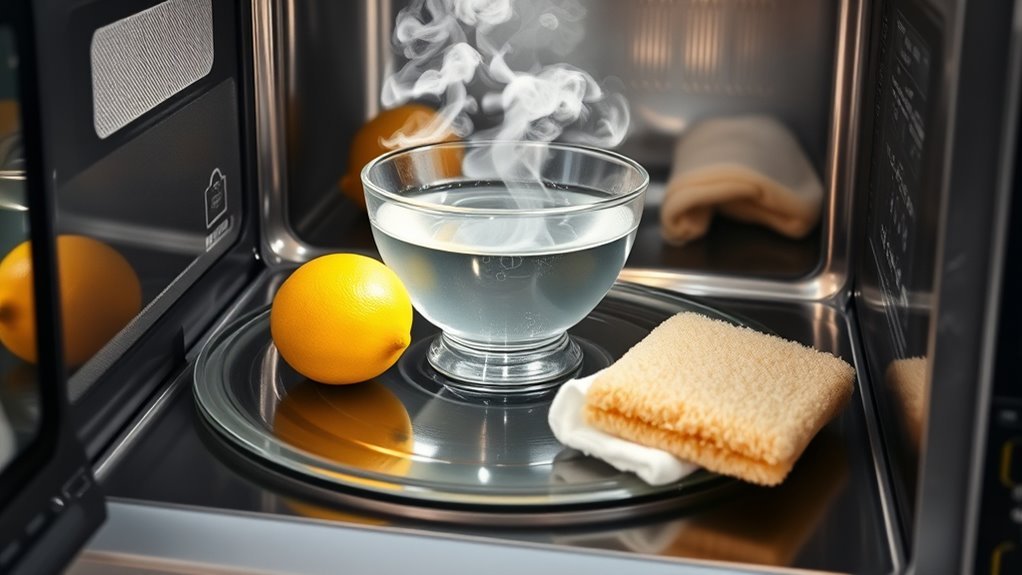
Although your DIY cleaner works well for everyday messes, some microwave stains can be stubborn and require extra effort. When tackling these tough spots, start by letting steam do the heavy lifting. Heat a bowl of water with lemon slices or vinegar inside your microwave for several minutes to loosen grime. Next, use a soft cloth or sponge dipped in your cleaner to gently scrub away residue. For particularly stubborn stains, try applying a paste made from baking soda and water—let it sit for a few minutes before scrubbing. Remember, using effective techniques like steaming and gentle abrasion prevents damage while freeing you from harsh chemicals. With these tips, you’ll reclaim a spotless microwave without sacrificing your freedom to choose natural, safe cleaning methods.
Deodorizing Your Microwave Naturally
Once you’ve tackled stubborn stains, the next step is to freshen up your microwave’s scent naturally. Embracing natural deodorizing methods helps you maintain microwave freshness without harsh chemicals. Here’s how you can do it:
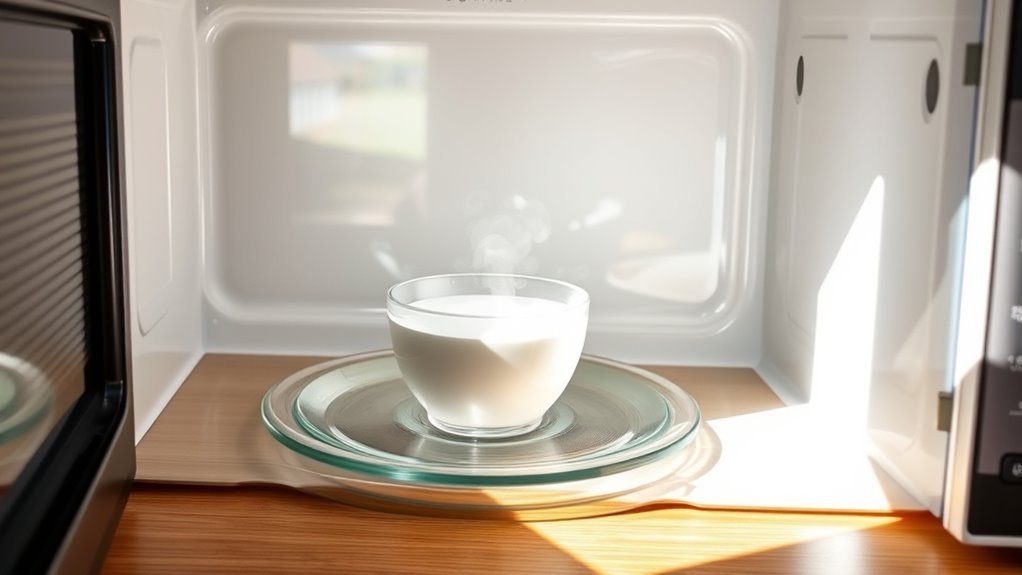
- Lemon and Water Steam: Slice a lemon, place it in a bowl with water, and microwave for 3-5 minutes. The steam loosens odors and leaves a citrusy scent.
- Baking Soda Placement: Leave an open box or a small bowl of baking soda inside the microwave overnight to absorb lingering smells.
- Vinegar Vapor: Microwave a bowl of equal parts water and white vinegar for five minutes; the vapor neutralizes odors effectively.
- Coffee Grounds: Set a bowl of fresh coffee grounds inside to naturally absorb and mask odors.
These simple steps guarantee your microwave stays fresh, embracing freedom from chemical-laden air.
Safety Precautions When Cleaning Your Microwave
Before you start cleaning your microwave, it’s important to take certain safety precautions to protect yourself and your appliance. First, unplug the microwave to avoid any electrical hazards. Wearing protective gear like gloves can keep your hands safe from harsh cleaning agents or hot steam. Never use abrasive materials inside, as they can damage the microwave’s interior and compromise microwave safety. Avoid spraying cleaner directly onto the control panel to prevent moisture damage. Also, verify the microwave has cooled down completely before cleaning to prevent burns. Following these steps gives you the freedom to clean confidently, knowing you’re protecting both yourself and your appliance. Safety isn’t a restriction—it’s the foundation for maintaining your microwave’s performance and your peace of mind.
Maintaining a Spotless Microwave Between Cleanings
Keeping your microwave spotless between deep cleanings doesn’t have to be a chore. With simple microwave maintenance and regular upkeep, you can enjoy a fresh, hassle-free appliance every day. Here are four easy tips to keep your microwave in top shape:
Maintaining a clean microwave daily is simple with regular care and easy upkeep tips.
- Wipe down the interior after each use with a damp cloth to prevent buildup.
- Cover your food while heating to minimize splatters and reduce cleaning frequency.
- Use a bowl of lemon water or vinegar to steam-clean and deodorize weekly.
- Regularly check and clean the microwave’s vent to guarantee proper airflow and efficiency.
Frequently Asked Questions
Can I Use This Cleaner on Other Kitchen Appliances?
You can definitely use a multi surface cleaner on various kitchen appliances, but you’ll want to check appliance compatibility first. Some surfaces, like stainless steel or glass, handle it well, while others might need gentler care. Don’t feel boxed in—experiment carefully to see what works best for your stuff. This way, you get the freedom to keep all your appliances sparkling without worrying about damage.
How Often Should I Replace the DIY Cleaner Solution?
You should replace your cleaner solution every 1 to 2 weeks to guarantee its effectiveness and safety. Proper solution storage plays a big role in cleaner longevity—keep it in a sealed container away from direct sunlight and heat. This way, you maintain the freshness and potency of your cleaner, giving you the freedom to tackle messes confidently without worrying about it losing strength or becoming contaminated over time.
Will the Cleaner Damage Microwave Seals or Electronic Parts?
When it comes to microwave maintenance, you don’t want to throw the baby out with the bathwater by damaging seals or electronics. If you stick to gentle, natural cleaners—like vinegar and water—you’re usually safe and won’t harm seal integrity or internal parts. Just avoid harsh chemicals or soaking the microwave. This way, you keep your freedom to clean thoroughly without risking costly repairs or loss of appliance function.
Can This Cleaner Be Used on Stainless Steel Microwaves?
You can definitely use this cleaner on stainless steel surfaces without worrying about damage. Its gentle formula guarantees the cleaner effectiveness while protecting the sleek finish of your microwave. Just apply it carefully and avoid abrasive scrubbing to keep that stainless steel looking sharp. You’ll enjoy a sparkling microwave with freedom from harsh chemicals, making your cleaning routine both easy and safe for your appliance’s exterior.
What Should I Do if the Microwave Still Smells After Cleaning?
If your microwave still smells after cleaning, it’s likely due to lingering food particles or moisture causing odor. To tackle this, try wiping down all surfaces thoroughly and leaving the door open to air it out. You can also place a bowl of vinegar or baking soda inside for a few hours to help with odor removal. Identifying possible causes like spills or hidden stains will give you the freedom to keep your microwave fresh.


