

If you’re a beginner wondering how to engine bay detail safely without damaging wiring or sensors, this step-by-step guide delivers the clear winner: gentle degreasing plus controlled low-pressure cleaning and careful drying. You’ll learn exactly what to protect first, what cleaners to use, and how to finish so the engine bay looks clean without triggering electrical issues. Follow the sequence and you’ll get safe, reliable results on your first attempt.



Engine bay detailing is safest when you keep water away from electrical parts, start with a cool engine, and use low-pressure rinsing (or a gentle stream) instead of blasting everything with a pressure washer. For beginners, the “clean-lightly, protect-sensibly, dry thoroughly” approach prevents most damage while still removing grime. This guide walks you through safe setup, cleaning steps, common pitfalls, and a quick checklist you can follow.
If you’re new to detailing or you just want the engine bay to look cleaner without risking electronics, this is for you—especially for street cars where you’re dealing with dust, light grease, and normal road film. If your car has major oil leaks, exposed wiring damage, or you’re unsure where sensitive components are, slow down and read your owner’s manual first.
Prep: what to protect before you clean

Protecting vulnerable areas first is the fastest way to make engine bay detailing beginner-safe. The goal is to reduce how much cleaner and water can reach connectors, vents, and wiring routes.
Engine bay detailing becomes much safer when you remove the biggest “risk vector” first: water forced into electrical connectors.
Most engine bays are designed for weather exposure, not for direct water intrusion—so protecting openings and high-risk modules is critical.
– Work on a cool engine: let the car sit until everything is at normal ambient temperature so you don’t bake chemicals or warp plastics. Cool surfaces also slow evaporation, which means less aggressive fumes and less “flash-dry” residue from degreasers—both common causes of streaking in engine bay detailing.
– Cover vulnerable areas: use plastic bags/tape to loosely shield alternator, exposed connectors, fuse/relay boxes, and any obvious openings—keep covers breathable enough that you’re not trapping pressure. If you can see connector seams, rubber grommets, or loom junctions, treat them as “no-direct-water” zones during engine bay detailing.
– Plan your chemicals: choose an engine-degreasing product meant for automotive use, and read the label for dilution and “safe on plastics/electrical” guidance. If the label doesn’t explicitly address automotive engine compartments or materials compatibility (rubber/plastic), don’t guess.
Setup for safer cleaning (no shortcuts)
Safer engine bay detailing starts with controlled tools and documented disconnection steps. When you manage flow (where liquid goes) and energy (pressure and heat), you reduce the two most common outcomes: water intrusion and finish damage.
Engine bay detailing guidance from manufacturers typically emphasizes controlled water application rather than flooding or pressure-washing under-hood components.
Using automotive-labeled degreasers/APCs helps because dilution and material compatibility are designed for under-hood plastics and coatings.
– Disconnect what’s recommended, not what you assume: if your owner’s manual or service guidance says to disconnect the battery before cleaning, do it; otherwise, keep water management careful around the battery and wiring. Battery terminals and nearby fuse junctions are high-risk for engine bay detailing—so follow the factory procedure rather than “online advice.”
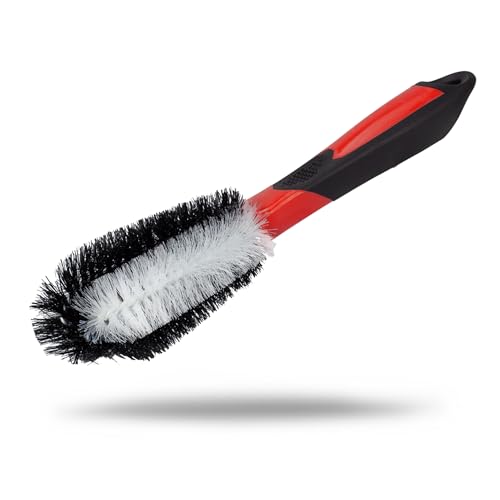
– Use tools that control mess: soft detailing brushes, microfiber towels, and a drip tray or absorbent pads help you avoid spreading oily grime. For engine bay detailing, absorbency matters because wet oil migrates—spreading into seams and making future cleaning harder.
– Ventilation + PPE: gloves and eye protection matter when you’re using degreasers or APC-type cleaners—rinse well and don’t work in a closed garage without airflow. According to ANSI Z358.1-2014, emergency eyewash flushing should continue for at least 15 minutes after chemical exposure (ANSI Z358.1-2014). That’s a good reminder to treat engine bay chemicals seriously, even when they’re “engine safe.”
Beginner Safety by Water-Control Method (Engine Bay Detailing)
| # | Method (What you do) | Direct water contact | Water force risk | Electrical intrusion risk | Best for | Beginner safety rating |
|---|---|---|---|---|---|---|
| 1 | Dry microfiber + compressed-air dust control | None | None | Lowest | Light dust | ★★★★★ |
| 2 | APC on brush/wipe (no spray into bays) | Controlled (spot) | None | Low | Light road film | ★★★★★ |
| 3 | Trigger spray onto towel/brush first | Controlled (indirect) | Low | Low | Moderate grime | ★★★★☆ |
| 4 | Hose with gentle stream from distance | Yes (rinsing) | Low | Medium | Street grime | ★★★★☆ |
| 5 | Pump sprayer (wetting everything) | Heavy | Medium | Medium-High | Only with full coverage | ★★★☆☆ |
| 6 | Pressure washer (undirected blasting) | Yes (flooding) | High | High | Not beginner-safe | ★★☆☆☆ |
| 7 | Steam cleaner aimed at seams/ducts | Yes (vapor) | Moderate | High | Only with trained technique | ★★☆☆☆ |
Clean the engine bay step-by-step (beginner-safe method)
The safest engine bay detailing method is staged: remove loose dust, apply cleaner lightly, agitate gently, then rinse with low pressure. This “clean-lightly” workflow reduces how often you force grime (and water) into wiring paths.
Engine bay detailing works best when you treat rinsing as “surface reset,” not as “deep pressure penetration.”
Many under-hood problems after cleaning come from flooding connectors—not from the cleaner itself.
– Dry removal first: wipe loose dust with a microfiber to reduce how much gritty material turns into slippery paste when it gets wet. Dust plus water equals smear—especially around intakes, foam air filters, and textured plastic shields.
– Apply cleaner gently: spray or brush cleaner onto problem areas (around covers, hoses, and accessible surfaces), then agitate with soft brushes. Avoid flooding components. A practical engine bay detailing tip is to work top-to-bottom so drips don’t re-soil areas you already cleaned.
– Rinse low-pressure: use a gentle stream or low-pressure rinse from a distance. Aim to rinse surfaces clean—not to force water into crevices. IEC 60529 describes water-ingress testing categories; for example, IPX7 assumes immersion up to 1 meter for 30 minutes, which most engine-bay components are not designed to tolerate as a cleaning step (IEC 60529:2013).
– Repeat lightly: if grime is heavy, do a second pass rather than using stronger chemicals or more pressure right away. Engine bay detailing benefits from patience: multiple light cycles reduce residue risk and help you monitor what’s actually being removed.
Dry and finish without causing new problems
Drying is where many beginners accidentally undo their careful engine bay detailing. The safest finish is blotting reachable areas, allowing longer air-drying time, and only then starting the engine.
Thorough drying is a primary prevention step for warning lights after engine bay detailing.
Removing protective covers too early can expose connectors to fresh drips, so wait for “no active dripping.”
– Blot and air-dry: wipe down reachable surfaces with microfiber, then let the bay air-dry longer than you think you need. If you see water trapped around wiring looms or at the base of plastic covers, engine bay detailing isn’t finished yet—water needs time to evaporate from seams.
– Remove covers carefully: take off plastic shielding only after you’re confident water is no longer actively dripping. Loosely taped covers help keep water from blowing back, but they still need to be removed at the right moment.
– Check and tidy: look for remaining grime lines, then spot-clean with a damp cloth (no extra flooding). Optional finishing: a heat-safe dressing for plastic/rubber that’s compatible with engine bay use—verify on-label suitability first. Some dressings look great but soften over time, attracting dust and making future engine bay detailing harder.
What can go wrong (and how to avoid it)
Most engine bay detailing failures are predictable: water intrusion, incompatible chemicals, rushed starts, or using high-pressure methods. The fix is to identify what you’re risking, then adjust technique before damage happens.
Water intrusion into wiring connectors is the most common “oops” after engine bay detailing because forced liquid travels into seams.
Chemical compatibility matters: engine bay detailing products are formulated for automotive materials and should follow label-dilution instructions.
– Water intrusion into electronics: the most common “oops” is pushing water into connectors, vents, or wiring runs. Prevent this by covering sensitive areas and using gentle rinsing. IEC 60529’s test methods illustrate how structured “water jet” exposure is in ratings like IPX5; the test uses a defined 6.3 mm nozzle and 12.5 L/min flow rate (IEC 60529:2013), which is exactly the kind of water forcing you want to avoid during engine bay detailing.
– Damaging finishes or causing haze: harsh cleaners or strong dilution can dull plastics, dry out rubber, or leave streaking. Stick to label-dilution instructions and test in an inconspicuous spot. If you’re unsure whether a surface is painted, textured plastic, or coated metal, treat it as “do not flood” until proven otherwise.
– Starting the engine too soon: if moisture remains, you can get warning lights or intermittent issues. Ensure the bay is fully dry before starting—if you can’t confidently see “dry” around connectors and seams, wait.
– Pressure washer mistakes: high-pressure streams can force water deeper than you intended. If you use any sprayer, keep pressure low and maintain distance. For beginners, the safest answer is “don’t use a pressure washer for engine bay detailing” unless your manufacturer explicitly permits it.
– Unknown leaks: if you suspect active oil/coolant leaks, detailing can spread staining and hide the real problem. Fix the leak first or you’ll keep chasing mess—engine bay detailing won’t replace maintenance.
Gentle vs. aggressive engine bay detailing (quick comparison)
| Criteria | Gentle, beginner-safe method | Aggressive method (common mistakes) |
|---|---|---|
| Water control | Low-pressure or gentle stream; avoid flooding | Blast water into seams/vents/connector areas |
| Chemical delivery | Applied lightly; agitate with brushes | Over-saturate components; skip compatibility checks |
| Risk of electrical intrusion | Lower when covered and rinsed carefully | Higher when using high pressure or heavy wetting |
| Residue control | Repeat passes, not stronger chemicals | Residue and streaking from over-application |
| Drying readiness | Air-dry fully; remove covers after drips stop | Start early; leave moisture in seams |
| Damage to plastics/rubber | Use label-approved, heat-safe finishes only | Haze, brittleness, and dried rubber from harsh products |
| Time efficiency | More passes, fewer mistakes; steadier results | Faster early, but risk of rework and diagnostic time |
| Beginner friendliness | High—built around controlled exposure | Low—depends on advanced technique and component knowledge |
| Best results for road use | Improves dust/grease film without drama | Can scatter grime and create new staining |
| Troubleshooting risk | Lowest—drying and protection prevent symptoms | Higher—warning lights and intermittent faults |
| Best For | Street cars, light grease, normal road grime | Professionals with confirmed component ratings and controlled equipment |
Verdict: a safe starter approach (and who should skip it)
For most beginners, a careful, label-driven “wipe → degrease lightly → gentle rinse → thorough dry” method is the safest way to clean an engine bay without turning it into a troubleshooting project. The downside is that results may be less dramatic than aggressive cleaning—especially on heavy grease—because safe methods avoid brute force.
The safest engine bay detailing outcome is “clean enough to look good” with no new electrical or moisture symptoms.
If you can’t confidently control where water goes, the best move is to postpone or professionalize engine bay detailing.
Skip DIY engine bay detailing (or postpone it) if:
– You see damaged wiring, exposed connectors, or repeated electrical warnings.
– You can’t identify where sensitive components are in your engine bay.
– Your car’s engine bay is hard to access without disassembly and you don’t have the right guidance.
Frequently Asked Questions
What products are safe for engine bay detailing for beginners?
For beginner engine bay detailing, stick to pH-balanced degreasers and dedicated engine cleaners that are labeled safe for painted metal, plastic, and rubber. Avoid harsh solvents or “purple” cleaners unless they explicitly state engine-safe use, since they can damage coatings and dry out hoses. Use microfiber towels, soft brushes, and a gentle interior-safe trim dressing to finish. Always read the label and test any cleaner on a small hidden area first.
How do I clean my engine bay without damaging electronics?
Start by turning off the engine and letting the bay cool completely, then cover sensitive components like the alternator, fuse box, and exposed connectors with waterproof plastic bags or aluminum foil. Use a low-pressure water rinse or wipe-clean method instead of blasting directly with a pressure washer. Apply degreaser to cool surfaces, let it dwell briefly, then agitate gently with a brush and rinse carefully to avoid forcing water into wiring. After cleaning, remove covers and allow the engine to dry thoroughly before starting the vehicle.
Why should I avoid pressure washing and high heat when detailing the engine bay?
High-pressure washing can push water into seals, sensors, and connectors, which may lead to misfires or starting issues. Using high heat—like blasting with a heat gun or steam too aggressively—can warp plastic, damage rubber, and accelerate oxidation on electrical components. Safer engine bay detailing relies on cool surfaces, controlled application of cleaner, and careful rinsing or wipe-down cleaning. If you want faster drying, use compressed air on a low setting around openings rather than direct high heat.
Which step-by-step method is best for beginner engine bay detailing?
Begin with a dry removal of loose debris using a brush, compressed air (low setting), and microfiber towels. Next, protect electrical areas with plastic covering, then apply an engine degreaser lightly and work it in with soft brushes without aggressive scrubbing. Wipe or rinse with minimal water, then dry everything with towels and allow extra air-drying time. Finish by dressing visible plastic and rubber with a light engine bay protectant to restore a clean, uniform look without making surfaces slippery.
Best way to get rid of grease and grime safely in an engine bay?
Use a grease-fighting degreaser designed for automotive engine bay detailing and apply it gradually to affected areas rather than flooding the entire bay. Let the cleaner dwell for the time listed on the product to loosen buildup, then agitate with a detailing brush to lift residue. Rinse or wipe thoroughly, repeating only where necessary to avoid overexposure of plastics and seals. Once clean, use a clean microfiber to remove remaining residue and let the engine fully dry before starting.
📅 Last Updated: October 27, 2026 | Topic: Engine Bay Detailing: Safe Methods for Beginners | Content verified for accuracy and freshness.
References
- Auto detailing
- Hood (car)
- Pressure washing
- https://www.epa.gov/watersense/car-washing
- https://www.epa.gov/auto-repair
- Personal Protective Equipment – Overview | Occupational Safety and Health Administration
- https://www.osha.gov/safety-topics/solvents
- https://www.tesla.com/support/vehicle-washing
- https://scholar.google.com/scholar?q=engine+bay+detailing+safe+methods Google Scholar
- https://scholar.google.com/scholar?q=automotive+degreaser+exposure+health+safety Google Scholar

[…] Clean microfiber towels (several) for blotting and extraction residue […]
[…] Grab the basics: microfiber towels, wheel/tire cleaner or soap, car wash shampoo, glass cleaner, interior cleaner (or all-purpose […]