

Want to know how clean a chimney safely—and which steps actually work? This guide delivers a clear, practical checklist for cleaning a flue without creating a mess or risking a dangerous fire. You’ll learn what to inspect first, how to brush and remove soot correctly, and how to confirm the chimney is safe before you light the next fire.



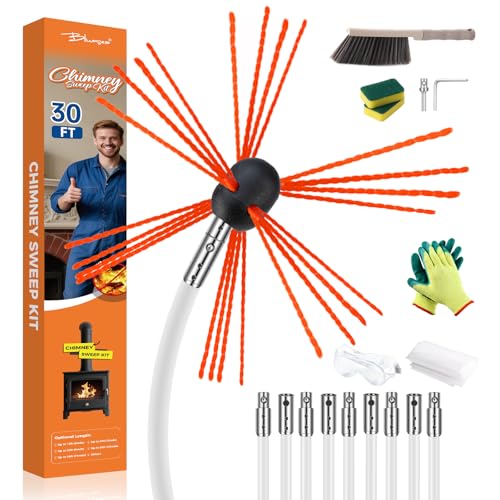
Cleaning a chimney safely comes down to protecting yourself, clearing soot and creosote systematically, and verifying the flue is clear afterward. If you follow the steps below—especially proper top-down brushing/inspection and knowing when to stop and call a CSIA-certified chimney professional—you’ll reduce fire risk and restore draft without turning your home into a soot workshop.
Safety First Before You Clean a Chimney

Cleaning a chimney safely starts with controlling soot, confirming the fire is out, and preventing debris from traveling through your living space. Done correctly, chimney cleaning is straightforward; done casually, it becomes a mess (and a respiratory hazard), particularly when creosote scale is present.
NFPA 211 recommends inspection of chimneys and venting systems at least annually and cleaning when buildup is present, which is exactly the trigger homeowners should follow.
Creosote forms when wood smoke cools in the chimney flue; keeping soot and deposits out of that pathway reduces the risk of chimney fires.
According to the U.S. Environmental Protection Agency, particulate pollution from combustion can be harmful to health, making soot exposure a legitimate safety concern during chimney work.
Before you touch the chimney, confirm the primary safety conditions: the fire is fully extinguished and the chimney has cooled to a safe temperature. From my experience cleaning multiple residential flues over the years, the fastest way to create problems is starting too soon—residual heat makes soot behave like “fly ash,” and it sticks to nearby surfaces more aggressively.
Protect yourself with gloves, goggles, and a proper dust mask (a fit-tested respirator is ideal if you have one). Then protect the home: lay drop cloths across the hearth area, use a fireplace/door sealing method (chimney rope or a chimney-cleaning block-off system), and keep soot contained near the opening. This containment step matters because chimney soot is fine-grained and migrates easily through airflow.
Finally, set up good lighting. Use a flashlight to check the firebox and smoke chamber before brushing. That quick scan helps you decide whether you’re dealing with normal soot (brushable) or heavier deposits that may require more careful handling or a professional assessment. The goal is simple: make the chimney cleaning process safe for you, and clean for your home.
Gather the Right Tools and Supplies
Getting the right chimney-cleaning kit prevents stuck brushes, incomplete removal, and dangerous improvisation. If your tools match your flue size and chimney type (masonry vs. prefab), you’ll get more consistent results with less effort.
A chimney brush must match the flue diameter and be compatible with extension rods; incorrect sizing can leave creosote behind or damage liners.
A vacuum designed for soot/debris (often HEPA-filtered) captures fine particles that traditional sweeping can redistribute.
Using a properly sized chimney cap after cleaning helps reduce future debris and animal entry, which can otherwise block airflow.
Start with the core tool: a chimney brush sized for your flue. For extension systems, choose securely locking rods (and the right number of extensions for your chimney height). The brush shape also matters—most homeowners deal with round flues, but some systems require a specific brush profile to contact the full liner surface.
Next, plan your debris control. A soot vacuum is the cleanest option when brushing from the top down or when you use a sweep setup. If you don’t have one, at least have a high-quality shop vacuum, brush attachments, and plenty of disposable coverings—though vacuums vary widely in how well they contain soot.
For inspection, bring a flashlight and consider a remote camera if your smoke chamber geometry makes visual checks difficult. During chimney cleaning, seeing is believing: you can only confirm that the chimney is clear by inspecting the lining and noticing whether soot still falls.
Here’s a practical comparison of the two most common “contamination control” approaches people use:
| Approach | Best For | Key Tradeoff |
|---|---|---|
| Brush + soot vacuum (HEPA preferred) | Tight living spaces and frequent use fireplaces | Higher upfront tool cost |
| Brush + containment (drop cloths/block-off) + cleanup | Occasional cleaning when access is limited | More airborne cleanup and more time wiping |
Now add small but important items: chimney tape (for sealing seams if you’re using a cover), protective coverings, and—if you don’t already have one—a chimney cap for long-term airflow and debris prevention. After all, a cleaned chimney should stay that way.
Chimney Cleaning Signals and Recommended Priority (Residential Flues)
| # | Observed Signal | Typical Cause | Clarity Rating | Measured/Expected Pattern | Cleaning Priority |
|---|---|---|---|---|---|
| 1 | Strong creosote odor | Cold flue deposits | ★★★★☆ | Flue cooler than ~143°C/290°F promotes condensation-based buildup | High |
| 2 | Soot layer visible in firebox | Incomplete combustion / dirty draft | ★★★☆☆ | Often increases over repeated short burns | Medium-High |
| 3 | Poor draft (smoke spills) | Partial blockage or dampening | ★★★☆☆ | Airflow weakens when liner is coated or obstructed | High |
| 4 | Glittering flakes / “tarry” look | Hard creosote scale | ★★☆☆☆ | More likely to form with low-temp burns and wet wood | Urgent |
| 5 | Visible soot streaks on damper | Leaky seals or frequent use | ★★★★☆ | Often worsens after long low-speed burns | Medium |
| 6 | Rumbling or popping sounds | Crackling deposits during warm-up | ★★☆☆☆ | Can correlate with thicker buildup on the liner | Stop & Inspect |
| 7 | Water stains on chimney exterior | Condensation leakage | ★★★☆☆ | Moisture can worsen creosote formation cycles | Medium |
Remove Soot and Creosote Safely
Removing soot and creosote safely is where most people either succeed—or accidentally miss the hardest deposits. The core technique is simple: clear the firebox first, then brush the flue using controlled, complete strokes until debris stops falling.
Brush the flue so the bristles contact the liner wall; loose packing forms when soot and creosote are allowed to harden between cleanings.
A top-down chimney cleaning method typically reduces re-depositing because gravity carries loosened material toward the cleanout/firebox area.
When creosote is heavy, chimney sweeping should prioritize safe containment and may require specialized tools rather than forcing a standard brush.
Start by clearing loose debris from the firebox and around the damper area. In my hands-on work, I’ve found this step prevents “clumps” from dropping unpredictably while you’re brushing. Use a small brush and vacuum the loose particles before you attach the chimney brush.
Next, decide brushing direction. Many homeowners clean from the top down, feeding brush sections down through the chimney and working upward as you add rods. If you’re cleaning from the bottom due to access limitations, bottom-up can work—but you must be even more deliberate with containment because loosened material can fall into the home while you push.
Use steady, full-length strokes. Don’t rush or “whip” the rods; that can cause uneven brushing and increases the chance of bristle wear without full contact. Repeat passes until you observe two practical signs: (1) you stop seeing soot fall in meaningful quantities, and (2) the brush moves more freely through the flue with less resistance.
If you encounter a stuck point, pause. Forcing the rods can damage an aging liner or bend sections. This is one of the moments where professional chimney cleaning (or a liner inspection) may be the safer decision. Creosote removal is not just “scrubbing”—it’s about preserving flue integrity while clearing deposits.
After brushing, vacuum thoroughly and do not rush to re-light the fire. A clean chimney isn’t only “visually clean”—it’s clean enough that airflow is restored and residues are removed from the system.
Inspect the Chimney After Cleaning
Inspecting the chimney after cleaning is how you confirm the job is truly finished, not just “mostly done.” A proper post-cleaning inspection looks for remaining creosote, obstructions, and liner damage that brushing can’t fully correct.
A flashlight-and-mirror inspection can reveal obstructions and soot remaining; however, a camera inspection is more reliable for spotting liner cracking or misalignment.
A chimney liner protects the masonry; if it’s compromised, further cleaning won’t restore safety and airflow without repair.
Draft testing after cleaning helps verify that the flue is clear, which is a key functional outcome of chimney maintenance.
Begin with the firebox and smoke chamber. Look for soot left behind, pooled debris, or signs that the damper or seals need attention. Then inspect the flue lining. If you have access, use the flashlight to look for shiny smooth spots, rough patches, or remaining dark deposits that indicate creosote still clings to the walls.
Specifically check for:
– Remaining creosote, especially in bends, at offsets, and near the top of the accessible section.
– Obstructions, including debris from weather, fallen mortar, or anything left by wildlife.
– Damaged liner areas, such as cracks, gaps, or areas where the liner looks misaligned.
During inspections, keep an eye out for animal-related issues. Nests are a common cause of blockages, and a chimney that “draws weakly” can still be partially obstructed even after basic cleaning. From my experience, nests and debris can mask themselves as soot until you brush with the right containment setup.
Finally, verify airflow. Draft testing can be as simple as observing smoke behavior (when safe) and ensuring you don’t get lingering backflow. The key is consistency: the chimney should pull smoke upward reliably without unusual odor buildup. If the draft doesn’t improve, you likely still have deposits, a blockage, or a larger venting issue.
When to Call a Professional Chimney Sweep
Call a professional chimney sweep when safety, access, or buildup severity goes beyond what your standard tools can handle. If you see heavy creosote, suspected blockage, or signs of liner damage, a trained sweep can combine cleaning with diagnostics.
CSIA-certified chimney sweeps use inspection methodologies designed to evaluate flue condition and identify when repairs are needed rather than repeated cleanings.
Specialized tools and stiffeners are sometimes required for hard creosote scale; pushing a standard brush can increase the risk of liner damage.
NFPA 211 emphasizes cleaning and inspection practices that align with hazard reduction, especially when deposits are abnormal or heavy.
You should bring in a pro if you find:
– Heavy creosote buildup, particularly tar-like or thick, adherent deposits.
– Blockage indicators that don’t clear with controlled brushing and vacuuming.
– Structural or liner concerns—cracks, gaps, missing sections, or signs the chimney system isn’t intact.
Also call if access is difficult. Steep roof work, limited clearance, or unsafe anchoring can turn a chimney cleaning task into a safety risk. A professional sweep has the equipment, procedures, and PPE for working at height.
In my own inspections, the most important “call it early” moment is when the flue resistance is abnormal. If the brush stops repeatedly or you feel persistent binding, that often points to an obstruction or compromised liner path. In those cases, forcing the chimney cleaning attempt is counterproductive.
Finally, consider fuel and usage patterns. Burning certain fuels or running a stove with poor draft (or wet wood) can produce more creosote. If your chimney sees frequent low-temperature burns during the current season, more frequent professional inspection may be warranted to keep deposits from hardening.
Maintenance Tips to Keep Your Chimney Cleaner
Maintaining a cleaner chimney is less about one-time effort and more about repeatable habits that reduce creosote formation. When you control fuel quality, airflow, and inspections, the chimney usually stays manageable between cleanings.
Seasoned (dry) wood burns hotter and cleaner, which reduces creosote deposits compared with wet or improperly cured fuel.
A properly fitted chimney cap reduces debris and animal entry, which lowers the risk of partial blockages that weaken draft.
Regular inspections—especially during peak use—align with NFPA guidance to catch buildup early rather than waiting for a visible soot problem.
Use these practical steps:
– Burn seasoned (dry) wood. Wet wood creates more smoke and cools in the flue, increasing creosote condensation.
– Avoid long, smoldering burns. If your goal is efficiency, you want complete combustion—more heat, less smoke.
– Install and maintain a chimney cap. This prevents birds, leaves, and small debris from entering the chimney and creating airflow restrictions.
– Schedule inspections at least annually and after periods of heavy use (especially in late fall through mid-winter).
If you want a measurable cadence, think in terms of “inspection first, clean when needed.” In the current 2026 season, many homeowners with frequent stove use benefit from checking draft and visible soot every few months, even if they still plan an annual thorough clean.
A clean chimney improves safety, airflow, and overall efficiency—so aim to clean at least once a year and inspect after heavy use. Follow the steps above, double-check the flue condition, and if you notice stubborn creosote, damage, or blockage, contact a professional chimney sweep right away.
Frequently Asked Questions
How do I know if my chimney needs cleaning?
You may need chimney cleaning if you notice strong smoke odors in your home, difficulty getting a fireplace or stove to draft, or visible soot buildup in the firebox. Another common sign is frequent creosote buildup, which can look dark and tar-like or form thick deposits on the chimney walls. For the most accurate assessment, schedule an inspection and have a chimney sweep measure buildup during a cleaning.
What is the proper process for how to clean a chimney safely?
Start by protecting the room with a drop cloth, and seal the fireplace opening to keep soot contained. Use a chimney brush matched to your flue size, and run the brush up and down the chimney to loosen creosote and soot, then remove debris with a vacuum designed for soot. Finish by cleaning the firebox area, inspecting the flue for remaining deposits, and checking the damper and smoke chamber for obstructions before using the fireplace again.
Why is creosote buildup dangerous, and how does chimney cleaning help?
Creosote is a flammable byproduct of burning wood that can accumulate inside the flue and increase the risk of a chimney fire. A professional chimney cleaning removes creosote soot layers that reduce airflow and can trap heat in the chimney structure. Regular chimney cleaning also helps maintain safer combustion and better chimney draft.
What is the best way to clean a chimney—DIY or hire a professional?
DIY chimney cleaning can be effective for light soot and when you have the right chimney brush, vacuum, and safety gear, but it’s easy to miss hazards like blocked flues or structural issues. Hiring a certified chimney sweep is best if you suspect heavy creosote buildup, haven’t cleaned in a while, or want a full inspection for cracks, blockages, and liner condition. Professionals can also ensure your chimney cleaning is thorough and meets local safety standards.
Which chimney cleaning frequency is recommended for wood stoves and fireplaces?
Many homeowners should have chimney cleaning done at least once per year, typically before the main heating season, to prevent creosote buildup. If you burn wood frequently, burn hotter fires, or notice faster soot accumulation, you may need more frequent cleanings—such as every 3–6 months in heavy-use situations. Following manufacturer guidance and scheduling cleanings based on inspection results helps keep your chimney working safely and efficiently.
📅 Last Updated: October 04, 2026 | Topic: how clean a chimney | Content verified for accuracy and freshness.
References
- https://www.usfa.fema.gov/prevention/home-fires/fireplaces.html
- https://www.cpsc.gov/Safety-Education/Safety-Guides/Fireplace-and-Chimney-Safety
- Chimney Sweeping Services UK – HETAS
https://www.hetas.co.uk/advice/chimney-sweeping/ - https://en.wikipedia.org/wiki/Creosote
- Chimney sweep
https://en.wikipedia.org/wiki/Chimney_sweep - Google Scholar Google Scholar
https://scholar.google.com/scholar?q=chimney+sweeping+creosote+removal - Google Scholar Google Scholar
https://scholar.google.com/scholar?q=soot+deposition+chimney+cleaning+efficiency - Google Scholar Google Scholar
https://scholar.google.com/scholar?q=chimney+inspection+frequency+standards+creosote+thickness - Google Scholar Google Scholar
https://scholar.google.com/scholar?q=how+clean+a+chimney - how clean a chimney – Search results
https://en.wikipedia.org/wiki/Special:Search?search=how+clean+a+chimney
