

Your mechanical keyboard can collect enough grime and germs on keycaps and in the crevices to make it feel gritty, smudged, and noticeably unhygienic. This usually happens from everyday hand contact, food crumbs, and moisture that seeps into switches over time. If you’re dealing with that “why does it look and smell like this?” problem, the practical cleaning steps to get it back to safe, fresh use are below.


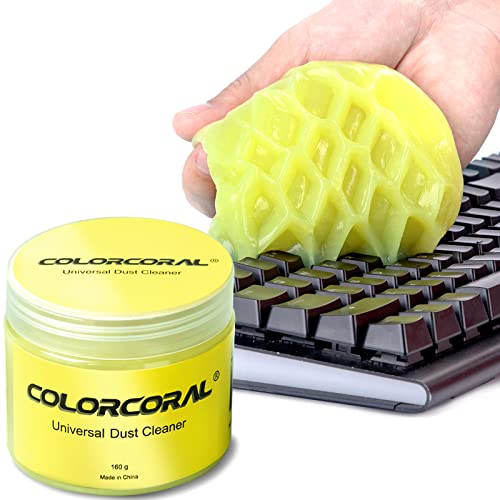

Your mechanical keyboard is usually dirtier than it looks, mainly because skin oils, sweat, crumbs, and day-to-day touch all accumulate in hard-to-reach areas. With a consistent, careful cleaning routine—especially keycaps and the space around switches—you can reduce the buildup of unseen microbes without risking damage to switches or finishes.
Regular desk hygiene matters because your keyboard is a high-touch device that stays in your “work zone” for hours at a time, and the grime you can’t see often lingers where fingers repeatedly press. In 2026, more people are working longer at home desks and swapping between commuting, snacks, and device use—so the “invisible gunk” problem is more common than many assume.
If you share your desk, eat near your keyboard, work with lots of hand contact, or just want a more hygienic setup, this is for you. It’s also useful if your keyboard has no obvious grime but still feels “sticky” or looks dull around the keycaps.
Where keyboard grime really comes from (and why it matters)

Keyboard grime isn’t random—it’s mostly a mixture of skin oils (human sebum), shed skin cells, fine dust, and food residue that migrates into crevices. When these materials combine, they can form a residue layer that traps moisture and makes keycaps feel tackier over time.
– Keycaps collect oils from hands, plus dust and skin cells that trap moisture and residue.
– Spills and crumbs migrate into crevices, and the spaces around switches become hard to clean thoroughly.
– Viruses and bacteria can hitch a ride on hands and surfaces—so the “cleanest-looking” areas can still be contaminated.
For context, “hand hygiene” and “surface hygiene” are linked because germs transfer through touch. According to CDC, hand sanitizers with at least 60% alcohol can reduce germs when used correctly (2024) CDC. According to CDC, washing hands with soap and water for at least 20 seconds helps remove germs (2024) CDC. Even if you do the hand hygiene part, the mechanical keyboard still acts as a reservoir—especially in the keycap wells where oils and crumbs collect.
How to tell when it’s time to clean (without a lab test)
You don’t need a microbiology lab to know your mechanical keyboard needs attention. Your board usually shows “cleaning signals” through sight, feel, and sound changes that reflect real buildup around keycaps and switch areas.
– Look for visible buildup: shinier tops, darkened edges, and gunk around frequently pressed keys.
– Check for “feel” problems: tackiness, uneven key travel, or keys that sound different.
– Use a simple routine audit: if your keyboard gets touched after snacks, cleaning, or commuting, treat it as high-risk even when it doesn’t look messy.
From my own desk experience, the “sticky” feeling often appears even when the keyboard looks clean from a few feet away—usually because oils thinly coat keycap surfaces and build up at the sides. Mechanical keyboards also tend to trap fine debris in and around switch housings, so a key can feel slightly different even before you can see a problem.
Also, consider what changed recently. If you recently ate at your desk, handled public transit surfaces, or cleaned around the keyboard with a damp cloth, your mechanical keyboard is now part of the contamination pathway.
A safe cleaning routine for mechanical keyboards
The safest mechanical keyboard cleaning routine is dry debris removal plus controlled keycap cleaning, while keeping liquids out of switch internals. If you treat keycaps as “the main contact surface” and handle the switch area gently, you reduce contamination without creating new moisture-related risks.
– Power down and unplug first, then remove keycaps if your keyboard design supports it (avoid prying or forcing).
– Clean keycaps with the method your materials allow (most often gentle soaking/wiping per keycap material guidelines), then fully dry before reinstalling.
– For the switch area, use gentle dust removal (like a soft brush and/or compressed air used carefully) and avoid wet cleaning that can seep into electronics.
Because mechanical keyboards combine electronics and moving parts, “less liquid” is usually the right default. According to WHO, its Five Moments for Hand Hygiene model emphasizes hand cleaning at key times during care and daily routines (2009) WHO. Your keyboard isn’t part of that model directly, but the principle translates: reduce what you touch, and reduce what you transfer.
H3: Quick clean vs. deep clean (choose based on what you see)
Quick clean is best when the mechanical keyboard looks fine but feels slightly tacky or shows light dust and oil transfer. Deep clean is worth doing when crumbs, residue buildup, or switch-area debris is obvious—or when keys feel inconsistent after use.
– Quick clean: wipe accessible surfaces, then target obvious grime on keycaps you can easily remove.
– Deep clean: remove keycaps, clean the underside and edges, and clear debris around switches without flooding the board.
Here’s a fast way to decide based on outcome and risk:
Pros/cons comparison (Quick vs. Deep clean)
– Quick clean
– Pros: Low risk to switches; faster; reduces surface oils on high-touch keycap tops.
– Cons: May leave hidden debris around switch housings; won’t fully address deep residue under frequently used keys.
– Deep clean
– Pros: Clears debris around switches and inside keycap wells; helps restore consistent feel and sound.
– Cons: More disassembly time; increases the chance of reassembly issues if you’re not careful with stabilizers.
H3: What to use (and what to avoid)
Use manufacturer-approved materials and electronics-safe cleaning practices—especially for keycap material and legend type. Avoid soaking the PCB, saturating switches, or letting liquids pool between keycaps, because moisture can create lingering residue and corrosion risks.
– Use lint-free cloths and manufacturer-approved or electronics-safe cleaners only where appropriate for your keyboard’s materials.
– Avoid soaking the PCB, saturating switches, or letting liquids pool between keycaps.
– Be cautious with aggressive solvents on dyes/legends and unknown finishes—damage can be permanent.
Mechanical keyboard “cleaners” are rarely one-size-fits-all because keycaps differ (ABS vs. PBT, different legend coatings, and different printing methods). If you’re unsure, treat the keyboard like electronics and keycap finishing are both sensitive—because they are.
Keycap Legend Types: Solvent Compatibility (Practical Cleaning Risk, 2026)
| # | Legend type | Typical weak point | Best cleaning approach | Solvent compatibility |
|---|---|---|---|---|
| 1 | Doubleshot (2-color injection) | Surface texture wear, not legend loss | Gentle wipe/soap & water (as allowed) | ★★★★★ |
| 2 | Dye-sublimation | Abrasion can dull surface shine | Mild cleaning + thorough drying | ★★★★☆ |
| 3 | Laser-etched | Residue can build in etched recesses | Dry dusting + gentle damp wipe (sparingly) | ★★★★☆ |
| 4 | Pad-printed | Print can fade with repeated rubbing | Soak/wipe only if keycap guidance allows | ★★★☆☆ |
| 5 | UV-printed / UV-cured decals | Coating can wear or smear under harsh wipes | Use mild cleaners; avoid aggressive solvents | ★★☆☆☆ |
| 6 | Painted or dyed legends (surface-applied) | Paint can peel or smear from solvents/abrasion | Prefer minimal damp wipe; avoid soaking | ★☆☆☆☆ |
| 7 | Decals / stickers on legends | Adhesive can loosen with moisture | Avoid liquids; dry clean only | ★☆☆☆☆ |
What can go wrong (common mistakes and edge cases)
The most common mechanical keyboard cleaning mistakes are moisture intrusion and “tool pressure” that dislodges parts. If you rush or treat the board like a sink-friendly device, you can create problems that look like dirt but are actually damage.
– Over-wetting: liquids can damage PCBs or get trapped where you can’t easily dry.
– Wrong approach to stabilizers and switch housings: dragging tools through tight gaps can loosen parts.
– Compatibility issues: non-standard keycaps, custom coatings, or hot-swap designs may require different care—always check your manual.
Mechanical keyboards vary a lot: some are hot-swap (designed to let you replace switches), others have soldered components, and stabilizers can be top-mounted, plate-mounted, or pre-lubed. That means a “generic” cleaning approach may cause unwanted rattles or loosenings during reassembly.
Also, some keycap finishes are sensitive. If your keycaps have unknown coatings or you’re using aftermarket legends, stronger chemicals can permanently alter the look and feel—even when the keyboard still works electrically.
If you’re thinking about disinfecting with chemicals, remember that disinfection goals and electronics safety goals can conflict. CDC and WHO emphasize reducing germs through correct hand hygiene and appropriate hygiene practices, but they don’t imply that every cleaning product is keyboard-safe (CDC, WHO).
Verdict: what we recommend (and who should skip DIY cleaning)
The most reliable recommendation is to do regular keycap-focused cleaning plus careful dry debris removal around the switch area. That combination reduces contamination on a high-touch device while keeping the biggest risk—liquid in electronics—under control.
That said, skip DIY and use the manufacturer’s official service route if your mechanical keyboard is unusual (rare materials/coatings), won’t unplug cleanly, has warranty constraints, or you’re not confident about disassembly/reassembly—especially for boards with fragile stabilizers. In 2026, with more compact designs and more custom finishes, “safe for one keyboard” can be “unsafe for another,” so the manual still matters.
Scan-friendly checklist (save this)
| Area | Clean when… | Safe approach |
|---|---|---|
| Keycap tops | They feel tacky or look dull/shiny | Remove keycaps if supported; wipe/clean per keycap material guidance; dry fully |
| Keycap sides/edges | Grime collects around frequently used keys | Use gentle cloth/brush work; avoid pushing debris deeper |
| Between switches | Dust, crumbs, or debris are visible | Use gentle dust removal; don’t flood the switch area |
| Under/around the board | You notice sticky residue on the desk | Unplug, wipe the exterior surfaces, and keep liquids away from the electronics |
Frequently Asked Questions
How dirty is a mechanical keyboard compared to a phone or mouse?
Mechanical keyboards can collect more grime than you expect because keys, keycaps, and the space between switches trap skin cells, dust, and crumbs. While phones are often the “worst” for visible germs, keyboards still harbor bacteria and allergens due to constant face and hand contact. If you eat at your desk or share your keyboard, the germ load can rise significantly, especially in the key rows you touch most.
What germs are you most likely to find on your mechanical keyboard?
Your keyboard can carry a mix of bacteria from skin contact, plus dust and microorganisms that build up in the crevices between keycaps. Allergens like dust mites and mold spores may also accumulate if humidity is high or the keyboard isn’t cleaned regularly. Even if germs aren’t visible, high-touch areas such as the WASD and spacebar region often hold the most residue and contaminants.
How should you clean a mechanical keyboard to reduce germs you can’t see?
Start by unplugging the keyboard or powering down the device, then remove loose debris with compressed air and a soft brush. For disinfecting, use manufacturer-recommended wipes or lightly damp microfiber cloth methods—avoid soaking. Pay special attention to high-touch key areas, and let everything fully dry before reconnecting to minimize moisture buildup and corrosion risk.
Which cleaning method is best for mechanical keyboards—sprays, wipes, or keycap removal?
The best approach depends on how dirty the keyboard is and the type of keycaps. For routine hygiene, alcohol-based wipes or keyboard-safe disinfecting wipes are often easiest and effective when used lightly and safely. If you see sticky residue, allergens, or heavy buildup, removing keycaps for thorough cleaning can be more effective, but only if you can do it without damaging switches, stabilizers, or legends.
Why does a mechanical keyboard get dirtier over time, and how often should you disinfect it?
Mechanical keyboards build up grime because their gaps between keycaps and switch housings act like collectors for skin oils, dust, and food particles. If you type for hours daily, your touch transfers oils and microbes that “stick” to residues, making regular keyboard cleaning essential. A practical schedule is to dust-clean weekly, disinfect monthly, and do a deeper clean after spills, travel, illness exposure, or shared use.
📅 Last Updated: November 04, 2026 | Topic: How Dirty Is Your Mechanical Keyboard? The Germs You Can’t See | Content verified for accuracy and freshness.
References
- https://www.cdc.gov/coronavirus/2019-ncov/community/clean-disinfect.html
- Environmental Infection Control Guidelines | Infection Control | CDC
- https://www.who.int/publications/i/item/cleaning-and-disinfection-of-environmental-surfaces-in-the-context-of-covid-19
- Fomite
- computer keyboard microbial contamination – Search Results – PubMed
- virus survival on surfaces disinfection – Search Results – PubMed
- https://www.britannica.com/science/fomite
- https://scholar.google.com/scholar?q=computer+keyboard+microbial+contamination Google Scholar
- https://scholar.google.com/scholar?q=mechanical+keyboard+germs+study+disinfection Google Scholar
- https://scholar.google.com/scholar?q=disinfecting+electronic+devices+computer+keyboard Google Scholar
