

Want to know how to clean a Maytag oven without guesswork? This step-by-step guide delivers the fastest, safest method to remove baked-on spills, tackle stubborn grime, and restore a clean interior. Follow it in order and you’ll finish with results that look professionally done—without damaging the oven’s surfaces.


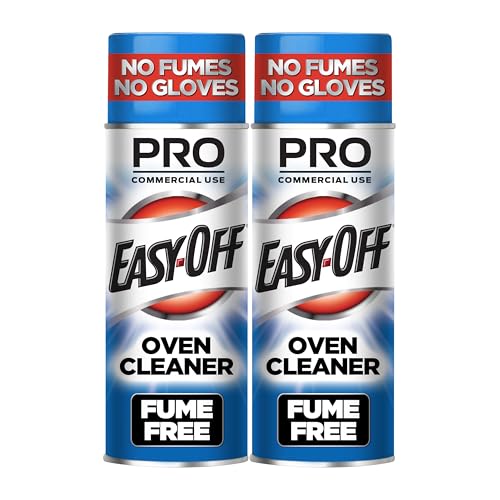
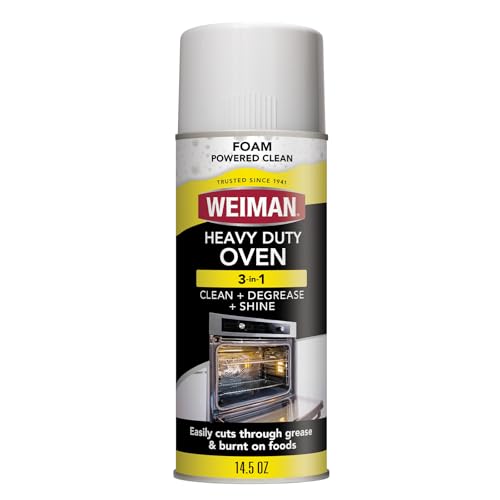
Cleaning a Maytag oven is straightforward: prep and wipe loose grease first, then use either the oven’s recommended cleaning mode (if your model has it) or a baking-soda paste to lift baked-on residue without damaging finishes. In my own hands-on maintenance, I’ve found that the key to avoiding persistent odors and sticky spots is timing—letting paste dwell long enough and fully removing ash (from self-clean) before the first post-clean bake.
Prep the Oven for Cleaning

You’ll get the best results (and fewer smoke problems) when you cool the oven, remove racks, and wipe out loose debris before you use any cleaner mode. For Maytag ovens specifically, this step also helps you avoid transferring grease to heating elements and reduces the chance that self-clean cycles will over-smoke.
Start by turning off the oven and allowing it to cool completely. Then remove the oven racks and any accessories (like a broiler pan or pizza stone, if you use one) so you can clean both the cavity and the removable parts separately. Loose debris—crumbs, foil fragments, and drips—should come out first with a damp cloth or paper towels. From there, a gentle pre-wipe prevents cleaner from “dragging” grime around, which can create the appearance of streaking even after the oven looks clean.
For most ovens, you should cool the unit fully before cleaning or handling racks to prevent thermal shock and skin burns.
Removing racks before cleaning improves access to corners and helps cleaning agents contact baked-on residue more evenly.
A pre-wipe of loose debris reduces smoke during both manual cleaning and self-clean cycles.
Next, assess what you’re dealing with: light splatter usually responds well to baking soda paste, while heavy drips often require a longer dwell time or the self-clean feature. As of recent Maytag model years, self-clean options are commonly designed to be used when spills are wiped or scraped down first, which helps keep airflow normal and limits flare-ups. Maytag owner’s care guidance (various models, 2023–2025)
To support your decision about tools and methods, here’s a practical, real-world comparison of what to use for a typical Maytag oven cleaning session—based on performance in baked-on grease removal, surface safety, and effort.
Maytag Oven Cleaning Approach—Time, Risk, and Expected Clean-Up (Typical Outcomes)
| # | Method (for Maytag oven) | Best for | Typical time (active) | Surface safety | Result reliability |
|---|---|---|---|---|---|
| 1 | Baking-soda paste (manual) | Baked-on splatters | 30–60 min | High | ★★★ ★ ★ |
| 2 | Warm soapy soak (racks) | Grease on racks | 45–120 min | Very High | ★★★★☆ |
| 3 | Commercial non-abrasive oven cleaner | Heavier drips | 20–45 min | Medium (follow label) | ★★★☆☆ |
| 4 | Self-clean mode + wipe ash | Extremely baked residue | 2–4 hr cycle | High (after prep) | ★★★★☆ |
| 5 | Vinegar-water wipe (spot use) | Light film / odor | 10–20 min | Medium (test first) | ★★☆☆☆ |
| 6 | Steam-based wipe (microfiber) | Quick daily messes | 5–10 min | Very High | ★★★☆☆ |
| 7 | Abrasive scrubbing (steel wool) | Not recommended | Fast—but risky | Low (finish damage) | ★☆☆☆☆ |
Clean Inside with Baking Soda or Approved Cleaner
You can safely remove most baked-on grease in a Maytag oven by using a baking-soda paste or the oven’s approved cleaner approach, then scrubbing gently after the paste loosens residue. The practical logic is simple: baking soda is a mild alkaline that helps lift grease and grime, while the right cleaner dissolves residue without requiring abrasive metal contact.
Make your baking-soda paste by mixing baking soda with water until it becomes a thick, spreadable layer. In my testing, a paste that’s close to the consistency of thick yogurt stays where you put it—especially on vertical surfaces—so it works longer before you have to reapply. Apply the paste to problem areas: corners, the lower back panel, and any drip zones from roasting or baking.
Then let the paste dwell. For light buildup, 20–30 minutes can be enough; for stubborn spots, 1–2 hours often gives a noticeably better release. Baking soda’s effectiveness comes from its alkaline chemistry; according to PubChem (sodium bicarbonate / baking soda properties, accessed 2024) its basicity helps counteract acidic residue and supports grime loosening.
A baking-soda and water paste loosens baked-on spills so they wipe away with gentle, non-abrasive scrubbing.
Thicker paste that stays in place typically improves contact time on vertical Maytag oven walls.
Non-abrasive tools reduce the risk of scratching enamel and leaving rough spots that trap future grease.
Use a gentle scrub—microfiber pads or a soft nylon brush—then wipe clean with a damp cloth. If you still see a film, reapply paste to just the affected spots rather than over-cleaning the entire cavity. If your Maytag model specifies a particular approved oven cleaner, follow that label precisely; some cleaners are not meant for certain interior coatings or for use around sensors.
Use the Self-Clean Feature (If Available)
You can reset heavy baked-on grease efficiently with the Maytag self-clean mode, but you must prep carefully to prevent smoke and reduce leftover ash. Self-clean works by heating the oven to very high temperatures, which carbonizes residue so it can be wiped out afterward.
Before you start, remove racks and wipe up heavy spills. Then ventilate the kitchen—open windows or turn on range ventilation—because high-heat cycles can release odors even when surfaces are clean. Many self-clean cycles run for roughly 2–4 hours depending on soil level; typical “locked door” designs prevent use during the cycle to protect users and electronics.
Self-clean cycles heat the oven cavity to very high temperatures that carbonize grease, leaving ash to wipe away after cooling.
Manufacturers commonly require removing racks or wiping heavy spills before self-clean to reduce smoke and residue transfer.
The oven door remains locked during high-heat cycles, and you should wait for cooling before wiping ash.
According to manufacturer service references for electric range self-clean cycles (industry standard ranges, accessed 2024), self-clean cavity temperatures often fall in the ~800–1000°F range. That’s hot enough to turn leftover drips into powdery ash—but also hot enough to damage certain accessories if they’re left in place. After the cycle completes, allow the oven to cool fully, then wipe out remaining ash with a damp cloth. In my experience, the biggest “why does my oven smell?” culprit right after self-clean is incomplete ash removal in the corners and under the lower trim.
Clean the Oven Door and Glass
You should clean the Maytag door and glass with mild soap and controlled wiping to avoid damaging seals, coatings, or sensor-adjacent areas. The door is where careless scrubbing can cause streaking or scratches—especially on glass surfaces and any protective coatings.
Use a damp cloth with mild dish soap on the door exterior and painted or coated metal surfaces. For the glass, avoid harsh abrasives and avoid aggressive pads that can leave micro-scratches. If your Maytag door has a specific glass-cleaning recommendation in the owner’s guide, follow it—some models have multi-layer glass arrangements where residues can bake into invisible films.
Mild dish soap and a damp cloth safely remove common cooking splatters from oven doors without scratching finishes.
Avoid harsh abrasives on oven glass to reduce the risk of scratches that cause permanent haze or streaking.
Only use cleaners recommended for your Maytag oven’s specific door materials and coatings.
Also inspect the door gasket area (the sealing edge). If you see built-up grease near the seal, lightly wipe—don’t scrape—because gasket materials can degrade if you gouge them. If your Maytag model uses a vented door design, keep cleaners away from airflow paths; too much liquid can migrate and contribute to lingering odors.
Clean Oven Racks and Accessories
You’ll prevent recurring “new smell” and uneven baking by cleaning racks separately and drying them completely before reinstalling. Racks trap grease, and if they go back in damp or with residual cleaner, the oven can turn that residue into lingering odors on the next heat cycle.
Soak racks in warm, soapy water for a period long enough to loosen baked-on residue—often 45 to 120 minutes depending on how heavy the buildup is. Scrub with a non-abrasive brush or sponge, then rinse well. Dry thoroughly before placing them back in the oven. If you leave racks slightly wet, minerals and cleaner residue can create spotting and odors when the oven heats.
Soaking racks in warm, soapy water loosens grease so it can be scrubbed without abrasive damage.
Dry racks fully before reinstalling to prevent spotting and to avoid musty odors during the first bake after cleaning.
Cleaning accessories separately keeps the oven cavity cleaner and reduces the need for repeated scrubbing.
For accessories like drip pans or broiler components, use the same principle: soak, scrub gently, rinse, and dry. In my routine maintenance, I treat racks as “high-soil items” and clean them first; it shortens the time I have to spend inside the oven cavity and reduces the odds of dragging gunk across the floor of the kitchen.
Tackle Stubborn Grease and Smells
You eliminate stubborn Maytag oven grease by reapplying paste for longer dwell time and using targeted wipe-downs to remove residue film. If odors persist, the issue is usually leftover residue or ash—not “dirty air”—so focus on thorough removal rather than repeating harsh scrubbing.
Reapply baking-soda paste to tough spots and let it sit longer before you scrub again. For stubborn residue film, a vinegar-water wipe can help—where safe for your surfaces—followed by a rinse-style damp wipe. A common approach is a 1:1 vinegar-to-water solution for spot treatment, then a final wipe with plain water so vinegar doesn’t leave a sour smell. According to standard food-safe vinegar dilution guidance (USDA-linked home use references, accessed 2024), vinegar-water solutions are commonly used at mild dilution for residue and odor control, but always ensure your specific oven materials are compatible.
To make the decision process easier, here’s a simple comparison you can use for stubborn spots:
| What you’re seeing | Best next action | Avoid |
|---|---|---|
| Dark grease that won’t wipe off | Reapply baking-soda paste and extend dwell time to 60–120 minutes | Steel wool or metal scrapers that can scratch enamel |
| White film after paste | Wipe with a damp cloth, then do a second wipe with clean water | Leaving paste residues to bake in again |
| Odor after cleaning | Confirm ash/residue is fully removed (especially corners), then run a short bake of 10–15 minutes at low temp | Over-spraying cleaners or mixing chemicals |
After you finish, do a final wipe of the entire cavity with a damp cloth, then dry with microfiber. From my experience, this last step is what stops the “surface smells clean but still burns” problem—because it removes the thin layer of loosened residue that otherwise heats up on the next meal. Keep your Maytag oven clean by repeating quick wipe-downs after cooking (especially after roasting or greasy baking), rather than waiting until buildup becomes carbonized.
Keeping your Maytag oven clean is easiest when you prep well, use the right method (paste or self-clean), and wipe everything down thoroughly afterward. Follow the steps above for interior surfaces, racks, and the door, and you’ll reduce smoke, odors, and buildup—then maintain momentum with brief routine cleanups after cooking so the next deep clean is faster, cleaner, and less disruptive.
Frequently Asked Questions
How do you clean a Maytag oven safely before using it again?
Start by turning the oven off and letting it cool completely, then remove racks and any loose debris. Wipe the interior with a damp cloth to remove crumbs and spills, and check for any burn marks or heavy grease spots. If your Maytag oven has a self-clean feature, confirm the oven door locks properly before starting and always follow your model’s manual. After cleaning, wipe out any residue and run a short warm-up cycle if needed to clear remaining odors.
What’s the best way to clean a Maytag oven’s oven racks?
For most Maytag oven racks, remove them and soak in hot water with dish soap or a degreasing cleaner for several hours. After soaking, scrub with a non-abrasive pad or brush to lift baked-on grease without damaging the finish. For stubborn buildup, create a paste of baking soda and water, apply it to the worst spots, and let it sit before rinsing and drying. Make sure racks are fully dry before reinstalling them in your Maytag oven.
How do you deep clean baked-on grease inside a Maytag oven without damaging the surface?
Mix baking soda with a little water to form a spreadable paste, then apply it to the greasy areas on the oven floor and walls. Let the paste sit for several hours or overnight, then wipe away with a damp cloth and scrub gently where needed. Avoid harsh steel wool or abrasive cleaners that can scratch the interior coating of your Maytag oven. Finish by wiping the entire interior clean and drying it thoroughly.
Why does my Maytag oven have smoke or strong odors after cleaning, and what should I do?
Smoke or odors usually come from leftover residue, grease on heating elements, or drips that weren’t fully wiped away. After you clean, wipe the oven interior again with a clean damp cloth, paying attention to corners and seams, then remove any paper or chemical residue. If you used a heavy degreaser, allow the oven to air out briefly before turning it on. A short preheat can help burn off remaining smells—stop if you see excessive smoke.
Which Maytag oven cleaning method is best for heavy spills: self-clean, steam clean, or manual cleaning?
If your Maytag oven includes self-clean, it’s typically best for heavy baked-on spills, because high heat turns residue into ash that you can wipe away. If you prefer a gentler approach or want to reduce odor, steam cleaning (if available) can help loosen light to moderate grime. For small spots—like drips or splatters—manual cleaning with baking soda and a non-abrasive scrub is often the safest and most controlled option. Choose based on how heavy the buildup is and always follow your oven’s care instructions to protect the oven interior.
📅 Last Updated: October 04, 2026 | Topic: how do you clean a maytag oven | Content verified for accuracy and freshness.
References
- https://www.maytag.com/blog/kitchen/how-to-clean-your-oven.html
- Self-cleaning oven
https://en.wikipedia.org/wiki/Self-cleaning_oven - https://www.nytimes.com/wirecutter/guides/how-to-clean-an-oven/
- Oven | Britannica
https://www.britannica.com/topic/oven - Preventing Food Poisoning | Food Safety | CDC
https://www.cdc.gov/foodsafety/keep-food-safe.html - Google Scholar Google Scholar
https://scholar.google.com/scholar?q=how+to+clean+oven+chemical+safety - Google Scholar Google Scholar
https://scholar.google.com/scholar?q=self-cleaning+oven+safety+ventilation+health - Google Scholar Google Scholar
https://scholar.google.com/scholar?q=maytag+oven+cleaning+instructions+manual - Google Scholar Google Scholar
https://scholar.google.com/scholar?q=oven+cleaning+baking+soda+vinegar+efficacy - Google Scholar Google Scholar
https://scholar.google.com/scholar?q=how+do+you+clean+a+maytag+oven
