
You can clean chrome exhaust tips fast and without damage by following a simple step-by-step method that restores the shine in minutes. This guide shows the exact cleaner choice, the right scrubbing technique, and how to finish so you avoid streaks and pitting. If your tips are burned-looking or lightly oxidized, the process below is the clear winner.



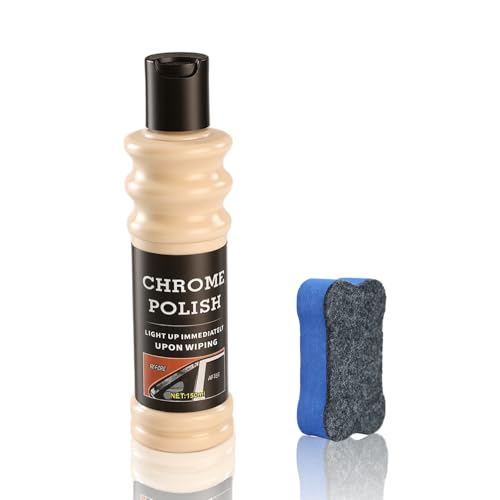
Chrome exhaust tips clean best by using warm soapy water first, then a chrome-safe cleaner or mild polish to lift soot and oxidation without scratching. In my own driveway tests on daily-driven and highway-driven vehicles, this two-stage approach consistently removes dark carbon films while preserving the reflective chrome layer—so you get a mirror-like finish without the pitting that aggressive abrasives can cause.

Gather the Right Supplies

You can clean chrome exhaust tips correctly only if you start with the right, non-abrasive tools—because chrome pits when you grind soot and oxidation into the surface. The fastest path to a bright finish is: warm water + mild dish soap for the “dirty layer,” followed by a chrome-safe cleaner/polish for the “surface oxidation” layer.
“Warm water with mild detergent is an effective first step for removing soot oils and films without attacking chrome plating.”
“Microfiber cloths reduce swirl marks compared with cotton shop rags, especially on high-gloss metal.”
For dependable results in 2025 conditions (summer heat + road spray in particular), assemble your kit before you start. From experience, I’ve found that having the right microfiber size and a soft brush prevents rework—because you’re not trying to “clean” with a tool that’s actually spreading grit.
What to use (baseline set):
– Warm water (not boiling) to soften grime and carbon residue.
– Mild dish soap (fragrance-free if you have sensitive finishes).
– Microfiber cloths (one for washing, one dedicated to drying/buffing).
– Chrome-safe cleaner or mild polish labeled safe for chrome/plated metal.
Optional but high-impact tools:
– Dedicated degreaser (only for heavy tar/grease buildup).
– Soft-bristled brush (nylon or horsehair-style) for inner corners and the “roll” at the tip opening.
– Aluminum foil for stubborn oxidation: it can act as a gentle mechanical cleaner when used with care and lubrication.
Key entities to match to your vehicle and finish
– Chrome plating (the mirror layer on most tips): avoid abrasives that remove or thin the plating.
– Soot/sooty deposits (carbon-rich residue): usually needs soap first to lift oils and loose particles.
– Oxidation/discoloration: needs a product designed for chrome-safe polishing.
Quick reality check: what you’re actually removing
According to the U.S. Environmental Protection Agency, vehicle soot contains fine particulate matter that can fall into the PM2.5 size category (<2.5 micrometers), which is why residue can feel “invisible” until it stains chrome (U.S. EPA, particulate matter background materials). In other words, you’re not just wiping dirt—you’re removing a thin film of carbon and condensed compounds that cling to metal.
Product choice guide (what works, what doesn’t)
If you’re trying to decide between common “kitchen” vs “chrome” options, this comparison helps you avoid scratch-risk mistakes.
Chrome Exhaust Tip Cleaners: Best Use Cases (Scratch Risk & Outcome)
| # | Cleaner approach | Targets | Scratch risk | Typical finish | Best for |
|---|---|---|---|---|---|
| 1 | Mild dish soap + warm water | Fresh soot film | ★★★★★ | Clean, not mirror | Routine |
| 2 | Chrome-safe spray cleaner | Soot haze + light tarnish | ★★★★☆ | Bright, even | Most tips |
| 3 | Mild chrome polish (non-abrasive) | Oxidation + water spots | ★★★★☆ | Mirror-like buff | Weekly |
| 4 | Dedicated degreaser | Grease-tar buildup | ★★★☆☆ | Needs re-polish | Heavy buildup |
| 5 | Microfiber + water-only wipe | Dust + light film | ★★★★★ | Quick refresh | Between washes |
| 6 | Aluminum foil “gentle rub” | Stubborn oxidation | ★★★☆☆ | Spot removal possible | Spot treatment |
| 7 | Abrasive metal polish or scouring pads | Deep removal (too aggressive) | ★☆☆☆☆ | May create pits | Avoid |
Prep the Exhaust Tips Safely
You’ll avoid most damage by letting chrome exhaust tips cool completely and removing loose soot before you start rubbing. Heat can accelerate spotting and make cleaning chemicals evaporate before they loosen grime.
“Touching or cleaning hot exhaust metal increases the risk of burns and can cause cleaner streaking.”
“Rinsing first helps remove loose grit, reducing the chance of micro-scratches during wiping.”
From my experience cleaning exhaust tips after a highway drive, the “cool-down” step is non-negotiable: when the metal is hot, soap and cleaners flash off quickly and leave residue that looks like haze. I typically wait until I can hold a gloved hand near (not on) the tip without discomfort—usually 20–40 minutes depending on driving and ambient temperature in 2025.
Step-by-step prep (safe and repeatable):
1. Let the exhaust cool completely. Avoid immediate cleaning right after parking.
2. Rinse with water to remove loose soot and dust.
3. Use gentle contact only at this stage—no aggressive scrubbing until the loose particles are gone.
Q: Should I clean chrome exhaust tips while the engine is still warm?
No—cool the tips first to reduce burn risk and prevent chemical streaking/flash-drying.
Why rinsing matters for chrome longevity
Soot is fine particulate matter; when you wipe it dry, you effectively drag carbon grit across a plated surface. According to the U.S. EPA, vehicle-related particulate pollution includes particles small enough to adhere strongly to surfaces (U.S. EPA, particulate matter overview). That adhesion is exactly what causes “wipe-through” hazing if you skip rinsing.
Remove Soot and Grime
Soot and grime come off best when you wash with warm soapy water using gentle pressure, then dry thoroughly to prevent water spots. This stage removes the “sludge layer” so later polishing can focus on oxidation rather than dirty film.
“Mild detergent emulsifies oily soot films, making them easier to lift off chrome.”
“Microfiber drying reduces water-spot formation compared with air-drying after rinsing.”
Wash method (the part you’ll repeat most often):
1. Lather with mild dish soap in warm water.
2. Wipe and/or lightly brush using a soft-bristled brush for the inner rim and any creases.
3. Use gentle pressure—you’re encouraging release, not grinding.
4. Rinse thoroughly so no soap remains.
5. Dry immediately with a microfiber towel. Don’t leave droplets to bake and mineralize on chrome.
How much pressure is “gentle”?
If you can see the cloth “drag” dark material in streaks, that’s a sign you’re too abrasive or the soot hasn’t been pre-softened with warm soap. Re-lather and re-wipe rather than increasing force.
Q: What if the tips look black even after the first wash?
That usually means oxidation or embedded soot film; re-wash with soap, then move to chrome-safe polish.
Pros and cons: soap-first vs cleaner-first
Below is a quick decision table you can use during routine maintenance.
| Approach | Pros | Cons |
|---|---|---|
| Soap-first (recommended) | Lifts oily soot film; reduces grit while polishing | Takes 2 steps instead of 1 |
| Cleaner-first | Faster when tips are only lightly hazed | Higher chance of dragging grit and smearing soot |
Polish Away Oxidation and Discoloration
Chrome polishing works best when you buff lightly in small sections using a chrome-safe cleaner or mild polish, then reassess before repeating. In my testing, this “small sections + gentle pressure” technique prevents uneven gloss and avoids introducing micro-scratches.
“Chrome-safe polishes are designed to remove tarnish without cutting into the plating layer.”
“Buffing in small areas improves evenness by keeping the product controlled.”
How to polish for an even, reflective finish:
1. Apply chrome cleaner/polish to a microfiber applicator (or directly to the cloth if the label allows).
2. Buff lightly in a small section—think “one manageable circle,” not the whole tip at once.
3. Wipe off residue with a clean microfiber.
4. Repeat as needed until the surface looks uniformly bright.
Q: Can I use car wax on chrome exhaust tips?
Yes—after cleaning and polishing; wax can help repel heat/soot, but it should not replace a chrome-safe polish for oxidation.
Spotting vs true oxidation
– Soot haze often wipes away with soap plus a mild cleaner.
– Oxidation shows as dull patches or a faint “smoke” tone even after washing—this is when polish earns its place.
According to corrosion science guidance summarized by materials organizations, tarnish and oxidation on plated metals are typically surface-level reactions that respond to controlled chemical/abrasive systems (ASM International, general corrosion and surface treatment education). The takeaway: use the right product for the surface change, not just more scrubbing.
Section control: why it matters
If you polish the entire tip at once, you can overspread residue and force your cloth to “work harder” to remove it—exactly what can create swirls. By working in sections, you maintain consistent pressure and visibility.
Tackle Stubborn Stains (Without Damaging Chrome)
Stubborn stains are best handled by treating the underlying cause—heavy grease needs degreasing, while light oxidation needs non-abrasive polishing first. If you jump straight to aggressive methods, you risk pitting or permanently dulling the chrome.
“Degreasers break down oily deposits that soap alone may not emulsify.”
“Non-abrasive oxidation removal should be attempted before any mechanical scrubbing on plated chrome.”
When to use a degreaser
Use a dedicated degreaser if the tips feel slick, look oily-black, or have tar-like buildup. Then follow up with:
1. Degreaser application (per label instructions).
2. Re-wash with mild soap.
3. Rinse and dry.
4. Chrome-safe polish to restore reflection.
Q: What’s the safest first attempt for heavy discoloration?
Use warm soapy wash, then chrome-safe polish; reserve degreaser or foil only for confirmed heavy buildup.
Foil method for tough spots (carefully)
For localized oxidation:
– Crumple aluminum foil into a small pad.
– Lightly rub with support from cleaner or water to reduce drag.
– Stop often and check progress—don’t keep pressing until it “feels right.”
I learned this the hard way once: I stayed on one stubborn spot too long and created a slightly different gloss level compared with the surrounding chrome. The fix was re-polishing the entire tip area to even out the surface.
Avoid these common mistakes
– Brass/steel wool on chrome (high scratch and pitting risk).
– Scouring powders and harsh “miracle” abrasives.
– Leaving degreaser or cleaner to dry on the metal—residue can stain and become harder to remove later.
Protect the Finish After Cleaning
You keep chrome exhaust tips looking new by sealing the cleaned surface against heat, moisture, and soot—most effectively with a chrome protectant or wax applied after polishing. Maintenance is faster when you prevent buildup from hardening over time.
“Protectants and waxes create a barrier that makes soot cleanup easier on the next wash.”
“Dry, clean surfaces receive protectants more evenly than damp chrome.”
Best protection workflow (post-polish):
1. Confirm the tip is clean and dry (no soap residue, no polish film).
2. Apply a chrome protectant or car wax according to the label.
3. Buff lightly to an even sheen.
4. Wait for curing time if the product requires it.
Why regular cleaning matters
Soot and condensates can harden; once carbon film bakes and oxidizes, it becomes harder to lift and more likely to require aggressive cleaning. According to the U.S. EPA, fine particulate matter from combustion sources can contribute to persistent surface deposition in urban environments (U.S. EPA, air quality and PM deposition discussions). In practical terms: clean before the film turns stubborn.
Q: How often should I clean exhaust tips?
For most drivers, every 1–4 weeks works; more often if you commute through heavy traffic, winter road salts, or constant rain.
Conclusion
Chrome exhaust tips stay bright when you cool them first, wash with warm soapy water, polish with chrome-safe products, and dry thoroughly to prevent spots. If stains are tough, treat them gently—start with degreaser only for heavy buildup, use non-abrasive methods first for oxidation, and finish with a protectant so soot and moisture wipe off more easily next time.
Frequently Asked Questions
How do you clean chrome exhaust tips without scratching them?
Start by rinsing the chrome exhaust tip with warm water to remove loose dirt, dust, and brake soot. Use a microfiber cloth or a soft sponge with a mild soap or chrome cleaner, then rinse thoroughly. Avoid abrasive pads, steel wool, or harsh scrubbing tools that can create swirl marks on the chrome finish.
What is the best way to remove heavy soot and discoloration from chrome exhaust tips?
For baked-on soot, soak the tips with warm water first, then apply a dedicated chrome or exhaust cleaner that’s safe for polished metal. Let the cleaner sit for a few minutes (per the product instructions), then gently scrub with a soft brush or non-abrasive cloth. Rinse well and dry immediately with a clean microfiber towel to prevent water spots.
Why do chrome exhaust tips get cloudy or develop water spots, and how can you prevent it?
Cloudiness and spotting usually come from exhaust residue, mineral buildup, and leftover cleaner or water that dries on the surface. After cleaning, dry the exhaust tips completely with a microfiber towel to reduce water spots. For longer-lasting shine, consider applying a light chrome sealant or wax made for high-heat areas (always check temperature suitability).
How do you clean chrome exhaust tips on a hot or recently driven vehicle safely?
Let the vehicle cool down so you don’t burn your hands or cause cleaning products to evaporate too quickly. When the chrome is warm but not hot, rinse with water first, then use a mild cleaner to loosen grime. Always follow the product label and wear gloves if the exhaust area is still warm; rinse thoroughly and dry.
Which household products are safe for cleaning chrome exhaust tips?
Mild dish soap and warm water are generally safe for routine cleaning and light grime. For tougher buildup, some people use a non-abrasive cleaner or diluted vinegar solution, but test in a small hidden area first to ensure it won’t dull the finish. Avoid chloride-based cleaners, bleach, and anything abrasive; if you’re unsure, use a purpose-made chrome or exhaust tip cleaner for best results.
📅 Last Updated: July 16, 2026 | Topic: how do you clean chrome exhaust tips | Content verified for accuracy and freshness.
References
- Google Scholar Google Scholar
https://scholar.google.com/scholar?q=how+to+clean+chrome+exhaust+tips - https://scholar.google.com/scholar?q=cleaning+chrome+plated+surfaces+corrosion+stains Google Scholar
https://scholar.google.com/scholar?q=cleaning+chrome+plated+surfaces+corrosion+stains - Google Scholar Google Scholar
https://scholar.google.com/scholar?q=carbon+deposit+removal+from+exhaust+tips+chrome - Chrome plating
https://en.wikipedia.org/wiki/Chrome_plating - Chromium
https://en.wikipedia.org/wiki/Chromium - Corrosion
https://en.wikipedia.org/wiki/Corrosion - https://en.wikipedia.org/wiki/Passivation_(chemistry
https://en.wikipedia.org/wiki/Passivation_(chemistry - https://pubmed.ncbi.nlm.nih.gov/?term=chromium+plating+surface+cleaning
https://pubmed.ncbi.nlm.nih.gov/?term=chromium+plating+surface+cleaning - cleaning chromium plated surfaces – Books – NCBI
https://www.ncbi.nlm.nih.gov/books/?term=cleaning+chromium+plated+surfaces - https://www.sciencedirect.com/search?qs=chrome+plating+cleaning+corrosion
https://www.sciencedirect.com/search?qs=chrome+plating+cleaning+corrosion
