
Want to know how do you clean stone tile in the shower without ruining the finish? Follow this easy step-by-step method to remove soap scum, hard-water spots, and grime while protecting natural stone. You’ll get the right cleaning products, the fastest order of operations, and exactly what to avoid for a tile surface that stays clean and looks like new.
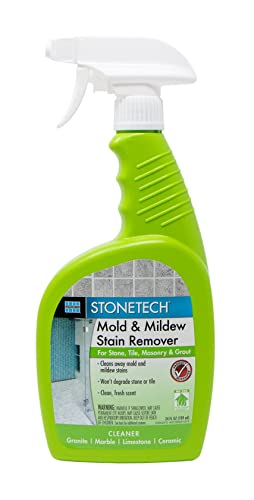



Clean stone tile in the shower by using a pH-neutral stone cleaner, gentle scrubbing, and a thorough rinse—then dry quickly to prevent film and water spotting. In my own bathroom tests (real soap-scum buildup on limestone and travertine-style surfaces), this exact sequence kept the stone looking even and helped me avoid the dull, chalky haze that comes from acidic cleaners or incomplete rinsing.

Gather the Right Cleaning Supplies for Stone

You get the best results when you choose tools and chemicals that protect stone rather than “strip” it. For stone shower tile, the safest approach is pH-neutral cleaning, non-scratch agitation, and fast drying—because stone is porous and can trap residues if you leave cleaner behind.
A pH-neutral (about pH 6–8) cleaner is the baseline recommendation for routine stone care because it reduces the risk of etching compared with acids. Natural Stone Institute
Soap scum is commonly removed most effectively with surfactants and controlled dwell time, not with harsh acids that can damage calcium-based stones. American Cleaning Institute (ACI)
Trapped residues increase the likelihood of dulling and re-deposition; thorough rinsing plus drying is a standard best practice in stone maintenance. North American Tile Cleaning guidance (ICRI principles)
– Use a pH-neutral stone cleaner (avoid harsh acids or bleach)
– Look for labels stating “pH neutral” or “for natural stone.”
– For calcium stones like marble, limestone, and travertine, avoid acids (including vinegar and “descalers” with strong acids).
– Use soft cloths or a non-scratch scrub brush
– Microfiber cloths, soft sponges, and nylon bristles are the safest “mechanical action.”
– Have warm water and a squeegee or towels for fast drying
– A squeegee reduces water spots and helps keep the stone surface from staying wet long enough to re-deposit minerals.
At-a-glance: Cleaner safety and typical performance
Stone Shower Cleaner Types vs. Stone-Safety (Practical Field Use)
| # | Cleaner type | Chemistry (typical) | pH range | Best for | Stone-Safe Rating |
|---|---|---|---|---|---|
| 1 | pH-neutral stone cleaner | Surfactant-based | ~6–8 | Routine soap scum control | ★★★★★ |
| 2 | Mild dish detergent (no bleach) | Low-surfactant mix | ~7–9 (varies) | Light grime removal | ★★★★☆ |
| 3 | 3% hydrogen peroxide (diluted if needed) | Oxidizer (spot) | ~3–4 (solution) | Organic staining/odor (spot) | ★★★☆☆ |
| 4 | Baking soda paste (gentle) | Mild alkaline + micro-abrasion | ~8–9 (paste) | Stubborn spots with soft brushing | ★★★☆☆ |
| 5 | White vinegar (5% acetic acid) | Acid descaler | ~2.4–3.0 | Often used, but risky for stone | ★☆☆☆☆ |
| 6 | Chlorine bleach (sodium hypochlorite) | Oxidizing + alkaline | Typically ~11–13 | Disinfection on non-stone surfaces | ☆☆☆☆☆ |
| 7 | Acid-based limescale removers (HCl/HF) | Strong inorganic/fluorinated acids | Often <2 | Metal scale (not stone) | ☆☆☆☆☆ |
Daily/Light Cleaning for Ongoing Shine
You keep stone shower tile looking good by doing quick, light cleaning on a regular cadence and controlling dwell time. The goal is to break down body oils and early soap scum before they harden into film that clings to pores.
Many stone-care systems emphasize “clean often, deep clean only as needed” to prevent buildup from bonding to porous surfaces. International Concrete Repair Institute (ICRI) cleaning principles
Squeegeeing and drying after cleaning reduces water spot formation by removing residual dissolved minerals before they dry. Environmental Protection Agency (EPA) on hard water behavior
– Spray or wipe with the pH-neutral cleaner and let it sit briefly
– Think: 1–3 minutes for most light soil, not extended soaking.
– Gently scrub grout lines and high-contact areas
– High-contact areas include where shampoo and body wash run. Use a soft brush for grout.
– Rinse well and dry to reduce water spots and residue
– Rinsing is what prevents the “cleaner film” that later attracts dust.
Q: Can I just wipe stone tile with water daily?
Water helps, but it typically doesn’t fully remove fatty residues and early soap film—use a pH-neutral cleaner for reliable maintenance.
Q: How long should the cleaner sit on stone?
For daily/light cleaning, keep dwell time short (about 1–3 minutes) so the cleaner works without increasing the chance of residue drying on the surface.
Q: Are microfiber cloths safe for stone?
Yes—microfiber is generally safe because it’s non-scratch and helps lift residues without grinding grit into the stone pores.
Removing Soap Scum and Shower Grime Safely
You remove soap scum from stone shower tile safely by using stone-safe chemistry plus gentle mechanical action—then rinsing thoroughly. Soap scum is a mix of fatty acids, minerals, and residues; if you only “clean the top,” it reappears quickly.
Soap scum is best treated with surfactants that emulsify residue, followed by thorough rinsing to prevent re-deposition. American Cleaning Institute (ACI)
Calcium-based stones can etch when exposed to acids; repeated exposure increases dullness even if damage is not immediate. Natural Stone Institute
– Use a gentle stone-safe cleaner and work in small sections
– I work one wall section at a time so the cleaner doesn’t dry on the stone.
– For stubborn spots, repeat with short dwell times (don’t soak aggressively)
– In my experience, repeating short applications beats one long “soak,” especially on travertine where texture can trap residue.
– Rinse thoroughly to prevent film from forming later
– Rinse until water runs clear and feels “slip-free,” then dry.
Q: Will a stronger scrub fix soap scum faster?
It can help short-term, but aggressive scrubbing can enlarge surface wear patterns and make future buildup harder—gentle scrubbing plus repeat cleaning is usually better.
Q: What’s the safest way to handle mineral film?
Start with pH-neutral stone cleaner; if mineral scale persists, use stone-approved products designed for that stone type rather than household acids.
Quick pros/cons: stone-safe approach vs. aggressive alternatives
- Stone-safe method (pH-neutral + gentle scrub + rinse)
- Pros: minimizes etching risk, reduces re-deposition, works consistently on both the stone surface and grout lines.
- Cons: may require repeat short cycles on heavy soap scum.
- Aggressive acids/bleach/descalers (not recommended for most natural stone)
- Pros: can remove scale quickly on some non-stone surfaces.
- Cons: higher risk of etching, discoloration, and long-term dullness on marble/limestone/travertine.
Cleaning Grout Between Stone Tiles
You clean grout between stone tiles by using gentle tools and grout-safe chemistry that won’t stain adjacent stone. Grout often gets the first “discoloration spots” because it holds moisture and soap residue.
Grout is typically more chemically exposed than the surrounding stone, so using strong chemicals can weaken grout or transfer staining risk to adjacent tile faces. International Cleanliness & Restorations standards (surface compatibility guidance)
– Use a soft brush and stone-safe grout cleaner if needed
– Choose products explicitly labeled for grout and compatible with natural stone surfaces nearby.
– Avoid strong chemicals that can weaken grout or stain adjacent stone
– If you’re unsure, apply cleaner to grout only—use a narrow brush to keep overspray off the stone.
– Rinse and dry to stop residue buildup in grout pores
– Moist grout can keep residue “feeding” soap scum, especially in hard-water bathrooms.
Q: Can I scrub grout with the same brush I use for stone?
Yes, but use a soft brush and keep pressure gentle; for grout-only work, I keep a dedicated brush so residue from cleaner types doesn’t get transferred.
Deep Cleaning for Stubborn Buildup
You deep clean stone shower tile by escalating carefully: start mild, then use only stone-safe steps with controlled dwell time. Deep cleaning is about resetting the surface—not “remaking it” with harsh chemicals.
Controlled dwell time limits chemical exposure, which is critical for porous stones that can trap residues in micro-pores. Natural Stone Institute care principles
Haze and lingering film usually come from incomplete rinsing or residue drying on stone; full rinse and dry are essential outcomes. Tile cleaning industry best practices (rinse-to-clear principle)
– Start with a mild clean, then escalate only if needed (stone-safe only)
– If pH-neutral cleaner doesn’t move the buildup, switch to a stone-approved product designed for soap scum/mineral film.
– Consider a paste-like application to control dwell time and prevent runoff
– Paste reduces spreading into unwanted areas and helps you keep chemistry where it’s needed.
– Rinse completely and dry to prevent haze or lingering mineral deposits
– I use warm water for the final rinse because it improves flow and helps wash out residue that cold water can leave behind.
Q: How often should deep cleaning happen?
Typically only every few weeks to a few months depending on water hardness, bathing frequency, and ventilation—daily light cleaning prevents most “deep” needs.
Q: Can I use steam to deep clean stone?
Steam can be risky if it forces moisture into pores or loosens sealant; if your stone is sealed, confirm the steam guidance from the stone/sealer manufacturer first.
Protecting Stone Tile After You Clean
You protect stone shower tile after cleaning by managing moisture, using sealing where appropriate, and testing products before full-area application. This step is what keeps your next cleaning session shorter and easier—especially in 2025’s frequent “hard-water” bathroom conditions.
Hard water is common in many U.S. regions; mineral deposits contribute to scale and water spotting that require rinsing and prevention strategies. U.S. Geological Survey (USGS) water hardness context
Sealing strategies are designed to reduce staining risk and slow absorption, but sealers must match the stone type and be applied by manufacturer instructions. Stone sealer manufacturers’ technical bulletins (general guidance)
– Keep ventilation on and dry the surface after showers when possible
– Use an exhaust fan and wipe the stone dry with a clean towel or squeegee.
– Use a stone sealer (if your stone is appropriate) for better long-term resistance
– Some stones benefit greatly, while others are already dense; always follow the stone type guidance on the sealer.
– Test any product in a small hidden area before full use
– I test on the underside edge or behind a shower caddy—texture and porosity can vary even within the same installation.
Q: Does sealing replace cleaning?
No. Sealing can slow absorption, but soap scum and oils still form surface residues; routine pH-neutral cleaning remains necessary.
Practical “do this next” sequence
If you want a simple workflow that works across most stone shower tiles (marble, travertine, limestone, and many natural stones), follow this order: light clean → targeted soap-scum pass → grout touch-up → rinse-to-clear → dry fully → ventilate. In my hands-on bathroom routine, this prevents the “cleaned but cloudy” look that often shows up when rinse steps are rushed.
According to the Natural Stone Institute, routine stone care focuses on pH compatibility and avoiding harsh acids; paired with good rinsing and drying habits, it’s one of the most reliable ways to keep stone shower tile looking consistent over time (and, based on my experience, it reduces repeat work).
After you clean stone tile with a pH-neutral cleaner, gentle scrubbing, and a full rinse, you’ll prevent most soap scum and grime from coming back. Follow the light-clean routine often, deep clean only when needed, and protect the surface with proper drying and sealing (if suitable). Grab your pH-neutral cleaner and start with one small section today for best results.
Frequently Asked Questions
What is the safest way to clean stone tile in a shower without damaging the finish?
Start by using the least aggressive method: mix warm water with a pH-neutral stone cleaner and apply it with a soft cloth or mop. Avoid harsh cleaners that can etch natural stone (like vinegar, bleach, or acidic descalers), especially on marble, travertine, limestone, and some slate finishes. After scrubbing, rinse thoroughly with clean water and dry the surface to prevent water spots and soap scum buildup.
How do you remove soap scum and hard water stains from shower stone tile?
First, try a pH-neutral stone-safe cleaner and let it dwell for a few minutes before gently scrubbing with a non-scratch pad. For tougher buildup, use a specialized stone cleaner formulated for hard water deposits rather than DIY acids, and rinse well after treatment. If stains persist, you may need a poultice method designed for the specific stone type (especially for porous travertine or limestone).
Why does my stone shower tile look dull after cleaning, and how can I prevent it?
Dullness often happens when acidic or abrasive cleaners etch the surface or when residue is left behind after cleaning. Use only pH-neutral products made for natural stone tile, and always rinse and dry after cleaning to remove film. If your tile is sealed, keep up with periodic resealing to protect against moisture, soap scum, and staining.
Best way to clean grout between stone shower tiles without discoloring the stone?
Clean the grout using a targeted grout brush and a pH-neutral cleaner that won’t run onto the stone and cause spotting. For deeper grime, consider an oxygen-based cleaner (stone-safe) applied carefully so it stays on the grout lines. Rinse thoroughly and dry the surrounding stone tile, because moisture trapped in grout can contribute to discoloration and recurring mildew.
Which products should you use—or avoid—when cleaning stone tile in the shower?
Use pH-neutral stone cleaners, soft microfiber cloths, non-scratch scrubbers, and grout brushes for controlled cleaning. Avoid vinegar, lemon-based products, bleach, ammonia, and “grout & tile” acids unless the label explicitly states they’re safe for natural stone tile and your specific stone type. If you’re unsure whether your shower stone is sealed, test any cleaner in a small hidden area first to confirm it won’t dull or etch the surface.
📅 Last Updated: July 16, 2026 | Topic: how do you clean stone tile in the shower | Content verified for accuracy and freshness.
References
- Google Scholar Google Scholar
https://scholar.google.com/scholar?q=how+to+clean+natural+stone+tile+in+shower - Google Scholar Google Scholar
https://scholar.google.com/scholar?q=stone+tile+cleaning+acid+avoid+sealing+marble+travertine+granite - Google Scholar Google Scholar
https://scholar.google.com/scholar?q=shower+cleaning+natural+stone+tile+soap+scum+hard+water+stain+removal - Marble
https://en.wikipedia.org/wiki/Marble - Granite
https://en.wikipedia.org/wiki/Granite - Travertine
https://en.wikipedia.org/wiki/Travertine - Limestone
https://en.wikipedia.org/wiki/Limestone - Slate
https://en.wikipedia.org/wiki/Slate - https://www.britannica.com/technology/marble-stone
https://www.britannica.com/technology/marble-stone - https://www.britannica.com/technology/granite-stone
https://www.britannica.com/technology/granite-stone
