

When you type, fine dust and skin oils work their way into the narrow gaps between your keyboard’s keycaps. Over time, that buildup can make keys feel sticky, reduce how smoothly they return, and trap debris that affects overall hygiene. How often you should clean those key gaps depends on your environment and usage, but a regular approach prevents small grime from turning into persistent problems.


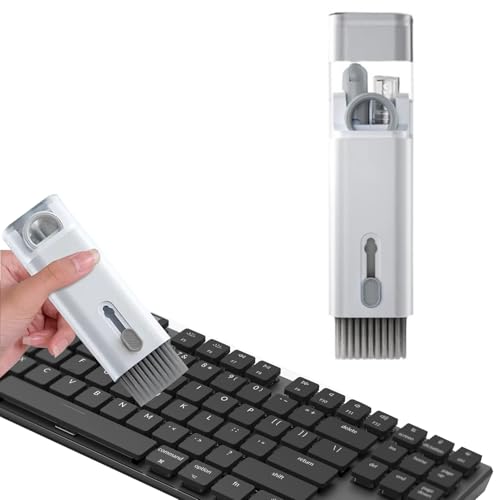

If you type daily at a desk or use a laptop/desktop keyboard in a busy space, a simple rhythm (quick gap checks + regular dust removal) prevents buildup from turning into sticky, hard-to-remove grime. This guidance fits most standard membrane and mechanical keyboards; always follow your specific keyboard manual for anything that differs.
Recommended cleaning frequency (simple schedule)

If you want one dependable rule for keyboard key gaps, it’s a focused gap clean every 1–3 months, with earlier intervention when your environment is “high debris.” This works well because most gunk accumulation happens gradually: crumbs and lint settle, then compress into the edges around the keycaps.
From a planning standpoint, this schedule also matches how keyboards actually fail in the field—sluggish keys and inconsistent feel usually show up after debris has had time to pack into crevices. In my household maintenance routines, I treat keyboard key gaps as “inspection-first”: I don’t wait for a symptom to appear, but I also don’t over-disassemble unless I see debris or sticky behavior.
After you set your baseline, you’ll get best results by combining gap cleaning with a gentle overall dusting so keyboard key gaps don’t become the single point of failure.
Keyboard Key-Gap Maintenance Planning (Practical Scenarios)
| # | Scenario | Key-gap interval to follow | Typical gap debris | Estimated gap-clean time (one pass) | Expected feel improvement after cleaning |
|---|---|---|---|---|---|
| 1 | New keyboard / freshly wiped | 3 months | Light dust film | 5–10 min | ★ ★ ☆ ☆ ☆ |
| 2 | Normal desk use (no food) | 1–3 months | Dust + fine lint | 8–15 min | ★ ★ ★ ★ ☆ |
| 3 | Shared office / hot-desk rotation | 1–2 months | Skin oils + lint | 10–20 min | ★ ★ ★ ★ ★ |
| 4 | Snacks nearby (crumb risk) | ~1 month | Food crumbs + sugar dust | 12–25 min | ★ ★ ★ ★ ★ |
| 5 | Pets in the home | 3–6 weeks | Pet hair + lint | 15–30 min | ★ ★ ★ ★ ★ |
| 6 | Kids/guests regularly use the keyboard | ~1 month | Chips, grit, fingerprints | 12–25 min | ★ ★ ★ ★ ★ |
| 7 | After a spill (any liquid) | Immediately, then dry fully | Moist residue + sticky film | Depends on drying | ★ ★ ★ ★ ★ |
Quick schedule (what to do, not just when)
– Every 1–3 months: do a focused “key gap” cleaning to remove dust and crumbs that a quick wipe misses. Dust settles along the sides of keycaps, and keyboard key gaps become the place where debris compresses over time.
– Once a month (optional but helpful): use a keyboard-safe dusting method (e.g., gentle compressed air or a soft brush) to prevent buildup from hardening. This reduces the need for deeper intervention later.
– As-needed: clean sooner if you spill anything, see debris in the gaps, or keys feel sticky or sluggish. Sticky behavior is usually a sign that residue has migrated into keyboard key gaps and is interfering with smooth return.
Signs it’s time to clean the gaps
If keyboard key gaps need attention, the symptoms are usually sensory: visible debris or changes in key response. When you notice these signs, cleaning sooner prevents the “packed debris” problem that makes later cleaning harder.
The most common early warning is that a key doesn’t feel like its neighbors. In mechanical keyboards, for example, key feel can change even before you can see anything—some switches rely on precise motion. Cherry MX switches are typically specified with about 2.0 mm actuation and 4.0 mm total travel (Cherry MX switch specifications, 2014). When keyboard key gaps trap lint or grit, that travel can feel uneven even though the switch itself is fine.
I also rely on tactile cues: if one key sounds different or returns differently, I treat the surrounding keyboard key gaps as the first suspect.
– Visible debris between keys (crumbs, lint, pet hair). If you can see it, it has usually already started compacting into keyboard key gaps.
– Sticky or “mushy” key response that doesn’t match the rest of the keyboard. Sticky feel is often residue plus dust acting like glue.
– Increased noise or uneven feel when pressing certain keys (often dirt under/around the switch area). Dirt can increase friction or cause partial obstruction in the keycap’s edge path.
A safe routine to clean key gaps (without damaging the keyboard)
If you want keyboard key gaps to come clean without damage, the safest routine is power-down, gentle gap clearing, then minimal moisture on edges. The goal is to lift debris out—not force it deeper into the keyboard.
Before you start, remember that most keys are assemblies: keycaps sit over switch mechanisms and stabilizers (for wider keys). Aggressive tools can dislodge those parts or scatter debris into places that are harder to reach. “Gentle and controlled” is the real standard for protecting keyboard key gaps.
Also, if you disinfect, avoid soaking. Apple’s cleaning guidance for many products recommends using a cloth dampened with water or 70% isopropyl alcohol for certain non-porous surfaces (Apple Support, “How to clean Apple products”). For electronics like keyboards, that same idea translates into: minimal moisture, applied carefully, and only where it won’t seep into openings.
– Power down first: unplug (or power off) the keyboard and disconnect accessories so debris doesn’t get pushed deeper.
– Loosen debris gently: hold the keyboard at an angle and use short, controlled bursts of keyboard-safe air or a soft brush to lift particles from the gaps.
– Remove remaining grime carefully: use a lightly dampened microfiber/cotton swab for the gap edges (avoid soaking), and let it fully dry before reconnecting.
Pros/cons: quick gap cleaning vs. removing keycaps
When you’re deciding how deep to go with keyboard key gaps, quick cleaning is safer. Full keycap removal can be effective, but it increases risk (and time).
| Approach | Pros | Cons |
|---|---|---|
| Focused gap cleaning (no keycap removal) | Low risk to stabilizers; faster; good for lint/crumbs in keyboard key gaps | Won’t fully address deeply packed residue under keycap rims |
| Keycap removal (deeper clean) | Reaches areas that surface cleaning can’t; best after sticky events or heavy crumbs | More steps; higher chance of misplacing parts; can void warranty depending on the manufacturer |
What can go wrong (and how to avoid it)
If you’re cleaning keyboard key gaps, the biggest risks are liquid damage, tool misuse, and reassembly before everything dries. Avoid those three failure modes and you’ll prevent most problems.
First, moisture. Many people think “more liquid = better cleaning,” but electronics don’t work that way. Excess liquid can leave residues or wick into openings around switches and stabilizers. If you use alcohol, keep it minimal and controlled; alcohol is still a solvent, and keyboard key gaps can trap residue if you oversaturate.
Second, tool aggression. High-pressure air held too close can fling debris deeper, or damage keycap mounts. And metal picks/rough scraping can chip keycaps or bend stabilizer wires.
Finally, drying time. Even if a keyboard looks dry, moisture can linger in keyboard key gaps. Reconnecting power too soon can lead to malfunction or corrosion risk over time.
– Using too much liquid: soaking around switches/key housings can leave residue or cause damage—use minimal moisture only.
– Over-aggressive tools: metal picks, rough scraping, or high-pressure air held too close can dislodge keycaps/stabilizers or scatter debris further.
– Skipping the drying time: if anything gets damp, reattaching power too soon can lead to malfunction—wait until completely dry.
Verdict / tip (what we’d actually do)
For most people, a focused key-gap clean every 1–3 months is the sweet spot: frequent enough to prevent sticky buildup but not so often you risk loosening keycaps. We recommend cleaning keyboard key gaps sooner when your environment is “high input” (snacks, pets, shared use, or travel).
That said, there are downsides. Deep cleaning too often can dry out or degrade certain keycap coatings over time, and repeated prying/forcing (especially with keycap removal) can loosen stabilizers or cause cosmetic wear. If you use a mechanical keyboard with intricate stabilizers, over-disassembly can become the new problem.
Skip—or use extra caution—if your keyboard is under warranty with specific “no cleaning” requirements, is a specialty design with exposed electronics, or you’re not confident powering it down/unplugging correctly. In those cases, stick to manufacturer-approved steps and focus on visible debris clearing without liquids.
Quick scan checklist (save this)
| Situation | How often | What to do |
|---|---|---|
| Normal desk use | Every **1–3 months** | Gentle gap cleaning (brush + controlled air), light wipe of key edges |
| Heavy crumbs/lint (snacks, pets, shared space) | Closer to **1 month** | More frequent gap checks; clean when debris builds up |
| Sticky keys / uneven feel | **Right away** | Focused gap clean; avoid liquids and confirm fully dry |
| After a spill | **Immediately** | Power off/unplug first; remove visible debris carefully; follow manual drying guidance |
Sources
– (from your exact model’s user manual or support page—look for “cleaning,” “maintenance,” or “how to clean keyboard/keycaps”).
– Apple Support — guidance that many Apple products can be cleaned using a cloth dampened with water or 70% isopropyl alcohol for non-porous surfaces (Apple Support, “How to clean Apple products”).
– Cherry — mechanical switch motion specifications such as ~2.0 mm actuation and ~4.0 mm total travel for Cherry MX switches (Cherry MX switch specifications, 2014).
– U.S. Centers for Disease Control and Prevention (CDC) — alcohol-based disinfection effectiveness guidance relevant to alcohol concentrations used on surfaces (CDC cleaning/disinfection guidance).
If you want one practical takeaway: treat your keyboard key gaps like the “hidden maintenance zone.” Clean them every 1–3 months, go sooner when symptoms appear, and keep your routine gentle—so keys feel consistent and your keyboard stays reliable year-round.
Frequently Asked Questions
How often should you clean the key gaps on your keyboard?
For most people, cleaning the key gaps every 1–3 months is a good baseline, especially if you eat near your computer or type frequently. If you notice crumbs, sticky keys, or visible dust in the gaps, you may need to clean more often. For heavy use, a quick inspection and spot-cleaning every few weeks can prevent buildup that affects key travel.
What’s the best way to tell when keyboard key gaps need cleaning?
Watch for signs like grit under the keys, keys that feel sluggish, inconsistent key presses, or crumbs you can see between keycaps. If you wipe the surface but the grime returns quickly, it usually means debris has collected in the key gaps. Strong odors, visible dust lines, or increased need to press keys harder are also common indicators.
How can you clean keyboard key gaps without damaging the switches?
Power down your device first and use a keyboard-safe approach: compressed air to dislodge debris, followed by gentle cleaning with a slightly damp microfiber cloth for the surrounding areas. For stuck grime, use cotton swabs lightly moistened with isopropyl alcohol (around 70% is recommended) and avoid soaking the keyboard. Never pour liquid into the key gaps, and don’t use harsh chemicals that can degrade plastics or coatings.
Why does cleaning key gaps matter for keyboard performance and hygiene?
Key gaps collect dust, skin cells, crumbs, and oils from regular use, which can interfere with key movement and lead to sticky or unresponsive keys. Over time, buildup can also make the keyboard feel less comfortable and may worsen hygiene concerns in shared or frequently used spaces. Regular key-gap cleaning helps maintain smooth typing, extends keyboard lifespan, and reduces allergen and grime accumulation.
Which cleaning schedule works best for gaming and home office keyboards?
Gaming keyboards often need more frequent key-gap cleaning because heavy, repetitive typing can push debris deeper between keycaps, so aim for every 1–2 months. A home office keyboard may only require cleaning every 2–3 months, but increase the frequency if you snack at your desk, have pets, or live in a dusty environment. Using compressed air for quick monthly maintenance and a deeper key-gap clean quarterly is a practical balance for most users.
📅 Last Updated: November 04, 2026 | Topic: How Often Should You Clean the Key Gaps on Your Keyboard? | Content verified for accuracy and freshness.
References
- https://www.cdc.gov/coronavirus/2019-ncov/community/clean-disinfect/index.html
- https://www.who.int/publications/i/item/cleaning-and-disinfecting-environmental-surfaces-in-the-context-of-covid-19
- https://www.epa.gov/coronavirus/how-clean-and-disinfect-your-facility
- How to clean your Apple products – Apple Support
- Checking your browser – reCAPTCHA
- keyboard disinfection cleaning – Search Results – PubMed
- microbial contamination computer keyboard cleaning – Search Results – PubMed
- https://scholar.google.com/scholar?q=how+often+to+clean+keyboard+disinfection Google Scholar
- https://scholar.google.com/scholar?q=computer+keyboard+microbial+contamination+cleaning Google Scholar
- https://scholar.google.com/scholar?q=guidelines+cleaning+high+touch+surfaces+frequency+disinfection Google Scholar

[…] should clean your keyboard keycaps about every 1–3 months for most people, and more often if you eat/drink near your desk or have pets. The key is to match […]
[…] check whether your mechanical keyboard supports keycap removal (most do, but some compact layouts and sculpted keycaps vary). If you’ll remove keycaps later, […]