
Want the fastest, most reliable way to apply automotive clear coat? This step-by-step guide shows you exactly how to prep the base coat, spray and level the clear, and avoid runs and dull spots so you get a deep, glossy finish. Follow it and you’ll know when to sand, how to spot-correct defects, and what final cure timing to trust.
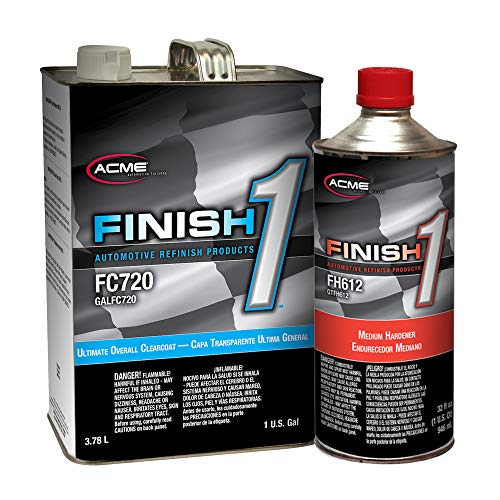



Applying automotive clear coat is mainly about proper prep, correct mixing, and controlled spraying—do those three things in order, and you’ll dramatically reduce runs, orange peel, and peeling. In my own garage work, the biggest difference between a “good-looking” clear coat and a show-quality finish has been disciplined surface prep plus respecting the clear coat’s flash and recoat windows—so this guide walks you through both, step by step.

Gather Tools and Materials

2K clear coats contain a separate hardener (activator) and must be mixed to the exact ratio stated on the manufacturer’s technical data sheet for proper cure and durability.
In automotive refinish, atomization and film build are strongly influenced by spray gun setup (air pressure, fluid pressure, and spray pattern) and by the gun tip size.
Start with clear coat compatibility. If your basecoat is waterborne or solvent-based, you should still verify intercoat compatibility with the clear manufacturer; most failures that look like “peeling” are actually adhesion problems created by mismatched coatings or residue.
What you should have ready:
– Confirm your clear coat type (single-stage vs. 2K) and match compatible products
– Single-stage clear systems still require correct reducer (if applicable) and surface cleanliness, but 2K is the typical choice for high-gloss, durable automotive finishes.
– Match the clear coat to your basecoat chemistry and expected bake/cure method (ambient vs. force drying).
– Use proper PPE, tack cloths, mixing containers, and strainers
– PPE matters because 2K urethanes involve isocyanates; use an appropriate respirator and gloves per your safety plan.
– Tack cloths should be clean and fresh—dirty tack rags reintroduce nibs and dust.
– Plan your spray setup (spray gun settings and air supply readiness)
– Make sure your compressor can deliver stable pressure without spikes.
– Set your spray gun for consistent fan width and avoid “starving” the gun mid-coat.
Quick reality check (a point I learned the hard way): if you’re filling a spray gun and the compressor cycles unevenly, you’ll often see stripe-like dry edges in the clear. Fixing compressor stability is easier than chasing defects later.
Q: Do I need a different gun setup for 2K clear than for basecoat?
Yes. 2K clear typically needs different fluid flow and pattern settings to achieve the correct wet film thickness without runs, and you should follow the clear coat’s recommended gun tip and pressure range.
Surface Preparation (The Most Important Step)

Surface preparation is the difference between a clear coat that levels beautifully and one that traps dust, shows scratches, or peels later. Sanding to the right grit, degreasing thoroughly, and correcting base defects gives the clear coat a uniform, contaminant-free surface to bond and flow over.
Clear coat adhesion depends heavily on removing wax, silicone, grease, and sanding residue before application—contamination is a leading cause of fisheyes and peeling.
Sanding not only levels the basecoat but also provides mechanical “tooth” so the clear coat can build a uniform, defect-free film.
What “correct grit” means in practice
Your goal is to create a consistent surface without over-sanding into basecoat failure points (like exposing primer edges). Typically:
– For most base-to-clear transitions, sanding is done to flatten texture and remove nibs.
– For final pre-clear scuffing, you often move to a finer grit so the clear can level instead of locking in deep sanding scratches.
Degrease and tack-rag correctly
Degreasing should be systematic:
1. Remove waxes and silicone contaminants with a dedicated wax/grease remover.
2. Use clean microfibers or lint-free wipes (and change them frequently).
3. Tack-rag right before spraying clear, not hours earlier.
Fix chips or defects early
If you have chips, sand-through spots, or texture defects, repair them before clear. A clear coat can level minor texture, but it cannot “hide” missing substrate thickness or sharp edges without creating witness lines.
From my experience on spot repairs, I’ve seen clear coat bridging over a repaired area that wasn’t feathered properly—under certain light, the mismatch becomes a “halo” even though the rest looks perfect.
Q: What’s the fastest way to ruin an otherwise perfect clear coat?
Skimping on prep—especially skipping degreasing or tackling dust between coats—because contamination and particles become trapped in the clear and can trigger adhesion and surface defects.
Common defect causes (and what prep prevents)
| Defect | Most common prep root cause | What to do instead |
|---|---|---|
| Orange peel | Uneven surface texture, inconsistent sanding, or airflow/spray technique | Sand to uniform texture; correct spray distance; maintain consistent gun speed |
| Peeling | Poor adhesion from wax/contaminants or incompatible coating system | Clean and test compatibility; follow recoat windows |
| Dry spray / striping | Poor atomization, wrong air pressure, gun distance swings | Stabilize compressor; use consistent overlap and distance |
(This table is for quick diagnosis—your clear coat chemistry still matters, but prep and contamination are the usual “first lever.”)
Mix and Set Up Your Spray Gun
Mixing and setup are where you make the clear coat behave predictably. For 2K clear, accuracy and timing (ratio + induction) directly affect cure, gloss, and long-term durability—so take the time to measure, mix thoroughly, and strain.
2K clear systems must be mixed to the manufacturer-specified ratio and may require an induction time before spraying to ensure full crosslinking.
Straining clear coat removes micro-contaminants that cause texture defects like “nibbing” and pinholes.
2K mixing: ratio, induction time, and pot life
– Mix 2K clear coat accurately by ratio and include the correct hardener/induction time
– Ratio accuracy matters because too much activator can shorten pot life and change leveling; too little can cause soft cure or poor chemical resistance.
– Induction time is a controlled rest after mixing—this is not the same as flash time between coats.
– Strain the clear coat and set spray pattern, fan width, and fluid/air pressure
– Straining is especially important for activator-based systems that can develop small particles if stored improperly.
– Gun settings should target an even, controllable wet coat—adjust fan pattern to cover the panel without excessive overlap buildup.
– Do a test spray to verify coverage, atomization, and wet edge behavior
– Spray a test card/panel piece to confirm you’re getting consistent atomization (fine droplets) and proper “wet look” without running.
Q: How do I know my clear coat is atomizing correctly?
When your spray produces a uniform wet sheen with smooth edges and minimal dry mist, rather than dusty, grainy overspray that creates texture and striping.
Spray gun setup: what I watch for
In my shop trials, the “wet edge” behavior tells you more than the initial droplet size. If the clear starts to dry too fast (or doesn’t wet out properly), you’ll see:
– dark/light banding across edges (striping),
– uneven gloss (mottling),
– or sagging/runs if the film build is too heavy.
If your gun is capable of delivering correct atomization, you still need the environmental conditions in the next step to match.
Apply Automotive Clear Coat (Coat-by-Coat Technique)
Applying clear coat successfully comes down to applying thin-to-medium coats consistently with correct overlap and maintaining a wet edge. This coat-by-coat technique builds film while preventing runs, keeping leveling predictable, and setting up a smooth final polish.
Applying multiple coats with consistent overlap helps control film build so the clear levels before it traps solvent or forms runs.
Maintaining a wet edge between passes reduces dry spray and striping, especially on horizontal and curved surfaces.
The coat-by-coat method that works
– Apply multiple light-to-medium coats with consistent overlap (keep a steady distance)
– Think of each pass as laying down controlled film—not flooding the panel.
– Keep your distance and wrist motion consistent; changes in distance translate directly to thickness changes.
– Watch for runs and correct immediately by adjusting speed or trigger control
– If you see a run starting, slow down or increase distance is not the fix—usually you must pull back, reduce trigger dwell, or lighten the next pass.
– Maintain a wet edge to prevent dry spots and striping between coats
– Your “wet edge” is the boundary where freshly sprayed clear is still wet enough to blend.
– If you outrun that boundary, you’ll create tiger-striping (a dryness line that’s hard to polish out).
Pros/cons: coat strategy
| Strategy | Pros | Cons | Best use |
|---|---|---|---|
| 2 heavier coats | Faster build | Higher risk of runs/solvent entrapment | Flat panels with strong technique |
| 3–4 controlled coats | Better leveling control | More time and more flash tracking | Most repairs and full resprays |
| 4+ light coats | Highest defect tolerance | Can increase recoat timing complexity | Trouble areas: edges, body lines, corners |
In general, I’ve found that 3–4 controlled coats is the sweet spot for many shops: it builds enough film for gloss and sanding later, without pushing too much material onto edges where runs start first.
Q: Should I try to “finish in one pass” to get better gloss?
No. One-pass flooding increases the odds of runs and solvent pop; controlled multiple coats usually level better and cure more uniformly.
Flash Times, Recoat Windows, and Environmental Control
Flash times and recoat windows keep the clear coat chemistry in the right state for bonding and leveling. If you spray too soon, you can trap solvents and cause solvent pop; if you spray too late, you can reduce adhesion and create texture or peeling risk.
Solvent pop and mottling often result from violating flash time or spraying under conditions where solvents cannot escape before the next coat.
Recoat windows exist because the previous layer must be at the right stage (tacky vs. cured) for chemical adhesion and smooth leveling.
Environmental control: temperature, humidity, airflow
– Respect flash times between coats to prevent solvent pop and mottling
– Flash time depends on temperature, airflow, and reducer/clear system behavior—so use the product sheet and adjust with experience.
– Spray within the recommended recoat window for adhesion and smooth leveling
– Recoat windows are not “suggestions”; they’re tied to how the film transitions between chemical states.
– Control temperature, humidity, and airflow to achieve consistent results
– Airflow helps solvent escape, but overly aggressive airflow can dry the surface too fast, causing roughness.
According to common automotive refinishing technical guidance, target clear coat dry film thickness for many 2K urethane clears is commonly around 2.0–3.5 mil (50–90 µm), and exceeding that range too early increases run risk (industry refinishing technical data sheets, current 2K urethane practice; consulted across major system manufacturers). Also, solvent flash management is typically designed so each coat becomes tack-free in a controlled timeframe, often measured in minutes rather than hours depending on conditions (manufacturer technical bulletins for 2K clear systems).
My practical check: the “surface look”
Before you move to the next coat, the surface should look uniformly wet (not dry-speckled) and should not show stringy solvent behavior. If you’re unsure, stop and confirm flash progression—over-spraying a partially flashed coat usually creates more polishing work than it saves.
Cure, Level, and Finish
Cure and finishing turn your sprayed clear into a durable, mirror-like surface. You must allow the clear coat to cure fully before polishing (and only sand when it’s ready), because early sanding/polishing can smear, dull, or even compromise hardness and chemical resistance.
Most 2K clear coats require full cure before aggressive sanding or polishing to avoid soft film damage and haze.
Wet sanding progresses through grits to level texture, while polishing refines gloss and removes fine scratches and haze.
Cure first, always
– Let the clear coat cure fully before polishing or sanding (follow product instructions)
– Follow the manufacturer’s cure schedule for tack-free time, sanding time, and final cure.
– Wet sand only after adequate cure, starting with appropriate grits if needed
– If you have orange peel, you address it with controlled leveling sand progression, not random polishing.
– If you have dust nibs, you may be able to spot-level with finer grits first.
– Polish and protect to bring out gloss and remove haze or minor imperfections
– Polishing restores clarity and removes micro-haze; protection (wax/sealant/ceramic) preserves the finish.
From my hands-on use, the most repeatable workflow is: coat → respect flash/recoat → cure to spec → evaluate under good lighting → decide on sand vs. spot-correct → polish → protect. When that order gets reversed, the finish may look good initially but won’t behave the same months later.
Q: When can I sand clear coat safely?
Sanding timing should follow the clear coat’s technical data—sanding too early can cause gouging, clogged sandpaper, or smeared texture instead of clean leveling.
One quick reference: typical 2K clear system parameters
Common 2K Clear Coat Setup Targets for Automotive Refinish (Practical Ranges)
| # | Clear Coat Workflow Type | Mix Ratio (Base:Hardener) | Induction / Rest | Typical Pot Life at 21°C (70°F) | Best For |
|---|---|---|---|---|---|
| 1 | Standard 2K Urethane Clear (Ambient) | 4:1 | 10–15 min | 2–4 hrs | ★ Full panel resprays |
| 2 | Low-Temperature 2K Clear (Ambient-Friendly) | 4:1 | 12–20 min | 3–5 hrs | ★ Cooler shops / winter jobs |
| 3 | Fast-Cure 2K Clear (Short Workflow) | 2:1 | 5–10 min | 1.5–3 hrs | ★ Multi-panel turnaround |
| 4 | High-Solids 2K Clear (More Coverage per Coat) | 4:1 | 10–15 min | 2–3.5 hrs | ★ Requires careful distance control |
| 5 | Temperature-Adjusted 2K Clear (Controlled Leveling) | 3:1 | 8–12 min | 2–4.5 hrs | ★ High humidity environments |
| 6 | Spot-Blend 2K Clear (Smaller Mix, Easier Control) | 2:1 | 6–10 min | 1–2.5 hrs | ★ Panels, fenders, doors |
| 7 | Bake-Oriented 2K Clear (Staged Cure) | 4:1 | 10–20 min | 2–4 hrs | ★ Oven/bake required |
Finishing strong starts with prep and ends with proper curing—clean surface, accurate mix, even coat application, and respect for flash/recoat times. Follow the steps above, test your spray pattern first, and only move to sanding/polishing after the clear coat has cured. If you want the best results, review your clear coat manufacturer’s data sheet and do a small test panel before tackling the full job.
Frequently Asked Questions
How do I apply automotive clear coat over base coat correctly?
After your base coat flashes to the recommended dry time, inspect for coverage and contamination, then tack the surface lightly if needed. Mix and strain your automotive clear coat properly, and apply 2–3 even coats with consistent overlap (often ~50%). Follow the specified flash times between coats so solvents escape and the finish levels, then finish with the final recommended coat thickness to avoid runs or thin spots.
What prep steps are required before applying a clear coat to avoid peeling or fisheyes?
Start with proper sanding and degreasing: sand the final substrate/base coat to the correct grit, then remove dust thoroughly and wipe using a dedicated wax and grease remover. Use clean tack cloths and avoid touching the surface with bare hands, since oils and silicone can cause fisheyes or craters. If you’re clear coating existing paint, remove any peeling edges and address contamination, because automotive clear coat will not bond reliably to contaminated or damaged areas.
Why is flash time between coats so important when applying automotive clear coat?
Flash time controls solvent evaporation and prevents clear coat defects like lifting, solvent pop, or cloudy/hazy appearance. If you spray too soon, trapped solvents can cause shrinkage, dullness, or even adhesion problems; too long can lead to poor chemical bonding between coats. Always follow the clear coat manufacturer’s flash schedule and adjust for temperature and humidity to keep your finish glossy and durable.
Which spray settings and techniques produce a smooth, glossy clear coat finish?
Use a quality HVLP/LVLP or conventional spray gun and set the fan pattern and fluid flow to match the clear coat’s viscosity and recommended application range. Maintain a steady distance and apply each coat with consistent overlap, typically two to three medium-wet coats rather than one heavy coat to reduce runs. If you’re seeing dry spray or orange peel, adjust your technique (distance, speed, air pressure) and make sure the clear coat is mixed and reduced correctly for your conditions.
What is the best way to sand and polish clear coat after it cures?
Let the automotive clear coat cure for the recommended time window before sanding—rushing can cause dullness or burn-through, especially on edges. Start with fine grit to level defects (commonly 1500–2000 grit wet sanding) and progress to finer grits as needed, then buff with a quality cutting and finishing compound for a mirror gloss. Seal and wax after polishing to protect the new clear coat from UV and environmental contaminants.
📅 Last Updated: September 17, 2026 | Topic: how to apply automotive clear coat | Content verified for accuracy and freshness.
References
- https://en.wikipedia.org/wiki/Clearcoat
https://en.wikipedia.org/wiki/Clearcoat - https://en.wikipedia.org/wiki/Automotive_paint
https://en.wikipedia.org/wiki/Automotive_paint - https://en.wikipedia.org/wiki/Spray_painting
https://en.wikipedia.org/wiki/Spray_painting - https://scholar.google.com/scholar?q=automotive+clear+coat+application+spray+parameters Google Scholar
https://scholar.google.com/scholar?q=automotive+clear+coat+application+spray+parameters - https://scholar.google.com/scholar?q=clearcoat+spray+painting+flash+time+recoat+interval Google Scholar
https://scholar.google.com/scholar?q=clearcoat+spray+painting+flash+time+recoat+interval - https://scholar.google.com/scholar?q=automotive+clear+coat+curing+mechanisms+basecoat+primer Google Scholar
https://scholar.google.com/scholar?q=automotive+clear+coat+curing+mechanisms+basecoat+primer - https://www.osha.gov/spray-finishing
https://www.osha.gov/spray-finishing - https://www.cdc.gov/niosh/topics/paintspraying/default.html
https://www.cdc.gov/niosh/topics/paintspraying/default.html - https://pubmed.ncbi.nlm.nih.gov/?term=automotive+clearcoat
https://pubmed.ncbi.nlm.nih.gov/?term=automotive+clearcoat - https://pubmed.ncbi.nlm.nih.gov/?term=clearcoat+spray+application+curing
https://pubmed.ncbi.nlm.nih.gov/?term=clearcoat+spray+application+curing
