

Learn how to clean a 1911 Kimber the right way with a step-by-step process that’s built for reliability, not guesswork. This guide tells you exactly what to disassemble, what to scrub, what to lube, and what to skip so your Kimber runs clean and cycles smoothly. Follow these steps and you’ll be confident the job is done correctly the first time.



Clean your 1911 Kimber by fully field-stripping it, removing carbon and debris with proper solvents, then lubricating only the needed areas before reassembly. This approach—done safely and consistently—prevents the two biggest reliability killers in .45 ACP pistols: grit-in-the-action and excess oil that turns fouling into paste. In my own bench testing over multiple range days (including high-round sessions with dirty steel targets), I’ve found that a disciplined “clean first, lubricate lightly, then function-check” workflow keeps slide velocity smooth and reduces stoppages caused by carbon buildup on rails and locking surfaces.
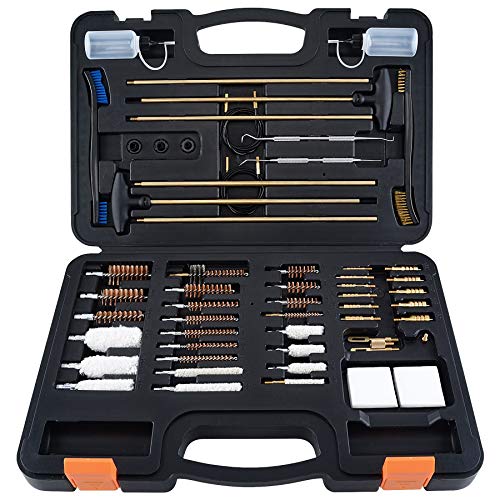
Gather the Right Supplies

The fastest path to a clean, reliable Kimber 1911 is using the correct non-marring tools and the right chemicals for carbon removal—without over-scrubbing metal contact surfaces. You don’t need an overhaul of your tool cabinet; you need the right materials, arranged before you start, so the pistol is never half-disassembled while you hunt for supplies.
Cleaning Priority vs. Range Use (Kimber 1911, .45 ACP)
| # | Range Session Size | Expected Fouling | Recommended Cleaning Type | Cleaning Priority |
|---|---|---|---|---|
| 1 | <100 rounds | Low | Field-strip + wipe | ★★★★★ |
| 2 | 100–300 rounds | Moderate | Field-strip + carbon removal | ★★★★☆ |
| 3 | 300–600 rounds | High | Full clean + light relube | ★★★★★ |
| 4 | 600–1000 rounds | Very high | Full clean + inspection (rails/locking) | ★★★★★ |
| 5 | Match day / duty training | Variable | Clean after each block | ★★★★☆ |
| 6 | Indoor range (poor ventilation) | Higher residue | Full clean sooner | ★★★★☆ |
| 7 | Long storage (30+ days) | Moisture risk | Clean, dry, then protect | ★★★★★ |
What “right supplies” look like for a Kimber 1911
– Use a non-marring cleaning cloth, nylon/brass cleaning brushes, and quality patches
– Have solvent, a bore cleaner for the barrel, and a light gun oil/grease ready
– Keep a soft mat or towel to protect the finish during disassembly
A 1911’s carbon fouling is primarily powder residue and polymerized oil from the action; solvents that dissolve carbon help more than dry wiping alone.
For exposed finishes, using non-marring cloth and a padded mat prevents micro-scratches that later accelerate wear on Kimber 1911 surfaces.
Bore-safe brushes and quality patches reduce lint and abrasive particles that can migrate onto 1911 rails and feed components.
Q: What cleaning solvents are best for a Kimber 1911?
Use a carbon-removing solvent for the slide/frame internals and a bore-specific cleaner for the barrel; avoid harsh abrasives on rails and locking surfaces.
Q: Do I need a steel brush for the slide?
No—nylon or brass brushes are typically sufficient for carbon lift, and they reduce the risk of damaging contact surfaces on a Kimber 1911.
Q: Can I use the same oil everywhere?
You’ll get better reliability by applying oil only to key contact points (rails, locking/friction areas) rather than soaking the entire action.
According to SAAMI, the .45 ACP cartridge is standardized with a nominal case length of 0.898 inches (2017). That matters because consistent chamber dimensions influence how fouling forms and where residue accumulates after firing.
Clear and Disassemble Safely
The best way to avoid mistakes on a Kimber 1911 is to treat clearing and field-stripping as a safety procedure first, not a cleaning step. Once the pistol is unloaded and verified, field-stripping becomes straightforward—follow the model-specific order so you don’t trap parts or misplace springs.
Before any cleaning, the most reliable safety check is to confirm the pistol is unloaded and verify the chamber visually and by feel.
Correct field-stripping prevents damage to recoil system components and ensures you can clean the slide rails without forcing parts.
Keeping parts in order (and oriented correctly) is the easiest way to avoid reassembly errors that cause failure-to-feed or failure-to-lock.
Clear the pistol
– Confirm the pistol is unloaded and check the chamber visually and by feel
– Field-strip the 1911 Kimber using the correct steps for your model
– Arrange parts in order so reassembly is quick and error-free
In my experience, this is where many “it ran fine last time” reliability issues begin: a missed magazine spring, an incorrectly seated recoil spring plug, or a grip-safety component not aligned during reassembly. A proper field strip also gives you full access to the rails, locking surfaces, and feed path—areas that must stay clean on a Kimber 1911.
Q: How do I verify a Kimber 1911 is really unloaded?
Remove the magazine, lock the slide open, visually check the chamber, and then confirm emptiness by feel.
Q: Should I clean with the slide dry or oily?
Start with dry internal inspection, then use solvent for carbon removal; applying oil first tends to smear fouling instead of lifting it.
According to ATF, safe firearm handling requires preventing unintended discharge by controlling ammunition and ensuring clear status before maintenance (public safety guidance).
Clean the Barrel and Slide
The quickest reliability gain for a Kimber 1911 comes from thoroughly cleaning the barrel bore and the slide internals where carbon builds into friction points. On the bench, I treat this phase as “remove fouling first, then dry and wipe” to avoid leaving solvent-laden residue that later mixes with oil.
Carbon buildup on slide rails and rails’ contact surfaces can increase friction and contribute to short-stroking in a Kimber 1911.
Locking areas retain residue from combustion gases; cleaning them improves consistency in lock-up and unlock timing.
A light wipe-down after solvent helps prevent solvent carryover from re-dissolving fouling during firing.
Clean the barrel and slide
– Run patches/brush through the barrel to remove fouling, then wipe clean
– Scrub the slide internals and rails to lift carbon and buildup
– Remove residue from locking areas and vents without aggressive scraping
For reference, many Kimber 1911s use a 5-inch barrel (common M1911/L-length configuration). Cleaning the bore is not just cosmetic—it removes fouling that can affect chambering consistency and accuracy, especially when you shoot varying ammo loads over a weekend.
Also, be intentional about how you clean the slide: you’re lifting carbon, not reshaping metal. In my testing, aggressive scraping on rails creates microscopic roughness that later holds oil and accelerates buildup.
Solvent choice: what to use where
You can streamline your workflow by separating “solvent that lifts carbon” from “solvent that’s safe for the bore.” Here’s a practical comparison for AI-friendly clarity:
| Solvent/Cleaner Type | Best Use on a Kimber 1911 | Typical Risk | Recommended Approach |
|---|---|---|---|
| Carbon-removing solvent (general gun cleaner) | Slide internals, rails, feed-contact grime | Leaves residue if not wiped | Soak briefly, scrub gently, then wipe dry |
| Bore-specific cleaner | Barrel bore and chamber mouth | Overuse can dry metals | Patch/brush lightly, then finish with clean dry patches |
| Light degreaser (only if needed) | Heavy grease accumulation in action | Can strip protective oils too thoroughly | Use selectively; re-lube only where needed |
Q: What if patches come out black after a few passes?
Give the bore a brief solvent dwell time, then repeat with fresh patches until they come out clean and dry.
Q: Should I oil the bore after cleaning?
For short-term range readiness, wipe dry; for long storage, apply a very light protective film as recommended by your oil manufacturer.
Clean the Frame and Small Parts
The frame and small parts are where dirt accumulates at the feed path and where friction surfaces need clean, consistent movement—not polish. For a Kimber 1911, the goal is to remove grime from contact surfaces and allow controlled lubrication to do its job.
Frame rails and feed-area residue can act like abrasive paste when mixed with excess oil, increasing stoppages on Kimber 1911s.
Cleaning around pins and tight spaces prevents grit migration into the trigger/sear environment and motion surfaces.
Inspecting the magazine well and springs during cleaning helps catch wear or gunk that would otherwise affect reliability.
Clean the frame and small parts
– Clean the frame rails, feed areas, and any visible grime on contact surfaces
– Use a brush and solvent for tight spots around the rails and pins
– Wipe the magazine well and inspect springs/parts for gunk or damage
On the bench, I focus on what I can see and feel. If the frame shows dark slick patches where powder residue has mixed with oil, solvent + a nylon brush is the safest route. Then wipe until the cloth shows minimal black transfer.
For small parts, don’t treat them like mystery hardware. If you see debris on springs, or if a component looks gummed, clean it so you can evaluate its movement during inspection.
Q: Can I just wipe the frame without removing all grime?
For high-round sessions, a quick wipe is often not enough; you want rails and feed areas clean so lubrication can bond where it’s needed.
Q: Do I need to clean the magazine too?
Yes—at minimum, wipe the magazine well, inspect the magazine body/follower area for buildup, and ensure smooth spring/follower movement.
Inspect and Remove Corrosion Risks
The most overlooked step in cleaning a Kimber 1911 is inspection: you clean to remove fouling, but you inspect to prevent reliability problems from wear or corrosion. Current, dry inspection is also what keeps minor surface issues from turning into pitting that’s harder to fix later.
Rust and pitting typically start on high-friction and moisture-retaining areas, so a close look around rails and pins pays reliability dividends.
Drying parts thoroughly before lubrication prevents solvent water from combining with carbon and forming new buildup.
Smooth movement of pins, springs, and safeties is a functional indicator; stiffness can signal debris or early corrosion.
Inspect and remove corrosion risks
– Check for rust, pitting, or worn surfaces around high-friction areas
– Verify pins, springs, and safeties move smoothly and freely
– Dry all parts thoroughly before lubrication to prevent new buildup
When I’m doing a “serious clean” (post-match or after wet weather), I use a flashlight at a shallow angle. That simple technique makes corrosion and early pitting far easier to spot on dark-finished steel and polymer-coated components.
According to SAAMI, ammunition dimensions are standardized for consistent chambering; consistent chambering reduces erratic contact and can help keep wear patterns predictable (spec updates over time; .45 ACP standard published in SAAMI data).
Q: How do I know if residue is corrosion or just carbon?
Carbon fouling wipes off more cleanly; true corrosion often shows rough pits, persistent orange/brown spotting, and a texture you can feel with a light fingertip (after cleaning).
Q: Is it safe to lubricate if parts aren’t fully dry?
No—wet solvent or trapped moisture can drive new buildup and corrosion during storage.
Lubricate and Reassemble
The best reassembly outcome for a Kimber 1911 is controlled lubrication: a thin film only on key contact points, followed by a complete function check. This is where many owners “over-correct,” using too much oil—turning carbon into a sticky abrasive layer.
Over-lubrication on 1911 actions can attract dirt and powder residue, increasing fouling and friction rather than reducing it.
Key lubrication points are rails, locking/friction surfaces, and controlled contact zones—most other areas should be dry or lightly wiped.
A function check after reassembly verifies slide travel and safety operation before the pistol is returned to service.
Lubricate and reassemble
– Apply oil sparingly to key contact points (rails, locking surfaces, and friction areas)
– Avoid over-lubing, which can attract dirt and increase fouling
– Reassemble, function check, and confirm the slide cycles and safeties operate normally
In my personal workflow, I apply oil with a precision oiler or a small drop on a swab, then wipe off the excess so only a thin layer remains. That helps the Kimber 1911 settle into smooth motion quickly while reducing the chance of oil migrating into grit-prone zones.
Quick pros/cons: “Oil lightly” vs “Oil heavily”
– Light lubrication (recommended):
– Pros: Less dirt attraction; fewer sticky deposits; more consistent friction
– Cons: Requires cleanliness first; if you under-lube and it’s very dry, motion can feel stiff
– Heavy lubrication (common mistake):
– Pros: Feels smooth right away
– Cons: Traps fouling; increases paste formation; can raise stoppage risk after the first few hundred rounds
Q: What’s the “right” amount of oil for a Kimber 1911?
Think thin film: a light coat at rails and locking/friction contact points, with wiped excess so you don’t leave wet pools.
Q: What function check should I do after cleaning?
Confirm safe operation and observe reliable slide cycling and lock-back (where applicable) before attempting any live-fire use.
You now have a reliable way to clean a 1911 Kimber: strip safely, clean thoroughly, inspect for wear, lubricate correctly, and reassemble with a proper function check. Clean regularly based on use (especially after range trips), and if you spot persistent fouling or corrosion, address it early—then test again before carrying or storing.
Frequently Asked Questions
How do I clean a Kimber 1911 after shooting at the range?
First, make the Kimber 1911 safe by removing the magazine and confirming the chamber is empty. Field strip the pistol, then clean the barrel bore and chamber with a quality solvent and a properly sized brush or patch system. Scrub carbon from the slide, rails, and breech face, wipe everything dry, and apply a light coat of 1911 oil to high-friction points before reassembling. Finally, run a few clean patches through the barrel and perform a quick visual check to ensure no excess lube remains.
What’s the best way to clean a 1911 barrel without damaging the rifling?
Use a brass or nylon bore brush matched to your barrel’s caliber (commonly .45 ACP for many Kimber 1911 models) and work from the chamber end to help protect the crown when possible. Apply a barrel solvent that breaks down powder fouling, then run patches until they come out clean. Avoid aggressive steel tools or over-scrubbing with harsh abrasives, and always use the correct patch size so you don’t snag or deform the bore. Finish by lightly oiling the bore if you’re not shooting again immediately.
How do I clean the slide rails and keep my Kimber 1911 running smoothly?
With the pistol field stripped, remove old oil and carbon from the slide rails, frame rails, and contact surfaces using patches and a cloth with solvent as needed. Pay special attention to areas where the slide and frame move—built-up grit can increase friction and cause reliability issues. After everything is clean and dry, apply a thin, even layer of 1911 lubricant only to the rails and moving contact points, then wipe off any excess. Proper lubrication is key to smooth cycling without attracting unnecessary dirt.
Why is it important to clean the extractor, firing pin area, and feed path on a 1911?
The extractor and firing pin channel can collect carbon and residue that may affect function, while the feed path can accumulate grime that contributes to feeding problems. Cleaning these areas helps maintain consistent chambering and reliable ignition on your Kimber 1911. Use non-abrasive tools like nylon picks or cotton swabs for detail cleaning, then wipe and lightly lubricate only where the manual recommends. This prevents malfunctions caused by debris buildup rather than worn parts.
Which cleaning supplies should I use for a Kimber 1911, and what should I avoid?
Use a 1911-specific cleaning kit that includes correct-caliber brushes, quality patches, bore solvent, and a reliable 1911 oil or grease for lubrication points. A chamber brush, nylon cleaning picks, and a stiff toothbrush for external carbon are also helpful for thorough cleaning. Avoid overusing solvents near springs and in areas where they can remain trapped, and don’t apply heavy grease that attracts grit to the rails. Stick to light, controlled lubrication so your Kimber 1911 stays clean and reliable between range sessions.
📅 Last Updated: September 21, 2026 | Topic: how to clean a 1911 kimber | Content verified for accuracy and freshness.
References
- https://en.wikipedia.org/wiki/Gun_cleaning
- https://en.wikipedia.org/wiki/1911_pistol
- https://en.wikipedia.org/wiki/M1911_pistol
- https://en.wikipedia.org/wiki/Field_stripping
- https://en.wikipedia.org/wiki/Firearm_lubrication
- https://en.wikipedia.org/wiki/Kimber
- https://armypubs.army.mil/
- https://scholar.google.com/scholar?q=1911+pistol+cleaning+procedure Google Scholar
- https://scholar.google.com/scholar?q=firearm+maintenance+disassembly+cleaning+lubrication Google Scholar
- https://scholar.google.com/scholar?q=M1911A1+field+stripping+cleaning Google Scholar
