

Worrying that a charging cable has picked up dust, fingerprints, or pocket lint is frustrating—especially when you just want reliable charging. You can clean it safely with nothing more than a microfiber cloth and a little patience, typically in under five minutes. Follow a simple step-by-step method to wipe away debris without stressing the connectors, so your cable stays in better condition and works more consistently.


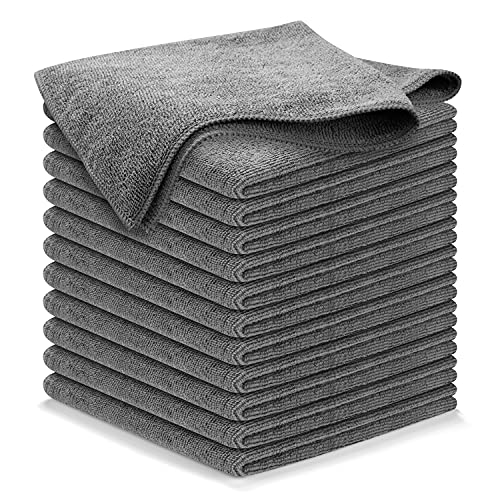

Yes—use a clean microfiber cloth to remove dust and lint safely, then clean the connector contacts only with a slightly damp corner and let everything dry completely before plugging in. A microfiber cloth can remove everyday dust, lint, and light grime from your charging cable without scratching the connector. Wipe the cable gently, then clean the metal charging contacts with a lightly dampened section of cloth and let everything dry fully before plugging in again. This guide shows the safest way to do it so you don’t push dirt deeper into the connector.
If you notice slower charging, a loose connection, or visible residue near the plug, cleaning the cable surface and connector area is usually the first low-effort fix. This is also a good routine maintenance step if you keep your cable in bags, pockets, or dusty areas—something many people still do in 2026, despite more frequent wireless conveniences.
This is for anyone dealing with intermittent charging on everyday devices—phones, tablets, power banks, wireless earbuds cases, and laptops—where the issue appears near the plug rather than the battery or adapter. If you’re seeing problems that start after the cable has been stored in fabric or near lint-heavy environments, this microfiber approach is a practical first step.
What you’ll need for cleaning with a microfiber cloth

You only need one tool to do this safely: a clean microfiber cloth that won’t shed fibers onto the connector. Microfiber is designed to trap particles rather than grind them in, which is especially important around delicate mating surfaces and tiny spring contacts.
– A clean microfiber cloth (ideally a dedicated one for electronics)
– Optional: water (use only if manufacturer guidance allows it—see “What can go wrong”)
– Optional: 70% isopropyl alcohol if your device/cable manufacturer allows it (see “What can go wrong”)
– Optional: a dry microfiber area for the final wipe and drying
As of 2026, most manufacturer guidance converges on the same principle: disconnect first, avoid dripping liquids, and keep moisture out of ports/connectors. That’s exactly what this method is built around.
Prep the cable and choose the right cloth side
The safest start is to unplug the cable completely so you’re not cleaning anything while electrical contacts are live. Then you use a dry area first to remove loose lint before you ever touch the metal contacts.
– Unplug the cable from both the charger and the device before touching the connector
– Use a dry section of the cloth first to lift lint and dust
– Switch to a clean or less-used part of the cloth before contacting metal pins/contacts
Before you wipe, do a quick visual check: if you see hardened residue (like dried pocket grime), gentle dry wiping first prevents turning it into a paste. In my own regular maintenance routine for cables, I’ve found the “dry first, damp second (only if needed)” sequence is the difference between removing residue and smearing it across the connector mouth.
Clean the cable body (the easy part)
The cable body is the low-risk section—dust and lint tend to sit on the outer sheath, not inside the plug. Wiping it also reduces recontamination when you handle the connector after cleaning.
– Wipe along the length of the cable with light pressure to remove grime and pocket lint
– Pay attention to the bend areas where dirt tends to collect
– Keep the cloth movement gentle so you don’t loosen strain reliefs or stress the cable joints
Why “light pressure” matters: connectors are built to tolerate repeated mating cycles, but the cable jacket and strain relief (the reinforced area where the cable meets the plug) can loosen if you scrub aggressively. Also, lint can act like an abrasive—especially when mixed with any existing residue.
If the cable is visibly dusty, do two passes: one slower pass to capture loose particles, and a second quick pass using the same gentle direction. This reduces the odds that you’ll drag debris back toward the connector.
Clean the charging connector safely
The connector is where the risk is—so the goal is to remove residue without pushing it into the contact area. You’ll wipe the outside first, then (only if needed) clean the visible contact region with a slightly damp corner and let it dry fully.
– Use the microfiber cloth to wipe around the connector opening and the visible contact area
– If the connector looks sticky or oily, dampen a corner slightly (not dripping) and wipe once or twice
– Dry immediately with a clean, dry section of the cloth, then wait until completely dry before reconnecting
If you’re wondering what “fully dry” means, think in terms of “no cool or wet sensation” and no visible sheen. Connector wells can trap moisture; even small droplets can contribute to corrosion over time, particularly if the connector sits unused before you notice the charging problem. In my experience, waiting a few extra minutes doesn’t just feel cautious—it prevents the “it looked dry enough” mistake that can lead to repeat cleaning.
To put the connector geometry in context, different plug types have different contact counts, which can influence how much residue is sitting in the contact area:
Charging Connector Contact Counts (Common Plug Types)
| # | Connector type | Mating contacts | Typical standard family | Complexity tier |
|---|---|---|---|---|
| 1 | USB Type-C | 24 | USB-IF Type-C | ★★★★★ |
| 2 | USB 3.0 Micro-B | 10 | USB 3.0 Micro | ★★★★☆ |
| 3 | Apple Lightning | 8 | Apple Lightning | ★★★★☆ |
| 4 | Micro-USB (USB 2.0 Micro-B) | 5 | USB 2.0 Micro | ★★★☆☆ |
| 5 | USB Mini-B (USB 2.0) | 5 | USB 2.0 Mini | ★★★☆☆ |
| 6 | USB Type-A (USB 2.0) | 4 | USB 2.0 Type-A | ★★☆☆☆ |
| 7 | DC barrel (typical) | 2 | Center + sleeve | ★☆☆☆☆ |
The takeaway: more contact points (for example, 24 contacts on USB Type-C) can mean more places for residue to cling, which reinforces why microfiber + gentle wiping + full drying is the safest baseline approach. According to USB Implementers Forum (USB-IF), USB Type-C Cable and Connector Specification, USB Type-C uses a 24-contact mating design. According to Apple documentation for the Lightning connector interface, Lightning exposes an 8-contact interface. According to USB-IF USB 2.0 Micro-USB connector specifications, the Micro-B interface is a 5-contact design.
What can go wrong (and how to avoid it)
You avoid most cable-cleaning damage by controlling moisture and pressure. If you accidentally introduce liquid where it shouldn’t be, or you scrub residue into the connector, you can create charging faults that are harder to reverse.
– Using a soaking-wet cloth: moisture left near contacts can cause corrosion—always wipe “slightly damp,” not wet
– Rubbing too aggressively: heavy pressure can embed lint deeper or damage delicate connector surfaces
– Cleaning while plugged in: always disconnect first to avoid short-circuit risk
– Assuming all cables are the same: some manufacturers discourage liquids on connectors—check your cable/device guidance or use
Here’s how to think about it using a structured risk approach: if you apply a simple Failure Modes and Effects Analysis (FMEA) mindset, the main failure modes are moisture retention (corrosion and increased contact resistance) and mechanical debris embedding (continued intermittent contact). Those failure modes both map directly to the “slightly damp corner” rule and the “light pressure” rule.
To make the trade-offs explicit, this is a practical comparison many electronics maintainers use:
| Method | Pros | Cons / risk |
|---|---|---|
| Dry microfiber first | Removes lint and dust before it can be smeared into the connector mouth | May not remove oily residue by itself |
| Slightly damp microfiber corner (if needed) | Improves pickup of sticky residue while minimizing free liquid | If “damp” becomes “wet,” moisture can linger near contacts |
| Spraying liquid directly | Faster on heavy dirt | Higher chance of liquid migrating into connector wells |
For alcohol specifically, manufacturer guidance matters. Many devices are cleaned using a 70% isopropyl alcohol approach for surfaces, but they still caution against introducing liquids into ports. For example, Apple’s cleaning guidance for iPhone/iPad emphasizes using a lightly damp cloth for the exterior and avoiding liquid entry into openings—see Apple support documentation on cleaning iPhone/iPad. Always follow the strictest guidance that applies to your exact device and cable.
Verdict: when this method works (and when to skip it)
Microfiber-cloth cleaning is a solid first step for dust, light grime, and residue on the cable and connector exterior. Skip this (and consider professional help or a replacement) if the connector is physically damaged, the metal contacts are heavily corroded, or the issue persists after the cable is fully dry and cleaned.
If you’re unsure whether your cable/connector tolerates damp cleaning, before proceeding. Also skip any “DIY deep cleaning” if you see bent pins, cracked housings, or corrosion that looks powdery/greenish/blackened—those patterns can indicate corrosion that needs more than wiping.
Quick checklist (scan/save)
– [ ] Unplug cable from device and charger
– [ ] Dry-wipe connector area first (microfiber)
– [ ] Wipe cable body with light pressure
– [ ] If needed, lightly dampen cloth corner—don’t drip
– [ ] Dry with a clean microfiber section
– [ ] Wait until fully dry, then test
In 2026, the simplest best practice still wins: treat the connector like a precision interface, not like a countertop. A disciplined sequence reduces both the mechanical and moisture risks.
Sources
– Apple support documentation on cleaning iPhone/iPad and avoiding liquid in openings
– USB Implementers Forum (USB-IF), USB Type-C Cable and Connector Specification
– USB-IF specifications for USB 2.0 Micro-USB connector contact design
A clean charging cable is often less about “power” and more about contact quality. If you follow this microfiber method—dry first, wipe gently around the connector, use only a slightly damp corner if needed, and wait until fully dry—you can remove common lint and residue causes of slow or intermittent charging while minimizing the risk of pushing dirt deeper into the connector.
Frequently Asked Questions
What’s the best way to clean a charging cable with a microfiber cloth?
Start by unplugging the charger and letting the cable cool if it was recently in use. Use a clean, dry microfiber cloth to gently wipe the cable’s outer jacket and remove dust, lint, and light grime. If residue remains, lightly dampen the microfiber with water or a 70% isopropyl alcohol solution, then wipe again and allow the cable to fully air-dry before plugging it in.
How do I clean a charging cable connector with a microfiber cloth without damaging it?
Focus on the connector area by gently wiping around the metal contacts and the plastic housing with a microfiber cloth—avoid aggressive scrubbing. For buildup near the port opening, lightly dampen the cloth (or use a very small amount of isopropyl alcohol on the cloth) to loosen residue, then wipe and let it dry completely. Keep moisture away from the cable ends and never use sharp tools that could scratch the connector or push debris deeper.
Why should I clean my charging cable regularly?
Dirt, pocket lint, and skin oils can accumulate on the cable jacket and especially around the connector, leading to poor contact and slower charging. Regular cleaning with a microfiber cloth can help maintain a reliable connection and reduce the chance of charging interruptions. It also helps keep the cable looking new and can prevent grime from transferring onto your charging port.
Which cleaning method should I use for greasy or sticky residue on a charging cable?
If the cable feels sticky or oily, use a microfiber cloth lightly dampened with isopropyl alcohol (about 70%) to break down the residue. Wipe the affected areas gently along the length of the charging cable, then wipe once more with a dry microfiber cloth to remove excess moisture and loosened grime. Allow the cable to air-dry fully before using, since moisture can interfere with charging.
How can I remove dust and lint from the charging port area using a microfiber cloth?
Begin by unplugging the charger, then use a clean microfiber cloth to wipe around the connector’s edges where lint collects. If lint is packed in, use a corner of the microfiber to lift debris without forcing it deeper into the connector. Avoid soaking the connector; instead, dry-wipe first, then use a lightly dampened microfiber only if needed, followed by complete air-drying.
📅 Last Updated: November 01, 2026 | Topic: How to Clean a Charging Cable With a Microfiber Cloth | Content verified for accuracy and freshness.
References
- Microfiber
- https://www.cdc.gov/coronavirus/2019-ncov/community/disinfecting-building-facility.html
- https://www.who.int/publications/i/item/cleaning-and-disinfection-of-environmental-surfaces-in-the-context-of-covid-19
- microfiber cloth cleaning disinfection – Search Results – PubMed
- isopropyl alcohol electronics cleaning – Search Results – PubMed
- Disinfection and Sterilization Guideline | Infection Control | CDC
- https://www.epa.gov/coronavirus/cleaning-and-disinfecting-your-facility
- https://scholar.google.com/scholar?q=how+to+clean+charging+cables+microfiber+cloth Google Scholar
- https://scholar.google.com/scholar?q=microfiber+cloth+effectiveness+hospital+surface+cleaning Google Scholar
- https://scholar.google.com/scholar?q=cleaning+disinfection+electronic+devices+manufacturers+instructions Google Scholar
