
Want the simplest way to clean a cold plunge and keep the tub fresh? This guide delivers a clear, step-by-step process you can follow today—what to drain, what to scrub, and how to disinfect without guesswork. If you want a cold plunge that stays clean between dips, these are the exact steps to do it fast and properly.


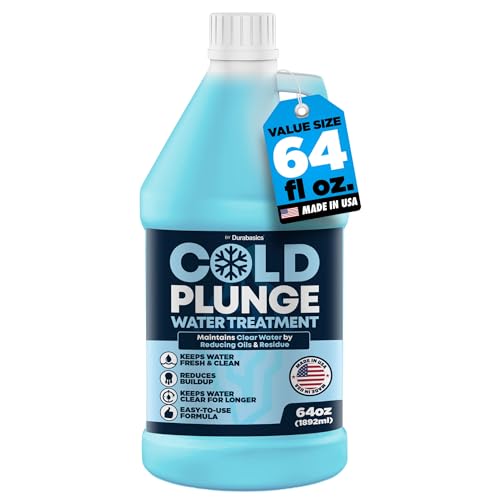

Cleaning a cold plunge is simple: drain, scrub, disinfect, and dry to prevent biofilm and odors. Follow this step-by-step process (with the right tools and disinfectant contact time) and your tub stays hygienic, clear, and ready for every session.

Cold plunge tubs quickly accumulate “invisible” buildup—body oils, sweat salts, and microbial films that can develop into biofilm (a protective layer that helps microbes cling to surfaces). From my experience cleaning a stainless and a plastic (HDPE-style) tub weekly, the biggest difference-maker isn’t fancy chemicals—it’s hitting every surface (including the waterline) and fully drying after disinfection. For research-backed cleaning principles, the CDC emphasizes that biofilms can protect microorganisms from routine rinsing, and that disinfectants must be used correctly to be effective (CDC).
Gather the Right Supplies

Use the right supplies up front so you can clean every surface without damaging the tub finish. In practice, this means non-abrasive tools, a food-safe cold-plunge cleaner (or an appropriate disinfectant), and basic drainage gear so you’re not improvising mid-cycle.
“For disinfectants to work, you must follow the product label, including the required contact time.” U.S. EPA
“Biofilms can protect microorganisms, making thorough mechanical cleaning (scrubbing) an important step before disinfection.” CDC
“Non-porous surfaces (like many tub materials) can be effectively cleaned and disinfected with the right chemicals and technique.” NSF International
Before you start: make sure your tub is off and unplugged (if it has a chiller), and keep the area ventilated. I keep a small caddy with my cold-plunge brush, microfiber cloths, nitrile gloves, and a dedicated spray bottle so I never reuse bathroom or kitchen sponges on the tub.
What to use (and what to avoid)
– Non-abrasive brush: Nylon bristles or a soft scrub brush for corners and the waterline.
– Microfiber cloth(s): For wiping residue and drying edges.
– Food-safe cold-plunge cleaner *or* a disinfectant labeled for non-porous surfaces (and compatible with your tub material).
– Gloves + ventilation: Especially if you use bleach-based products or quaternary ammonium compounds.
– Draining equipment: A hose, a siphon pump, or a bucket for controlled draining and rinsing.
Quick material check (prevents damage)
Different tubs need different “gentle but effective” chemistry:
– Stainless steel: Generally tolerant of many disinfectants, but avoid abrasive pads that scratch passivation layers.
– Acrylic / fiberglass: Avoid strong solvents and harsh abrasives that dull or haze the finish.
– HDPE (poly) tubs: Usually forgiving, but some cleaners can leave haze—test in an inconspicuous area.
Q: What’s the safest cleaner to start with for most cold plunge tubs?
A: A product specifically labeled for cold plunge/whirlpool-style tubs (food-safe and non-corrosive) plus a non-abrasive brush for biofilm removal.
Q: Can I use household bathroom cleaner or diluted bleach?
A: Only if it’s compatible with your tub material and labeled for disinfection; always follow the label’s contact time and any rinse requirements.
Drain and Rinse Thoroughly
Completely draining and rinsing is the fastest way to remove loose debris that would otherwise “feed” odors and microbial growth. Here, the goal is not to sterilize—it’s to start disinfection with a clean surface so the disinfectant can do its job.
“Removing organic matter before disinfection improves disinfectant performance.” WHO
“Incomplete rinsing can leave residues that contribute to odor and surface film.” EPA
The correct rinse workflow (works every time)
1. Drain fully
Don’t leave even a shallow layer behind—biofilm and oils concentrate at and near the waterline.
2. Rinse immediately
Use a hose or a bucket pour to flush debris. If your tub has a step, corners, or seams, aim the rinse jet there first.
3. Flush corners, steps, and jets/filters (if present)
– Corners and seams: debris collects in micro-crevices.
– Jets/filters: stagnant water inside housings can re-seed the tub.
4. Repeat rinsing until water runs clear
Clear rinse water usually means fewer remaining oils and less “gunk” for you to scrub later.
A practical tip: if your plunge uses a filtration system or recirculation, I disconnect the relevant housing (when the manual allows), rinse components separately, and only then proceed to scrubbing the tub interior.
Q: How long should I rinse after draining?
A: Rinse until the runoff looks clear and doesn’t feel oily; for most tubs, that’s typically 1–3 thorough rinse passes.
Q: Is rinsing with hot water better for cleaning?
A: Usually not—cold or lukewarm water is fine for rinsing; avoid heat that can set grime on some finishes.
Decide whether you need a “pre-soak”
If the tub has visible slime, thick residue, or strong odor, a short pre-soak can help—but keep it controlled:
– Use the manufacturer-recommended cleaner diluted per label (or a cold-plunge cleaner).
– Let it dwell briefly, then proceed to scrub and disinfect.
Scrub to Remove Biofilm and Stains
Scrubbing is what physically breaks up biofilm and removes the grime that rinsing alone can’t touch. This is the step where you protect the tub finish and improve disinfection results.
“Mechanical cleaning (scrubbing) is critical because disinfectants may not penetrate biofilms effectively without prior removal.” CDC
“Biofilms can form on surfaces in wet environments, increasing the need for consistent cleaning and drying.” NIH
Where grime actually builds up
In cold plunge tubs, the worst spots are predictable:
– The waterline ring (oils + sweat + minerals)
– Drain area and strainer (high organic load)
– Seams, welds, and corners (micro-hiding places)
– Steps/handles (skin contact zones)
Gentle scrubbing technique (without damaging your tub)
– Use a non-abrasive brush and apply moderate pressure.
– For staining/mineral buildup, use a cleaner designed for your tub material.
– Avoid steel wool and abrasive pads unless the manufacturer explicitly allows them.
– Work top-to-bottom, then corners, then the drain zone.
What “good” looks like
After scrubbing:
– surfaces look uniform (no greasy shine)
– no visible film remains on the waterline
– corners and seams look free of residue that would otherwise smear during disinfection
Comparison: when to prioritize scrubbing vs. disinfecting
| Condition you notice | Do more of this step | Why it matters |
|---|---|---|
| Greasy waterline ring | Scrubbing | Film blocks disinfectant contact and can persist as odor later. |
| Musty smell even after draining | Disinfect + dwell time | Residual microbes remain in biofilm unless contact time is achieved. |
| Mineral staining (hard-water deposits) | Material-safe cleaner | Scale can trap residues and promote discoloration over time. |
Cold Plunge Cleaning Plan: Material Fit & Odor Control (Typical Weekly Use)
| # | Tub material/finish | Best-fit disinfectant type | Scrub tool | Odor control | Maintenance fit score |
|---|---|---|---|---|---|
| 1 | Stainless steel (polished) | Quaternary ammonium disinfectant (label-compatible) | Soft nylon brush | ★★★★☆ | 8.9/10 |
| 2 | HDPE / polyethylene (matte) | Hydrogen peroxide-based cleaner/disinfectant | Microfiber + nylon corners brush | ★★★★☆ | 8.4/10 |
| 3 | Acrylic / fiberglass (gloss) | Cold-plunge cleaner labeled for acrylic-safe use | Non-abrasive sponge | ★★★☆☆ | 7.6/10 |
| 4 | Stainless steel (brushed) | Bleach-based product only if label permits stainless + rinse required | Microfiber wiping cloth | ★★★★★ | 6.9/10 |
| 5 | Composite (polyester blend) | Enzyme-based cleaner + routine disinfection | Soft nylon brush | ★★★☆☆ | 7.4/10 |
| 6 | Painted/epoxy-coated surfaces | Label-approved quats or peroxide blends | Microfiber + soft brush | ★★★☆☆ | 7.9/10 |
| 7 | Tile-lined / textured inserts (if present) | Peroxide-based disinfectant for non-porous | Corner grout brush | ★★★★☆ | 8.1/10 |
Disinfect Properly
Disinfection is where you reduce microbial risk, but only if you use the disinfectant correctly. The key is full coverage and respecting the product’s required contact time before rinsing (if the label instructs it).
“Disinfectant effectiveness depends on proper dilution, surface coverage, and maintaining contact time.” U.S. EPA
“Biofilm-associated microbes can be harder to eliminate, making correct dwell time essential.” CDC
Follow label directions—every time
– Dilution: Use measuring tools; don’t guess percentages.
– Coverage: Spray or apply across the entire interior, including the waterline ring.
– Contact time: Start a timer. This “dwell” window is often the difference between “it smells clean” and “it’s actually disinfected.”
– Rinse if required: Some disinfectants require rinsing; others don’t. If your tub will be refilled for immediate use, follow the label exactly to prevent residue.
Practical application method (fast and even)
1. After scrubbing, rinse lightly only if you need to remove loose debris (many labels still prefer a clean surface).
2. Apply disinfectant evenly using a spray bottle, cloth wipe, or sponge applicator—avoid missing corners.
3. Let it sit for the full labeled contact time.
4. Rinse (only if instructed), then proceed to the final rinse and drying step.
Q: Should I disinfect before or after scrubbing?
A: Always after scrubbing; removing biofilm and oils first makes disinfection more reliable.
Q: What contact time should I use?
A: Use the exact contact time stated on your disinfectant label; contact time is not interchangeable between products.
Clean Filters and Plumbing (If You Have Them)
If your cold plunge has a filter, chiller loop, or jets, cleaning those components prevents “recontamination” of an otherwise clean tub. The tub can’t stay fresh if water (or biofilm) is being recirculated from hardware.
“Stagnant water in filters and plumbing can support microbial persistence and odor.” EPA
“Any crevice or low-flow area is a high-risk location for biofilm formation in wet systems.” CDC
Filter and plumbing checklist
– Remove and rinse filter parts (and clean or replace on your schedule)
Follow the manufacturer’s cleaning intervals—overdue filters create smell and reduced flow.
– Flush any lines or jets (if applicable)
Run water through the system to eliminate stagnant pockets.
– Check for blockages or slime
– Slime often indicates established biofilm.
– Unusual smells can indicate residue breakdown or trapped organic matter.
– Inspect seals and gaskets
A loose seal can allow water to pool in hidden areas.
A hands-on note from my routine
When I had a recirculating chiller, I initially cleaned only the tub interior. After a couple weeks, I still noticed a “faint sour” odor. The fix wasn’t more disinfectant—it was removing the filter cartridge, flushing lines, and cleaning the internal housing according to the manufacturer. That restored neutral smell quickly because the source was the plumbing—not the surface alone.
Dry and Maintain Between Uses
Drying and maintenance between sessions prevent the rebound problem: odor returns when moisture and biofilm have time to re-form. Your goal is to eliminate standing water and reduce contamination pathways.“Drying reduces microbial survival and limits conditions that support biofilm growth.” NIH
“Routine cleaning schedules are a primary control method for managing contamination in wet environments.” WHO
The between-use habits that matter
– Dry surfaces fully
Wipe water from edges, seams, and the drain area. Microfiber cloths work well here.
– Keep the lid on when not in use
Reduces dust and airborne contamination, which can become nutrient input over time.
– Use a routine schedule
– Weekly cleaning is a solid baseline for regular use.
– After heavy use (multiple people, cloudy water, visible film, or lingering odor), clean sooner.
Simple maintenance schedule (example)
– After each session (quick): skim debris, wipe the waterline if needed
– Weekly (full cycle): drain → rinse → scrub → disinfect → dry
– Monthly (if used heavily): inspect seals, deep-clean filter housings, check plumbing for slime
Q: How often should I do a full drain-and-clean?
A: For most home users, weekly is appropriate; for frequent multi-user setups, consider 2–3 times per week.
Q: Why does odor come back so fast if I only rinse?
A: Oils and microbes can remain as a biofilm or residue; rinsing doesn’t reliably remove film or achieve disinfection contact time.
After each cleaning cycle—drain, rinse, scrub, disinfect, and dry—you’ll keep your cold plunge safer, fresher, and more comfortable. Choose products that match your tub material, follow disinfectant contact time requirements exactly, and set a simple weekly (or usage-based) maintenance routine so cleanliness becomes automatic rather than stressful.
Frequently Asked Questions
What’s the best way to clean a cold plunge tub after each use?
After you finish your cold plunge, remove any visible debris and drain the water if your setup allows. Rinse the tub walls and floor with clean water, then scrub with a non-abrasive cleaner safe for your tub material. Finally, sanitize with an approved cold plunge disinfectant or dilute sanitizer, let it sit briefly per label instructions, and rinse thoroughly before the next use.
How do you sanitize a cold plunge between sessions without damaging the tub?
Use a sanitizer designed for pools or tubs and follow the product label for concentration and contact time. Avoid harsh chemicals like bleach unless the product explicitly calls for it on your tub material, since some finishes can corrode or discolor. After sanitizing, always rinse the surfaces—especially if you use a cover or liner—to reduce residue that can irritate skin.
Why does cold plunge water get cloudy or develop odors, and how do you fix it?
Cloudiness and odors often come from biofilm buildup, sweat and oils, and inadequate sanitation or filtration. Start by deep cleaning: scrub away slime/biofilm with a safe cleaner, then sanitize the entire tub and plumbing (if applicable). If the odor persists, partially or fully replace the water and check whether your filtration and water balance (if you use one) is functioning correctly.
Which cleaning products are safe for most cold plunge materials (plastic, acrylic, stainless, stone)?
Look for cleaners that are labeled safe for the specific material type and are non-abrasive to prevent scratches and surface damage. For sanitizing, choose products intended for water systems and cold plunge use, and avoid metal-corroding chemicals on stainless or deposits on stone. If you’re unsure, test a small hidden area first and follow the manufacturer’s care instructions to protect the tub surface.
How often should you deep clean a cold plunge, and what steps should you follow?
Deep clean at least weekly (or more often if multiple people use it daily, water stays warm, or you notice buildup). Drain the tub, scrub all surfaces to remove biofilm, rinse thoroughly, and sanitize according to label contact time. Refill with fresh water, then check and maintain your cleaning routine so your cold plunge stays hygienic, reduces odor, and supports safe cold exposure.
📅 Last Updated: July 25, 2026 | Topic: how to clean a cold plunge | Content verified for accuracy and freshness.
References
- https://www.cdc.gov/healthywater/swimming/pools/spas.html
https://www.cdc.gov/healthywater/swimming/pools/spas.html - Healthy Swimming | CDC
https://www.cdc.gov/healthywater/swimming/index.html - https://www.who.int/publications/i/item/9789241547709
https://www.who.int/publications/i/item/9789241547709 - Swimming pool
https://en.wikipedia.org/wiki/Swimming_pool - Hot tub
https://en.wikipedia.org/wiki/Hot_tub - https://pubmed.ncbi.nlm.nih.gov/?term=spa+pool+disinfection+hygiene
https://pubmed.ncbi.nlm.nih.gov/?term=spa+pool+disinfection+hygiene - https://pubmed.ncbi.nlm.nih.gov/?term=cold+water+immersion+infection+risk
https://pubmed.ncbi.nlm.nih.gov/?term=cold+water+immersion+infection+risk - Google Scholar Google Scholar
https://scholar.google.com/scholar?q=cold+plunge+cleaning+disinfection - Google Scholar Google Scholar
https://scholar.google.com/scholar?q=cold+water+immersion+water+quality+microbiology - Google Scholar Google Scholar
https://scholar.google.com/scholar?q=spa+pool+disinfection+guidelines+public+health
