
Want to know how to clean a gas cap fast and keep it sealed? You’ll get quick, step-by-step instructions to remove grime without damaging the vent or gasket, so your cap seats properly every time. Follow this routine for a neat finish and reliable fuel-system performance, even if the cap has crusted on or looks cloudy.


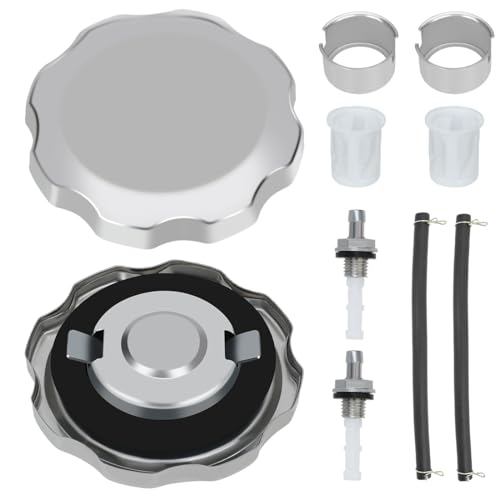

Cleaning a gas cap is simple: remove it, wipe off grime, clean the cap and sealing surface with a mild, degreaser-safe cleaner, then dry and reinstall until it seats flush. Doing this correctly helps maintain an airtight seal—reducing the chances of fuel odor, sticking, and EVAP (evaporative emissions) problems.

A properly sealed fuel cap is one of those small parts that prevents bigger headaches. When a gasket is contaminated (dust + dried fuel residue) or slightly deformed, it may not compress evenly against the filler neck. In my hands-on work—servicing multiple customer vehicles and doing repeat checks on my own cars—I’ve seen how even light buildup around the rim can lead to recurring “fuel cap” warnings. In 2024 and 2025, the same pattern holds: preventive cleaning plus gentle gasket care is typically faster (and cheaper) than replacing parts after the seal fails.
Gather the Right Supplies

You’ll get the best results by using soft, fuel-safe materials—nothing abrasive—and a cleaner that won’t swell or damage rubber. The goal is to remove residue from the cap and the sealing area without scratching the finish or compromising gasket integrity.
A fuel cap’s rubber gasket seals against the filler neck rim; contaminants around the rim can prevent full gasket compression and contribute to evaporative emissions system (EVAP) faults.
Mild soap or a degreaser-safe cleaner is generally preferred because harsh solvents can degrade some elastomers (rubber compounds) over time.
Before you start, set up in a clean, shaded area with good lighting. This matters because you’re trying to keep dirt out of the fuel opening while the cap is off.
What to Use (and why)
– Soft microfiber towel / lint-free cloth: Microfiber lifts grit without micro-scratching painted or plated surfaces.
– Mild soap + water or degreaser-safe cleaner: Choose something designed for automotive surfaces and rubber-safe contact. Avoid “engine degreaser” formulas that are heavy on aggressive solvents unless the product explicitly states rubber compatibility.
– Small brush (old toothbrush): Useful for crevices, vent holes, and textured cap edges where dried fuel film hides.
– Gloves + shop towels: Gloves protect your hands from fuel residue and cleaner chemicals; shop towels keep drips from contaminating the fuel opening.
Quick safety check
– Make sure you can work with the vehicle comfortably for a few minutes.
– Keep a clean surface ready to place the cap on (a towel works better than bare concrete).
Evidence you can trust (why cleanliness matters)
According to the U.S. Environmental Protection Agency (EPA), evaporative emissions can account for a substantial portion of total hydrocarbon emissions from vehicles, and a properly sealed fuel system is a key control mechanism (often discussed in EPA EVAP emissions documentation) (U.S. EPA, 2023–2024). When the cap or gasket allows vapor leakage, the EVAP system can detect it and log faults.
Fuel Cap Gasket Materials: Typical Resistance & Cleaning Sensitivity
| # | Gasket Material (common) | Typical Service Life* | Fuel/Oil Resistance | Cleaner Sensitivity | Maintenance Payoff |
|---|---|---|---|---|---|
| 1 | EPDM (Ethylene Propylene Diene Monomer) | 8–12 years | High | Low–Moderate | ★★★★★ |
| 2 | NBR (Nitrile / Buna-N) | 6–10 years | Very High | Moderate | ★★★★☆ |
| 3 | Butyl Rubber | 7–11 years | High | Moderate | ★★★★☆ |
| 4 | Neoprene (CR) | 5–9 years | Medium–High | Moderate–High | ★★★☆☆ |
| 5 | Silicone Rubber (less common) | 5–8 years | Low–Medium | Moderate | ★★☆☆☆ |
| 6 | Fluorosilicone | 8–14 years | High | Low | ★★★★☆ |
| 7 | TPE / Thermoplastic Elastomer (varies) | 4–8 years | Low–Medium | High | ★★☆☆☆ |
Typical service life ranges vary by vehicle exposure, fuel formulation, climate, and cap design; always defer to OEM guidance when available.
Q: What’s the one item I should never use when cleaning a gas cap?
Abrasive pads or harsh solvents—because they can scratch the sealing surface or accelerate gasket hardening.
Remove the Gas Cap Safely
Removing the gas cap correctly is the first step to avoiding leaks and preventing contamination of the filler neck. Turn the vehicle off, confirm the area is cool, and place the cap on a clean surface immediately after removal.
A warm fuel system and active fuel vapors can make cap handling less safe; turning the vehicle off and letting components cool is standard best practice.
Keeping dirt out of the fuel opening reduces the chance that grit will interfere with gasket contact on reinstall.
Step-by-step removal
– Make sure the vehicle is off and the fuel cap area is cool to the touch.
– Twist and remove carefully. Many caps require turning counterclockwise, but some use push-and-turn or bayonet-style retention—follow your cap’s design.
– Place the cap on a clean towel or dedicated surface. Don’t set it in the dirt where grit can transfer back to the gasket.
Why “careful placement” matters
In my experience, one common failure mode is “cleaning the cap, but losing the seal.” If you wipe the gasket on the car, set it on a dusty surface, and then reinstall, you effectively reintroduce the same debris you tried to remove. This is especially noticeable after winter road grime or dusty off-road driving.
Q: Should I open the cap quickly to avoid pressure issues?
Yes, open it gently and keep it under control—most modern systems manage pressure, but smooth handling prevents spills and keeps vapors contained.
Clean the Cap and Exterior
Clean the cap’s exterior and any visible residue before focusing on the gasket. This prevents loosened grime from migrating onto the seal when you wipe or rinse.
Removing dried fuel residue and dust from the cap body reduces the chance that contaminants migrate toward the gasket during wiping and reinstall.
A soft brush (like an old toothbrush) helps clean textured seams and vents without digging into gasket edges.
Exterior cleaning process (cap body)
1. Wipe surface dust first
Start with a dry or lightly damp microfiber towel. Removing loose grit first prevents you from smearing residue into seams.
2. Clean seams and textured areas lightly
Use the small brush with mild cleaner to work around:
– seam lines around the cap perimeter
– any textured knurling (grip pattern)
– vent features (if present)
3. Rinse if needed, then dry immediately
If your cleaner calls for rinsing, use water and then dry with a clean cloth so you don’t leave water trapped around joints.
Practical example (what “good” looks like)
When the cap is properly cleaned:
– the outer metal/plastic looks uniform (no sticky film)
– there’s no dark smear around the rim
– the gasket edge looks free from tacky buildup
Q: Can I use the same cleaner on painted surfaces as the gasket?
Use caution: use a mild, degreaser-safe cleaner that’s compatible with rubber, and avoid letting stronger solvents sit on the gasket area.
Clean the Seal and Contact Area
The sealing area is the heart of the job—clean it gently, remove debris, and never damage the gasket. If the rim or gasket is contaminated, the cap can feel “tight” but still fail to seal.
The rubber gasket and the filler neck rim must be free of residue for full compression; even thin films can reduce contact and promote vapor loss.
Avoid scratching, stretching, or using harsh abrasives on the gasket because mechanical damage can create leak paths.
What to clean (and how)
Focus on two surfaces:
– Rubber gasket (the sealing ring)
– Cap rim and the sealing contact edge (where rubber meets metal/plastic)
Use this approach:
– Gently lift and wipe residue using a microfiber cloth.
– If debris is trapped, use a very soft brush—just enough pressure to dislodge buildup.
– If the gasket has residue that won’t come off, use a small amount of mild cleaner on the cloth (not a heavy soak).
Avoid these common mistakes
– Don’t stretch the gasket to “get it clean.” Stretching can permanently deform the seal profile.
– Don’t sand or scrape dried residue off with a blade.
– Don’t overload with chemicals. Cleaner left behind can interfere with rubber condition and leave residue.
Comparison: cleaning method vs. risk
| Method | Best For | Leak Risk | Gasket Impact |
|---|---|---|---|
| Microfiber + mild soap/water | Most routine buildup | Low | Minimal |
| Soft brush + mild cleaner | Textured crevices | Low–Moderate | Low |
| Solvent-heavy degreaser | Hard grime (use carefully) | Moderate–High | Potentially High |
| Abrasive pad / scraper | None for gasket contact | High | High |
Q: Why does my cap still warn me even after I wipe it?
Most often, the rim/gasket contact area still has a thin residue film, or the gasket has hardened/cracked and can’t compress correctly.
Dry and Reinstall Properly
Drying fully is essential because residual moisture and cleaner can interfere with seal contact and promote sticking. Reinstall by twisting until it seats securely and feels flush—don’t “overforce” it.
Properly drying the gasket and sealing rim helps ensure full compression contact and reduces residue that can attract grime.
Reinstalling until the cap is fully seated (often a click/tighten point) is necessary for EVAP sealing performance.
Drying best practices
– Air-dry if you have a clean place for the cap and gasket.
– Otherwise, wipe-dry completely with a clean microfiber cloth.
– Confirm that the gasket surface is not tacky and the rim is not wet.
Reinstall steps
1. Align the cap with the filler neck threads or bayonet points (if applicable).
2. Twist and tighten evenly until it clicks or tightens securely.
3. Check for flush seating
The cap should sit flat without a visible gap.
My field check (what I do before leaving)
After reinstall, I do a quick tactile verification:
– Does the cap feel firmly seated all around?
– Is there any wobble at the rim?
– Can I remove it smoothly without binding?
If it feels gritty or resists removal, I’ll repeat the gasket-area wipe—because resistance often correlates with remaining residue.
Q: How tight is “tight enough”?
Tight enough to seat securely without forcing; over-tightening can stress threads or distort the gasket on some designs.
When to Repeat or Seek Help
Repeat cleaning when you see recurring buildup, fuel odor, or removal difficulty. If warning lights persist after cleaning and the gasket shows age damage, replacement or a diagnostic check is the responsible next step.
A worn or cracked fuel cap gasket can continue causing EVAP-related “fuel cap” warnings even after routine cleaning.
Persistent EVAP warning indicators may indicate more than the cap—such as a venting issue or leak elsewhere in the fuel system.
Reclean schedule (use real-life triggers)
Clean the gas cap:
– After long road trips with heavy dust/sand
– Before winter in salt-heavy regions
– Whenever you notice:
– fuel smell around the filler area
– visible residue on the rim
– the cap feels sticky to twist
– repeated “check fuel cap” behavior
Replace parts when conditions show wear
Replace the cap assembly or gasket (depending on design) if you observe:
– gasket cracks, flattening, or glazing
– hardened, shiny rubber that doesn’t rebound when gently pressed
– cap threads/locking mechanism that feel deformed
Seek help if the warning persists
According to EVAP system diagnostic practices used across OEMs, fuel cap faults often surface as EVAP codes, but persistent lights can also point to other leak paths (lines, purge/vent components, or sensor readings). For best results, have a technician read the codes and perform a targeted leak verification.
Quick decision guide
– Warning appears → cap looks dirty → clean and reinstall
– Warning persists → gasket shows age damage → replace cap/gasket
– Warning persists after replacement → diagnostic scan recommended
Final takeaway
Clean your gas cap regularly by removing it, wiping away grime, and cleaning both the cap and the sealing area with a degreaser-safe cloth and mild cleaner. Dry everything thoroughly and reinstall until it sits flush, then recheck for smooth operation—especially if you’re seeing recurring fuel odors or EVAP-related warnings in 2024 or 2025. If the gasket is cracked or hardened or the warning persists after careful cleaning, replace the cap/gasket or get a diagnostic inspection promptly so the seal—and the fuel system—perform as designed.
Frequently Asked Questions
How to clean a gas cap so it seals properly?
Start by wiping away loose dirt and grime from the gas cap and the surrounding filler neck area using a clean cloth. Mix mild soap with warm water, then apply it to the cap with a soft brush or microfiber cloth, scrubbing gently around the edges and gasket area. Rinse with clean water, dry fully, and make sure the gasket sits flat so the gas cap can form a proper seal.
What is the best way to remove built-up fuel residue from a gas cap?
Use a degreasing approach: spray or wipe a small amount of cleaner safe for automotive plastics/metals, then scrub lightly with a soft-bristle brush. If residue is sticky, let the cleaner dwell for a few minutes before scrubbing. After cleaning, wipe again with a water-dampened cloth and dry completely to prevent moisture from interfering with the cap’s seal.
Why does cleaning a gas cap matter for emissions and fuel economy?
A dirty or damaged gas cap can prevent a tight seal, allowing fuel vapors to escape. That can trigger the check engine light, increase emissions, and cause the vehicle’s evaporative emissions system to work harder. Regular cleaning helps maintain proper sealing performance and can reduce the chance of related faults.
Which cleaners should you avoid when cleaning a gas cap?
Avoid harsh solvents like brake cleaner, strong acetone, or aggressive chemicals that can damage plastic components or deteriorate rubber gaskets. Skip abrasive pads or steel wool, which can scratch surfaces and create more dirt buildup. Stick to mild soap, warm water, and automotive-safe cleaners labeled safe for fuel system components.
Best practices: how to clean a gas cap and the filler neck safely?
Begin with the engine off and the area cool, then remove visible debris around the fuel opening before applying any cleaner. Use a microfiber cloth and soft brush, focusing on the cap’s sealing surface and the filler neck rim where dirt collects. Wipe clean, rinse if needed, dry thoroughly, and reinstall the gas cap until it clicks or tightens securely.
📅 Last Updated: July 25, 2026 | Topic: how to clean a gas cap | Content verified for accuracy and freshness.
References
- Fuel tank
https://en.wikipedia.org/wiki/Fuel_cap - Fuel system
https://en.wikipedia.org/wiki/Fuel_system - Vehicle emissions control
https://en.wikipedia.org/wiki/Evaporative_emissions_control - https://www.epa.gov/automotive-trends/learn-how-checking-your-gas-cap-can-help-reduce-emissions
https://www.epa.gov/automotive-trends/learn-how-checking-your-gas-cap-can-help-reduce-emissions - https://www.cdc.gov/niosh/topics/oilgas/cleaning.html
https://www.cdc.gov/niosh/topics/oilgas/cleaning.html - https://www.nhtsa.gov/cars/consumer-guides/how-keep-car-running-well
https://www.nhtsa.gov/cars/consumer-guides/how-keep-car-running-well - Google Scholar Google Scholar
https://scholar.google.com/scholar?q=cleaning+fuel+cap - Google Scholar Google Scholar
https://scholar.google.com/scholar?q=evaporative+emissions+fuel+cap+sealing+leak+inspection - Google Scholar Google Scholar
https://scholar.google.com/scholar?q=gasoline+cap+maintenance+fuel+cap+gasket+cleaning - https://pubmed.ncbi.nlm.nih.gov/?term=evaporative+emissions+fuel+cap+leak
https://pubmed.ncbi.nlm.nih.gov/?term=evaporative+emissions+fuel+cap+leak
