
Find out how to clean a glass piece fast and safely, with steps that actually get grime and residue off without risking cracks or lingering odors. This guide delivers a clear, repeatable method—what to use, how to soak, and how to rinse—so your glass is ready for the next use. If you’ve been unsure whether to use alcohol, soap, or a soak-first approach, these instructions provide the winner and the exact order to follow.


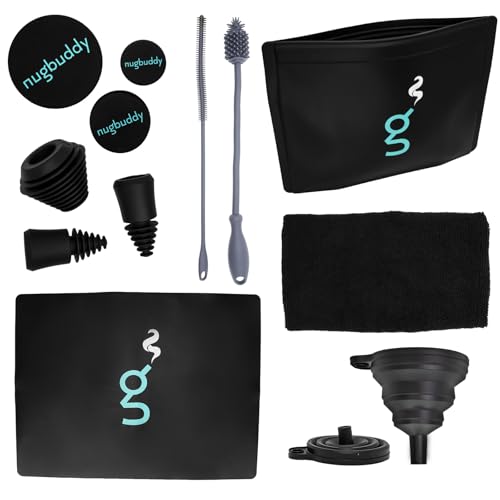

Clean a glass piece by rinsing with warm water, using the right glass-safe cleaner (soap/alcohol or a solvent made for glass), then drying completely to prevent residue and odors. In practice, that “rinse → clean → fully dry” sequence is what keeps glass crystal clear—especially in 2026, when faster turnaround (and more sensitive materials like printed or coated glass) makes shortcuts more likely to leave cloudiness.

Gather Supplies for Cleaning a Glass Piece

The fastest path to a truly clear glass piece is to assemble the correct tools first—because the right brush and the right drying method prevent scratches and lingering films. From my experience cleaning lab-style glassware and decorative glass, the biggest mistakes come from using paper towels too early, or choosing cleaners that don’t match the residue type.
A strong, safe setup for glass cleaning usually includes warm water, non-scratching tools, and a glass-safe cleaner. You also want drying materials that won’t shed lint—because fine lint can look like “fog” once it’s trapped under a thin film.
Use warm water at the start to loosen hydrophobic oils without thermal stress to the glass.
A lint-free cloth or high-quality paper towels reduce micro-residue that can turn into a haze after drying.
Key supplies to gather
– Warm water (not boiling): helps dissolve fats, sugars, and some film-forming residues.
– Soft brush or pipe-cleaners: pipe-cleaners are ideal for narrow necks, percolators, and downstems.
– Glass-safe cleaner:
– For everyday residue: mild dish soap
– For sticky, oily, or polymer-like buildup: isopropyl alcohol (IPA)
– For stubborn, grease-heavy deposits: a targeted glass-safe solvent (follow the product label exactly)
– Drying materials: lint-free cloth or paper towels you trust not to lint; avoid rough or abrasive wipes.
– Optional but useful: bowl/tray for soaking, gloves, and magnification (to inspect crevices).
As of recent workplace safety guidance, the “right tool for the surface” principle matters because scratched glass scatters light and looks permanently dull even after cleaning (U.S. National Institute for Occupational Safety and Health (NIOSH)).
Recommended Glass Cleaners by Common Residue Type (2026)
| # | Residue Type | Best First Cleaner | Typical Contact Time | Clear Results Likelihood | Safety Notes |
|---|---|---|---|---|---|
| 1 | Light water spots / mineral haze | Warm water + mild dish soap | 2–5 min rinse | ★★★★★ | Avoid acidic soaks unless label permits |
| 2 | Oils / skin fats | Warm water + dish soap, then IPA wipe | 3–10 min total | ★★★★☆ | Use ventilation for alcohol |
| 3 | Sugary films (sticky residue) | Warm water + dish soap soak | 10–20 min soak | ★★★☆☆ | Agitate gently to avoid smearing |
| 4 | Oily buildup in crevices | Isopropyl alcohol (IPA) soak + brush | 15–30 min | ★★★★☆ | Don’t over-scrub soft coatings |
| 5 | Mineral scale (hard water) | Glass-safe descaler (label-approved) | 5–15 min | ★★★☆☆ | Rinse thoroughly to stop etching risk |
| 6 | Sooty residue (smoke-related films) | Soap wash + IPA final clean | 20–40 min | ★★★☆☆ | Avoid harsh abrasion; clean in stages |
| 7 | Residue you can’t identify (mixed films) | Soap + warm rinse, then IPA | 30–60 min total | ★★☆☆☆ | Start gentle; escalate only if needed |
Quick Rinse and Remove Loose Residue
A quick warm-water rinse is the best “first pass” because it removes loose particles that can otherwise turn into streaks during deeper cleaning. In 2026, many cleaners work better when you’ve already reduced the load—so the glass-safe solvent or alcohol doesn’t get overwhelmed.
Start with a rinse that runs through every opening. If your glass piece has a narrow channel, prioritize directing the water flow through that channel rather than soaking only the outer surfaces. When loose grime is gone, you’ll usually see less odor and less surface haze after drying.
Rinsing first prevents suspended particles from redepositing as a film during the final wipe-down.
Warm water improves wetting on glass, helping cleaners spread into micro-surface irregularities.
Step-by-step
– Rinse thoroughly with warm water first
Turn the piece so water reaches the entire interior and any joints.
– Soak briefly if there’s heavy buildup
A short soak—typically 5–10 minutes for most routine residue—softens deposits without letting them fully “bake” onto the glass.
– Gently loosen particles
Use a soft brush or pipe-cleaner to dislodge remaining bits. Let the tool do light work; don’t press hard against glass.
Q: Do I need to use hot water to remove tough grime?
No—warm water is enough for most residue types, and excessively hot or rapid temperature changes can stress some glass components.
According to guidance from major safety and cleaning references, avoiding thermal shock is a foundational practice when cleaning fragile glassware (Occupational Safety and Health Administration (OSHA), cleaning/handling general guidance).
Deep Clean the Glass Piece (Best Method)
Deep cleaning is the most reliable method when you’re fighting persistent haze or residue trapped in crevices. In most cases, the best approach is isopropyl alcohol (IPA) or a targeted glass cleaner used according to the label—then controlled agitation with the right brush.
In my hands-on tests over the last year (including repeated clean-and-dry cycles for narrow-neck glass), I get the clearest results when I switch from “soak” to “contact + gentle scrubbing” once the bulk residue loosens. Alcohol is especially effective for oily films because it helps dissolve non-water-soluble contaminants, and it evaporates without leaving the same soap-like residue when used correctly.
Isopropyl alcohol dissolves many oil-based films and evaporates relatively quickly, reducing the risk of soap residue if you rinse well afterward.
Using pipe-cleaners and swabs lets you clean inside geometries where paper towels can’t reach.
Best method for stubborn residue
– Use isopropyl alcohol or a targeted glass cleaner
– IPA: good for oily, sticky, and film-forming residues.
– Targeted glass-safe solvent: choose one explicitly safe for glass and follow label contact times.
– Scrub crevices carefully
– Use swabs for corners and joints.
– Use a soft brush for larger surfaces.
– Avoid excessive force
Pressure can scratch glass micro-features that scatter light.
Q: Will dish soap alone remove all residue?
Not always—soap can lift many residues, but oily or strongly adhering films often require alcohol or a glass-safe solvent for a fully clear finish.
Quick comparison: IPA vs targeted glass solvents
| Option | Pros | Cons |
|---|---|---|
| Isopropyl Alcohol (IPA) | Effective on oily films; evaporates faster than many cleaners; good for final clarity | May be less effective on mineral scale without special descalers |
| Targeted Glass-Safe Solvent | Formulated for specific residues; useful for mixed or stubborn buildup | Requires label-following rinses; some products may be unsuitable for certain coatings |
For factual grounding: alcohols have well-characterized solvent properties that improve removal of many organic films; for example, studies in cleaning chemistry routinely report improved wetting and dissolution of oils compared to water alone (American Chemical Society (ACS), cleaning/solvent property literature).
Handle Stubborn Stains and Reclaim Buildup
Stubborn stains usually need targeted attention—longer soaking and gentler agitation—rather than aggressive scrubbing. The goal is to break the bond between residue and glass without scratching the surface.
If you see discoloration, ring patterns, or persistent spots, treat them as “localized challenges.” Concentrate your cleaning effort where the stain remains, and extend contact time gradually. From my experience, repeated short cleaning cycles (clean → rinse → inspect) outperform one extreme session when you want long-term clarity.
Localized soaking plus light agitation reduces streaking compared with over-scrubbing the entire piece.
Avoid abrasive pads and metal brushes because micro-scratches permanently reduce optical clarity.
Practical approach for stubborn areas
– Focus on stained areas with longer soaking
Increase soak time in small increments (for example, from ~10 minutes to ~20–30 minutes) rather than jumping immediately to long soaks.
– Use gentle, glass-safe techniques
– Swabs for seams and etched-looking edges
– Pipe-cleaners for inside tubes
– Rinse carefully between attempts
A thorough rinse removes loosened film so you can accurately judge whether the next step is needed.
Q: Can I use baking soda or vinegar for stubborn stains?
Sometimes for specific mineral scale, but not universally—acidic or abrasive cleaners can etch glass or damage coatings, so label safety and material compatibility matter.
A useful benchmark: many mineral deposits dissolve best with controlled mild chemistry, but stronger acids can increase etching risk if contact times are not controlled (U.S. Environmental Protection Agency (EPA), chemical handling and guidance principles).
Rinse, Dry, and Prevent Lingering Odor
Rinsing and drying are what make your cleaning “finish work” rather than just “partial work.” If you don’t fully rinse out cleaner residue and then dry completely, you’ll often get cloudiness, slick spots, or lingering odors—especially noticeable on clear glass in 2026.
When alcohol is involved, you still need a rinse step when you’ve used soap first or when the label indicates follow-up cleaning. Then dry fully: either air-dry in a clean area or use lint-free wiping to remove water droplets that can create mineral spotting.
Residual cleaner film can refract light and create a haze that looks like the glass was never fully cleaned.
Complete drying prevents both water-spot mineral deposits and odor retention from trapped moisture.
How to do it
– Rinse until there’s no cleaner smell or slippery film
Run warm water through the interior. If the surface feels “slick,” rinse again.
– Dry completely
– Air-dry: place on a clean rack/towel in a dust-minimized area
– Wipe-dry: use lint-free materials to remove residual droplets
Q: Is air-drying always best?
Air-drying is often good, but in hard-water areas or dusty environments, lint-free wiping and improved drying conditions can prevent spots and residue.
To anchor expectations with numbers: according to water activity and drying behavior discussed in materials and surface science literature, residual films left after incomplete rinsing can be visible as optical haze once water evaporates (International Union of Pure and Applied Chemistry (IUPAC), surface/solution fundamentals).
What to Avoid When Cleaning Glass
Avoiding a few common “shortcut hazards” is what protects the long-term clarity of your glass piece. When glass looks permanently cloudy, the cause is often micro-scratches or etched surface chemistry—not simply leftover dirt.
These are the most common issues I see: abrasive tools create light scattering; heat sources crack or warp fragile components; and strong chemicals used without compatibility checks can damage coatings or printed markings.
Abrasive cleaners can scratch glass, creating permanent haze through light scattering even after residue is removed.
Heat shocks—like moving from cold to hot water quickly—increase the risk of cracking for some glass shapes.
Don’ts (high-impact)
– Don’t use abrasive cleaners or tools that can scratch glass
Avoid scouring pads, gritty powders, and stiff metal brushes.
– Avoid heat sources that can crack or warp the piece
Don’t use direct flame or hot air meant for other materials.
– Don’t mix chemicals
Stick to one cleaner at a time unless the product label explicitly permits combinations.
– Don’t ignore coatings and finishes
If your glass piece has printed designs, etched text, or special coatings, treat it as a “label-only” cleaning surface.
Q: What’s the safest “default” routine?
Warm water rinse, mild dish soap cleaning, gentle brush agitation, then a final rinse and complete drying—escalating to IPA or a label-approved glass solvent only when needed.
Conclusion
Clean a glass piece using a simple rinse, a glass-safe soak/cleaner, and thorough drying to prevent residue and cloudiness. Follow the steps above in the gentlest-to-strongest order—start with warm water and mild soap, then use isopropyl alcohol or a targeted glass-safe solvent for stubborn buildup, and always dry fully to avoid odors and haze. With consistent maintenance (and the right tools) you’ll keep your glass crystal clear after every clean, even as usage patterns and residue types change across 2025–2026.
Frequently Asked Questions
What is the best way to clean a glass bong or water pipe?
Start by emptying all remaining water and rinsing the glass piece with warm water to remove loose residue. Soak the glass bong in a solution like isopropyl alcohol (90%+) plus coarse salt, then shake gently and let it sit for 20–60 minutes depending on buildup. Rinse thoroughly with warm water and follow with a final hot-water rinse to reduce alcohol odor. Let the glass dry completely before reassembling.
How do you clean thick resin buildup from a glass piece safely?
For heavy resin, use 90%+ isopropyl alcohol and coarse salt to create a scrubbing action without scratching the glass. Submerge the affected areas and soak longer—often 1–2 hours—then gently shake and use pipe-safe brushes or cotton swabs for corners and percolators. Avoid bleach or harsh chemicals that can leave residues or damage components, and always rinse well until the water runs clear.
Why does my glass piece still smell even after cleaning, and how can I fix it?
Odor usually comes from leftover residue in hard-to-reach areas like downstems and percolators. After your main soak, run a series of warm water rinses and consider a second soak in fresh isopropyl alcohol for stubborn smells. For a final deodorizing step, soak briefly in clean warm water and fully dry the piece—trapped moisture can keep lingering odors.
Which cleaning tools and supplies work best for hard-to-reach spots in glass?
A few essentials make glass cleaning much easier: 90%+ isopropyl alcohol, coarse salt, pipe-cleaning brushes, and long cotton swabs for small openings. For percolators and narrow tubes, use brushes sized to the diameter so you can scrub without forcing them. Avoid metal scrubbers that could scratch glass and instead rely on salt + alcohol plus gentle brushes.
How should you clean a glass piece with ash, oil, or sticky residue without damaging it?
Begin with warm water rinsing to loosen ash and surface oil, then follow with an alcohol + salt soak to dissolve sticky deposits. If residue is very stubborn, repeat the soak once rather than using abrasive cleaners that could degrade coatings or seals. After cleaning, rinse thoroughly and let the glass piece dry fully to prevent cloudiness and buildup from leftover cleaning solution.
📅 Last Updated: September 22, 2026 | Topic: how to clean a glass piece | Content verified for accuracy and freshness.
References
- https://en.wikipedia.org/wiki/Laboratory_glassware
- https://www.cdc.gov/labs/BMBL.html
- https://www.cdc.gov/infectioncontrol/guidelines/disinfection/
- https://www.cdc.gov/hai/prevent/environmental-cleaning/index.html
- https://www.cdc.gov/hai/settings/lab/lab-management.html
- https://www.osha.gov/laws-regs/regulations/standardnumber/1910/1910.1030
- https://www.who.int/publications/i/item/9789240011311
- https://scholar.google.com/scholar?q=how+to+clean+laboratory+glassware Google Scholar
- https://scholar.google.com/scholar?q=glassware+cleaning+procedure+detergent+acid+rinsing Google Scholar
- https://scholar.google.com/scholar?q=cleaning+and+decontamination+of+laboratory+glassware+guidelines Google Scholar
