

Between spills, fingerprints, and shared office air, using disinfecting wipes on a mechanical keyboard can make you worry about getting moisture into the switches. Follow a simple, safe method to wipe keycaps clean, disinfect the surface, and dry it properly so it performs normally again—usually in about 15 minutes. You’ll just need lint-free wipes approved for electronics, a microfiber cloth, and a soft brush or cotton swabs for the edges.
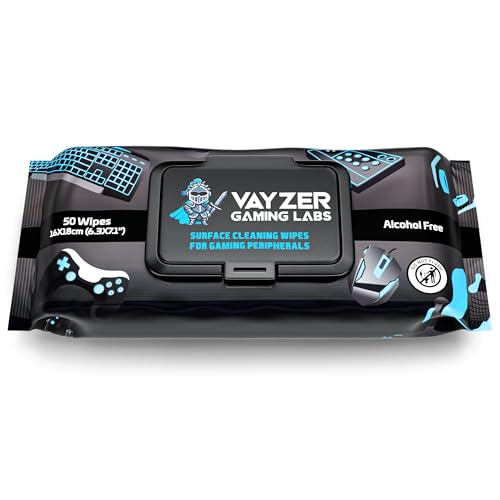



Use disinfecting wipes to clean the keycaps and visible keyboard surfaces, but avoid soaking the switches, gaps, and underside openings. The safest approach is a wipe-first clean (light pressure), followed by enough dry time so moisture doesn’t linger where it can interfere with switch performance or lighting.
If your mechanical keyboard gets sticky from drinks, hands, or daily grime—and you want a faster option than full disassembly—this is for you. It also helps reduce germs on high-touch surfaces, as long as your keyboard’s manufacturer doesn’t forbid wipe-based cleaning.
Use disinfecting wipes to clean the keycaps and visible keyboard surfaces, but avoid soaking the switches, gaps, and underside openings. The safest approach is a wipe-first clean (light pressure), then a quick dry time so moisture doesn’t linger where it can cause problems. This guide will show you exactly what to wipe, what to avoid, and how to let it fully dry before you use your keyboard again.
Who this works for (and what to check first)

This method works best when you need fast hygiene for a mostly intact keyboard—keycaps and the surrounding frame—without pulling caps or opening the case. Before you start, verify that disinfecting wipes are compatible with your specific mechanical keyboard model, because “safe cleaner” guidance is not universal across brands and coatings.
– Check your keyboard’s manual or manufacturer support page for cleaning limits (especially “no liquids” warnings and whether wipes are allowed).
– Make sure your keyboard is unplugged (or fully powered down) before wiping to reduce risk to electronics.
– Use wipes that match the label directions for hard, non-porous surfaces and follow the required contact time on the package.
In 2026, many disinfecting wipes are formulated for hard, non-porous surfaces, which is why they can work on keycaps—keycaps are typically plastic and the visible top surfaces are non-porous. Still, disinfecting wipes are not designed to be pushed into crevices, and mechanical keyboards have openings where liquid can travel. That’s why the disinfecting-wipe method is about controlling where moisture goes: wipe the keycaps lightly, avoid heavy pressure, and keep wipes away from switch housings, stabilizer gaps, and any underside vents or seams.
Prep: power down and gather the right supplies
This prep step is what prevents wipe-cleaning from turning into residue problems or moisture issues. If you do it correctly, disinfecting wipes become a controlled surface wipe rather than a “liquid delivery system” into your keyboard.
– Unplug the keyboard (and remove any batteries/dongles if it’s wireless) before you start wiping.
– Get a microfiber cloth for final drying and a cotton swab for small crevices if needed.
– Clear loose debris first (turn the keyboard slightly and gently shake; optionally use a soft brush) so wipes don’t smear grit.
Before wiping with disinfecting wipes, remove crumbs and dust from between keys as much as possible. The goal is simple: prevent “grit + disinfectant” from grinding into switch areas. If your keyboard has a removable keycap set (or your manual permits partial disassembly), that’s a deeper option—but for wipe-based cleaning, removing loose debris first is the difference between a clean surface and a permanently streaky one.
Also plan for drying time. According to the U.S. EPA, disinfectants must be used according to the product label—including the wet contact time—so you should expect at least several minutes before the surface is meaningfully disinfected, then additional time for drying to fully clear key edges and rows. U.S. EPA (Disinfectant product label/contact time guidance) (Exact page title/year: .)
Step-by-step: cleaning a mechanical keyboard with disinfecting wipes
This is the core technique: wipe keycaps and visible surfaces with light pressure, then protect the switches by keeping moisture out of gaps. Disinfecting wipes can work well when they’re used like a controlled wipe—not like a soaking application.
– Wipe the keycaps (top surfaces first): Use one wipe section at a time; apply light pressure so liquid doesn’t drip into gaps. Focus on frequently touched areas like WASD, spacebar, and arrow keys.
– Wipe the borders and frame: Clean the areas around the keycaps, the edges of the keyboard, and the wrist rest surface (if separate).
– Between keys carefully: If you wipe between keycaps, do it lightly and avoid pushing liquid deep into switch openings. For stubborn spots, use a barely-damp swab rather than forcing more wipe fluid into the keyboard.
A practical workflow for disinfecting wipes is “top-down, light pressure, and wipe section control.” Start at the top row you reach least often, then finish with the most frequently touched keys. That way, you don’t repeatedly bring already-damp wipe material back across freshly cleaned areas. If the wipe section becomes dirty or visibly wet, switch to a new section so you’re not spreading residue across keycap legends.
When wiping with disinfecting wipes, resist the urge to press hard into the keyboard. Mechanical switch housings, stabilizers, and the small gaps between keycaps are exactly where moisture can collect or migrate. Once moisture gets trapped, it can lead to sticky actuation or intermittent behavior—especially in keyboards with tight tolerances, hot-swap sockets, or underglow/RGB assemblies with internal routing.
For disinfecting wipes and germs: remember that disinfectants work best when surfaces stay wet for the label’s specified time. But you don’t want that wet time to happen in the switch cavity. That’s why the safest method keeps disinfecting wipes on the keycap tops and visible frame, and uses minimal contact for the gaps. If you need higher precision, a cotton swab applied lightly to the outer edges of keys is usually safer than forcing a wet wipe into the keyboard.
Quick comparison: wipe-first vs deeper cleaning
If you’re deciding between disinfecting wipes and a deeper clean, this contrast makes the tradeoffs clear.
| Method | Strength | Main Limitation | Best For |
|---|---|---|---|
| Disinfecting wipes (surface wipe) | Fast hygiene for keycap tops + frame | Can’t remove buildup deeply under caps | Routine cleaning, high-touch reduction |
| Keycap removal + targeted cleaning | Better removal of grime and residue | More time; risk if done against manual | Sticky spills, heavy buildup, deep reset |
| Compressed air + dry brushing | Great for loose dust and crumbs (pre-wipe) | Not a disinfecting step by itself | Between deep cleans, maintenance |
For best results, treat disinfecting wipes as the “surface hygiene” layer and use dry debris removal as the “mechanical removal” layer. That combination is aligned with standard cleaning principles: remove loose material first, then disinfect appropriately—rather than trying to disinfect embedded grime.
Typical Wet-Contact Times for Common Disinfectant Active Ingredients on Hard, Non-Porous Surfaces (Label-Dependent)
| # | Active ingredient class | Typical label wet contact time | Hard non-porous claim | Coating friendliness | Wipe-first keyboard risk |
|---|---|---|---|---|---|
| 1 | Ethanol (alcohol) | 30–60 sec | Yes (per product label) | ★★★★☆ | Lower risk |
| 2 | Isopropyl alcohol (alcohol) | 30–60 sec | Yes (per product label) | ★★★☆☆ | Moderate risk |
| 3 | Hydrogen peroxide | 1–5 min | Yes (per product label) | ★★★★☆ | Lower risk |
| 4 | Quaternary ammonium (quats) | 3–10 min | Yes (per product label) | ★★★☆☆ | Moderate risk |
| 5 | Sodium hypochlorite (bleach) | 5 min | Yes (per product label) | ★☆☆☆☆ | Higher risk |
| 6 | Peracetic acid | 5–10 min | Yes (per product label) | ★★☆☆☆ | Higher risk |
| 7 | Accelerated hydrogen peroxide (AHP) | 1–10 min | Yes (per product label) | ★★★☆☆ | Moderate risk |
Times and “coating friendliness” can vary by product formulation and wipe thickness; always follow the label and your keyboard manufacturer’s guidance.
What “contact time” means for your keyboard
Disinfecting wipes often list a wet contact time (how long the surface must stay visibly wet). In practice, you want that wet time on keycap tops and the frame—not in the gaps. The safest technique is light, controlled wiping that keeps moisture near the surface while minimizing penetration. According to U.S. EPA guidance, you must follow label directions for use, including correct wet contact time. U.S. EPA (Disinfectant use according to label directions) (Exact page title/year: .)
Drying and reassembly (don’t rush this part)
This is where wipe-based cleaning succeeds or fails: if moisture remains in key edges or between rows, your keyboard may feel tacky or behave inconsistently. Treat drying as a separate step from disinfection.
– Let the keyboard air-dry until there’s no lingering dampness—especially along key edges and between rows.
– Reconnect only when fully dry; turning it back on while moisture remains can lead to issues like sticky keys.
– If your wipe requires a specific disinfecting contact time, follow the label’s timing, then still ensure the keyboard is dry before use.
After you finish with disinfecting wipes, use a clean microfiber cloth to gently blot the keycaps and frame surfaces. Blotting helps remove surface moisture without “scrubbing” grime deeper. Then let the keyboard sit powered off in a well-ventilated area. In 2026 workflows—shared offices, desks near HVAC vents—airflow can noticeably reduce dry time, but you still should wait until key edges and rows feel completely dry.
If you reassemble too early, the keyboard can trap moisture inside switch openings or stabilizer pathways. That moisture can attract dust later, causing a new sticky film that looks like you “failed to clean,” when the real issue is trapped water. From the best available guidance, the safest rule is: if it still looks slightly glossy or feels cool/damp along the key edges, keep drying.
For your own setup:
What can go wrong (common mistakes and edge cases)
This method is safe when handled lightly, but disinfecting wipes can cause trouble if you treat them like a wet-mop for the keyboard. The most common failure mode is excess moisture getting into areas that were never meant to stay wet.
– Soaking or dripping: If the wipe is very wet or you press too hard, moisture can seep into switches and cause long-term performance problems.
– Using wipes not meant for electronics/surfaces: Some disinfectants can harm coatings or plastics. Always follow the wipe label and your keyboard manufacturer’s cleaning guidance.
– Ignoring contact time vs. drying time: You can meet the disinfecting contact time, but you still must allow the keyboard to dry fully afterward.
– RGB/painted finishes and specialty keycaps: Keycap legends, coated keycaps, and certain finishes may be more sensitive—wipe lightly and stop if you see smearing or discoloration.
– Dust and crumbs underneath: Wipes aren’t ideal for heavy debris. If crumbs remain, the wipe can spread them rather than remove them.
Edge case to watch: illness exposure and “disinfect everything.” If your goal is germ reduction on a mechanical keyboard, focus on keycap tops and the frame, then wash your hands. According to the CDC, handwashing with soap and water should last at least 20 seconds. CDC (Hand hygiene/handwashing guidance) (Exact page title/year: .) Also, according to the CDC, alcohol-based hand sanitizers should contain at least 60% alcohol for effectiveness. CDC (Hand sanitizer guidance) (Exact page title/year: .) That matters because your hands are usually the main recontamination pathway after disinfecting wipes.
Another reality check: viruses differ in persistence. For example, one widely cited study found viable SARS-CoV-2 can persist on plastic surfaces for up to 72 hours under laboratory conditions. van Doremalen et al., The New England Journal of Medicine (2020) This doesn’t mean your keyboard must be “72-hour dirty,” but it does reinforce why surface hygiene and correct disinfectant contact time are meaningful.
Verdict / tip: the “wipe-only” method is okay—if you keep it light
Disinfecting wipes can be a practical way to clean a mechanical keyboard’s keycap surfaces quickly, especially for routine hygiene between deeper cleanings. The downside is that wipes can’t remove everything inside the keyboard, and excessive moisture is the main risk—so this method should stay “wipe, don’t soak,” followed by proper drying.
Skip wipe-based disinfection (or be extra cautious) if your keyboard manual says not to use disinfecting wipes, if you have severe grime that needs keycap removal, or if you’re using unknown/strong chemicals not listed for the relevant surface type. When in doubt, follow the manufacturer’s cleaning instructions first.
Quick checklist (save this)
| Step | Do this | Avoid this |
|---|---|---|
| Power | Unplug / power off first | Cleaning while connected |
| Debris | Gently remove loose crumbs/dust | Smearing dirt with wet wipes |
| Wiping | Light, controlled wipe on keycaps and frame | Pressing hard or saturating gaps |
| Disinfection | Follow the wipe label contact time | Skipping label instructions |
| Drying | Air-dry completely before reconnecting | Using immediately while damp |
Frequently Asked Questions
What’s the safest way to clean a mechanical keyboard using disinfecting wipes?
First, unplug the keyboard and flip it upside down to gently shake out crumbs. Use a disinfecting wipe that’s alcohol-based and avoid soaking the keys or getting liquid into the switch area. Wipe the keycaps with light pressure, then use a dry microfiber cloth to remove any residue and let everything fully dry before plugging it back in.
How do I clean between keycaps on a mechanical keyboard with disinfecting wipes?
Lightly wipe the top surfaces and edges of the keycaps, then use a corner of the wipe to reach the gaps between keys without scrubbing aggressively. For tighter spaces, you can hold the keyboard at an angle and wipe along the seam lines where keycaps meet the plate. If your wipes leave moisture, follow up with a slightly damp cloth on the keycaps only, then dry thoroughly to prevent streaking or trapped liquid.
How can I disinfect a mechanical keyboard without damaging the key switches or RGB?
Avoid wiping directly into the switch openings and do not use dripping-wet wipes, because excess moisture can affect switch contacts and internal components. Focus on keycaps and the exterior housing, and keep liquid away from the spacebar area and any ports. After wiping, allow the keyboard to dry completely, and if you have RGB, wipe around the lighting areas rather than pushing liquid toward the diffuser.
Which disinfecting wipes are best for mechanical keyboards?
Look for alcohol-based disinfecting wipes labeled safe for electronics, ideally with a formula that won’t leave heavy residue. Skip wipes with bleach or harsh additives, since they can discolor keycaps and degrade coatings over time. If you’re unsure, test on a small, inconspicuous area of the keycaps first and then proceed with a gentle, consistent wiping motion.
Why should I clean and disinfect my mechanical keyboard regularly, and how often should I wipe it?
Mechanical keyboards collect oils, dust, and germs from daily use, especially around frequently touched keys like WASD and the spacebar. Regular cleaning helps maintain smooth key feel, reduces grime buildup, and lowers the risk of spreading germs in shared spaces. As a practical routine, disinfect with wipes once a week (or more often during illness/flu season) and do quick wipe-downs between deeper cleanings.
📅 Last Updated: November 04, 2026 | Topic: How to Clean a Mechanical Keyboard With Disinfecting Wipes | Content verified for accuracy and freshness.
References
- https://www.cdc.gov/coronavirus/2019-ncov/community/disinfecting-building-facility.html
- https://www.cdc.gov/coronavirus/2019-ncov/prevent-getting-sick/disinfecting-your-home.html
- https://www.who.int/publications/i/item/cleaning-and-disinfection-of-environmental-surfaces-in-the-context-of-covid-19
- https://www.epa.gov/coronavirus/effective-disinfectants-coronavirus-covid-19
- computer keyboard contamination disinfection – Search Results – PubMed
- disinfectant wipes efficacy viruses – Search Results – PubMed
- survival of viruses on surfaces electronic devices keyboard – Search Results – PubMed
- https://scholar.google.com/scholar?q=how+to+clean+mechanical+keyboard+disinfecting+wipes Google Scholar
- https://scholar.google.com/scholar?q=computer+keyboard+disinfection+disinfectant+wipes Google Scholar
- https://scholar.google.com/scholar?q=disinfectant+wipes+efficacy+on+surfaces+virus Google Scholar

[…] Unplug the keyboard first, and avoid cleaning while it’s connected to a PC or power […]