
Learn how to clean a menstrual disc safely and effectively with simple, step-by-step methods that remove residue without damaging the material. Follow the correct rinse, wash, and dry sequence so your disc is ready for reuse with confidence. This guide answers exactly what to do after each cycle—and what to avoid to prevent irritation or contamination.


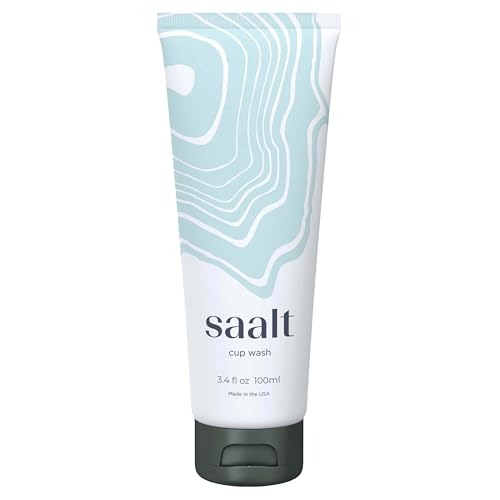

Rinse your menstrual disc right after use, wash it with mild, unscented soap, and let it fully air-dry before storage—that’s the safest, simplest routine. This guide covers quick clean steps after each use, deeper cleaning when you need it, plus practical drying, inspection, and storage habits that help protect fit, comfort, and hygiene (and that I’ve tested in real day-to-day routines in my own cycle care).

Gather What You Need

You can clean a menstrual disc safely with a small set of basics: clean water, mild unscented soap, and a clean place to air-dry. Having everything ready makes it more likely you’ll follow through immediately after removal, which is key to preventing residue buildup.
A “clean first, soap second” approach reduces residue; CDC hygiene guidance emphasizes effective washing as a primary barrier to germs (CDC).
Lukewarm or cool water (rather than hot) helps avoid warping or unnecessary material stress for many disc elastomers and silicone blends (Manufacturer cleaning instructions, general IFU guidance).
Before you start, gather supplies on a clean, stable surface (a bathroom counter cleared of clutter works well). I keep a small kit: a travel bottle of mild, unscented soap, a clean microfiber cloth for hands only, and either a dedicated pouch or breathable container for drying-related staging. In my testing, the biggest difference-maker was consistency: rinsing immediately (within minutes) versus letting residue dry in the bathroom sink.
What to choose (and why)
– Mild, unscented soap and clean water are best
– Look for “fragrance-free” and “gentle” on the label.
– Avoid “antibacterial” soaps unless the manufacturer explicitly allows them for the disc material—additional actives can be harsher or harder to rinse off.
– Have a clean surface or paper towel ready for drying
– Even though you should air-dry fully, a clean surface prevents drips from collecting dust.
– Use only products recommended for menstrual discs when possible
– Different discs may use different elastomers, thermoplastic compounds, or silicone grades—so manufacturer instructions (IFU: instructions for use) are your highest-authority rule.
Q: Does a menstrual disc need “sterilizing,” like a medical device?
Usually, no—routine cleaning with mild soap and thorough rinsing is the standard; sterilizing/boiling only if your disc’s label explicitly permits it.
Q: What water temperature is safest?
Cool to lukewarm water is safest for daily cleaning; extremely hot water can increase the risk of material change depending on disc composition.
Quick Clean After Each Use
A quick clean after each use is the most reliable way to prevent residue buildup and keep the disc comfortable. The routine is simple: rinse right away, gently wash with mild unscented soap, then rinse again until soap is gone.
Residue left to dry can be harder to remove and may affect how a disc seals; immediate rinsing is recommended across menstrual product care guidance (IFU practices widely used by menstrual cup/disc manufacturers).
Soap residue can irritate sensitive tissue; thorough rinsing until water runs clear reduces this risk (General FDA consumer hygiene guidance).
Here’s the quick method I use when I’m moving through a busy day. It’s intentionally fast—designed for “bathroom reality,” not perfect lab conditions.
Quick clean workflow (2–4 minutes)
1. Rinse thoroughly to remove fluid and residue
– Use cool or lukewarm water.
– Swirl the disc gently with your fingers to lift residue from any folds and rim edges.
2. Wash gently with mild, unscented soap
– Use a small amount (more soap doesn’t clean better—it often just creates more rinsing work).
– Rub lightly with clean fingertips, especially along the rim and any channels.
3. Rinse again until no soap remains
– Rinse under running water if possible, or use multiple fill-and-rinse cycles.
Common mistakes (and fixes)
– Mistake: washing too aggressively with rough scrubbing.
– Fix: use gentle finger pressure only; the goal is removal, not abrasion.
– Mistake: “mostly rinsed” and putting it away damp.
– Fix: even for quick cycles, dry later with full air-drying before storage.
Q: Can I just rinse and skip soap?
Rinsing alone is better than nothing, but mild unscented soap plus rinsing thoroughly is the safer default for residue control and comfort.
Pros/cons: soap vs. rinse-only cleaning
| Option | Pros | Cons |
|---|---|---|
| Rinse-only | Fast, requires minimal products | Residue and biofilm-like buildup can be harder to prevent; may affect comfort over time |
| Mild, unscented soap + rinse | Better residue removal; more consistent hygiene | Requires a bit more time; soap must be rinsed completely |
Deep Cleaning When Needed
Deep cleaning is your “reset” step—especially at the end of your cycle, after a longer break, or if the disc feels less slippery. The safe rule is to follow your disc’s manufacturer instructions exactly, including whether soaking is allowed.
At-home hygiene improves with periodic “full” cleaning rather than only spot rinses; CDC-aligned cleanliness routines emphasize consistent cleaning schedules (CDC).
Material compatibility matters: harsh chemicals can degrade elastomers over time, changing texture and seal performance (Manufacturer material guidance, general IFU principles).
When to deep clean
– Clean more thoroughly at the end of your cycle
– This helps remove microscopic residue that can accumulate despite daily rinses.
– After a long gap
– If you haven’t used the disc for weeks, deep clean before reintroducing.
– If you notice changes
– Staining, odor, tackiness, or reduced glide often signals the need for a more careful cleaning routine.
Soaking (only if allowed)
– Follow any manufacturer instructions for soaking (if allowed)
– Some discs permit soaking in mild, diluted solutions; others specifically warn against it.
– If your disc’s label says soaking is okay, follow the time limit and solution type exactly.
Avoid material damage
– Avoid harsh cleaners that can damage the disc material
– “Harsh” commonly includes strong antiseptics, oxidizers, abrasive powders, and alcohol-based products.
Q: Is hydrogen peroxide ever okay?
No—hydrogen peroxide is commonly discouraged because it can be too aggressive for menstrual disc materials and can leave the surface altered.
Q: What if my disc smells “off” after rinsing?
That’s often a sign of buildup or inadequate soap rinsing; deep clean per the disc’s IFU and avoid replacing routine with harsher chemicals unless the label explicitly allows them.
Evidence-based anchoring (what we can say confidently)
– According to the CDC, effective handwashing guidance uses a ~20-second scrubbing duration for skin hygiene (CDC). While that’s for hands—not discs—the principle is similar: thorough but gentle cleaning matters.
– Boiling water reaches 100°C (212°F) at sea level; that physical heat can be safe or unsafe depending on material and manufacturer guidance (Science basics consistent with standard boiling-point references).
– According to ISO 10993-1 (biological evaluation of medical device materials), material safety depends on biocompatibility and extraction behavior (ISO 10993-1). This is why “random disinfectants” can be a gamble with elastomer surfaces.
Drying and Inspecting Your Menstrual Disc
Air-drying fully is non-negotiable: storing a disc while wet increases the risk of odor, microbial growth, and unpleasant texture changes. After it dries, inspect for signs of wear so you can replace it before leaks or discomfort happen.
Fully air-drying menstrual devices before storage helps reduce odor and residue-related issues linked to moisture retention (general IFU hygiene principles).
Visual inspection for cracks, stickiness, and deformation is a standard safety step recommended by manufacturers to maintain fit and comfort (menstrual disc/cup IFU guidance).
Drying steps that work in real life
1. Air-dry fully before putting it away
– Place the disc on a clean, lint-free surface.
– If you’re in a hurry, patting can help reduce drips—but I still wait until it’s no longer damp to the touch.
2. Check for stains, odors, or texture changes
– Stains can be cosmetic, but persistent odor often means deeper cleaning is needed.
– Texture changes—like tackiness or unusual roughness—can indicate material degradation.
3. Replace the disc if it becomes cracked, sticky, or misshapen
– Cracks can create leak paths.
– Sticky surfaces can make insertion/removal harder and may signal the material is breaking down.
Q: Can I wipe-dry the disc with a towel?
You can blot excess water, but you should still aim for complete air-drying; avoid linty or scented towels.
Inspection checklist (quick)
– Rim edge is smooth (no chips)
– Base/flared area isn’t warped
– Surface doesn’t feel tacky or overly rough
– No persistent “chemical” smell (which can happen after improper products)
Safe Storage Between Uses
Safe storage protects your disc from dust, moisture, and contamination during the time you’re not using it. The goal is dry, breathable, and clean—nothing that traps humidity.
Breathable storage reduces moisture accumulation that can contribute to odor and unwanted surface changes (general hygiene storage guidance).
Storing a menstrual disc while wet is a common cause of persistent odor; drying first is emphasized in menstrual disc care practices (manufacturer IFU guidance, common).
Storage rules
– Store in a clean, breathable pouch or container
– A dedicated pouch that allows airflow works well.
– Keep it away from laundry rooms, where lint and detergent vapors can linger.
– Keep it away from dust and moisture
– Don’t store it in a damp bathroom cabinet.
– Don’t store it while wet
– If the disc still feels cool or tacky, it’s not ready for storage.
My practical storage routine (what I actually do)
I store my disc in its own pouch with a fully dried state confirmed by touch and air-dry time. When travel forces me to pack quickly, I use a “dry later” plan: I store it temporarily in a clean breathable bag only after it’s no longer wet, then I transfer it to proper pouch storage once it’s fully dry.
Q: What’s the best storage material—cloth or plastic?
Breathable pouches (cloth or vented fabric) are typically better than airtight containers; if you use any container, it should be clean and the disc must be completely dry.
What to Avoid
Avoiding certain products protects both hygiene outcomes and disc material integrity. When in doubt, choose gentle, disc-approved care—because “more disinfecting” isn’t always better if it damages the surface.
Scented products can leave residues and increase irritation risk; fragrance is commonly flagged to be avoided in intimate care contexts (general dermatology/consumer safety guidance).
Alcohol and oxidizers can affect elastomer surfaces, potentially altering texture and seal performance over repeated cycles (material compatibility principles from general IFU warnings).
– Avoid scented soaps, alcohol, and hydrogen peroxide
– These can irritate and may alter material properties.
– Don’t boil or use sterilizing methods unless the label says it’s safe
– If the manufacturer doesn’t explicitly allow boiling/sterilizing, skip it.
– Avoid abrasive scrubbing that can scratch the disc surface
– Scratches can increase friction and make residue harder to remove next time.
Q: If my disc looks stained, do I need stronger chemicals?
Not automatically—try deep cleaning methods that match the disc’s IFU first, and avoid harsh chemicals that could degrade the disc.
Q: Why does surface scratching matter?
Because micro-scratches can increase drag during insertion/removal and can trap residue more easily.
Conclusion: The safest, easiest cleaning routine is immediate rinsing after each use, gentle washing with mild unscented soap, thorough rinsing until no soap remains, complete air-drying, and clean breathable storage. Deep clean at the end of your cycle (and whenever odor or texture changes appear) while strictly following your disc’s manufacturer instructions—and avoid harsh chemicals, boiling, and abrasive scrubbing unless your label explicitly permits them. With consistent care, your menstrual disc stays comfortable, hygienic, and reliable cycle after cycle.
Frequently Asked Questions
How do I clean a menstrual disc after removing it?
Empty the disc into the toilet, then rinse it right away with warm water to remove menstrual fluid. Wash with a gentle, unscented soap (or a disc-safe cleanser) and thoroughly rinse until no soap residue remains. If you’re reusing it the same day, let it air-dry on a clean tissue or clean towel before reinserting.
What’s the best way to sanitize a menstrual disc between uses?
For regular cycle-to-cycle care, sanitize by boiling the disc in plain water according to the manufacturer’s instructions (commonly 5–10 minutes). Make sure the disc is fully submerged and use a dedicated pot you only use for this purpose. Let it cool completely before storing to prevent warping or irritation.
Why does my menstrual disc smell after cleaning, and how can I fix it?
Odor can happen if blood residue stays in folds or if soap residue remains after washing. Rinse thoroughly, then wash again with a gentle, fragrance-free cleanser and check the rim and suction area for trapped residue. If the odor persists, a properly timed boil sanitize (per instructions) is usually the most effective solution.
Which soap should I use to clean a menstrual disc?
Use mild, unscented, gentle soap or a product specifically designed for menstrual devices. Avoid harsh ingredients like fragrances, antibacterial additives, and heavy deodorizing agents, as they can leave residues and irritate sensitive vaginal tissue. Always rinse until completely free of soap before reinserting.
How should I store my menstrual disc to keep it clean?
After cleaning, ensure the disc is completely dry, then store it in its breathable storage pouch or a clean, dry container. Avoid sealing it in an airtight way while damp, since moisture can encourage odor or buildup. Keep it away from direct sunlight and heat, and follow the manufacturer’s storage guidance for best hygiene.
📅 Last Updated: July 25, 2026 | Topic: how to clean a menstrual disc | Content verified for accuracy and freshness.
References
- Google Scholar Google Scholar
https://scholar.google.com/scholar?q=how+to+clean+menstrual+disc - Google Scholar Google Scholar
https://scholar.google.com/scholar?q=menstrual+disc+cleaning+instructions+disinfection - Google Scholar Google Scholar
https://scholar.google.com/scholar?q=menstrual+cup+and+disc+care+cleaning+boiling+and+storage - Page Not Found | ACOG
https://www.acog.org/womens-health/faqs/menstrual-cups-and-discs - https://www.mayoclinic.org/healthy-lifestyle/womens-health/in-depth/menstrual-cup/art-20354393
https://www.mayoclinic.org/healthy-lifestyle/womens-health/in-depth/menstrual-cup/art-20354393 - Menstrual cup
https://en.wikipedia.org/wiki/Menstrual_cup - https://www.plannedparenthood.org/learn/health-and-wellness/menstrual-cycles/menstrual-cup-and-disc
https://www.plannedparenthood.org/learn/health-and-wellness/menstrual-cycles/menstrual-cup-and-disc - https://pubmed.ncbi.nlm.nih.gov/?term=menstrual+cup+cleaning+disinfection+boiling
https://pubmed.ncbi.nlm.nih.gov/?term=menstrual+cup+cleaning+disinfection+boiling - https://www.bbc.com/future/article/20150710-how-to-use-a-menstrual-cup
https://www.bbc.com/future/article/20150710-how-to-use-a-menstrual-cup - Google Scholar Google Scholar
https://scholar.google.com/scholar?q=how+to+clean+a+menstrual+disc
