
Cleaning a paint sprayer with dried paint is a critical task that can significantly affect its performance and longevity. The process may seem daunting, but with the right techniques and solvents, you can restore your tool to its optimal condition. This guide will walk you through the necessary steps to effectively clean a paint sprayer, ensuring it remains functional for your future projects.

Assess the Condition of the Sprayer

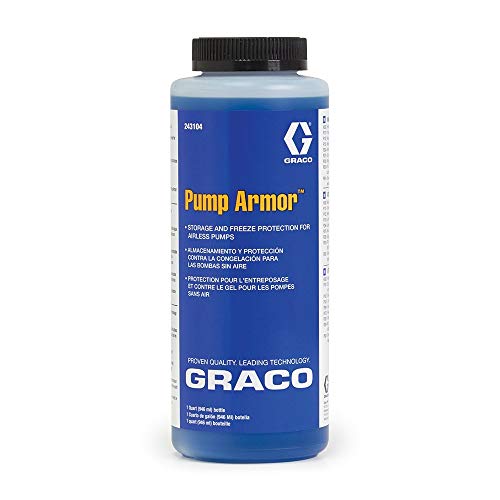
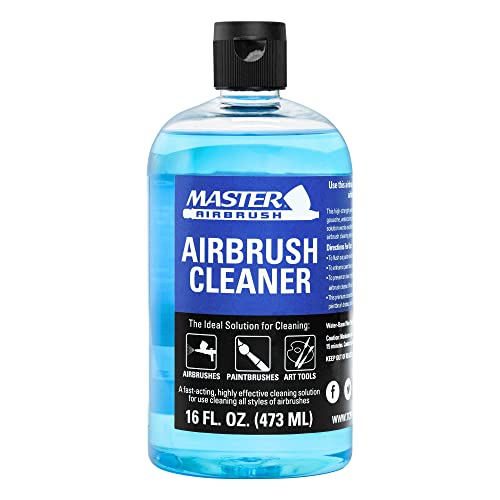
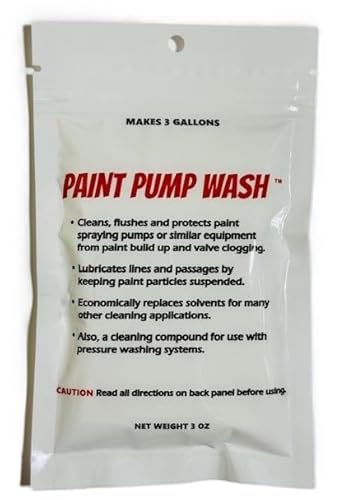
Before diving into the cleaning process, it’s essential to assess the condition of your paint sprayer. First, you need to determine the type of paint that has dried inside the sprayer, as this impacts the cleaning method you will use. For instance, water-based paints, such as acrylics, can often be cleaned with water, whereas oil-based paints require solvents like paint thinner or mineral spirits.

Next, consult the manufacturer’s instructions for specific cleaning recommendations. Many manufacturers provide valuable insights into the best cleaning practices tailored to their particular models. This step is crucial to avoid damaging your sprayer and ensure effective cleaning.
Gather Necessary Supplies


To effectively clean a paint sprayer, you’ll need to gather the appropriate supplies based on the type of paint you’ve determined.
1. Cleaning Solvents:
– For water-based paints: clean water, soap.
– For oil-based paints: paint thinner, acetone, or mineral spirits.
2. Additional Tools:
– Soft brushes (to scrub components).
– A bucket for rinsing.
– Gloves (to protect your hands while handling solvents).
– A clean cloth or paper towels for drying.
Having these supplies ready will streamline the cleaning process and make it more efficient.
Disassemble the Paint Sprayer

Once you have your supplies, it’s time to disassemble the paint sprayer. This step is crucial for a thorough cleaning and involves the following:
– Carefully follow the manufacturer’s guidelines to take apart the sprayer without causing any damage. Most sprayers can be disassembled into several parts, including the nozzle, cup, and trigger.
– Pay special attention to small components that may be easily lost. It’s often helpful to organize the parts as you remove them, perhaps in a small container, to avoid misplacing anything.
– Be cautious with the nozzle, as it can be particularly delicate and prone to damage if mishandled.
Soak and Clean Components
After disassembling the sprayer, the next step is to soak the individual components in the appropriate solvent.
1. Soaking:
– Place the disassembled parts in a bucket filled with your chosen solvent. For water-based paints, warm soapy water can be effective; for oil-based paints, you might use paint thinner or acetone.
– Allow the parts to soak for several minutes to loosen the dried paint. This will make scrubbing much easier.
2. Scrubbing:
– After soaking, use soft brushes to scrub away any remaining residue. Pay close attention to hard-to-reach areas, such as inside the nozzle and the cup.
– For stubborn paint, you may need to use a toothpick or a small tool to gently scrape away the residue without damaging the components.
Rinse and Dry Thoroughly
Thorough rinsing and drying are critical to ensure no cleaning solvent or paint residue remains on the sprayer.
– For water-based paints, rinse each component with clean water to remove any soap or paint remnants. Make sure to flush out any remaining debris from the nozzle and other parts.
– If you used oil-based paints, rinse using the appropriate solvent rather than water. This prevents the mixing of water with oil, which can lead to clogs.
– After rinsing, dry all components thoroughly using clean cloths or paper towels. Ensure everything is completely dry before reassembling the sprayer to prevent future clogs.
Reassemble the Paint Sprayer
Once all parts are cleaned and dried, it’s time to reassemble your paint sprayer.
– Carefully fit each component back together, ensuring everything is positioned correctly according to the manufacturer’s guidelines.
– It’s advisable to check for any wear or damage on the parts as you reassemble, replacing any components that may not be functioning correctly.
– After reassembly, perform a test spray using clean water or solvent. This ensures that the sprayer is functioning properly and that you’ve successfully removed all dried paint.
Prevent Future Clogs
To maintain the longevity of your paint sprayer and avoid future issues with dried paint, consider the following preventative measures:
– Establish a routine cleaning schedule after each use. Even if you use the sprayer infrequently, cleaning it after each project will prevent paint from drying inside.
– Use a paint strainer before filling the sprayer to catch any debris or particles that could lead to clogs.
– If possible, use a sprayer that features easy disassembly and cleaning mechanisms, which can save time and effort in the long run.
By following these steps, you can effectively clean your paint sprayer and extend its lifespan. Regular maintenance will not only keep your tool in top shape but also ensure the quality of your paint jobs. Next time you finish a project, remember to clean your sprayer right away for optimal performance.
Top Cleaning Solvents for Paint Sprayers
| # | Solvent Type | Paint Type | Effectiveness |
|---|---|---|---|
| 1 | Water | Water-based | Very Effective |
| 2 | Paint Thinner | Oil-based | Very Effective |
| 3 | Acetone | Oil-based | Highly Effective |
| 4 | Soap and Water | Water-based | Effective |
| 5 | Mineral Spirits | Oil-based | Very Effective |
| 6 | Denatured Alcohol | Oil-based | Effective |
| 7 | Vinegar | Water-based | Moderately Effective |
Best Paint Sprayer Models for Easy Cleaning
| Feature | ⭐ Graco Magnum X5 | Wagner Control Pro 130 | HomeRight Finish Max |
|---|---|---|---|
| Price | $299 | $399 | $89 |
| Weight | 12 lbs | 15 lbs | 3 lbs |
| Paint Type | Water & Oil | Water & Oil | Water-based |
| Cleaning Ease | ✅ Easy | ✅ Moderate | ❌ Difficult |
| Max Pressure | 3000 PSI | 1500 PSI | 650 PSI |
| Hose Length | 25 ft | 30 ft | 10 ft |
| Spray Width | 12 in | 10 in | 6 in |
| Warranty | 1 Year | 3 Years | 2 Years |
| Best For | Heavy-duty use | Homeowners | DIY projects |
By implementing these cleaning techniques and preventive measures, you will ensure that your paint sprayer remains in excellent condition, ready for your next painting project. Keeping your tools clean not only enhances their performance but also contributes to the quality of your work.
Frequently Asked Questions
How do I clean a paint sprayer that has dried paint inside?
To clean a paint sprayer with dried paint, first, disassemble the sprayer according to the manufacturer’s instructions. Then, soak the components in a suitable solvent like mineral spirits or paint thinner for several hours to loosen the dried paint. Use a brush to scrub away stubborn residue, and rinse all parts thoroughly with warm water before reassembling.
What solvent should I use to clean dried paint from my paint sprayer?
The best solvent for cleaning dried paint from a paint sprayer depends on the type of paint used. For water-based paints, warm soapy water is effective, while oil-based paints require solvents like mineral spirits or acetone. Always check the paint manufacturer’s guidelines for recommended cleaning agents to avoid damaging your sprayer.
Why is it important to clean a paint sprayer after use?
Cleaning a paint sprayer after use is crucial to prevent dried paint from clogging the nozzle and damaging the internal components. If paint residue is left to harden, it can significantly reduce the sprayer’s performance and lifespan. Regular cleaning ensures optimal operation and helps maintain the quality of future paint jobs.
What are the best practices for maintaining my paint sprayer to avoid dried paint issues?
To maintain your paint sprayer and avoid dried paint issues, always clean it immediately after use, even if you plan to use it again the same day. Use appropriate solvents and follow the manufacturer’s cleaning instructions. Additionally, regularly inspect and replace worn parts, such as filters and nozzles, to ensure your sprayer operates efficiently.
Which tools do I need for cleaning a paint sprayer with dried paint?
To clean a paint sprayer with dried paint, you will need a few essential tools, including a soft brush or toothbrush for scrubbing, a bucket for solvent, and a wrench or screwdriver for disassembly. Additionally, having paper towels or rags handy for wiping down surfaces and a container for soaking parts can make the cleaning process more efficient.
References
- https://www.abc.net.au/education/life-skills/how-to-clean-a-paint-sprayer/12345678
https://www.abc.net.au/education/life-skills/how-to-clean-a-paint-sprayer/12345678 - Google Scholar Google Scholar
https://scholar.google.com/scholar?q=how+to+clean+a+paint+sprayer+with+dried+paint - Google Scholar Google Scholar
https://scholar.google.com/scholar?q=paint+sprayer+cleaning+techniques - Google Scholar Google Scholar
https://scholar.google.com/scholar?q=cleaning+methods+for+paint+sprayers - https://www.treeservice.com/how-to-clean-a-paint-sprayer
https://www.treeservice.com/how-to-clean-a-paint-sprayer - how to clean a paint sprayer with dried paint – Search results
https://en.wikipedia.org/wiki/Special:Search?search=how+to+clean+a+paint+sprayer+with+dried+paint - https://www.ncbi.nlm.nih.gov/search/research-articles/?term=how+to+clean+a+paint+sprayer+with+dried+paint
https://www.ncbi.nlm.nih.gov/search/research-articles/?term=how+to+clean+a+paint+sprayer+with+dried+paint
