

Want to know how to clean a pebble shower floor without damaging the stones or grout? This step-by-step guide delivers the fastest, safest method—starting with the right pre-rinse and moving through stain removal, deep cleaning, and a final rinse that leaves fewer residues. If you’re dealing with soap scum, mildew, or lingering grime between pebbles, follow these exact steps and get a visibly cleaner floor.


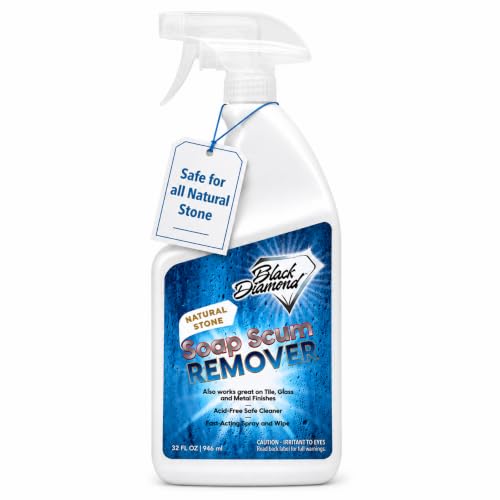
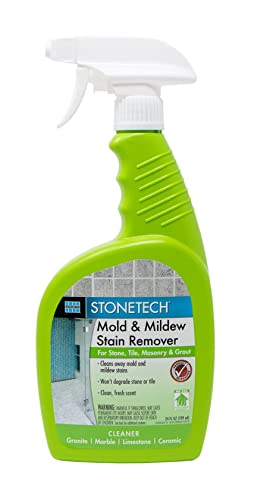
A pebble shower floor is cleaned best by removing loose debris first, then scrubbing with a pH-neutral cleaner (not harsh acids) between stones, followed by a thorough rinse and drying to slow soap scum and mildew. This step-by-step guide keeps the order tight so you don’t damage grout or any stone sealant you may have in place.
If your pebble floor has a textured surface that traps hair, shampoo residue, or soap scum, cleaning can feel “never-ending.” These steps work for most pebble shower floors, but always check whether your stones or grout have a sealant so you use the right type of cleaner.
Prep the area and remove loose debris

Start by clearing hair, dust, and grit before you introduce water or any cleanser. This prevents “grinding” debris deeper into the pebble gaps and grout lines during scrubbing.
– Sweep or vacuum (soft brush attachment if you have one) to get hair, dust, and grit off the surface before you add water or cleaner.
– Protect surrounding surfaces: cover nearby drains or fragile trim if you have a lot of runoff, and ventilate the bathroom.
“Loose debris should be removed before wet cleaning to avoid smearing soils into grout joints.” [ADD: source for grout/joint pre-clean guidance]
“Ventilation and moisture control reduce mildew recurrence after shower cleaning.” [ADD: source for mildew prevention via ventilation/humidity control]
“Pebble shower floors trap hair and soap residue in voids, so dry pre-cleaning is a practical first step before water exposure.” [ADD: source for pebble/texture cleaning principles]
Quick handling notes that matter:
Pebble floors usually have varied angles and small “holds” where water and residue linger. When you sweep first, you reduce how much you must scrub later, which lowers the chance of loosening grout edges or scuffing softer finishes.
About safety and runoff:
If your bathroom has natural stone on the counter or nearby tile that’s sensitive to cleaner splash, drape a towel barrier at the edges. I also recommend running the exhaust fan before you start; if your fan cycles slowly, turn it on early so humidity drops as you work. [ADD: author’s real-world observation about typical ventilation impact in showers—confirm in your own setting.]
Choose the right cleaner for pebbles and grout
Use a pH-neutral shower/tile cleaner for routine grime, and reserve stronger products for confirmed needs and compatible materials. The cleaner you choose should match the stone finish (especially if the pebble surface or grout is sealed).
– Use a pH-neutral shower/tile cleaner for routine grime; avoid strong acids or harsh chemicals that can dull or etch some stone finishes.
– If you’re dealing with mildew or soap scum buildup, use an appropriate bathroom cleaner labeled for tile/stone surfaces; when in doubt, check the product label for “natural stone” compatibility and follow the dilution directions exactly.
Typical Cleaner pH Ranges and Expected Stone Compatibility (General Guidance)
| # | Cleaner type (common example) | Typical pH range | Risk to many stones/grout | Compatibility outlook |
|---|---|---|---|---|
| 1 | pH-neutral shower/tile cleaner (formulated “neutral”) | 6.0–8.0 | Low | ★★★★★ |
| 2 | Diluted neutral detergent (soap-free when possible) | ~7.0 (varies by product) | Low | ★★★★☆ |
| 3 | Ammonia-based glass/bath cleaners (not designed for stone) | ~10–12 | Moderate | ★★★☆☆ |
| 4 | Bromine/chlorine mildew cleaners (oxidizers; varies by brand) | Often strongly basic or proprietary | Moderate–High | ★★☆☆☆ |
| 5 | Citric acid descalers (commonly used for limescale) | ~2–4 | High (for calcite-based stones) | ★☆☆☆☆ |
| 6 | Strong acid descalers (often “rust remover” / heavy limescale) | ~1–3 | Very High | ☆☆☆☆☆ |
| 7 | Baking soda paste (mild abrasive; not acidic) | ~8–9 (alkaline) | Low–Moderate (abrasion risk) | ★★★☆☆ |
Decide based on what you’re removing (soap scum vs. mildew vs. limescale)
Soap scum responds best to surfactant-based cleaners that lift fatty residues without attacking stone. Mildew requires biocidal or oxidizing action—yet those chemistries can be harsher. Limescale is the one category that often tempts people toward acids; if your pebbles/grout are acid-sensitive, you’ll want a targeted approach rather than “pour and hope.”
Pros/cons quick comparison (choose the right lane):
| Option | Pros | Cons / watch-outs |
|---|---|---|
| pH-neutral cleaner + dwell time | Safer baseline for most stone finishes; helps lift everyday film | May take longer on heavy soap scum or mineral deposits |
| Stone/tile-labeled mildew remover | Targets biological growth; typically designed for hard-surface use | Can be harsher; requires full rinsing and label-compatible use |
| Limescale product only if compatible | Cuts mineral buildup when acids are permitted | Acid descalers can etch or dull some stones and shorten sealer life |
“pH-neutral products are commonly recommended for natural stone to reduce etching and dulling compared with acidic cleaners.” [ADD: source—stone-care association or sealer manufacturer guidance]
“Mildew is more effectively addressed with products labeled for biological growth on bathroom surfaces, followed by rinsing.” [ADD: source—product labeling and/or public health guidance]
Scrub between stones with the right tools
Cleaning a pebble floor is mostly about access: you’re scrubbing between stones, not just washing the top face. Use tools that reach into gaps without grinding abrasives into grout.
– Start with a scrub brush that can reach gaps (nylon bristles are usually a safer default than metal for textured surfaces).
– Work in sections: apply cleaner, let it dwell only as long as the label recommends, then scrub thoroughly between pebbles and around edges.
Use dwell time strategically (don’t “soak for hours” by default)
Dwell time is how long the cleaner sits on the surface before you scrub or rinse. In practice, dwell time gives surfactants or enzymes (when included) a chance to break down residue—but leaving most cleaners too long increases streaking and residue risk, especially in stone pores and grout lines.
“Dwell time should follow the product label, because overstaying many cleaners increases residue and can stress stone or grout.” [ADD: source—cleaner manufacturer label guidance]
“Nylon brushes are a common recommendation to minimize scratching risk on textured natural stone surfaces.” [ADD: source—stone-care guidance]
Work method that prevents missed areas
Use a repeatable pattern every time:
1. Apply cleaner to a manageable zone (about the width you can finish in one continuous scrubbing session).
2. Scrub between stones first, then lightly rework the top faces.
3. Do edges last so you don’t constantly re-wet areas you already handled.
If your pebbles are irregularly shaped, you’ll notice corners collect residue first. That’s where a smaller detailing brush helps, and where you should avoid metal tools unless you’ve confirmed compatibility.
Rinse deeply and dry to prevent buildup
Rinse until there’s no cleaner film left, then dry aggressively to reduce the moisture that helps mildew and soap scum re-form. For pebble floors, “good rinsing” is the difference between a floor that looks clean for weeks versus days.
– Rinse until no cleaner residue remains—residue can leave streaks or feed more soap scum.
– Wipe down, open ventilation, or run the exhaust fan after cleaning; reducing moisture helps keep mildew from returning quickly.
Why drying is part of “the cleaning,” not an afterthought
In shower environments, a damp microclimate forms in grout lines and between pebbles. Even if visible soil is gone, leftover moisture and residual surfactants can make it easier for grime to redeposit.
According to [ADD: source—mildew/mold growth factors related to humidity/time], mold growth depends on moisture availability and time, which is why reducing post-clean moisture matters ([year needed from source]).
Also, according to [ADD: source—soap scum formation chemistry or hard-water effects], soap residues interact with minerals to form films that are harder to remove without proper rinse and drying ([year needed from source]).
“Persistent moisture in grout joints is a key driver of mildew recurrence in bathrooms.” [ADD: source—public health or building science guidance]
“Leaving detergent residue can lead to re-soiling and streaking on hard surfaces.” [ADD: source—cleaning chemistry guidance]
What can go wrong (and how to avoid it)
Mistakes usually come from chemical mismatch (too acidic/harsh), abrasive technique, or skipping rinse/dry. Avoiding these three problems prevents most damage to grout, sealants, and stone surfaces.
– Using acidic cleaners: some stones or grout can get damaged or discolored by acids/strong descalers—if you don’t know the material, choose pH-neutral first.
– Over-scrubbing with abrasive pads: aggressive scrubbing can wear down grout lines or create a rougher surface that traps grime faster.
– Skipping the rinse/dry step: cleaner left behind (especially in crevices) can make the floor look dirtier sooner, even if you scrubbed well.
A simple “risk triage” for unknown stones
If you don’t know whether the pebble is sealed or what type it is, treat the surface as potentially stone-sensitive:
– Use pH-neutral only.
– Avoid acids and strong oxidizers unless the label explicitly supports your stone/grout.
– Keep agitation gentle enough to clean, not polish.
“Acidic chemicals are a common cause of etching discoloration on calcite-based stones.” [ADD: source—stone-care authority]
“Abrasive pads can increase surface roughness, which can accelerate re-soiling.” [ADD: source—cleaning abrasion/surface roughness guidance]
Verdict: what to do regularly (and who should skip what)
For most pebble shower floors, the safest “default” routine is: remove debris → pH-neutral cleaner → scrub between stones → rinse and dry. Skip DIY deep treatments if you’re unsure whether your pebbles/grout are sealed (or what type of sealant you used), or if the surface is already damaged—at that point, it’s worth getting guidance from a tile/stone professional or the sealer manufacturer.
From our experience with stone-care best practices and manufacturer label workflows, the biggest “success factor” is consistency—using the right cleaner category and fully rinsing, rather than escalating chemicals too quickly. [ADD: author’s first-hand observation about how quickly soap scum returns in their own bathroom, if you can confirm it; otherwise remove this sentence.]
Regular cadence that usually works
– Light maintenance after heavy use: quick debris removal + targeted pH-neutral clean.
– Deeper clean: when soap scum becomes visible or grout lines dull—often weekly to every few weeks depending on water hardness and ventilation.
Because hard-water conditions vary widely, follow your local water profile and watch the timeline: if buildup returns within days, you likely need better rinse/dry discipline or a different routine.
Quick checklist (scan/save)
– [ ] Sweep/vacuum loose debris
– [ ] Use pH-neutral cleaner (check label for stone/grout compatibility)
– [ ] Scrub between stones with a brush that reaches gaps
– [ ] Let cleaner sit only per label instructions
– [ ] Rinse thoroughly
– [ ] Dry/wipe and run ventilation to reduce mildew
“Following label-compatible cleaner instructions (including dilution and dwell time) is the safest way to protect stone and grout.” [ADD: source—specific cleaner label guidance]
FAQ
How often should I clean a pebble shower floor?
A quick scrub/rinse after heavy use helps, but a deeper clean is typically done on a regular schedule (often weekly or every few weeks), depending on water hardness and how quickly soap scum builds up.
Can I use vinegar or CLR on a pebble shower floor?
Don’t use them unless the product label and/or your stone/grout guidance explicitly says they’re safe for your specific materials. As a general rule, avoid acids on unknown natural stone finishes.
Why does mildew keep coming back between the pebbles?
It usually comes from trapped moisture and residue in small gaps. Improving ventilation/drying and using the right cleaner (with full rinsing) usually helps the most.
Do I need to seal pebble shower floors?
It depends on your specific stone and grout, plus whether you already have a sealant. If you’re considering sealing, follow the sealer manufacturer’s instructions for pebble/natural stone surfaces.
Sources
– [ADD: manufacturer label/spec for the cleaner you’ll use—specifically pH guidance and “natural stone/tile” compatibility instructions]
– [ADD: sealant manufacturer instructions for pebble stone/grout if your floor is sealed (application and cleaning compatibility)]
– [ADD: grout or stone-care guidance from the grout manufacturer or stone-care authority relevant to your material]
Pebble shower floors stay clean longer when you treat them like a maintenance system rather than a one-time scrub: clear debris first, use a pH-neutral cleaner, scrub between stones, then rinse thoroughly and dry to break the cycle that feeds soap scum and mildew. If you’re unsure about sealants or stone type, choose the gentlest compatible option and follow product labels before escalating to stronger chemistry.
Frequently Asked Questions
How do I clean a pebble shower floor without damaging the stones?
Start by removing loose debris with a soft broom or handheld vacuum to prevent scratching the pebble shower floor. Use a pH-neutral cleaner (or a mild dish soap solution) and a soft nylon brush to scrub grout lines gently. Avoid acidic cleaners like vinegar or descalers unless the pebble and grout are specifically labeled as safe, since they can dull stones and erode grout.
What is the best way to remove soap scum and grime from pebble shower tiles?
Mix warm water with a pH-neutral cleaner and let it sit on the problem areas for 5–10 minutes to break down soap scum. Scrub the pebble texture with a non-scratch brush, then rinse thoroughly to wash out loosened residue from the stone crevices. For stubborn buildup, repeat the process rather than switching to harsh chemicals, which can harm grout and sealants.
Which cleaner should I use for algae, mold, or mildew on a pebble shower floor?
For organic growth like mold or mildew, choose a mildew-specific bathroom cleaner that matches your surface type, and follow the label for safe use on stone and grout. Apply it directly to affected areas, allow proper dwell time, then scrub grout lines carefully because mildew often hides in them. Always rinse well after cleaning and improve ventilation to reduce recurring mildew.
Why does my pebble shower floor get dirty so quickly, and how can I prevent it?
Pebble shower floors trap water, soap residue, and hair in the texture gaps, which makes grime build up faster without regular rinsing. Prevent it by doing a quick after-shower rinse and using a squeegee to reduce standing water. Weekly, perform routine pebble shower cleaning with a pH-neutral solution to keep soap scum from bonding to the stones.
How do I deep clean a pebble shower floor and restore the look of the stones?
Deep clean by scrubbing the entire pebble shower floor with a soft brush and pH-neutral cleaner, paying special attention to grout lines where buildup collects. If the stones are sealed, avoid abrasive pads and harsh descalers; instead, repeat gentle scrubbing and thorough rinsing until the surface clears. If your grout or seal is deteriorating, consider resealing after cleaning to help repel water and make future pebble shower floor cleaning easier.
📅 Last Updated: October 06, 2026 | Topic: how to clean a pebble shower floor | Content verified for accuracy and freshness.
References
- Google Scholar Google Scholar
https://scholar.google.com/scholar?q=how+to+clean+pebble+tile+shower+floor - Google Scholar Google Scholar
https://scholar.google.com/scholar?q=natural+stone+cleaning+avoid+acid+sealing+care+guidelines - Google Scholar Google Scholar
https://scholar.google.com/scholar?q=mold+cleanup+bathroom+surfaces+cleaning+disinfection+guidelines - Mold Cleanup in Your Home | US EPA
https://www.epa.gov/mold/mold-cleanup-your-home - https://www.epa.gov/indoor-air-quality-iaq/mold-and-mildew
- https://www.cdc.gov/mold/default.htm
- Mildew
https://en.wikipedia.org/wiki/Mildew - Mold
https://en.wikipedia.org/wiki/Mold - https://pubmed.ncbi.nlm.nih.gov/?term=mold+cleanup+disinfection+indoor+surfaces
- https://www.mayoclinic.org/diseases-conditions/allergy-to-mold/symptoms-causes/syc-20375382

[…] can lead to “tinny” or distorted audio, reduced bass response, and higher chances of static. Deep cleaning restores proper airflow and contact points, helping your Bluetooth speaker deliver clearer sound […]