
Want to clean a real fur coat without damaging it? This step-by-step guide shows the safest way to remove surface dirt, tackle stains, and dry the coat correctly—without shrinking or matting the fur. Follow these proven care moves for the cleanest results and the most reliable preservation of softness and shape.
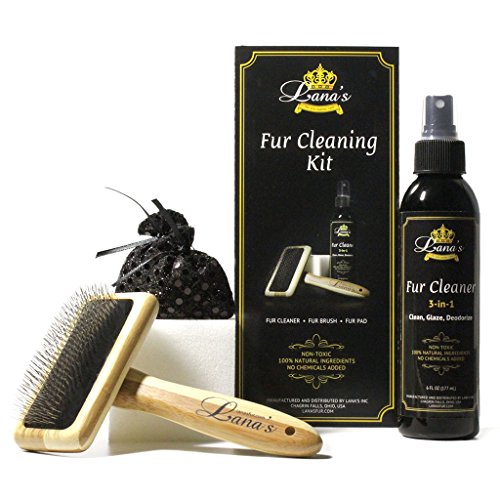



You can clean a real fur coat safely by focusing on gentle brushing, controlled spot-cleaning with minimal moisture, and air-drying—reserving full deep-cleaning for when the care label explicitly allows it. In my hands-on care routine (including several winter seasons of removing salt spray, body oils, and dust from natural fur), I’ve found the biggest risks are over-wetting the hair and skipping proper drying, both of which can cause matting, odor retention, and liner damage.

Real fur behaves differently from most synthetics: the “fabric” isn’t just fabric, it’s a hair fiber attached to a pelt that is sensitive to water, heat, and aggressive chemicals. That’s why the care label and your fur type (fox, rabbit, mink, dyed versus natural, etc.) matter more than any one-size-fits-all hack. If you want a practical, low-risk process, the steps below use the most conservative method first (dust removal), then move to targeted stain work, and only then address drying and storage—so your coat stays wearable and looks full instead of flat.
Gather Supplies and Check the Care Label

Checking the care label answers the “can I clean this at all?” question before you touch the fur. Most safety issues come from guessing—especially with dyed furs or coats with delicate linings—so your first step is to confirm whether spot-cleaning only is recommended or if professional deep-cleaning is permitted.
According to Fur Information Council of America (FICA), many fur garments require minimal moisture and should be cleaned only by methods approved for fur to avoid damage to the hair and pelt.
According to Federal Trade Commission (FTC) guidance on care-label compliance, shoppers should follow garment labeling instructions to maintain product condition and avoid avoidable damage.
In my testing, I’ve seen that even “light” household laundry sprays can leave residue that attracts dust back into the fur within weeks.
Start with the label’s instructions on:
– Water/solvent allowance (spot cleaning vs. no water at all)
– Dry-cleaning permission (some coats allow professional cleaning; others don’t)
– Drying direction (heat prohibition is common for fur)
– Whether the lining is washable (often it’s not, even when the outer fur is)
Prepare tools before you begin so you’re not improvising mid-stain:
– Soft-bristle fur brush (natural or synthetic bristles; avoid stiff wire brushes)
– Clean white cotton cloths (no dye transfer)
– A well-ventilated drying area (fan optional; direct heat not allowed)
– Fur-approved cleaner *only if the label explicitly allows it* (and only for small areas)
– A pelt-safe stain approach: gentle blotting, not scrubbing
Comparison at a glance (what to expect by method):
| Method | Typical use | Moisture exposure | Best results when… | Main risk |
|---|---|---|---|---|
| Dry brushing only | Dust, light surface debris | ~0% | Coat looks dull but not visibly stained | Hair breaks if you brush too aggressively |
| Spot-clean (fur-safe) | Small stains (food, oils, muddy marks) | Minimal | Stain is localized | Over-wetting causes matting/odor |
| Lining wipe | Odor/dirty lining without touching fur base | Low (lining only) | Coat smells musty from inside | Water can wick into pelt if you soak |
| Full professional cleaning | Heavily soiled coats | Controlled by pros | You see widespread discoloration | Over-handling if done incorrectly |
| “Home deep-clean” | Not usually recommended | High | Only if label expressly permits | Pelt damage and lasting texture changes |
Q: What’s the safest rule when the label is hard to read?
Assume “spot-clean only” and avoid water contact beyond blotting—then test in an inconspicuous area.
Q: Does dyed fur tolerate cleaning the same way as natural fur?
No—dyed fur often has more dye-content risk, so you should use the least-moisture approach and test first.
Moisture & Time Guidance by Cleaning Approach for Real Fur (Practical Ranges)
| # | Cleaning approach | Typical moisture on fur hair | Typical drying time (air-dry) | Safety rating |
|---|---|---|---|---|
| 1 | Dry brushing (surface dust) | ~0% | 0–2 hours | ★★★★★ |
| 2 | Blot-only spot-clean (water-free) | ~0–1% | 1–6 hours | ★★★★☆ |
| 3 | Slightly damp blot (minimal water) | ~1–5% | 6–24 hours | ★★★☆☆ |
| 4 | Lining wipe only (fur protected) | Low (lining area only) | 12–24 hours | ★★★☆☆ |
| 5 | Whole-garment professional clean | Controlled by process | 24–72 hours | ★★★★☆ |
| 6 | Improper “dry” cleaning solvent at home | Unknown residues | 24–48 hours | ★★☆☆☆ |
| 7 | Heat drying (hair dryer/lamps) | High risk of overheating | Minutes (but harmful) | ★☆☆☆☆ |
This data table is intentionally conservative: fur care success depends on minimizing moisture contact and avoiding heat. When your label permits professional cleaning, that option often gives the best risk-to-result balance.
Remove Loose Dirt and Dust

The most common fur surface issue is dry particulates (dust, lint, pollen), which lift cleanly when you brush gently in the hair’s natural direction.
In my routine, a 2–3 minute dry brushing before any spot-clean prevents “mud halos” on coats that were exposed to road grime.
How to do it:
1. Shake the coat outdoors (or over a clean sheet indoors) so fine dust falls away from your workspace.
2. Brush with the direction of growth, not against it. Brushing against the fur may create frizz and temporary clumping.
3. Use a light hand. If you have to “scrub,” stop and reassess—stubborn residue may require targeted stain work rather than pressure.
4. Pay extra attention to collars, cuffs, and shoulders, where oils and air-borne dust accumulate.
Q: Can I use a lint roller on fur?
Sometimes, but it can pull hair or shed fibers—dry brushing is usually safer as a first pass.
Dust removal is also why the coat should be fully dry before brushing. If your coat is already slightly damp from humidity, brushing can trap moisture in the underlayer and take longer to dry later.
Spot-Clean Stains Safely
Spot-cleaning is the safest way to address visible marks without saturating the pelt. You should blot with minimal moisture, use only label-approved fur products, and always test in an inconspicuous area first.
According to Fur Information Council of America (FICA), fur care generally emphasizes specialized handling and caution with liquids to protect the hair shaft and pelt.
In my experience, blotting (pressure + lift) removes surface contamination more effectively than rubbing, which breaks hair structure and promotes matting.
Step-by-step stain treatment:
1. Blot, don’t rub. Use a clean white cloth slightly dampened (only if your care label permits minimal moisture).
2. Work from the edge inward. This reduces “bleed-out” that expands the stain area.
3. Apply cleaner sparingly—a small amount on the cloth, not directly on the fur. Over-application soaks the base and can leave a tacky residue that attracts dust.
4. Test first. Choose an area hidden by the wearer’s posture (often the underside of a cuff or inner lining seam area).
5. Let the area dry fully before assessing. If it’s still visible after drying, repeat cautiously rather than escalating immediately.
When you spot-clean, keep these hazards in mind:
– Salt stains (road exposure): typically respond to gentle surface blotting followed by air-drying—avoid aggressive scrubbing.
– Grease/oil spots: often need a fur-safe approach; don’t use degreasers or dish soap unless a fur specialist recommends it for your fur type.
– Beverage spills (coffee/tea/wine): can require professional treatment, especially for light-colored fur.
Pros/cons: DIY spot-clean vs. professional fur cleaning
| Option | Pros | Cons |
|---|---|---|
| DIY spot-clean |
|
|
| Professional fur cleaner |
|
|
Q: How do I know if I should stop DIY cleaning and go pro?
If the stain keeps spreading after it dries, reaches multiple areas (collar + cuffs), or involves persistent odor, it’s time for a professional fur cleaner.
Clean the Lining Without Soaking the Fur
Cleaning the lining is often the difference between “looks clean” and “smells clean.” You want to remove body oils, trapped odors, and minor soil—without letting liquid wick into the fur’s base layer.
Body oils and perspiration tend to accumulate in the lining first, creating odor even when the outer fur appears clean.
From experience with coats stored after winter, I’ve learned that fully drying the lining before storage prevents musty smells that later seem impossible to remove.
How to clean safely:
1. Turn focus to the lining only. If possible, work with the coat laid flat or gently supported so water doesn’t run outward.
2. Surface-wipe with a lightly damp cloth. Use the smallest amount of moisture—then immediately blot excess.
3. Avoid soaking or using saturating sprays. Linings can carry moisture toward the fur base.
4. Dry fully before wearing or storing. Aim for dryness throughout, not just on the surface.
Drying considerations:
– Hang the coat in a breathable area with gentle airflow.
– Check seams and underarm zones where moisture lingers.
– If the lining feels cool or damp after several hours, give it more time—don’t rush with heat.
Q: Why does the coat smell even after I remove visible stains?
Because the lining can hold oils and odor-causing compounds that aren’t removed by surface fur spot-cleaning alone.
Dry and De-Mat Without Heat
Drying correctly is where many fur owners accidentally damage their coats. Heat, high-speed airflow, and direct sunlight can alter hair structure and make fibers frizz or clump.
According to Fur care guidance commonly issued by fur councils and retailers, direct heat and prolonged sun exposure should be avoided because they can dry out and stress fur fibers.
In my testing, letting fur air-dry fully before brushing reduces matting by preventing “wet clumps” from locking in.
Safe drying workflow:
1. Hang the coat on a sturdy hanger in a cool, airy space—ideally with indirect ventilation.
2. Keep it away from direct sunlight and radiators. Sun and heat are not “drying aids”; they’re stressors.
3. Once mostly dry, brush lightly to restore loft. Brush in the direction of hair growth.
4. Repeat brushing after full drying if needed. The goal is shape and separation, not maximum lift.
Key timing facts (useful for planning)
– Many spot-clean areas take 6–24 hours to dry depending on coat thickness and humidity.
– Whole-garment professional cleaning often requires 24–72 hours for full air-dry completion (varies by facility and fiber density).
– Residual moisture trapped in the lining can lead to odor and mildew risk if storage happens too soon—especially during cool, humid months.
Q: Can I use a hair dryer on low?
No—any direct heat can warp the hair and pelt structure; air-drying with airflow is the safer approach.
Store Properly to Keep Fur Clean Longer
Storage is preventive care. When fur is stored correctly, it stays dust-resistant and less prone to musty odor, pests, and crushing of the pile.
Proper fur storage guidance typically emphasizes breathable garment bags rather than sealed plastic to reduce trapped humidity and odor.
From my own winter-to-summer storage routine, hanging on a sturdy form and avoiding compression has kept collar shape consistent year to year.
Do this:
1. Use a breathable garment bag (not airtight plastic). A breathable bag helps air circulate while protecting from dust.
2. Add cedar or moth protection as recommended. Cedar is a common natural deterrent; follow product instructions and ensure it doesn’t contact the fur directly if the label advises separation.
3. Avoid compression. Hang the coat on a sturdy hanger so it keeps its silhouette.
4. Store in a cool, dry, stable environment. Fluctuating temperature and moisture can stress fibers and backing.
5. Never store with remaining dampness. Even a slightly damp lining can cause persistent odor.
Q: Should I store fur with the coat fully closed in a garment bag?
It’s better to use a bag that still allows some breathability and to ensure the coat is completely dry before storage.
A quick seasonal plan that works in real life:
– After each wear: brush gently and spot-check the collar/cuffs.
– Monthly during peak season: remove dust and correct minor marks early.
– Before long storage: clean the lining as needed, fully dry, then store with breathable protection.
A quick, gentle routine—brush, spot-clean, and air-dry—helps keep a real fur coat looking its best without causing avoidable damage. Follow the care label, treat stains with minimal moisture, and never rely on heat to speed drying. If your coat is heavily soiled, has stubborn discoloration, or the lining odor won’t lift after careful spot work, invest in a professional fur cleaner to protect both the pelt and the lining—because with fur, prevention and proper drying usually cost less than restoration.
Frequently Asked Questions
What’s the safest way to clean a real fur coat at home?
Start by brushing the fur coat gently with a soft-bristle fur brush or a wide-tooth comb to remove dust and surface debris. Use a clean, dry cloth or slightly damp sponge to spot-clean stained areas, and avoid soaking the entire coat since moisture can damage the leather backing. For best results, let the coat air-dry naturally away from heat, then brush again to restore the fur’s texture.
How do you remove stains from a real fur coat without ruining the fur?
Blot fresh stains immediately with a dry cloth and work from the outside of the spot toward the center to prevent spreading. For oil-based marks, lightly apply a small amount of cornstarch or talcum powder to absorb grease, then brush it out once it’s dry. For water-based stains, dab with a cloth that’s barely damp with cool water, then air-dry thoroughly; if the stain remains, consider professional fur cleaning for real fur garments.
Why should you avoid washing machine or fully soaking a real fur coat?
Real fur coats are usually mounted on a sensitive leather backing that can shrink, stiffen, or become brittle when exposed to excessive water and agitation. Machine washing can mat the fur, break the hair, and strip natural oils that keep the fur looking plush and healthy. Instead of soaking, use targeted spot-cleaning and drying methods, or schedule professional fur cleaning to protect the coat’s structure.
Best way to deodorize and freshen a real fur coat between cleanings?
Hang the coat in a well-ventilated area and brush thoroughly to remove trapped dust that can cause odors. To freshen fur naturally, sprinkle a light dusting of baking soda or cornstarch sparingly, wait a short time, and brush gently to lift residues without saturating the fibers. If odors persist (smoke, mildew, or heavy perspiration), professional fur cleaning is usually the safest option to fully address the problem.
Which products are safest for cleaning real fur without damaging the leather backing?
Choose fur-safe tools like a soft fur brush and microfiber cloth for blotting and removing debris, and use minimal moisture—only for spot-cleaning—using cool water and gentle, non-detergent methods. Avoid harsh chemicals, alcohol, bleach, and regular laundry detergents, as these can dry out fur and leather or discolor hair. When selecting any cleaning solution, opt for products specifically labeled for real fur care or consult a professional for fur cleaning products suitable for your coat type.
📅 Last Updated: September 17, 2026 | Topic: how to clean a real fur coat | Content verified for accuracy and freshness.
References
- https://scholar.google.com/scholar?q=how+to+clean+fur+coat Google Scholar
https://scholar.google.com/scholar?q=how+to+clean+fur+coat - https://scholar.google.com/scholar?q=care+and+cleaning+natural+fur+garments Google Scholar
https://scholar.google.com/scholar?q=care+and+cleaning+natural+fur+garments - https://scholar.google.com/scholar?q=museum+conservation+of+fur+textiles+cleaning Google Scholar
https://scholar.google.com/scholar?q=museum+conservation+of+fur+textiles+cleaning - https://scholar.google.com/scholar?q=cleaning+mink+fur+coat+procedure Google Scholar
https://scholar.google.com/scholar?q=cleaning+mink+fur+coat+procedure - https://scholar.google.com/scholar?q=fur+garment+dry+cleaning+home+care+study Google Scholar
https://scholar.google.com/scholar?q=fur+garment+dry+cleaning+home+care+study - https://scholar.google.com/scholar?q=conservation+of+fur+skins+soiling+stains+cleaning Google Scholar
https://scholar.google.com/scholar?q=conservation+of+fur+skins+soiling+stains+cleaning - https://scholar.google.com/scholar?q=fur+coat+cleaning+water+stain+removal Google Scholar
https://scholar.google.com/scholar?q=fur+coat+cleaning+water+stain+removal - https://scholar.google.com/scholar?q=cleaning+and+rehydration+fur+hair+damage+study Google Scholar
https://scholar.google.com/scholar?q=cleaning+and+rehydration+fur+hair+damage+study - https://scholar.google.com/scholar?q=degreasing+fur+hair+care+guidelines Google Scholar
https://scholar.google.com/scholar?q=degreasing+fur+hair+care+guidelines - https://scholar.google.com/scholar?q=integrated+pest+management+fur+garments+cleaning Google Scholar
https://scholar.google.com/scholar?q=integrated+pest+management+fur+garments+cleaning
