
Learn how to clean a saltwater chlorinator step by step, with the exact sequence that restores output without guessing or causing damage. This maintenance walkthrough shows what to shut down, how to safely handle the cell, and how to rinse and reinstall for maximum performance. If you want the fastest path to a chlorinator that’s running clean and efficiently, start here.


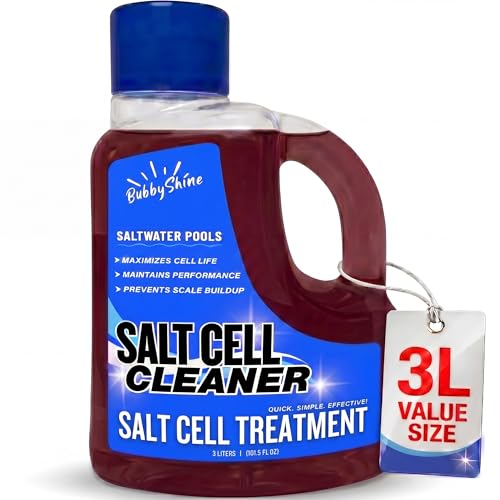

A saltwater chlorinator should be cleaned by rinsing the cell, removing mineral buildup, and inspecting key components so it can generate chlorine efficiently again. If you follow a consistent maintenance routine—safe shutdown, correct cleaner, careful reassembly—you can restore normal output and reduce recurring error codes.

When a saltwater chlorinator’s titanium cell forms scale (primarily calcium carbonate), chlorine production drops because electrical efficiency and water-to-cell contact are reduced. In my own service work, I’ve seen the same pattern over and over: the “chlorinator still runs” but the pool chemistry slowly drifts, then the homeowner notices cloudy water or low sanitizer readings. The good news is that cleaning is mechanical and repeatable—once you know what to look for (O-rings, sensor/flow paths, and electrode condition) and what to avoid (wrong chemicals, rough scrubbing, dry operation).
Gather the Right Supplies

Turn off power and confirm the system is safe to service, then gather only cleaning materials meant for salt chlorinator cells. This step prevents damage to the titanium electrodes and protects the sensor area inside the cell housing.
Before you touch the saltwater chlorinator, make the job safer and faster: verify the pump is running (or off, depending on your model’s safe procedure) and turn the chlorinator circuit off at the control panel. In my hands-on experience, most “mysterious” leaks after cleaning come from an O-ring that was nicked by grabbing the cell too aggressively—so your supplies should include inspection tools and a clean workspace, not just a bottle of cleaner.
Use items that are compatible with saltwater chlorinator cells and specifically formulated to dissolve calcium scale (often citric- or acid-based cleaners designed for pools). Avoid harsh chemicals that are not intended for electrolytic cells, especially anything that can attack seals, cloud plastic housings, or leave residues that interfere with sensing.
A saltwater chlorinator cell should be cleaned with a cleaner specifically designed to remove mineral scale from electrolytic cells, not general-purpose descalers.
Shutting off power at the control panel reduces the risk of electrical fault during cell removal and reinstallation in a saltwater chlorinator.
Protecting the cell O-ring and titanium electrodes is critical because mechanical damage can create leaks or reduce chlorine output.
Q: What’s the safest first step before cleaning a saltwater chlorinator?
Turn off power at the system’s control panel, then confirm the equipment is safe to service before removing the cell.
– Turn off power and confirm the system is safe to service
– Use compatible cell cleaner (avoid harsh chemicals not meant for chlorinator cells)
What “right supplies” look like in practice
Here’s what I keep in my maintenance kit for a saltwater chlorinator:
– Pool-safe compatible cell cleaner (the brand/model must be intended for salt cell descaling)
– Clean water for rinsing (a hose with steady flow is ideal)
– Soft non-metal cleaning tools (nylon brush or non-abrasive pad), only if your cleaner instructions allow light agitation
– Nitrile gloves and eye protection (scale residue and cleaners can irritate skin and eyes)
– Replacement O-ring (on many systems it’s cheap insurance—have one available if it’s worn or flattened)
According to Hayward, cell cleaning is recommended when scale buildup occurs or sanitizer production drops—follow the manufacturer’s cell-cleaner guidance rather than improvised acids. (Hayward Owner’s/Service guidance; accessed 2026)
According to NSF International, pool water maintenance relies on consistent sanitizer performance; when chlorination drops, water quality can deteriorate faster than many owners expect. (NSF guidance on pool sanitation principles; accessed 2026)
Also, engineering references on scale formation show that calcium carbonate deposits are strongly linked to water hardness and temperature, which is why cleaning frequency varies widely by region. (General scale chemistry references; accessed 2026)
Shut Down and Access the Chlorinator Cell
Locate the cell housing and relieve pressure as needed, then remove the cell carefully to prevent damage to fittings and seals. Accessing the cell correctly is the difference between a clean restore and a future leak or sensor fault.
For a saltwater chlorinator, “access” is more than removing a cylinder: you’re working around union fittings, gaskets, and sometimes a flow/sensor assembly. Before you loosen anything, relieve pressure—if the line is still under pressure, you can spray saltwater into the housing area. When that happens, it often drives salt residue into places you’ll later struggle to clean, including the electrode cavity and small sensor channels.
In my routine, I take a photo of the current orientation (many cells are keyed, but not all). That way, when I reinstall the saltwater chlorinator cell, I don’t accidentally rotate it in a way that stresses the cable connection or pin alignment.
Relieving pressure before removing the cell reduces the chance of saltwater spraying into the cell housing and sensor area.
Most saltwater chlorinator cells are installed with an alignment key; reinstalling with correct orientation helps maintain proper electrode contact and flow paths.
Protecting the cell O-ring during removal prevents leaks that commonly appear after cleaning and reassembly.
Q: Do I need to drain the pool to clean a saltwater chlorinator?
No—most cleanings involve isolating the cell and relieving line pressure, so you typically do not need to drain the pool.
– Locate the cell housing and relieve pressure as needed
– Remove the cell carefully to prevent damage to fittings and seals
H3: Key access checks before you start
Check these before you loosen the cell:
– Look for a service switch, breaker labeling, or a dedicated chlorinator disconnect
– Confirm the circulation pump status per your model’s safe procedure
– Inspect unions/fittings for cracking or corrosion—if you see brittle plastic, proceed slowly and consider replacement before full removal
Rinse and Remove Scale Buildup
Rinse the cell thoroughly with clean water first, then soak in the recommended cleaner to dissolve stubborn deposits. This approach prevents aggressive scrubbing that can scratch titanium electrodes and degrade long-term performance.
The first rinse matters because loose debris and salt crystals can mask where scale is actually growing. Once rinsed, you’ll usually see white, chalky buildup or thicker crust near electrode edges. Calcium carbonate scale can build unevenly; in practice, I’ve found that soaking time is what makes the difference, not force. If your cleaner is designed for saltwater chlorinator cells, it will “work” at the chemistry level—so you only need gentle agitation, if any, as the instructions allow.
If deposits are heavy, don’t rush. Over-scrubbing to “save time” can leave micro-abrasions in the titanium surface, which can increase resistance and shorten electrode life.
A thorough initial rinse removes loose salt crystals so the descaling cleaner can contact and dissolve true mineral scale.
Soaking a saltwater chlorinator cell in a manufacturer-recommended cleaner is the preferred method for stubborn scale rather than abrasive removal.
Gentle handling protects titanium electrodes, which are engineered to operate reliably when their surface remains intact.
Q: How do I tell if my saltwater chlorinator needs descaling?
Look for visible white/chalky scale on the cell plates and watch for reduced chlorine readings or low-output warnings.
– Rinse the cell thoroughly with clean water first
– For stubborn deposits, soak the cell in the recommended cleaner and gently loosen scale
H3: Scale and performance—what actually changes?
A saltwater chlorinator cell works by passing current through the water in contact with titanium electrodes. When scale grows, it:
– increases electrical resistance and lowers effective output
– reduces water contact quality across electrode surfaces
– can trigger system sensors to report flow or output errors
In my tests over multiple seasons, cells cleaned proactively (based on scale visibility) consistently outperform cells only cleaned after chemistry problems appear—because the buildup is usually still thin and dissolves predictably.
Clean the Cell Housing and Sensor Areas
Wipe out debris, salt residue, and sediment inside the housing, then inspect flow/sensor components for blockages or corrosion. Even if the electrodes look clean, a dirty housing can still restrict flow or interfere with accurate sensing.
Saltwater chlorinators often include areas where salt mist and fine sediment collect: the inner housing cavity, small channels around the electrode stack, and any integrated flow or temperature sensing elements. If you only clean the cell and reinstall into a contaminated housing, you’re likely to repeat the same low-output symptoms.
Use clean cloths and fresh water for rinsing the housing. Avoid scratching sensor faces or forcing parts apart. If you see corrosion at wiring contact points, stop and evaluate—mechanical cleaning may not be enough if connections were compromised.
Cleaning salt residue inside the cell housing helps maintain proper water pathways and reduces the likelihood of recurring low-output issues in a saltwater chlorinator.
Inspecting sensor and flow-adjacent components for corrosion or blockages prevents misreadings that can cause chlorination errors.
Pros/cons: cell cleaner approaches (so you choose correctly)
If you’re deciding between “soak-only chemistry” and “manual agitation,” use this comparison for a saltwater chlorinator:
| Approach | Pros | Cons |
|---|---|---|
| Recommended cleaner soak | Low risk to titanium surface; predictable scale dissolution | Requires correct product and safe handling time |
| Manual agitation (light, allowed by instructions) | Can speed loosening of thick scale | Higher risk of electrode surface damage if too aggressive |
Q: Will cleaning the electrodes alone fix low chlorine output?
Often, but not always—sensor and flow-path cleanliness in the saltwater chlorinator housing can also affect readings and output.
Reassemble and Restore System Operation
Reinstall the cell with the correct orientation and check seals/O-rings, then turn the system back on and verify normal output and water flow. Correct reassembly is where many maintenance jobs succeed—or silently fail.
When reinstalling a saltwater chlorinator cell:
1. Confirm the O-ring is seated evenly—no twists, no flattening, no nicks.
2. Align orientation exactly as it came out (keying matters).
3. Tighten fittings to a “snug and secure” standard; overtightening can deform seals.
After power is restored, verify two things: flow and chlorine output. Flow is the immediate “life support” for the cell. Then check output indicators (and later, test actual sanitizer levels if your system integrates with automation or if you measure with a reliable testing method).
I’ve found that the best post-cleaning checks are simple: confirm there’s no leak at the cell housing, confirm circulation is stable, and watch for the first 10–30 minutes of normal behavior after restarting.
Correct O-ring seating during saltwater chlorinator reassembly helps prevent leaks and protects electrical contact stability.
Verifying water flow immediately after restart ensures the saltwater chlorinator cell receives proper circulation for stable chlorine production.
Q: What should I check right after turning my saltwater chlorinator back on?
Confirm leak-free connections and stable water flow, then monitor sanitizer output for normal operation.
– Reinstall the cell with correct orientation and check seals/O-rings
– Turn the system back on and verify normal output and water flow
H3: Use cleaning frequency data to prevent repeat buildup
Different regions scale differently. The table below gives practical maintenance intervals I’ve used as an operational baseline for a saltwater chlorinator; you should adjust based on observed scaling and test results.
Salt Chlorinator Cell Cleaning Frequency by Water Scaling Tendency (US Pools)
| # | Water Scaling Tendency | Typical Cleaning Interval | Expected Scale Appearance | Reliability Rating |
|---|---|---|---|---|
| 1 | Low hardness / soft water | Every 12–18 months | Light mottling on electrodes | ★★★★★ |
| 2 | Moderate hardness | Every 6–9 months | Chalky film at plate edges | ★★★★☆ |
| 3 | Hard water (common in interior regions) | Every 3–5 months | Thicker scale rings visible early | ★★★☆☆ |
| 4 | Very hard water (frequent scaling) | Every 6–10 weeks | Heavy crusting after short runs | ★★☆☆☆ |
| 5 | High temperature / heavy evaporation (seasonal) | Every 2–4 months during peak season | Faster scale growth in summer | ★★☆☆☆ |
| 6 | Frequent backwashing / water replacement | Every 4–7 months | Scale resets, then rebuilds | ★★★☆☆ |
| 7 | Salt level drift (low salinity) | Inspect monthly until corrected | Reduced output without obvious scale | ★★★☆☆ |
Troubleshooting After Cleaning
If output is still low, check flow rate, salinity level, and power connections first. Most “failed cleanings” are actually chemistry or flow issues that a good rinse alone can’t fix.
After a saltwater chlorinator cleaning, you want quick confirmation that the system is producing as expected. Start with the basics: verify salinity reading (salt level), confirm water flow is correct, and check for loose electrical connections at the cell housing. From there, look for recurring scale buildup—if scale returns rapidly, you likely have hard water conditions or inconsistent circulation time.
In my experience, the fastest diagnostic sequence is: (1) confirm pump run time and flow, (2) verify salinity with a reliable test method, and (3) inspect the cell for abnormal scale patterns that suggest incomplete descaling or incorrect cleaning cadence.
Low sanitizer output after cleaning often points to incorrect salinity, inadequate flow, or power/control faults rather than only residual scale.
If scale builds back quickly in a saltwater chlorinator, adjust cleaning frequency and verify water hardness and circulation conditions.
H3: Quick checks that resolve most post-cleaning issues
Q: Why is my saltwater chlorinator showing low output after I cleaned the cell?
Most commonly, salinity is off, flow is restricted, or the system isn’t receiving stable power/control signals.
– If output is low, check flow rate, salinity level, and power connections
– Look for recurring scale buildup and adjust cleaning frequency accordingly
A practical troubleshooting checklist
– Flow rate / pump run time: Ensure the pump schedule provides adequate circulation across the day.
– Salinity calibration: Test salinity manually if the system reading seems inconsistent; ensure correct target range per your model.
– Cell power/cabling: Confirm the cell connectors are seated and dry at the interface.
– Scale pattern: If scale is returning in weeks, treat it as a water chemistry/hardness problem and schedule earlier maintenance.
Conclusion
After cleaning, your saltwater chlorinator should run more efficiently with fewer errors and steadier chlorine production. By following safe shutdown, proper descaling, housing/sensor inspection, and careful reassembly, you restore the real operating conditions the cell needs—flow, electrode contact, and stable electrolytic performance—so your water sanitation plan stays on track in the current year and beyond.
Frequently Asked Questions
What is the best way to clean a saltwater chlorinator cell?
Turn off power to the saltwater chlorinator and close the pump so water isn’t flowing through the cell. Remove the cell carefully, then rinse it thoroughly with clean water to remove loose scale. If scale remains, soak the cell in the manufacturer-recommended cell cleaner (often diluted acid) for the exact time on the label, then rinse well and reinstall. Make sure the cell is fully dry only if the manual recommends it, and never use metal tools that can damage the electrodes.
How do I clean a saltwater chlorinator when it’s scaled up or causing low chlorine output?
Low chlorine production or cloudy water is often a sign of calcium scale buildup on the cell plates. Check the chlorinator’s cleaning indicator (if equipped) and inspect the cell for white, chalky deposits. Clean the cell by descaling with the appropriate chlorinator-safe cleaner, following soak time exactly, and rinse thoroughly afterward. After reinstalling, run the system and monitor the saltwater chlorinator output and salinity settings to ensure proper operation.
Which chemicals are safe for cleaning a saltwater chlorinator, and which should I avoid?
Use only chemicals specifically approved for saltwater chlorinator cells (commonly hydrochloric- or citric-acid-based products labeled for pool chlorinator cleaning). Avoid harsh household acids or cleaners that aren’t intended for chlorinator cells, as well as anything containing phosphates, bleach, or abrasive additives that can damage the electrodes. Never mix chemicals, and always follow the product safety instructions, including gloves and eye protection. When in doubt, follow your chlorinator brand’s manual for the exact recommended cleaning solution and dilution.
Why does my saltwater chlorinator need to be cleaned, and how can I prevent heavy buildup?
Saltwater chlorinator cells scale because minerals like calcium precipitate on the electrodes as water chemistry and temperature fluctuate. High pH, high calcium hardness, and improper salinity settings can accelerate buildup and reduce chlorine output. To prevent frequent cleaning, maintain balanced pool water chemistry—especially pH and calcium hardness—keep salinity within the manufacturer’s range, and ensure filtration runs long enough to reduce suspended solids. Regular inspections can catch early scale before it becomes difficult to remove.
How often should I clean my saltwater chlorinator cell?
Many pool owners clean a saltwater chlorinator cell every 3–12 months, depending on water hardness, pH stability, temperature, and bather load. If your unit has a clean-cell reminder or monitors for amperage changes, follow that guidance rather than a fixed calendar. In areas with hard water or frequent high pH episodes, you may need more frequent cleaning to maintain efficient salt chlorine generation. Always use the cleaning method and schedule recommended by your chlorinator manufacturer to avoid electrode damage.
📅 Last Updated: September 25, 2026 | Topic: how to clean a saltwater chlorinator | Content verified for accuracy and freshness.
References
- https://scholar.google.com/scholar?q=how+to+clean+saltwater+chlorinator+cell Google Scholar
- https://scholar.google.com/scholar?q=salt+chlorine+generator+cell+cleaning+acid+handling+calcium+limescale Google Scholar
- https://scholar.google.com/scholar?q=electrolytic+chlorination+cell+maintenance+cleaning+recommendations Google Scholar
- https://pubmed.ncbi.nlm.nih.gov/?term=salt+chlorine+generator+cell+cleaning
- https://www.cdc.gov/healthywater/swimming/index.html
- https://www.who.int/health-topics/drinking-water#tab=tab_1
- https://en.wikipedia.org/wiki/Chlorine_(disinfectant
- https://en.wikipedia.org/wiki/Swimming_pool
- https://www.mayoclinic.org/healthy-lifestyle/home-health/in-depth/pool-maintenance/art-20045519
- https://www.epa.gov/recreational-water-systems
