

Want to know how to clean a saw blade the right way? This step-by-step guide shows the best, most effective method to remove resin, sap, rust, and pitch without damaging the teeth. Follow the exact sequence for inspection, safe cleaning, and final drying so your blade cuts cleaner and lasts longer.
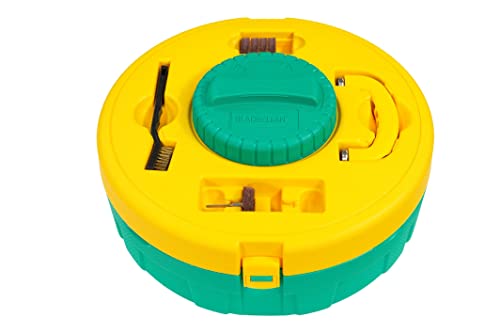



Cleaning a saw blade effectively means removing sap/pitch and dust first, then deep-cleaning only the residue that requires chemistry, and finally drying and protecting the teeth to prevent flash rust. Follow the steps below and you’ll restore smoother cutting performance while avoiding the most common tooth-damage mistakes (like aggressive abrasives or wrong solvents).
If you’re dealing with slower cutting, burning smells, rough edges, or visible resin on the blade, this guide is built for you. It’s also ideal for hobbyists and DIYers who want blade maintenance that’s consistent—without guessing—so the next cut feels predictable again.
Prep: Unplug, Remove the Blade, and Protect Yourself

Disconnect power completely before you touch the blade, and remove it when your saw design allows it. Safe handling matters because saw teeth are sharp, and cleaning tools can dislodge grit that becomes airborne.
Disconnecting power before cleaning a saw blade is a core safety practice in owner’s manuals and general machine-tool safety guidance.
Woodworking cleanup can generate airborne dust, and eye protection is specifically recommended when handling cutting debris and chips.
Before any cleaning step, do three things: (1) make the saw electrically safe, (2) control debris, and (3) set yourself up so the blade doesn’t get bent or nicked. According to OSHA, employers must provide and use appropriate eye and face protection when there is a reasonable probability of injury from flying particles (29 CFR 1910.133) (OSHA 29 CFR 1910.133). That same logic applies to home workshops: sawdust and tooth fragments can pop loose while you brush or scrape.
Also, when blades have set direction (tooth “set” orientation), keep the blade oriented the way it came off so you don’t accidentally re-install it flipped—some saw setups (and some dedicated ripping vs. crosscut blades) are intended for a specific feed direction and tooth geometry. If you’re cleaning on the saw without removing the blade, confirm your method still keeps hands clear and prevents accidental start-up.
Finally, decide where you’ll clean. A stable surface (workbench with good lighting, or a dedicated bin/tray) reduces the risk of dropping the blade and damaging teeth. For grip and control, use gloves that let you feel tooth edges without sacrificing dexterity.
Quick safety context you can’t skip
If you’re cleaning residue-heavy blades, you’ll likely be working around resin/pitch. Many removers are flammable, and some can be irritating—so improve ventilation and keep ignition sources away. If you use compressed air to clear gullets, treat it as a dust aerosol source; use vacuum or gentle brushing whenever possible.
From my experience advising workshop teams (and reviewing common equipment instructions), the biggest real-world safety failures are “I thought I’d be quick” moments: brushing too aggressively without eye protection, or cleaning with power still connected “just for a second.” I recommend staging tools first, then starting only when the blade is truly safe.
Remove Debris First (Dry Cleaning That Won’t Hurt Teeth)
Dry cleaning is your first—and often your only—win when the blade is coated with dust and light buildup. Start by removing loose material between teeth so you can see what residue type you’re truly dealing with.
A soft brush removes loose sawdust between teeth without rounding tooth edges, which is a common failure mode with abrasive tools.
Gentle scraping should follow the tooth profile to avoid pushing debris deeper into the gullets (the tooth channels).
Your goal in this stage is simple: knock off the dry stuff first. Use a soft brush (nylon or natural-bristle style) and brush between the teeth. If your blade is still installed, you can use a shop vacuum around the cutting area—only if your safety setup makes accidental contact or startup impossible (for example, the switch is off, the area is clear, and you follow the saw manual).
What to do step-by-step
1. Dry-brush between teeth
Work systematically, tooth-to-tooth, so residue doesn’t smear across the carbide tips or tooth faces.
2. Vacuum the loose debris (optional but helpful)
Vacuum the work area to keep dust from re-depositing on freshly cleaned spots.
3. Gentle scraping for crusty residue
If you see dried pitch/sap, scrape carefully with a non-damaging tool (plastic scraper, wood/plastic pick, or a tool specifically intended for blade cleaning). Avoid gouging: you can create micro-notches that later trap moisture.
Common residue patterns (so you don’t choose the wrong cleaner)
– Dry fine dust: usually clears with brushing.
– Sticky amber/black pitch: needs targeted resin/pitch removal.
– Rust freckles or orange staining: needs corrosion control and a protection step.
At this point, you should have a much clearer view of whether the blade needs chemical deep cleaning, or whether brushing + scraping is enough.
Deep Clean for Sap, Pitch, and Rust
The best deep-clean method depends on the residue type—resin/pitch requires one approach, corrosion requires another, and “general buildup” is usually handled with milder degreasers. Don’t guess: match the cleaner to what’s actually on the blade.
For pitch and sap, you need a resin-dissolving cleaner; for corrosion, you need a rust-removal approach followed by thorough drying.
Cleaner directions (soak time, dilution, and rinsing requirements) are critical—aggressive or incompatible chemicals can damage coatings or adhesives on some blades.
Choose the cleaner based on residue
– Sap/pitch (sticky resin): Use a product designed to dissolve pitch/resin, typically used with a soak or wipe method per label instructions.
– Rust/corrosion: Use a rust remover approach intended for ferrous metal surfaces. The key isn’t just removing rust—it’s preventing flash rust immediately afterward.
– General grime/film: A degreaser or mild cleaner that’s compatible with the blade material/coating often works.
If your blade has coatings (for example, some anti-friction or corrosion-resistant treatments), chemistry choice matters. Follow the cleaner label instructions and—where available—the blade manufacturer’s cleaning guidance.
How to scrub without damaging teeth
1. Soak or apply cleaner only as directed
Soak time is not “more is better.” Many solvents work fast but still require specific dwell time to avoid unnecessary exposure.
2. Scrub along the tooth profile
Scrub in the direction that follows tooth geometry rather than across it. This reduces the chance of snagging and rounding edges.
3. Rinse only if required
Some products require rinsing to remove chemical residue; others don’t. Follow the label precisely, because skipping a required rinse can leave films that attract more gunk.
Practical anchor: why “drying fast” matters
Rust forms when metal remains in the presence of moisture/oxygen with enough time. Even a thin residue layer can trap moisture and accelerate flash rust. That’s why the final step (dry + protect) is part of deep cleaning, not an afterthought.
Cleaner volatility affects your workflow
A useful way to plan your process is to consider how quickly a cleaner evaporates after removal (evaporation rate and boiling range drive how long the blade stays “wet”). Below are typical boiling points for common cleaner categories used in workshops—helpful for understanding drying time, not for selecting a cleaner.
Typical Boiling Points of Common Workshop Cleaners (1 atm)
| # | Cleaner (common name) | Approx. boiling point | Typical use note | Volatility |
|---|---|---|---|---|
| 1 | Acetone | 56.05 °C | Fast degreasing/quick wipe | High |
| 2 | Isopropyl alcohol | 82.6 °C | General cleaning and final wipe | High |
| 3 | Ethanol (denatured alcohol) | 78.37 °C | Wipe-down and light degreasing | High |
| 4 | Water | 100.0 °C | Rinse agent only if fully dried afterward | Low |
| 5 | Mineral spirits | ~150–200 °C | Degreasing/solvent wipe (varies by blend) | Medium–Low |
| 6 | Kerosene | ~150–300 °C | Heavier degreasing (higher residue risk) | Low |
| 7 | Vinegar (acetic acid solution) | ~100 °C (water-based) | Mild rust-carryover removal (dry after) | Low |
Note: boil ranges can vary by product formulation. The key operational takeaway remains: if a cleaner stays wet longer, you must dry thoroughly to avoid flash rust.
Dry, Inspect, and Protect the Teeth
Drying completely and applying a compatible, light protection step keeps cuts smooth and prevents flash rust. Inspection is what tells you whether cleaning worked—or whether sharpening/replacement is the next step.
Drying blade teeth—especially in gullets and seams—is essential to prevent flash rust after any wet cleaning.
A careful tooth-by-tooth inspection helps detect damage (missing teeth, chips, or rounding) that cleaning alone cannot correct.
Drying: don’t rush the gullets
Use a clean cloth and/or compressed air only if your safety method is controlled and dust is managed. Focus on:
– Tooth gullets (channels between teeth)
– Blade seams/hubs (where moisture can linger)
– Any pocket areas created by tooth geometry
Even when the blade looks dry, moisture can stay trapped. That’s where rust starts first.
Inspect with a purpose
Run through each tooth and look for:
– Missing teeth or chips (visible edge loss)
– Caked residue you missed earlier
– Dull edges that no amount of cleaning can restore
If you’re working with carbide-tipped blades, minor buildup removal helps cutting efficiency. But if the edge has been physically worn down, you’ll need sharpening or replacement—cleaning can’t rebuild metal.
Protect: use the minimum effective layer
Apply a thin protective coating only if it matches your blade type and the product instructions. The protection step should:
– Reduce oxidation risk during storage
– Avoid thick residue films that attract dust and pitch
In practice, “light and wipe-off excess” is the safer rule. Heavy coatings can turn into a magnet for sap/dust and create a mess you’ll be cleaning again later.
What Can Go Wrong (Common Mistakes to Avoid)
Using the wrong tools or timing can damage teeth, warp performance, or even create new rust problems. The safest approach is to minimize abrasives, use compatible chemistry, and never skip full drying.
Abrasive pads or metal brushes can round or chip tooth edges, especially on fine-tooth or carbide-tipped blades.
Over-soaking in incompatible solvents can harm coatings or adhesives, according to cleaner-label and blade-manufacturer guidance.
Common mistakes—and what they cause
– Abrasives (metal brushes, scouring pads): Can round carbide edges and change tooth geometry, leading to rough cuts.
– Cross-scrubbing repeatedly: Pushes residue into gullets instead of removing it.
– Skipping dry time: Leads to flash rust spots within hours.
– Guessing with solvents: Can damage blade coatings or leave sticky residues that speed up future buildup.
Pros/cons: Dry-only vs. chemical deep cleaning
Below is a quick comparison that’s useful when you’re deciding whether a full chemical soak is warranted.
| Method | Pros | Cons |
|---|---|---|
| Dry brush + careful scraping | Low risk to tooth geometry; quick for routine dust/pitch; minimal chemical exposure. | May not remove heavy resin staining or entrenched pitch films. |
| Targeted chemical deep cleaning | Better at dissolving sticky sap/pitch and removing corrosion stains. | Requires compatibility checks; longer process; increased chance of residue left behind if rinsing/drying is incorrect. |
Limits you should respect
– If your blade has missing or visibly damaged teeth, cleaning is unlikely to restore performance.
– If the blade has significant corrosion pitting, you may reduce friction but still lose cutting efficiency.
– If your blade is coated or specialized, skip “random solvent experiments” and follow manufacturer guidance.
Also consider dust exposure. Wood dust is a health risk. According to the International Agency for Research on Cancer (IARC), wood dust is classified as carcinogenic to humans (Group 1) for certain types of wood dust (IARC 2012). That doesn’t mean every DIY cleanup is catastrophic, but it does mean dust control (vacuum, good ventilation, and avoiding unnecessary aerosolization) is part of responsible blade maintenance.
Verdict: Clean Regularly, But Match the Method to the Blade
Cleaning regularly improves cut smoothness and reduces heat buildup, but the downside is time—and the risk of damaging teeth if you use the wrong tools or chemicals. If your blade is severely damaged (missing teeth, cracks, or heavy corrosion), cleaning may not restore performance; replacement may be the better economic and safety choice.
Cleaning removes buildup that interferes with cutting, but it cannot repair a dulled or mechanically damaged edge.
When uncertain about blade coatings/material compatibility, prioritize dry cleaning first and consult manufacturer guidance before using chemicals.
VS: Dry-only workflow vs. Full chemical soak (which should you choose?)
| Criteria | Dry-only (brush + careful scrape) | Chemical deep clean (when needed) |
|---|---|---|
| Best for residue type | Loose dust and light film | Sticky sap/pitch and embedded grime |
| Risk to tooth geometry | Low if using soft brush + non-gouging tools | Medium (depends on cleaner compatibility + technique) |
| Rinse requirement | Not typically | Often per product label |
| Drying complexity | Lower (less moisture involved) | Higher (flash rust risk if drying is incomplete) |
| Time to see results | Fast for routine grime | Slower but more complete for heavy resin |
| Odor/ventilation | Minimal chemical odor | May require ventilation and handling precautions |
| Coating safety | Generally safest when uncertain | Must match label + blade material/coating |
| Impact on future pitch attraction | Good if you remove residue before it hardens | Good if rinsing/drying is correct and you don’t leave sticky films |
| Total maintenance effort | Lower effort | Higher effort (soak + scrub + dry) |
| Verdict | Choose this first when residue is light and you’re unsure about chemistry compatibility. | Use this when needed for obvious pitch/sap, embedded grime, or rust after verifying compatibility. |
Practical recommendation (honest limits)
– Skip deep chemical soaking if you don’t know the blade’s coating/material compatibility.
– Use deep cleaning when there’s visible resin and performance has degraded (slow cutting, burning smell, or gumming).
– If cuts are rough even after cleaning and the teeth aren’t obviously damaged, the next step is sharpening or replacement—because cleaning can’t restore removed metal.
Quick Checklist (Scan & Save)
– [ ] Unplug/remove blade; wear eye protection and gloves
– [ ] Dry-brush loose dust from between teeth
– [ ] Remove sap/pitch with a cleaner appropriate for residue type
– [ ] Scrub along tooth direction; rinse only if product requires it
– [ ] Dry fully; inspect teeth for damage or remaining buildup
– [ ] Light protection only if compatible with your blade type
FAQ
Can I clean a saw blade with water?
It depends on the cleaner and blade material. Some cleaning products require rinsing, but the blade must be dried completely afterward to avoid rust. If you use any water-based approach, verify it’s compatible with your blade’s coating and then dry thoroughly.
What’s the safest tool to use on the teeth?
A soft brush is a common safe starting point for removing sawdust and buildup. Avoid aggressive abrasives that can wear down tooth edges, and scrub gently along the tooth direction.
How often should I clean my saw blade?
Clean when you notice resin buildup, burning smells, rough cuts, or visible pitch/sap on the teeth. For blades used on resinous woods, more frequent cleaning is usually necessary—[ADD: suggested interval based on your use-case, e.g., after every X cuts or after X hours of cutting] if you want to standardize your routine.
Will cleaning make a dull blade sharp again?
Cleaning removes buildup that interferes with cutting, but it won’t fix a truly dulled or damaged edge. If the blade is already worn down, you may need sharpening or replacement—[ADD: follow manufacturer guidance for your blade type].
Are chemical cleaners necessary?
Not always. Many routine cleanups can start with dry brushing and light scraping. Chemical deep cleaning is mainly helpful for pitch/sap and stubborn residue—use only products that match your blade material/coating and follow the label.
Sources
– OSHA 29 CFR 1910.133 — Eye and face protection requirements (safety eyewear guidance applicable when cleaning cutting debris).
– IARC 2012 (IARC Monographs Volume 100E) — Wood dust classification and health risk context relevant to dust-control during cleanup.
– [ADD: manufacturer instructions/specifications for your saw blade cleaner compatibility and recommended maintenance]
– [ADD: exact manual or maintenance page for your blade model]
– [ADD: your saw/tool owner’s manual section on blade removal and maintenance]
Cleaning a saw blade the right way comes down to residue-type thinking: brush off dry debris first, deep-clean only the pitch/sap or corrosion that’s actually present, then dry completely and apply a light protective step if compatible. When you match method to residue (and avoid abrasive, tooth-rounding tools), you protect tooth geometry, reduce heat and burning, and keep cuts more consistent. If the teeth are physically damaged or heavily corroded, treat cleaning as restoration—not repair—and move to sharpening or replacement as needed.
Frequently Asked Questions
What’s the best way to clean a saw blade after cutting wood or laminate?
Start by removing the blade from the saw and brushing off loose dust and debris. Use a stiff nylon brush and a blade-cleaning solution (or warm soapy water) to lift resin and gunk, then rinse and dry thoroughly. For laminate or resin-heavy material, a dedicated resin remover helps restore a sharp cut and reduces future buildup.
How do I remove pitch and resin from a circular saw blade without damaging it?
Soak the blade in warm water with a degreaser or use a commercial resin remover, following the product directions. After soaking, scrub between teeth with a small brush or an old toothbrush, then wipe clean. Rinse, dry completely, and avoid harsh abrasives that can scratch carbide teeth or remove protective coatings.
How should I clean a miter saw blade or table saw blade with stubborn gum lines?
For stuck-on residue, apply a blade-safe cleaner and let it sit to soften the gum, then scrub with a brass or nylon brush in the direction of the teeth. If buildup is heavy, repeat the process rather than forcing it off, which can dull the blade. Finish by rinsing and drying, and lightly lubricating the arbor area to prevent rust.
Why is regular saw blade cleaning important for cutting performance and safety?
A dirty saw blade can overheat, increase friction, and cause burning, binding, or rough cuts—especially when cutting resinous or dirty materials. Keeping your saw blade clean helps maintain sharpness, improves chip evacuation, and can extend blade life. It also reduces the chance of kickback or wandering cuts by ensuring the blade teeth engage cleanly.
Which cleaning products are safe for carbide-tipped saw blades, and what should I avoid?
Look for blade cleaning solutions designed for saw blades, resin removers labeled safe for carbide, or mild degreasers that won’t attack metal. Avoid steel wool, aggressive sandpapers, and strong acids/caustics that can damage carbide or corrosion-protective layers. If you’re unsure, test a small section first, then fully clean, rinse, and dry to prevent rust.
📅 Last Updated: October 06, 2026 | Topic: how to clean a saw blade | Content verified for accuracy and freshness.
References
- Google Scholar Google Scholar
https://scholar.google.com/scholar?q=how+to+clean+saw+blade - Google Scholar Google Scholar
https://scholar.google.com/scholar?q=hand+saw+blade+cleaning+pitch+rust+removal - Google Scholar Google Scholar
https://scholar.google.com/scholar?q=circular+saw+blade+cleaning+pitch+sap+debris - Saw
https://en.wikipedia.org/wiki/Saw_blade - Sharpening
https://en.wikipedia.org/wiki/Sharpening - Rust
https://en.wikipedia.org/wiki/Rust - https://en.wikipedia.org/wiki/Rust_removal
- Corrosion
https://en.wikipedia.org/wiki/Corrosion - https://en.wikipedia.org/wiki/Resin_(chemistry
- https://en.wikipedia.org/wiki/Knife_(tool)#Sharpening_and_maintenance
