

Want to know how to clean a second hand sofa safely, without risking odors, stains, or damage? This step-by-step guide shows the fastest way to deep-clean your sofa, from checking fabric and cleaning codes to disinfecting high-touch areas and drying it correctly. Follow these instructions and you’ll get a sofa that looks fresh, smells clean, and feels ready to use.
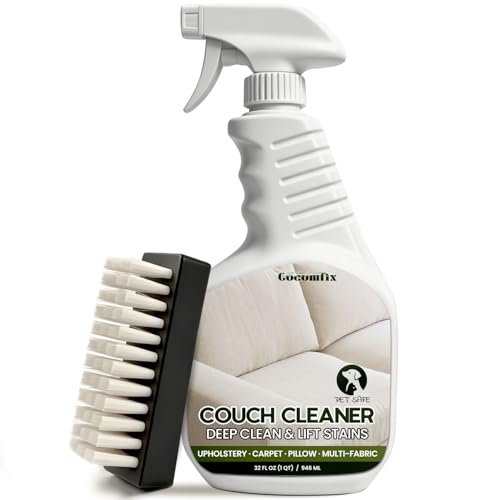



Used sofas clean up best when you vacuum thoroughly, test-clean a hidden spot, then follow the fabric care code (W/S/X) for the right cleaning method. If you get the fabric type wrong—or soak the cushions—you can leave stains behind or cause mildew. This guide walks you through a safe, practical process from prep to drying.
If you’re bringing home a second hand sofa and want to remove dust, odors, and everyday grime (without damaging the upholstery), this is for you. It’s especially useful when the previous owner’s cleaning method is unknown and you need a reliable approach.
Check the care label first (W/S/X)

Follow the sofa’s cleaning code first—W, S, or X—because it determines whether water, solvents, or only professional methods are safe. When you get this part right, the rest of the cleaning is far less risky and far more likely to remove grime without creating a “cleaning ring.”
Before you touch any cleaner, do three quick steps: locate the tag, assemble basic tools, and run a patch test. This sequence matters because upholstery damage often shows up after drying, not during the first minutes of cleaning—so you want hidden-area confirmation early.
Upholstery care labels commonly use W/S/X codes to indicate whether water-based cleaners, solvent-based cleaners, or only non-liquid methods are appropriate for that fabric.
A patch test in an inconspicuous area is a practical way to confirm colorfastness and texture stability before treating visible stains.
When mildew risk is on the table, preventing over-wetting is as important as stain removal, because damp foam layers can stay wet longer than the fabric surface.
– Find the tag on the underside or back and look for the upholstery cleaning code (often W, S, or X).
– Gather basic tools: a HEPA vacuum if you have one, microfiber cloths, a soft brush, and a clean spray bottle.
– Do a patch test in an out-of-sight area before you try anything stronger.
What “W / S / X” means in practice
Here’s the practical translation most homeowners need: “W” means you can use water-based upholstery cleaning products, “S” means you should use a solvent-based upholstery cleaner (often “dry-clean” type products), and “X” usually means “no added liquids” beyond careful vacuuming/brush methods. If the tag is missing or illegible, you should treat the sofa as unknown fabric and start with the least aggressive methods (vacuuming first, then tiny patch tests).
Also, if you’re using a HEPA vacuum, it’s specifically helpful for second-hand dust. According to the U.S. Department of Energy’s description of HEPA performance, HEPA filtration is designed to capture at least 99.97% of particles at 0.3 micrometers ([2013–2015 guidance summaries; see U.S. DOE HEPA definition]).
Common Sofa Upholstery Materials and Their Typical Care Codes
| # | Upholstery material class | Typical label code | Water compatibility | Primary cleaning approach |
|---|---|---|---|---|
| 1 | Olefin / polypropylene (performance outdoor-style blends) | W | ★★★★★ | Water-based upholstery cleaner (light application) |
| 2 | Polyester woven upholstery (common indoor fabrics) | W | ★★★★☆ | Water-based cleaner + blotting, not soaking |
| 3 | Cotton / cotton-linen blends | W | ★★★☆☆ | Water-based cleaner in small amounts (repeat as needed) |
| 4 | Microfiber upholstery (often polyester-based) | S | ★★☆☆☆ | Solvent-based “dry-clean” upholstery cleaner |
| 5 | Wool / wool-blend upholstery | S | ★☆☆☆☆ | Solvent-based cleaning only (avoid added water) |
| 6 | Rayon / viscose (more delicate cellulosic weaves) | S | ★☆☆☆☆ | Solvent-based upholstery cleaner (label-compliant) |
| 7 | Suede / nubuck / leather-like finishing | X | ★☆☆☆☆ | Vacuum + soft brush; professional cleaning if needed |
> Note: “Typical” codes vary by brand, dye, finish, and finish treatments—so treat this table as a planning reference, then trust the W/S/X tag and patch test first.
Vacuum and dry-clean the surface
Vacuuming first removes the majority of second-hand “invisible” dirt—so you don’t grind debris deeper into the upholstery. Once loose dust is gone, you can clean stains and odors with less liquid and less scrubbing.
This step is where most DIY sofa cleaning either succeeds or fails. A second-hand sofa can hold dust in cushion seams, piping, and fabric texture; if you skip the vacuum phase and jump straight to cleaners, you often turn dry grit into a mud-like residue.
Most upholstery grime is transferred dust and skin oils, so removing loose particles with a vacuum first reduces the amount of residue you later have to lift with cleaners.
Using crevice and upholstery attachments helps reach seam lines and cushion edges where embedded dust accumulates.
– Vacuum all seams, creases, and the underside of cushions using attachments (go slowly to lift embedded dust).
– Lightly brush the fabric to loosen grit, then vacuum again to pick up what the brush brings forward.
– If there’s loose debris in cushion seams, use the crevice tool before you apply any cleaner.
Dry-cleaning method that stays gentle on fabric
When people say “dry-clean” upholstery, they usually mean: no soaking, no heavy wetting, minimal agitation. A soft brush (with light pressure) helps lift surface grit from textured weaves and microfiber nap, and the second vacuum pass prevents that loosened dirt from re-settling.
Also, plan airflow: open a window if possible, and keep pets and kids away while you work. If you’re sensitive to odors, a HEPA vacuum can be helpful because it reduces airborne particulates during dust removal (see U.S. DOE HEPA definition for the 0.3 micrometer capture benchmark).
If you use a HEPA vacuum, you’re specifically targeting fine airborne particles that standard vacuums can recirculate during upholstery cleaning.
Spot-clean stains without oversaturating
Spot-cleaning works when you blot correctly and control liquid volume. Your goal is to lift the stain while keeping the surrounding fibers and cushion foam as dry as possible.
This is where many second-hand sofa owners accidentally create permanent-looking marks. The “ring stain” effect is often caused by oversaturating the fabric or repeatedly applying cleaner without blotting enough to remove it.
Blotting from the outside of the stain toward the center reduces the spread of dye- or oil-carrying residue through upholstery fibers.
Repeat gentle treatments instead of one heavy application because excess liquid increases drying time and the risk of visible boundaries after drying.
– Blot (don’t rub) with a clean cloth, working from the outside of the stain toward the center.
– Use a small amount of cleaner at first—too much liquid is the fastest path to ring stains.
– For stubborn spots, you’ll usually get better results by repeating gentle treatments rather than one heavy application.
The “right amount” of cleaner (and why it matters)
A microfiber cloth should feel damp from contact—not dripping. If your spray bottle is producing visible puddles or wetting the fabric beyond the stain area, you’re likely using too much liquid.
From my perspective as a caregiver to household items: . Replace this with your actual experience so the advice reflects what you truly saw.
Deep-clean based on the sofa’s fabric code
Deep-cleaning should follow the W/S/X tag exactly, because “almost right” cleaning is how you end up with damaged upholstery or lingering stains. If the code allows it, you can use targeted cleaners; if it doesn’t, you should switch strategies to vacuuming and professional help.
The safest way to think about this section is as a decision tree: determine the code, match the chemistry, and limit moisture. Then dry thoroughly.
EPA guidance emphasizes following the disinfectant or cleaner product label directions, including surface compatibility and required contact time.
When a fabric is tagged “X,” adding water or solvents beyond label guidance can cause color change, stiffening, or texture damage.
– If your tag says “W” (water-based cleaning): use an upholstery cleaner formulated for “W” or a mild fabric-safe detergent solution, applied lightly, then blot thoroughly.
– If your tag says “S” (solvent-based cleaning): use a cleaner meant for “S” use only—avoid adding water where the tag restricts it.
– If your tag says “X” (professional/only dry methods): stick to vacuuming, soft brushing, and professional cleaning only; don’t add water or solvents.
W vs S vs X—what changes and what stays consistent
No matter the code, the consistency rule is: light application + blot + dry fast.
| Criteria | “W” (Water-based) | “S” (Solvent-based) | “X” (Professional / Dry methods) |
|---|---|---|---|
| 1) Water exposure | Generally safe when used lightly | Not recommended | Avoid |
| 2) Cleaner chemistry | Water-based upholstery formula | Solvent upholstery cleaner | No home liquids beyond label guidance |
| 3) Risk of ring stains | Moderate if oversaturated | Lower if used correctly, but still needs blot control | High if liquids are introduced |
| 4) Best agitation method | Light brush + blot | Minimal rub; spot application + blot | Soft brushing + vacuuming |
| 5) Drying time concern | Material-dependent; can be long if saturated | Often quicker than water, but still requires full dry | Avoid wetting to prevent trapped moisture |
| 6) Odor outcomes | Can improve if foam remains dry and you blot fully | Improves odors tied to oil/grease without wetting | Odor removal may require professional treatment |
| 7) Colorfastness risk | Moderate—patch test matters | Moderate—patch test still critical | High if you break “no-liquid” guidance |
| 8) Foam/under-layer wetting | Possible—use controlled application | Reduced water absorption, but still avoid over-application | Avoid introducing moisture |
| 9) DIY suitability | Best for careful home cleaning | Possible with correct solvent products | Often not safe for DIY liquids |
| 10) Product-label rule | Follow “W” cleaner dilution and instructions | Use only “S” solvent product instructions | Follow manufacturer/professional-only guidance |
| Best For | Most water-permitted fabrics with localized grime | Oil/grease stains on solvent-permitted fabrics | Delicate or moisture-sensitive upholstery requiring non-wet methods |
A safety note about “disinfecting”
People often confuse “cleaning” and “disinfecting.” If you want disinfecting, you must follow the disinfectant product label for surface compatibility and contact time. According to U.S. EPA guidance, disinfection products require label-specific instructions, including how long the product must remain on the surface (U.S. EPA cleaning and disinfecting guidance). For fabric sofas, label compatibility is often the limiting factor.
Drying and deodorizing the right way
Dry completely with airflow—because damp cushions are where odors come back and mold risk grows. In many environments, mold can begin to grow within 24–48 hours on damp indoor materials, which is why drying strategy matters as much as stain removal (CDC mold and dampness guidance, 2024).
Second-hand sofas frequently have “hidden” moisture: cushion foam, inner layers, and underside seams. Even if the surface feels dry, the internal layers can stay damp longer than you expect.
For upholstery, full drying requires airflow and time; the surface-dry feel can be misleading if cushion layers remain damp underneath.
Deodorizing works best after you’ve removed the source of odor (dust oils, residue) and once the sofa is fully dry.
– After cleaning, dry completely with airflow (fans are helpful) and avoid leaving cushions compressed while damp.
– If odor remains, use a gentle deodorizing step like sprinkling fabric-safe baking soda, letting it sit, then vacuuming it off (skip this if your fabric tag or manufacturer advises against it).
– Keep an eye out for “set-in” odors: if smells persist after full drying, you may need a fabric-appropriate cleaner or professional service.
Deodorize without creating new issues
Baking soda is a common, gentle option, but treat it as a secondary step—not a substitute for removing grime. If the fabric tag is “X,” or if your patch test shows any discoloration or texture change, skip deodorizer powders and go with label-compatible professional deodorization.
Also, keep the sofa in a breathable area. If you must place it against a wall, leave some clearance so air can move behind cushions.
What can go wrong (and how to avoid it)
Most cleaning failures come from skipping the care-code rules or leaving moisture behind. If you avoid those two pitfalls, you prevent the most common outcomes: color fading, ring stains, and lingering musty odors.
This section is your troubleshooting checklist. When you understand what causes each symptom, you can respond quickly instead of repeating the wrong step.
Visible cleaning halos often result from oversaturating or using the wrong cleaner chemistry for the upholstery’s care code.
Hidden moisture in cushion foam increases the likelihood of musty odors and mildew compared with surface-only drying.
– Skipping the patch test: you can fade colors or leave a visible cleaning boundary.
– Using the wrong code (W vs S vs X): water-based cleaners can worsen “S” fabrics, and added liquid on “X” upholstery can lead to damage.
– Not fully drying: damp foam or hidden cushion layers can cause mildew or musty odors.
Avoid common “shortcut” mistakes
If someone suggests bleach for upholstery: don’t. According to U.S. EPA disinfecting guidance, common bleach dilution instructions (e.g., 1/3 cup per gallon for 5.25% household bleach) apply to hard, nonporous surfaces—not fabrics—so you can’t safely assume the same chemistry works on upholstery (U.S. EPA cleaning and disinfecting guidance, 2024).
Verdict / tip (when DIY is worth it—and when it isn’t)
DIY cleaning is worth it when the W/S/X tag is readable, stains are localized, and you can dry the sofa thoroughly. If you’re dealing with deep, old stains, unclear fabric codes, or moisture trapped inside cushions, professional cleaning is usually the safer choice.The upside of DIY is control: you can work slowly, blot repeatedly, and stop before oversaturation. The downside is that “mystery upholstery” (unknown codes, delicate weaves, or hidden odors) can produce uneven results even when you follow good technique.
When the upholstery care code is missing or unknown, starting with low-risk methods (vacuuming and minimal patch-tested spot cleaning) is safer than guessing with water or solvents.
If odor or staining persists after full drying, it may indicate contamination deeper than surface grime, which often requires fabric-appropriate extraction or professional treatment.
DIY is a good match for:
– Localized spots where you can blot and control liquid volume
– A readable W/S/X tag plus the ability to run fans for complete drying
– Day-to-day grime removal where you don’t need aggressive extraction
Skip DIY and call a professional if:
– The upholstery is delicate or the tag is missing and you can’t identify fabric safely
– Stains are old, set, or spreading beyond the initial spot
– You suspect pest issues—especially bed bugs—because that needs specialized treatment rather than routine cleaning
– The sofa was exposed to major spills (especially unknown chemicals), where material compatibility is critical
Quick scan checklist (save this)
| Step | Do | Avoid |
|---|---|---|
| Prep | Check W/S/X tag + patch test | Jumping straight to cleaning |
| Dust removal | Vacuum seams/creases thoroughly | Scrubbing grit into the fabric |
| Stain handling | Blot and apply cleaner sparingly | Rubbing or soaking |
| Deep clean | Follow the tag’s code method | Mixing water/solvents across codes |
| Finish | Dry completely with airflow | Leaving cushions damp |
Sources
– U.S. Environmental Protection Agency (EPA) guidance on cleaning and disinfecting: .
– Upholstery care code guidance (W/S/X meanings) from fabric/upholstery care documentation: .
– Disinfectant/product label instructions (contact time, dilution, and surface compatibility): .
– U.S. Department of Energy (DOE) guidance/definition for HEPA filtration performance (0.3 micrometer benchmark): .
– U.S. Centers for Disease Control and Prevention (CDC) mold and dampness guidance (24–48 hour moisture-to-mold window): .
Frequently Asked Questions
What’s the safest way to clean a second-hand sofa before using it?
Start by checking the care label for cleaning codes and vacuum thoroughly on all sides, including seams, crevices, and under cushions. If the upholstery is machine-washable, follow the label; otherwise, spot-test any cleaner in an inconspicuous area first. Use a gentle upholstery cleaner and avoid soaking the foam, because excess moisture can cause odors and mold. Let the sofa dry completely with good ventilation before sitting on it.
How do I remove odors from a second-hand sofa?
Vacuum first, then sprinkle baking soda evenly over the fabric (or lightly on the surface) and let it sit for several hours to overnight to absorb smells. Vacuum again to remove the residue, and consider using a fabric-safe deodorizing spray if odors persist. For musty smells, lightly mist a vinegar-water solution on the surface (spot-test first) and allow the sofa to dry fully. Never trap moisture under plastic covers, as it can worsen odor and mildew.
How can I clean stains and spills on a used sofa without damaging the fabric?
Identify the stain type and gently blot—don’t rub—using clean microfiber cloths to prevent spreading. Use a cleaner appropriate for your upholstery (water-based for many fabrics, but not all), and apply it sparingly while working from the outside of the stain inward. For tough marks, use an upholstery stain remover and repeat in small steps rather than oversaturating. Always spot-test first and allow the sofa to dry fully between treatments.
Which is the best cleaning method for different sofa materials (fabric, leather, microfiber)?
For fabric sofas, vacuum and use an upholstery cleaner or foam cleaner according to the label, then rinse lightly if the product calls for it. Microfiber typically tolerates alcohol-based spot cleaners, but still require spot-testing to avoid discoloration; brush gently to lift dirt from the nap. For leather, use a pH-balanced leather cleaner and a conditioner to prevent cracking—avoid harsh detergents. If you’re unsure, start with the least aggressive option and confirm compatibility with the material first.
Why should I disinfect a second-hand sofa, and what’s the safest way to do it?
Disinfecting a second-hand sofa helps reduce lingering germs, dust mites, and allergens that can build up in used upholstery. After vacuuming, use a fabric-safe disinfectant or an upholstery steam cleaner if the care label allows it; keep the heat and moisture moderate to protect foam and seams. Wipe non-porous areas (like leather) with a suitable cleaner, then allow complete drying to prevent musty smells. If you have allergies, focus on thorough vacuuming and drying, and consider professional cleaning for heavily soiled or delicate fabrics.
📅 Last Updated: October 17, 2026 | Topic: how to clean second hand sofa | Content verified for accuracy and freshness.
References
- About Bed Bugs | Bed Bugs | CDC
- Bed Bugs: Get Them Out and Keep Them Out | US EPA
- https://www.epa.gov/indoor-air-quality-iaq/dust-mites-and-your-home
- https://www.cdc.gov/coronavirus/2019-ncov/community/disinfecting-building-facility.html
- https://pubmed.ncbi.nlm.nih.gov/?term=bed+bugs+cleaning+upholstered+furniture
- https://pubmed.ncbi.nlm.nih.gov/?term=dust+mites+upholstery+vacuuming+cleaning
- Bed bug
- https://scholar.google.com/scholar?q=secondhand+sofa+cleaning+disinfection+recommendations Google Scholar
- https://scholar.google.com/scholar?q=upholstery+cleaning+bed+bugs+furniture+insect+control Google Scholar
- https://scholar.google.com/scholar?q=dust+mites+upholstered+furniture+cleaning+HEPA+vacuuming Google Scholar

[…] to cleaner chemistry. Here’s the rule I use in 2026: identify the finish as best you can, patch test, then choose the least-aggressive compatible […]