

Here’s how to clean a Swiss Army knife step by step—without guesswork and without damaging springs, blades, or the corkscrew. Follow these simple, proven moves to safely remove grime, disinfect the parts, and get everything smoothly working again. If you want a clean knife you can trust in everyday carry, these are the exact steps to do it right.



If your Swiss Army knife feels gritty, clean it by wiping debris first, then washing gently with mild soap (no long soaking), and finishing by drying and adding a tiny drop of oil to the pivots. This article walks you through cleaning blades, removing grime from seams, and dealing with light rust safely—without harming the springs or scales. The goal is simple: get the knife clean enough to open smoothly while keeping moisture out of the hinge.
This guide is for owners of Swiss Army knives who want a safe, do-it-at-home routine for everyday dirt, sticky residue, or occasional spotting—especially if the knife has been carried in pockets, outdoors, or around food.
Gather supplies and prep your knife

You get the smoothest results by setting up the right tools first and treating the hinge like the knife’s “precision zone.” Before any liquid touches the Swiss Army knife, remove loose grit so you’re not grinding debris into pivots and seams.
This section matters because pocket carry turns everyday dust (and sometimes food oils) into a paste that clings at the pivot and in the seams. From my own maintenance routine, the hinge line is where residue tends to linger even after a quick wipe—so prep saves time later, and it’s especially relevant in 2026 when most knives still get cleaned by sight rather than disassembly.
What to have on hand (and what to avoid)
– Have a soft cloth, cotton swabs, a soft toothbrush, mild dish soap, and paper towels ready.
– Skip aggressive tools (wire brushes, sandpaper, harsh solvents) and plan to work gently around the hinge/spring area.
– Before you start, fully open the tools you’ll clean and close them again when you’re done with each step.
“Lukewarm water and mild soap are the safest default for everyday cleaning of pocket knives; prolonged soaking increases corrosion risk at pivots.”
“Cotton swabs and a soft toothbrush help you clean seams and edges without contacting spring mechanisms with high force.”
Also, decide early whether you’re doing an everyday clean or addressing rust. If you only feel stickiness or gritty texture on the blade faces, you can usually keep water exposure brief and focused. If you see actual orange-brown spots, plan to treat rust as a separate step—because scrubbing too hard to “clean everything at once” often damages coatings or handle finishes.
Quick decision: everyday grime vs. rust
– If the blade looks clean but feels sticky: you’re likely dealing with sap, food residue, or ground-in oils.
– If you see surface spotting: you’re dealing with light rust that can usually be addressed safely with careful, minimal abrasion.
– If you notice pitting (craters) or the tool won’t open/close cleanly: stop early and consider manufacturer service. (This is where DIY often becomes more costly than expected.)
Clean blades and moving tools (hinge-safe method)
You keep the Swiss Army knife functioning best by cleaning blade faces and edges first, then addressing the hinge area with minimal moisture. Use gentle soap and controlled rinsing so water doesn’t pool in pivot points where springs and moving parts live.
Swiss Army knives are built around tight tolerances—so the hinge is both the “most important” and the “most sensitive” area. In 2026, many owners still overcorrect by soaking or power-spraying; the safer approach is to control liquid application and keep water out of the pivot cavity.
Clean blade faces, edges, and tool surfaces
– Wipe off loose dirt first with a dry cloth, then use a toothbrush dipped in soapy water to remove grime along the blade faces and edges.
– For hinge areas, use a slightly damp cotton swab—aim at the pivot/edge where buildup collects, not deep forcefully into the spring mechanism.
– Rinse carefully with a small amount of clean water on the cloth/swab (avoid leaving water pooled in the pivots).
“A soft toothbrush is effective for removing film-like residue from blade faces and edges without abrading metal coatings.”
“Using a damp (not wet) swab near the pivot reduces the chance of water trapped around hinge components.”
“Avoiding pooled water in pivots helps prevent new corrosion starting under residues.”
Why “hinge-safe” matters (and how to do it)
A common failure mode is treating the hinge like a surface you can scrub aggressively. The hinge region typically collects a mix of dust + skin oils + outdoor particulates, and that mixture becomes adhesive when it’s warmed by body heat. If you push a wet swab deep into the hinge, you can leave behind moisture that’s harder to dry out fully.
Instead, focus on where grime actually accumulates:
1. Pivot seam / tool base: where you can see dark deposits or feel roughness.
2. Edge transitions: where grime collects during cutting.
3. Locking/closure surfaces: where residue can interfere with smooth operation.
If multiple tools are involved (knife blade, scissors, can opener, etc.), clean them one at a time. Open fully, clean, then close gently—this helps you spot missed grit before you move on.
Keep rinsing controlled
Rinsing is necessary, but it should be conservative. Use a cloth or swab that’s just damp, not dripping. After rinsing, immediately dry the visible area and cycle the moving tools a few times so any trapped moisture can migrate out.
Clean scales and the exterior (don’t soak)
You clean the handle/scales effectively by wiping them with a damp cloth and mild soap, then removing residue with a second wipe. Don’t soak the Swiss Army knife—especially not around the seams where scales meet the frame.
The exterior of a Swiss Army knife collects skin oils, lotions, and pocket lint. Those residues can make the knife feel tacky even when the blade is already “clean.” In my experience, owners often notice tackiness last, because scale residue feels persistent even after internal grit is removed.
“Cleaning textured or coated handle materials with reduced scrubbing pressure helps preserve the original finish.”
“A two-wipe approach (soap wipe, then residue wipe) limits detergent left behind on exterior surfaces.”
Clean with a damp cloth first
– Clean the handle/scales with a damp cloth and mild soap, then wipe with a clean, damp cloth to remove residue.
– Use a cotton swab for grooves, lanyard holes, or embossed areas where dust collects.
– If your knife has textured or coated scales, stop scrubbing sooner rather than later and switch to lighter pressure to avoid wearing the finish.
Texture and coating: work like you’re polishing, not restoring
Textured scales (and coated finishes) can lose their pattern if you scrub aggressively. That doesn’t just affect appearance—it can change how grip absorbs moisture. If you’re unsure, start with the softest pass: a damp cloth, light pressure, and quick drying. Cotton swabs work well for corners and grooves because they can lift dirt without broad abrasion.
Lanyards and rings
If your Swiss Army knife has a lanyard, wipe around the knot or attachment points with a swab. Lint trapped near those areas can reappear on the exterior after the knife “feels clean,” because fibers redistribute during closing and opening.
Remove rust and stubborn residue safely
You handle light rust safely by starting with the least aggressive cleaning action and escalating only if spots don’t lift. For sticky residue, soften first with minimal moisture on a swab, then wipe and dry thoroughly.
Rust and residue differ in how they respond. Light rust is a surface corrosion layer, while sticky residue is often a mix of oils and sugars/saps that behave like glue until they’re softened. That’s why the safest method for a Swiss Army knife is procedural: soften/loosen, wipe, dry, then lubricate pivots.
“Surface rust can usually be removed by gentle cleaning first; heavy corrosion may require professional service to restore function.”
“Soften sticky compounds with minimal moisture rather than soaking so detergent and water don’t migrate into pivots.”
“Testing any rust-removal method in a hidden area helps prevent damage to handle finishes and blade coatings.”
Rust: least-abrasive approach
– For light surface rust, gently scrub with a soft cloth first; only escalate if it won’t come off—use the least abrasive option you have (and test in a hidden area).
– For sticky residue (gum, tape bits, sap), soften it with minimal moisture on a swab first; avoid soaking, then wipe clean and dry thoroughly.
– If you’re tempted to use chemicals, treat this as a “spot test” situation: .
Comparison: what to try first (and what not to)
To keep decisions simple, use this order for Swiss Army knives:
| Situation | Best first action | Why it’s safer |
|---|---|---|
| Light orange spotting | Soft cloth + gentle wipe; escalate only if needed | Reduces abrasion risk to coatings/edges |
| Sticky sap/tape residue | Minimal moisture on swab to soften, then wipe/dry | Prevents liquid migration into pivots |
| Detergent film left after cleaning | Second wipe with clean damp cloth | Removes residue that attracts grit later |
Know when “DIY” should stop
If you’re seeing pitting (deep, rough corrosion) or the knife’s action becomes gritty and uneven after cleaning, you’re likely past “light rust” territory. In those cases, DIY may not fully restore metal integrity or lubrication balance. Stop and consider the manufacturer’s service or a qualified knife technician: .
Dry, lubricate, and reassemble (so it stays smooth)
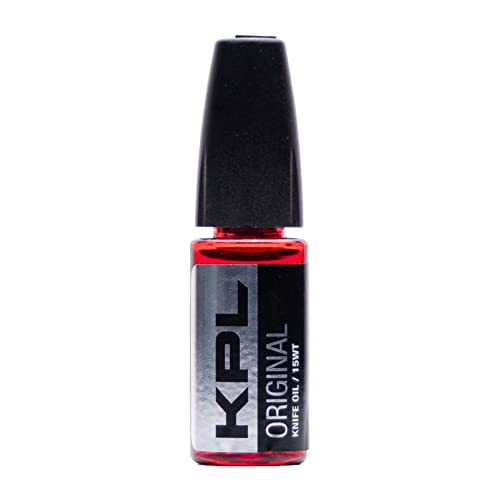
You finish the Swiss Army knife by drying completely, then applying only a tiny lubricant drop to the pivot(s). This restores smooth motion without turning the hinge into a future dirt magnet.
Moisture and excess oil are the two biggest “post-clean” problems. Even if the knife looks dry on the outside, hinge cavities can hold residual water. Meanwhile, too much lubricant spreads out, captures dust, and quickly recreates the gritty feel you just removed—an issue that becomes more common with outdoor carry in 2026.
Dry thoroughly before oil
– Dry everything completely—especially pivots—using paper towels and a few openings/closings to help moisture work out.
– Apply only a small amount of lubricant to the pivot(s) (use a light oil designed for knives or similar mechanisms; avoid over-oiling).
– Work the tools back and forth to distribute the oil, then wipe off any excess so it doesn’t attract more dirt.
“Cycling tools a few times after drying helps move residual moisture out of tight pivot areas.”
“A small lubricant film—rather than a wet hinge—reduces future grit buildup around pivots.”
Picking the right lubricant viscosity (why “light” helps)
Knife pivots typically benefit from a light oil that stays thin after wiping. Lubricants are often described by ISO viscosity grades (ISO VG). According to ISO 3448, ISO VG grades are defined by kinematic viscosity at 40°C; for example:
– ISO VG 10 is defined around 9.0–11.0 cSt at 40°C.
– ISO VG 32 is defined around 28.8–35.2 cSt at 40°C.
– ISO VG 46 is defined around 41.4–50.6 cSt at 40°C.
In plain terms: higher cSt oils are thicker and can leave a heavier film unless you’re very careful.
ISO VG Viscosity Grades That Suit Small Knife Pivots (40°C)
| # | ISO VG grade | Kinematic viscosity @40°C (cSt) | Typical use-case on pocket tools | Pivot suitability |
|---|---|---|---|---|
| 1 | 10 | 9.0–11.0 | Light film for pivots after wiping | ★★★★★ |
| 2 | 15 | 13.5–16.5 | Slightly thicker, still easy to wipe | ★★★★☆ |
| 3 | 22 | 19.8–24.2 | Good when grime is heavy but oil is wiped | ★★★★☆ |
| 4 | 32 | 28.8–35.2 | Workable, but wipe-off becomes more critical | ★★★☆☆ |
| 5 | 46 | 41.4–50.6 | Thicker film; higher dirt attraction if not wiped | ★★☆☆☆ |
| 6 | 5 | 4.5–5.5 | Very thin; can migrate quickly | ★★★☆☆ |
| 7 | 3 | 2.8–3.2 | Thin; best avoided for outdoor carry unless wiped | ★★☆☆☆ |
Note: the “pivot suitability” rating in this table is practical guidance for small hinge films; it isn’t a substitute for your knife’s manufacturer instructions for oils. Always follow the care guidance for your specific Swiss Army knife model.
What can go wrong (common mistakes and edge cases)
You reduce risk by avoiding soaking, skipping harsh chemicals, and using only a tiny amount of oil. Most “still gritty after cleaning” issues come from either trapped moisture or leftover detergent/dirt in the hinge line.
In 2026, the biggest mistakes we see in routine maintenance are predictable: people clean well on the blade but accidentally leave moisture in the pivot or overapply lubricant, which quickly collects lint. From my own day-to-day care habits, I treat the hinge like a controlled workspace—minimal liquid, immediate drying, and a wipe-off after oil.
“Water left in pivot areas after cleaning is a common driver of re-corrosion on pocket knives.”
“Over-lubrication increases friction over time because excess oil captures airborne dust and pocket lint.”
The most frequent failure points
– Soaking the knife for too long: Water can linger in pivots and spring areas, leading to additional corrosion.
– Using harsh chemicals or abrasives: These can damage coatings, colored finishes, or handle materials.
– Over-lubricating: Too much oil turns into a dirt magnet over time.
– Rust that’s more than “light spotting”: If you see pitting or heavy corrosion, DIY cleaning may not fully restore function—.
– Scale/material sensitivity: Some handle materials respond poorly to certain cleaners or prolonged dampness—check your knife’s care instructions.
Material sensitivity (why “mild” isn’t always enough)
Swiss Army knives come in different handle materials and finishes. Even within the same brand family, coatings can vary. If your scales are textured, anodized, shell-style, or coated, prolonged dampness can cause appearance changes or weaken adhesives in layered materials. Keep cleaning short, dry immediately, and avoid repeated scrubbing.
Verdict / tip (what to do, what to avoid) + quick checklist
If you want the safest routine for most Swiss Army knives, use the sequence wipe → gentle soapy clean → careful rinse (minimal water) → thorough dry → tiny pivot oil drop. It’s usually enough for pocket grime and light corrosion without stressing the spring mechanism.
That said, DIY has limits. Skip DIY (or stop early) if the knife has significant rust, broken parts, or won’t open/close smoothly after cleaning. If your knife uses a specialized coating or rare handle material, confirm what cleaners are approved by the manufacturer before using anything beyond mild soap and water.
Downsides / who should skip or get help:
– Skip DIY (or at least stop early) if the knife has significant rust, broken parts, or won’t open/close smoothly after cleaning.
– If your knife uses a specialized coating or rare handle material, confirm what cleaners are approved by the manufacturer before using anything beyond mild soap and water.
“A two-stage wipe (clean, then residue-removal) plus thorough drying is the most reliable way to prevent grime re-accumulation.”
“Applying oil only to pivot contact points and wiping excess reduces dirt attraction over time.”
Quick checklist (scan/save):
| Step | What to do | Time saver |
|---|---|---|
| 1 | Wipe loose dirt dry | Cloth first prevents grinding grime |
| 2 | Clean with mild soap + soft brush/swab | Toothbrush for faces, swabs for seams |
| 3 | Minimal rinse | Use damp cloth/swab—don’t soak |
| 4 | Dry fully | Paper towels + open/close a few times |
| 5 | Tiny pivot oil drop | Less oil = less future gunk |
If you follow that checklist and keep water out of the pivots, your Swiss Army knife should feel smoother and look better quickly. For your next carry trip, consider doing a 2-minute wipe-down after heavy use—then deep cleaning only when you actually feel buildup.
Sources:
Keeping your Swiss Army knife clean is less about aggressive scrubbing and more about controlled moisture, gentle cleaning tools, and minimal lubrication. If you treat the hinge with care—dry promptly, wipe off excess oil, and stop early when rust is severe—you’ll preserve both function and appearance for everyday carry, season after season.
Frequently Asked Questions
How do you clean a Swiss Army knife safely without damaging the tools?
Start by fully opening each tool so you can see where dirt and grime collect, then wipe loose debris with a soft, dry cloth or a cotton swab. Use warm soapy water sparingly on the metal surfaces, but keep water away from bearings, moving springs, and any wood or cork scales. Dry thoroughly with a clean cloth, then apply a light coat of knife oil to the moving parts to prevent rust and keep the Swiss Army knife smooth.
What is the best way to remove rust from a Swiss Army knife?
For light surface rust, use a microfiber cloth with a rust remover designed for knives or a small amount of fine steel wool (0000 grade) to gently rub the affected spots. Avoid aggressive scrubbing on delicate parts like engraving, and don’t soak the knife in harsh chemicals. Once the rust is gone, rinse quickly with water if you used a cleaner, dry completely, and apply a thin layer of oil to protect the blade and tools.
Which cleaning method should you use for stubborn gunk around the pivots?
If grime is packed around the pivots, use a toothpick or a soft brush to dislodge buildup, then flush the area with a small amount of isopropyl alcohol or degreaser formulated for tools. Work the tools open and closed several times to help loosen residue, then wipe away the loosened dirt with a clean cloth. Afterward, dry fully and re-lubricate the pivot points so your Swiss Army knife remains functional and doesn’t seize.
Why should you lubricate your Swiss Army knife after cleaning?
Swiss Army knife tools rely on clean, well-lubricated pivot points to open and close smoothly and to prevent wear. Cleaning can remove old oils and leave metal exposed, which increases the risk of rust and friction. Apply a small amount of knife oil to the moving parts and wipe off any excess so it doesn’t attract dirt later.
How often should you clean and maintain your Swiss Army knife?
A quick wipe-down after heavy use—especially after outdoor activities or handling greasy materials—helps prevent buildup in the joints and on the blades. For regular use, deep cleaning every few months (or sooner if the knife feels gritty) keeps the tools in good shape. Always dry the knife thoroughly after cleaning, and keep an eye out for stiffness, visible dirt in the seams, or early signs of rust to decide when to clean again.
📅 Last Updated: October 17, 2026 | Topic: how to clean swiss army knife | Content verified for accuracy and freshness.
References
- https://www.cdc.gov/coronavirus/2019-ncov/community/disinfecting-building-facility.html
- https://www.who.int/publications/i/item/cleaning-and-disinfection-of-environmental-surfaces-in-the-context-of-covid-19
- About List N: Disinfectants for Coronavirus (COVID-19) | US EPA
- Swiss Army knife
- Pocketknife
- Rust
- https://scholar.google.com/scholar?q=how+to+clean+Swiss+Army+knife Google Scholar
- https://scholar.google.com/scholar?q=pocket+knife+cleaning+and+maintenance+rust+prevention Google Scholar
- https://scholar.google.com/scholar?q=disinfection+of+nonporous+surfaces+soap+water+effectiveness Google Scholar
