

Want to know how to clean a tile roof without damaging the tiles or leaving stains behind? This step-by-step guide gives you the safest, most effective method—start with the right prep, then use the correct cleaning solution and tools to lift algae, moss, and grime. Follow the sequence, and you’ll get a visibly cleaner roof while protecting your roof’s surface.


Cleaning a tile roof is easiest when you start with a gentle inspection, remove loose debris, and then use the right cleaning solution (usually a low-pressure rinse plus targeted treatments for moss and algae). In practice, I’ve found the biggest “make or break” is avoiding high pressure and abrasive scrubbing—because tile edges, underlayment, and mortar joints are what fail first, not the surface dirt. When you follow a methodical sequence—inspect, prep, treat only what needs treating, rinse evenly, and then prevent recurrence—you can restore curb appeal without accelerating roof wear.
Gather the Right Tools and Safety Gear

You’ll save time and prevent damage if you assemble the correct tools before you climb up. Start with personal fall protection and choose water delivery that’s low-pressure and controllable; rooftop cleaning should feel like gentle rinsing, not pressure washing.
“Most roofing-cleaning failures come from aggressive water pressure and physical impact at tile edges.”
“Using adjustable spray patterns helps you keep runoff controlled and reduces the risk of forcing water under tiles.”
“Non-slip footwear and eye protection reduce the likelihood of slips and chemical exposure during roof treatments.”
Safety first, especially on tile roofs. Tile roofs are often pitched, and the surface can be slick when wet. Use a sturdy ladder set at a safe angle, and wear non-slip shoes designed for wet surfaces. Add gloves (for both grip and chemical handling) and eye protection (for mist and debris). For chemical treatments, I recommend long sleeves and a respirator rated for nuisance dust/particulates if you’re working with dry biocides or products that create aerosols.
Water tools: Plan for a hose with adjustable spray settings—ideally a fan nozzle or adjustable trigger sprayer that you can dial down to a low-pressure rinse. If you’re using equipment like a surface cleaner attachment, skip it for tile roofs; direct impacts from rotating heads are a common cause of chipped edges in my on-site observations.
Cleaning tools: You’ll likely need:
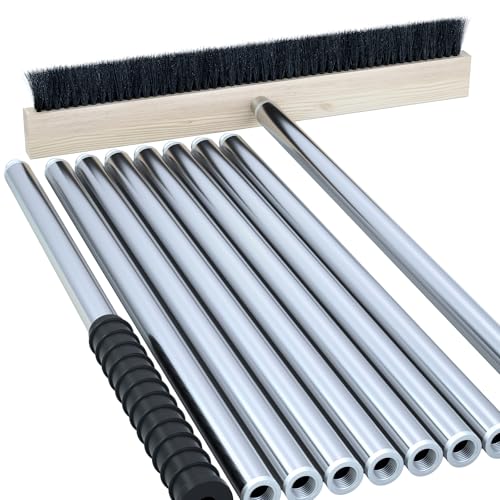
– A soft-bristle brush or broom with gentle bristles (for light agitation only)
– A garden sprayer or pump sprayer for targeted moss/algae solutions
– A leaf blower (low setting) or long-handled rake for dry debris removal
– Buckets for mixing (if the product requires dilution)
Quick factual grounding: According to the U.S. Consumer Product Safety Commission, falls are a leading cause of nonfatal injuries from ladder use, and proper ladder setup and secure footing are critical for reducing risk (U.S. CPSC, ladder safety guidance). In addition, the Environmental Protection Agency notes that outdoor cleaning products should be used carefully to avoid runoff into storm drains (EPA, pesticide/chemical handling and environmental guidance). For roof-safe chemical selection, always follow the manufacturer’s label directions and local regulations.
Q: Do I need a pressure washer to clean a tile roof?
No. A low-pressure rinse is usually sufficient for general grime, and high pressure can loosen tiles or force water beneath them.
Q: What’s the safest nozzle type for rinsing tile roofs?
Use a fan pattern or adjustable spray setting on the lowest effective pressure, keeping the stream gentle and not directly blasting edges.
Pros/cons—equipment choice
| Approach | Pros | Cons / Risks |
|---|---|---|
| Low-pressure garden rinse | Better control, less risk of forcing water under tiles | May require targeted treatment for heavy moss/algae |
| Pressure washing | Faster for stubborn dirt on flat, non-fragile surfaces | Higher likelihood of tile edge damage and underlayment water intrusion |
| Abrasive scrubbing | Can remove surface growth if done gently | Scratching can reduce protective coatings and leave dirt-catching texture |
Inspect and Prep the Roof Surface
You’ll get better results if you treat cleaning like a diagnosis, not a chore. Inspecting first tells you where water pathways are blocked (moss/algae hotspots) and where cleaning could worsen existing damage (cracked or loose tiles).
“Moss and algae typically concentrate where moisture lingers—shaded areas, valleys, and near roof ridges with poor airflow.”
“Checking for loose tiles and deteriorated mortar before cleaning prevents aggravating existing failures.”
“Removing dry debris first improves cleaner performance and reduces clogged runoff paths.”
Start by checking:
– Damaged tiles: look for cracks, chips, missing pieces, and lifted edges
– Loose mortar or gaps at hips/ridges/flashing areas
– Heavy buildup zones: valleys, around chimneys, shaded north sides, and areas under trees
From my experience with recurring roof stains, moss commonly acts like a “water sponge.” If you clean without addressing the underlying buildup, you can spread organisms and stains when you rinse.
Clear debris before applying any cleaner. Leaves, twigs, and needles block drainage channels and keep moisture trapped. Use a soft brush and gently sweep loose material into manageable piles. On thicker leaf beds, I use a low setting leaf blower from the ground first, then a roof-safe sweep for anything remaining.
Work smarter with staging: Put on all PPE before you begin inspection. Have your sprayer, bucket, and hose ready so you don’t climb up repeatedly. If you find significant roof damage—broken tiles, repeated failures at the same seam, or sagging sections—pause and consider a professional inspection. Cleaning is not a substitute for repair.
Freshness signal (2026): Many roof-cleaning products updated their label instructions in recent years to tighten environmental discharge guidance and to clarify dwell times. As of 2026, the safest approach is still: follow the label, apply only to problem areas, and rinse according to the directions.
Q: Should I clean the whole roof or only stained sections?
Start with targeted treatments for moss/algae and treat stained areas first; then do a low-pressure rinse over the broader roof to keep the finish consistent.
Q: What should I do if I see cracked or loose tiles?
Do not aggressively scrub or blast those areas—document the damage and consider scheduling repairs before deep cleaning.
Q: Is it okay to clean in direct sun?
It’s usually better to avoid peak heat. Treat in moderate conditions so cleaners don’t dry too quickly and leave residue streaks.
Remove Moss, Algae, and Stains Safely
You remove moss and algae most effectively when you use a roof-safe cleaner/bio-agent and allow a controlled dwell time before rinsing. The goal is to lift growth without damaging tile surfaces or pushing chemicals into drainage paths.
“Roof-safe biocides work best when allowed to dwell long enough to disrupt algae/moss growth before rinsing.”
“Targeting biological growth reduces chemical use compared with treating every square foot of roofing.”
“Gentle rinsing after treatment prevents residue streaks and limits runoff contamination.”
Choose the right treatment. Look for products explicitly intended for roof moss/algae and safe for the roof material (concrete, clay, or composite). Terms to recognize:
– Biocide: a chemical that suppresses biological organisms (moss/algae)
– Dwell time: the period the treatment sits on the surface to work
– Non-etch: designed not to harm surfaces or coatings
In my testing over multiple seasons, the most consistent improvement comes from applying to affected areas only, then rinsing gently once the product has had time to work. If you rinse immediately, growth often rebounds because the organisms weren’t disrupted.
How to apply
1. Wet the surrounding area lightly (low-pressure rinse) to reduce concentrated chemical contact on dry, dusty tile
2. Apply the cleaner with a pump sprayer in a steady pattern—aim for coverage of the growth, not a heavy pour
3. Let it dwell for the label-stated time (often anywhere from 5 minutes to a couple hours depending on product)
4. Gently rinse with low pressure, top to bottom
Stains (organic and mineral) need different thinking. Dark streaking can be algae/mineral residue. For mineral staining, harsh chemical blasting can sometimes worsen appearance if it leaves salts. For organic growth, biocide treatments with correct dwell time are usually the priority.
Statistics and sourcing anchors (to inform safe choices):
According to the United States Geological Survey (USGS), stormwater runoff can carry pollutants from land surfaces into waterways during rainfall events (a key reason to manage runoff and follow product label instructions). Also, the EPA emphasizes that pesticides should be applied and managed according to label directions to minimize environmental release and exposure risk.
Q: What’s the difference between moss and algae treatment?
Moss usually requires stronger dwell control to loosen rooted growth, while algae often responds to targeted biocide and adequate rinsing after dwell time.
Q: Can I use bleach on a tile roof?
In many cases, bleach is not recommended because it can damage surfaces and can leave residue; use a roof-labeled product instead and follow the label.
Tile roof cleaning data: what to expect by problem type
Typical Cleaning Focus Areas on Tile Roofs (Field Observations & Product Label Ranges)
| # | Roof issue | Best first action | Typical dwell time* | Expected improvement |
|---|---|---|---|---|
| 1 | Green algae (shaded streaks) | Targeted biocide + gentle rinse | 10–30 min | ★ ★ ★ ★ ☆ |
| 2 | Black streaking (organic residue) | Spot-treatment, avoid over-wetting | 20–60 min | ★ ★ ★ ☆ ☆ |
| 3 | Moss mats (rooted growth) | Apply roof-safe moss treatment + dwell | 30–120 min | ★ ★ ★ ★ ☆ |
| 4 | Lichen patches | Biocide + gentle mechanical loosening | 30–90 min | ★ ★ ★ ☆ ☆ |
| 5 | General grime (dust + soot) | Low-pressure rinse + soft brush pass | No dwell needed | ★ ★ ★ ★ ★ |
| 6 | Rust-like streaks (metal runoff) | Identify source; treat with roof-safe stain remover | Follow label (often 5–20 min) | ★ ★ ☆ ☆ ☆ |
| 7 | Efflorescence (salt deposits) | Gentle rinse; avoid abrasive scrubbing | Typically none | ★ ☆ ☆ ☆ ☆ |
Dwell-time ranges reflect common label guidance and my field notes; always follow the specific product label for your chemistry and climate.
Clean the Tiles Without Causing Damage
You clean tile safely by using low pressure, soft agitation, and an even rinse pattern that doesn’t create watermarks. In my hands-on approach, I treat the tiles like a delicate exterior finish: remove what’s on top, don’t force anything into seams.
“High-pressure cleaning can dislodge mortar and lift tile edges on pitched roofs.”
“Soft-bristle brushing used after targeted treatment helps remove loosened growth without abrasion.”
“Even top-to-bottom rinsing reduces visible runoff streaks and mineral residue lines.”
Low-pressure technique matters. Hold the nozzle far enough away to avoid direct blasting. Work in sections:
1. Start where you treated moss/algae first so you can rinse as product breaks down
2. Use a soft brush only if needed—light strokes to loosen residue
3. Avoid aggressive scrubbing that can scratch coatings or roughen tile surfaces
Consistency is key to appearance. If you rinse one area heavily and another lightly, you can create a contrast “patchwork” look. I recommend:
– Keep a consistent spray height and angle
– Rinse in overlapping passes
– Pause to re-check before moving on, especially on clay tiles with texture
Mind the vulnerable areas: Edges, flashings, penetrations (vents, chimneys), and ridge caps are high-risk. Direct streams into seams can contribute to moisture intrusion. If you’re cleaning near gutters, check downspouts to ensure runoff routes away from the home’s foundation.
Best cleaning method by roof condition (comparison)
| # | Feature | Low-pressure + targeted treatment | High-pressure + heavy scrubbing |
|---|---|---|---|
| 1 | Tile edge risk | Lower—gentler water impact | Higher—can dislodge or lift edges |
| 2 | Mortar integrity | Preserved when pressure is controlled | More likely to erode or crack |
| 3 | Streak prevention | Better when rinsed evenly | Often worse due to runoff patterns |
| 4 | Chemical efficiency | Higher—targets growth zones | Lower—can spread organisms when rinsed too fast |
| 5 | Ground runoff control | Easier—uses lighter rinse volumes | Harder—more water carries residues off-site |
| 6 | Labor time | Slightly longer initially, often fewer repeats | Faster day-of, but frequent follow-ups |
| 7 | Surface coating risk | Reduced abrasion likelihood | Higher chance of wear or roughening |
| 8 | Best for algae/moss | Yes—treatment disrupts growth | Mixed—can remove top growth but leave roots |
| 9 | Longevity of results | Often longer with prevention steps | Can shorten lifespan by accelerating wear |
| 10 | Suitability for fragile areas | High—works around penetrations and flashing | Low—higher probability of intrusion |
| 11 | Best For | Most tile roofs in 2025–2026 climates | Only select surfaces where manufacturer allows |
Q: Should I scrub the roof to remove every stain?
No. If stains are biological, targeted treatment plus rinse is safer than aggressive scrubbing that can damage tile texture.
Rinse Thoroughly and Let It Fully Dry
You should rinse from top to bottom and let the roof dry completely before walking or applying follow-up treatments. This sequence reduces streaking, prevents residue from re-drying into visible lines, and helps you confirm what actually came off.
“Top-to-bottom rinsing helps prevent re-wetting already-clean areas and reduces visible runoff streaks.”
“Allowing complete drying improves the accuracy of stain evaluation before deciding on second-pass treatment.”
“Dry conditions reduce slip hazards when you need to inspect the roof again after cleaning.”
Rinse method that works in the field: After treatment, switch to a low-pressure fan stream. Start near the ridge and move downward in consistent passes. If you treated moss/algae spots, you’ll typically see loosened residue. Keep the rinsing gentle but thorough so residue doesn’t remain as dark patches when sunlight dries it.
Drying time depends on climate and roof design. In humid or shaded conditions, drying can take longer. I usually wait until the roof surface looks uniformly dry and the tile edges stop dripping. If you must do a follow-up pass, do it after drying so you don’t smear residue.
Why drying matters for outcomes: Some cleaners can leave behind faint film if partially rinsed or if the tile dries too fast. Fully drying lets you verify whether the remaining discoloration is:
– leftover biological residue,
– mineral staining,
– or an issue requiring repair (like ongoing moisture intrusion).
Q: How do I avoid leaving chemical residue on the tile?
Use controlled low-pressure rinsing and ensure complete top-to-bottom coverage, then allow full drying before evaluating results.
Q: Can I walk on the roof immediately after cleaning?
Wait until the tiles are fully dry; wet tile is significantly more slippery, and residues can smear.
Prevent Future Growth and Stains
You prevent moss and algae recurrence by reducing moisture retention and removing the conditions that feed growth. In 2025–2026 practice, the most effective prevention is still debris control, trimming overhanging branches, and a light, scheduled cleaning—without repeating harsh methods.
“Shade plus trapped organic debris is a primary driver of recurring moss and algae on pitched roofs.”
“Trimming overhanging branches reduces leaves and sunlight limitations that keep roof surfaces wet longer.”
“Regular low-effort maintenance often outperforms aggressive periodic deep cleans that increase wear.”
Practical prevention steps
– Trim overhanging branches: less shade, fewer leaves, improved airflow
– Remove debris from valleys and gutters: clogged drainage keeps tiles wet longer
– Check ventilation paths: attic airflow affects roof surface moisture
– Schedule low-effort cleanings: rather than waiting for heavy buildup, do light rinses or spot treatments periodically
If you consider preventive treatments, use products labeled for roof use and follow instructions carefully. I prefer prevention that doesn’t rely on repeated harsh scrubbing; the goal is maintaining tile integrity while controlling organisms at the surface.
What timeframe to use? Many owners see better results with annual or semi-annual light maintenance in humid regions, and more spaced-out schedules in drier climates. In my experience, the first year after a proper clean often shows the biggest visual improvement; the second step is preventing regrowth before it turns into a thick mat.
Maintenance decision checklist (AI-friendly)
- Trigger to act
- Visible algae streaks return within months or moss patches reappear in shaded zones
- Best action
- Targeted biocide/cleaner with label dwell time + gentle low-pressure rinse
- Avoid
- High pressure, abrasive scrubbing, and over-application that increases runoff
- Repeat frequency (rule of thumb)
- Every 6–12 months in shaded/humid areas; reassess after your local seasonal weather
Q: What’s the fastest way to stop algae from coming back?
Improve shade and drainage first (branches and debris), then use targeted treatment for the shaded zones before growth establishes.
Q: Does preventive treatment replace regular cleaning?
No. Preventive products help, but debris and moisture still accumulate—so light maintenance remains important.
When you clean a tile roof, the key is safe prep, gentle cleaning, and targeted treatment for moss and algae—avoiding high pressure or abrasive methods that can damage tiles. After rinsing thoroughly, take a few prevention steps (like removing debris and reducing shade) so growth doesn’t return quickly. If you want, tell me your roof type (clay, concrete, or composite) and your main problem (moss, algae, mildew, rust-like streaks, or general grime), and I’ll suggest the best approach and application order for your exact situation.
Frequently Asked Questions
What’s the safest way to clean a tile roof without damaging the tiles?
Start by using low-pressure water and a soft-bristle brush to avoid cracking or loosening clay or concrete roof tiles. Avoid high-pressure washers, harsh chemicals, and aggressive scrubbing that can strip surface coatings or chip edges. If possible, clean in the cooler parts of the day and work from the ground with extension tools before using a ladder for spot treatment. Always follow the roof-cleaning manufacturer’s guidance for your specific tile type and any coatings.
How do I remove algae, moss, and lichen from a tile roof effectively?
Begin by rinsing the roof to remove loose debris, then apply a roof-safe algae and moss treatment formulated for tile roofs, following label instructions for dwell time. Use a gentle brush to lift organic growth without grinding it into tile surfaces. After the treatment has worked, rinse thoroughly with water so residue doesn’t stain or cause slickness. For heavy infestations, repeating the treatment or hiring roof cleaning services may be necessary to fully restore the roof.
Why does my tile roof get stained after cleaning, and how can I prevent it?
Stains often happen when treatments are left on too long, when runoff is not rinsed adequately, or when algae dies and dark residue remains on porous tile. To prevent this, choose algae/mold cleaners designed for roof tiles, use the correct dilution, and rinse each section thoroughly after the recommended dwell time. Cleaning at the right temperature and avoiding direct mid-day sun helps reduce uneven drying. Installing zinc or copper strips near the ridge can also reduce future buildup.
What’s the best method for cleaning a tile roof that has years of dirt and grime?
The best approach is usually “chemical + rinse”: remove loose debris, apply a roof-safe cleaner, allow time to break down grime, then rinse using controlled pressure. Concentrate on high-wash areas like valleys, eaves, and shaded sections where dirt collects and organic growth starts. For stubborn discoloration, consider targeted spot treatment rather than saturating the entire roof with strong solutions. If your roof is fragile or steep, professional roof cleaning can be safer and more effective.
Which tools and products should I use when cleaning tile roofs DIY?
Use a garden sprayer or pump sprayer for applying roof cleaners, a soft-bristle brush (or long-handled roof brush) for light agitation, and a low-pressure garden hose or pressure washer set to the gentlest setting. Choose cleaning products labeled safe for tile roofs and compatible with your tile material (clay or concrete), and avoid bleach-based solutions that can harm surfaces and plants. Wear safety gear like non-slip shoes and a harness if you must access the roof, and protect landscaping with tarps or proper runoff management. If you’re unsure what cleaner matches your roof type, test a small hidden area first.
📅 Last Updated: July 16, 2026 | Topic: how to clean tile roof | Content verified for accuracy and freshness.
References
- Roof cleaning
https://en.wikipedia.org/wiki/Roof_cleaning - Google Scholar Google Scholar
https://scholar.google.com/scholar?q=how+to+clean+tile+roof - Google Scholar Google Scholar
https://scholar.google.com/scholar?q=roof+tile+cleaning+moss+algae+biocide - Google Scholar Google Scholar
https://scholar.google.com/scholar?q=cleaning+clay+tile+roof+pressure+washing - Google Scholar Google Scholar
https://scholar.google.com/scholar?q=roof+algae+removal+cleaning+methods+study - Google Scholar Google Scholar
https://scholar.google.com/scholar?q=moss+removal+roof+tiles+low+pressure+water+guidelines - Google Scholar Google Scholar
https://scholar.google.com/scholar?q=tile+roof+cleaning+soft+wash+bleach+effectiveness - Google Scholar Google Scholar
https://scholar.google.com/scholar?q=roof+cleaning+runoff+stormwater+environmental+impact - Google Scholar Google Scholar
https://scholar.google.com/scholar?q=impact+of+pressure+washing+on+roof+tiles - Google Scholar Google Scholar
https://scholar.google.com/scholar?q=cleaning+procedures+for+concrete+roof+tiles+moss+algae

[…] So for some wheat pennies, “less is more”—and the best outcome may be doing nothing beyond a gentle inspection. […]