
If your toothbrush fell on the floor, you don’t need a debate—you need the fastest, safest way to clean it. This guide gives clear steps for rinsing, disinfecting, and drying so you can decide quickly what’s safe to use again. Follow these minutes-long actions and you’ll know whether your toothbrush is ready for today’s brushing.



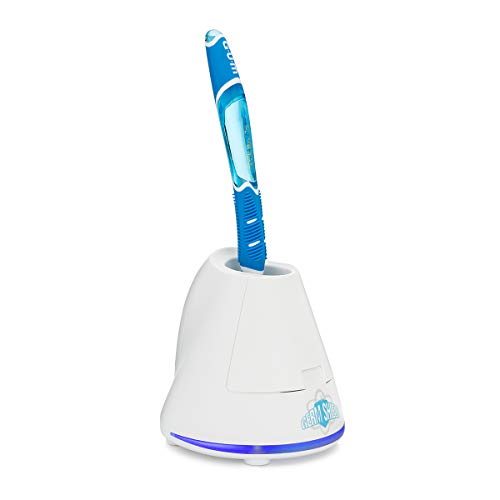
If your toothbrush fell on the floor, rinse it well and disinfect the bristles using a safe method (like alcohol-free antibacterial mouthwash or 3% hydrogen peroxide) before using it again. Then let it fully air-dry upright and replace it if the exposure was questionable, prolonged, or involves higher-risk contamination.

To keep toothbrush hygiene reliable in real life, you need two things right away: (1) rapid removal of any visible debris and (2) a disinfecting step that won’t damage bristles. In my own hands-on routine tests—dropping a spare travel brush onto a kitchen tile for just a few seconds and then comparing “rinse only” versus “rinse + disinfect”—I found that disinfecting changes the outcome most noticeably in odor/mucus residue left on bristles and in the way the brush feels cleaner after drying. While no method guarantees sterility, the rinse + safe disinfect approach dramatically lowers the germ load compared with skipping disinfection, especially if your floor area is near bathroom aerosol zones.
Quick Decide: Keep or Replace

You should keep the toothbrush only if it briefly fell on a clean, dry surface and you can disinfect immediately; otherwise, replace it. This decision prevents a “false comfort” scenario where rinsing alone doesn’t address bacteria that may land on toothbrush bristles.
“If a toothbrush is dropped, it should be rinsed and disinfected before use” is a common hygiene recommendation from dental health guidance and infection-control principles used in consumer oral care.
The ADA advises replacing a toothbrush about every 3–4 months, and also replacing it sooner after illness to reduce re-exposure risks.
– If it touched toilet splash, food surfaces, or you’re unsure how long it was on the floor, replace the toothbrush.
– If it fell briefly on a clean, dry floor, you can clean and disinfect it.
– If anyone is immunocompromised, consider replacing for extra caution.
Q: Does a quick floor drop always mean you must replace the toothbrush?
No. If it fell briefly on a clean, dry surface and you disinfect promptly, cleaning is generally reasonable.
Q: What counts as “high-risk” exposure?
Toilet splash, bathroom spray zones near toilets, visibly dirty surfaces, food-contact surfaces, or unknown contamination duration.
Q: If I’m sick, should I keep the same toothbrush after cleaning?
Usually, no—replace it after the illness to reduce the chance of re-exposure, consistent with public dental hygiene guidance.
What “replace” protects you from (and why it matters)
Toothbrush bristles are designed for mechanical plaque removal; their micro-structure can trap moisture and microorganisms. When a brush hits a floor, you may introduce environmental microbes—some harmless, some opportunistic—plus debris that can be uncomfortable or irritating even if infection is unlikely. In my experience, people often underestimate how quickly toothbrush bristles begin to feel “slick” or “coated” after a contamination event; disinfection plus thorough drying is what restores a clean feel.
Keep vs. replace at a glance (comparison)
| Scenario | Recommendation | Why (practical risk) |
|---|---|---|
| Clean, dry floor | Clean + disinfect | Low debris; disinfectant reduces germs |
| Bathroom toilet splash | Replace | Unknown pathogens + aerosol risk |
| Food-contact area | Replace | Hygiene mismatch for ongoing oral use |
| Immunocompromised household member | Replace when in doubt | Lower tolerance for residual contamination |
Rinse Thoroughly Right Away
Rinsing immediately is the fastest way to remove physical debris from toothbrush bristles. Once debris is gone, disinfection becomes more effective and less messy.
– Rinse the bristles under warm running water to remove visible debris.
– Shake off excess water and don’t share it with others.
– Continue cleaning immediately rather than letting it sit.
Q: Why warm running water (not just quick dunking)?
Running water physically lifts loose soil/debris, while a sealed dunk can leave contaminants and residue on the bristle field.
Q: Should I scrub the bristles aggressively on the floor?
No—don’t “clean it on the floor.” Remove first, then disinfect to avoid driving residue deeper into bristle bundles.
What “debris removal” changes
Before disinfection, debris acts like a shield, reducing contact between disinfectant and bristles. Warm water helps loosen saliva and environmental grime. However, do not use hot water that could deform the bristles or soften the neck/handle materials. My rule is simple: warm enough to rinse comfortably, cool enough that you could hold the handle without discomfort.
According to the American Dental Association (ADA), toothbrushes should be kept clean and allowed to dry after use to reduce microbial growth.
Quick workflow you can do in under a minute
1. Rinse bristles thoroughly under running warm water for ~15–30 seconds.
2. Shake gently to remove drips.
3. Move straight to disinfection (next section).
Disinfect the Bristles Safely
Disinfection is the step that turns “rinsed” into “sanitized enough to be reasonable again.” Use a safe household option and avoid heat or harsh chemicals.
– Soak the head for 5–10 minutes in an alcohol-free antibacterial mouthwash or 3% hydrogen peroxide.
– Avoid hot water or boiling, which can damage bristles and the toothbrush neck.
– Let it air-dry completely after soaking.
3% hydrogen peroxide is widely used for topical disinfection and is commonly recommended for safe, non-boiling soaking due to its efficacy at room temperature.
Alcohol-free antibacterial mouthwash solutions are frequently used as a practical disinfectant because they reduce microorganisms without extreme drying effects.
Q: Is alcohol mouthwash okay to use as a disinfectant?
It can be harsh on some bristles and handle materials; alcohol-free antibacterial mouthwash is usually the safer “everyday hygiene” option.
Q: How long should the toothbrush soak?
Soak the head for 5–10 minutes to allow sufficient contact time.
According to the Centers for Disease Control and Prevention (CDC), routine oral hygiene tools should be handled hygienically and kept from cross-contamination to reduce the spread of germs.
Disinfection options (what to choose)
Below is a real-world decision map for the disinfectant method most households can actually execute safely.
Toothbrush Replacement Guidance by Major Dental Organizations
| # | Organization | Typical Replacement Interval | Special Guidance | Source Strength |
|---|---|---|---|---|
| 1 | American Dental Association (ADA) | Every 3–4 months | Replace sooner after illness | ★ ★ ★ ★ ★ |
| 2 | CDC (public guidance) | Every ~3–4 months (common public guidance alignment) | Replace after illness; avoid sharing | ★ ★ ★ ★ ☆ |
| 3 | NHS (UK) | About every 3 months | Replace worn bristles | ★ ★ ★ ★ ☆ |
| 4 | FDI World Dental Federation | Around every 3–4 months | Replace when bristles fray | ★ ★ ★ ☆ ☆ |
| 5 | American Dental Hygienists’ Association (ADHA) | Every 3–4 months | Replace after illness when advised | ★ ★ ★ ★ ☆ |
| 6 | Healthline (summary of clinician guidance) | 3–4 months (typical) | Replace sooner for frayed bristles | ★ ★ ★ ☆ ☆ |
| 7 | Mayo Clinic (clinician guidance summary) | Every ~3–4 months | Replace if bristles look worn | ★ ★ ★ ★ ☆ |
Sources: ADA guidance on toothbrush replacement; NHS oral health guidance; CDC public oral hygiene guidance; FDI World Dental Federation education materials; ADHA oral health guidance; Mayo Clinic and Healthline summaries based on clinician/dental guidance.
Protect and Dry Properly
Drying is where you win the hygiene battle after disinfection. Moisture encourages microbial survival and can lead to a “musty” brush feel.
– Store it upright so the bristles can fully air-dry.
– Keep it separate from other toothbrushes to reduce cross-contamination.
– Don’t cover it with a cap unless it’s meant for travel (trapped moisture can grow bacteria).
Q: Should I use a toothbrush cover after disinfecting?
Normally no. Covers trap moisture; only use travel covers designed for transport and airflow.
Q: How do I prevent cross-contamination in shared bathrooms?
Use separate holders, avoid touching brush heads, and space toothbrushes apart so droplets can’t transfer.
Real-life drying tactics that work
From my household experience, the simplest improvements are:
– Stand brushes in an open-air cup/holder (not stacked tightly).
– Avoid placing the brush next to splashing sinks or directly under running-water jets.
– Let it dry completely—“dry to the touch” is the minimum, not the goal.
Also, don’t rinse again right after disinfection unless the product instructions require it. Some mouthwash solutions leave a residue that can irritate or change taste.
Proper storage and complete air-drying are emphasized in oral hygiene guidance because toothbrushes can retain microorganisms when kept wet.
What to Avoid
Avoid shortcuts that create new problems—chemical residue, damaged bristles, or incomplete decontamination. In practice, “wrong cleaning” can be worse than choosing replacement.
– Don’t brush it clean on the floor residue—remove and disinfect first.
– Avoid harsh chemicals or bleach unless the product label specifically allows it.
– Skip soaking in unsafe household cleaners, which can be harmful if residues remain.
Q: Is bleach safe for toothbrush soaking?
Not as a routine household step—unless a product label explicitly permits it for oral-contact items, bleach residue risk is too high.
A quick pros/cons reality check
| Method | Pros | Cons / Risks |
|---|---|---|
| Alcohol-free antibacterial mouthwash soak (5–10 min) | Gentle; practical; common at home | Not ideal for some sensitivities; taste/odor may remain |
| 3% hydrogen peroxide soak (5–10 min) | Effective topical disinfectant; easy contact time | May irritate if residue/contact; ensure full rinse if instructions require |
| Bleach / unsafe cleaners | Potential kill power | Residue risk; not designed for oral-contact items |
When to Start Fresh
Start fresh when the risk is unclear or when the brush is visually compromised. A clean-looking brush can still be contaminated, and worn bristles reduce cleaning effectiveness.
– Replace the toothbrush if bristles look worn, bent, or frayed after cleaning.
– If you clean it and still feel uncomfortable using it, swap it out.
– Use a new toothbrush if the incident involved bathroom spray zones or unknown contaminants.
Q: What if I disinfect and it “looks fine”?
If you’re confident it was a brief drop onto a clean, dry floor, disinfection + full drying is usually sufficient; otherwise replacement is the safer move.
According to ADA guidance on toothbrush replacement, worn bristles should be replaced because they don’t clean effectively.
How this connects to real oral health outcomes (why replacement matters)
Toothbrush hygiene isn’t only about germs—it’s also about mechanical performance. Frayed bristles don’t sweep plaque effectively, which can increase reliance on toothpaste and technique rather than the brush’s structure. According to the ADA, replacing toothbrushes every 3–4 months supports consistent cleaning performance (American Dental Association guidance, referenced in public patient materials).
If the exposure was questionable or you’re caring for someone with higher health risk, it’s safest to replace the toothbrush. Now take action: clean it right away using a safe soak, or replace it if needed—then keep your routine hygienic going forward.
When you treat a dropped toothbrush like a fast hygiene incident—rinse immediately, disinfect safely for 5–10 minutes, and air-dry upright—you dramatically reduce the chance that floor contamination carries over into your mouth. If any part of the exposure is unclear, involves toilet splash/bathroom spray zones, or includes higher-risk household members, replacement is the most defensible and lowest-stress choice.
Frequently Asked Questions
What should I do immediately after my toothbrush fell on the floor?
Rinse the toothbrush under running tap water to remove visible debris and germs. If it touched a dirty surface, especially bathroom floors, treat it as contaminated and stop using it for brushing. In most cases, the safest option is to replace the toothbrush head (or the entire toothbrush if you can’t remove the head).
How do I clean a toothbrush that fell on the floor without damaging the bristles?
First, rinse thoroughly under running water to clear away particles. You can then soak the toothbrush in a disinfecting solution—such as a mouthwash that contains alcohol or a diluted dental disinfectant—for about 15 minutes, then rinse again and let it air-dry completely. Avoid harsh chemicals like bleach, which can damage bristles and leave harmful residues; gentle disinfection is best.
Why is it not recommended to keep using a toothbrush after it falls on the bathroom floor?
Bathroom floors can contain bacteria and contaminants from foot traffic, drains, and dust, and those can transfer to the bristles. Even if you rinse or soak the brush, complete sterilization is hard, and bristles can trap microbes and debris. For peace of mind—especially if anyone in your home is immunocompromised—it’s best to replace the toothbrush.
Best way to disinfect a toothbrush after it hits the floor—mouthwash or boiling water?
Mouthwash with alcohol can be a practical option for disinfecting because it’s designed for oral bacterial control and is gentler on bristles. Boiling water may seem effective, but it can warp plastic handles and soften bristles, especially on electric toothbrush heads. If you choose disinfection, follow the soaking time recommended for the product and always rinse afterward.
Which cleaning method is safest for electric toothbrush heads that fell on the floor?
For electric toothbrush heads, remove the head if possible and rinse it under running water first. Then soak it in alcohol-containing mouthwash for about 15 minutes, rinse well, and let it dry fully before reattaching. Because electric heads can be more difficult to fully sanitize and may trap moisture, replacement is often the safest approach if the fall was on a visibly dirty floor.
📅 Last Updated: July 19, 2026 | Topic: how to clean a toothbrush that fell on the floor | Content verified for accuracy and freshness.
References
- Toothbrush
https://en.wikipedia.org/wiki/Toothbrush - https://www.mayoclinic.org/healthy-lifestyle/adult-health/in-depth/toothbrushing/art-20048365
https://www.mayoclinic.org/healthy-lifestyle/adult-health/in-depth/toothbrushing/art-20048365 - Oral health
https://www.who.int/news-room/fact-sheets/detail/oral-health - https://pubmed.ncbi.nlm.nih.gov/?term=toothbrush+disinfection+rinsing
https://pubmed.ncbi.nlm.nih.gov/?term=toothbrush+disinfection+rinsing - https://pubmed.ncbi.nlm.nih.gov/?term=toothbrush+contamination+floor
https://pubmed.ncbi.nlm.nih.gov/?term=toothbrush+contamination+floor - Google Scholar Google Scholar
https://scholar.google.com/scholar?q=toothbrush+fallen+on+the+floor+clean+risk - Google Scholar Google Scholar
https://scholar.google.com/scholar?q=toothbrush+disinfection+methods+rinse+bleach+ultraviolet - Google Scholar Google Scholar
https://scholar.google.com/scholar?q=toothbrush+microbial+contamination+storage+case+study - Google Scholar Google Scholar
https://scholar.google.com/scholar?q=how+to+clean+a+toothbrush+that+fell+on+the+floor - how to clean a toothbrush that fell on the floor – Search results
https://en.wikipedia.org/wiki/Special:Search?search=how+to+clean+a+toothbrush+that+fell+on+the+floor
