

Wireless chargers collect dust, skin oils, and lint around the charging coil, and it can feel awkward handing one over with a grimy surface. You can restore a clean, like-new look in about 10–15 minutes using a microfiber cloth, cotton swabs, 70% isopropyl alcohol, and gentle dry cleaning tools. Follow careful, non-liquid-soaked steps so the charging area stays intact and the buyer receives something they can trust.
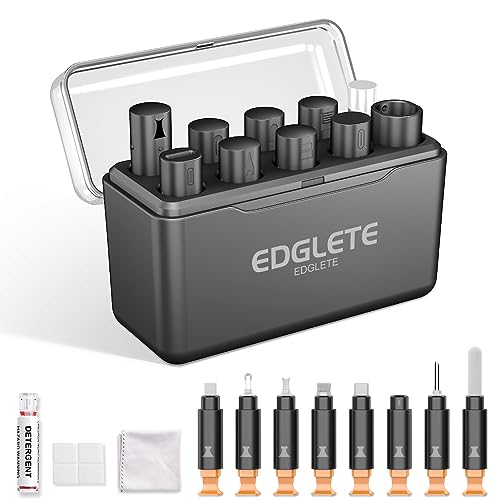

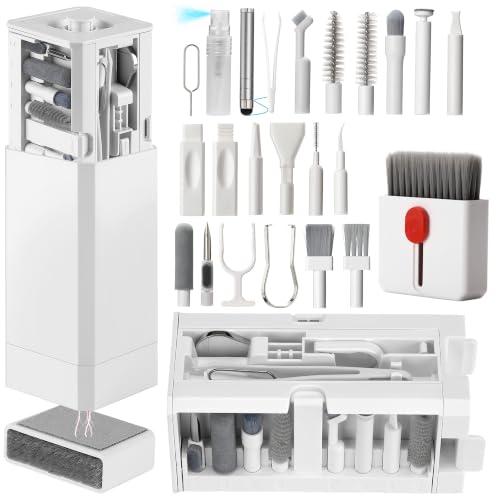

Clean your wireless charger by wiping the outside first, then clearing dust from the charging surface (and any vents) with dry tools. If there’s sticky residue, use a barely-damp microfiber (or a lightly moistened cotton swab) and avoid getting liquid into seams, ports, or under the coil area—so it looks presentable and charges reliably for the next owner.
If you’re handing off a used Qi charger, dock, or stand, a careful clean also prevents grime from mixing with heat and reduces the chance of a “won’t charge” complaint after sale. The steps below focus on the safest methods that work for most consumer chargers—then we’ll cover common mistakes to avoid. As of 2026, most brand guidance still boils down to “dry first” with only minimal moisture for exterior tackiness, because wireless charging pads are mechanically sensitive and liquids can migrate into openings.
Who this is for (and what you’ll need)

This is for anyone selling or gifting a wireless charger with visible dust, lint, or smudges on the top surface or around the edges. You’ll also want the right tools so you can remove buildup without scratching finishes or forcing debris into seams.
– This applies when your charger’s top looks dusty, feels tacky from skin oils, or has lint gathered around the center charging circle.
– Gather basic items: a microfiber cloth, cotton swabs (or a soft brush), and optionally .
– If your charger has a USB port, inspect it visually so you don’t accidentally push debris deeper.
Wireless Charger Cleaning: Safer Methods Ranked by Liquid-Ingress Risk (2026)
| # | Method | Moisture/solvent exposure | Best for | Safety for seams/ports* | Score |
|---|---|---|---|---|---|
| 1 | Dry microfiber wipe (outside) | 0% liquid | Dust, fingerprints, light smudges | Lowest | ★★★★★ |
| 2 | Dry soft brush (charging surface/edges) | 0% liquid | Lint + micro-debris around the pad | Low | ★★★★☆ |
| 3 | Barely-damp microfiber (exterior only) | Trace moisture | Oils and light tackiness on top casing | Medium | ★★★☆☆ |
| 4 | Lightly moistened cotton swab (targeted tackiness) | Trace moisture at one spot | Sticky residue on non-vent exterior edges | Medium | ★★★☆☆ |
| 5 | 70% isopropyl alcohol (manufacturer-approved) | Low–medium solvent | Some external grips/finishes (only if approved) | Higher | ★★☆☆☆ |
| 6 | Disinfectant wipes (ingredient-dependent) | Liquid + additives | Only on finishes documented as wipe-safe | High | ★☆☆☆☆ |
| 7 | Acetone or strong solvent cleaning | High risk solvent | None (unless manual explicitly allows) | Very high | ☆☆☆☆☆ |
“Safety for seams/ports” score is a risk-based estimate based on how easily moisture can migrate into openings and how solvents can degrade plastics/finishes; it is not a manufacturer rating.
> Note: The cleanest charger is still the one that’s aligned correctly and kept free of grit on the charging surface. Even tiny particles can matter—fine dust includes particles in the PM2.5 category (≤2.5 micrometers) that can work their way into edges and create inconsistent contact patterns. US EPA (PM2.5 size definition)
Quick safety prep before you clean
Before you touch the surface, unplug the charger and confirm it’s cool—this prevents heat-related warping of finishes and reduces the risk of liquid migration. Safety prep also helps you see exactly where debris is packed.
– Unplug the charger and let it cool completely—wireless chargers can retain heat from recent use. If it was charging minutes ago, give it time to return near room temperature.
– Work on a dry, well-lit surface so you can see where dust is packed (especially around the center charging circle).
– Check the manual for any model-specific “do not clean with…” warnings: .
If your charger has a USB port or exposed connector, look closely with good lighting. Debris sometimes sits at the edge of the port where it can later be pushed deeper by a cotton swab—so the safer approach is to clean externally first and only use a swab where you can stop short of openings.
Clean the outside without damaging finishes
The fastest way to make a charger look “like new” is a dry microfiber wipe first, then only minimal moisture on the exterior if fingerprints or smudges remain. This preserves the casing finish and avoids accidentally wetting seams or the charging interface.
– Wipe the casing with a dry microfiber first to remove loose dust and lint.
– For fingerprints and smudges, use a microfiber that’s lightly damp—no dripping—and wipe around vents and edges.
– For textured rubber or matte finishes, avoid aggressive scrubbing; stick to gentle, repeated wipes to prevent streaking or wear.
In my routine, I treat the outside finish as a “no drama” zone: dry wipe, inspect, and then a second pass with barely-damp cloth only if needed. That approach is consistent with how many manufacturers protect coatings—coarse friction can haze matte plastics even when the charging pad is unaffected. As of 2026, that small difference matters because buyers judge cosmetic condition first, and it influences whether they believe the device was cared for.
Clear dust and debris from the charging surface
To restore reliable charging, remove lint and dust from the charging pad and any nearby side openings using dry tools. You’re not trying to disinfect the coil area—you’re trying to remove the grit that interferes with alignment and contact.
– Use a dry soft brush or a fresh microfiber corner to remove dust around the charging pad and any side openings.
– If you see stubborn lint at the edges, use a dry cotton swab to lift it—don’t dig into seams.
– Keep liquids away from the charging area; the goal is to remove debris that can interfere with contact and alignment.
Why the focus on dryness? Wireless charging transmitters work by coupling energy between coils; the charger and phone have to “line up” enough for efficient transfer. The Qi ecosystem uses defined operating parameters (including a typical transmit frequency range around 110–205 kHz). Wireless Power Consortium / Qi specification (operating frequency range) Dust isn’t likely to stop the physics entirely, but it can create an insulating layer, trap grit under alignment guides, and make charging inconsistent—especially with cases that already sit slightly higher than bare phones.
If you’re cleaning a dock stand, pay attention to cable routing and the lip where the dock meets the base. Lint often collects there and later falls onto the pad as you move the device.
Handle sticky spots carefully (no soaking)
A tacky top is best handled with targeted, barely-damp cleaning—never soaking and never flooding the seams. When residue remains after a dry wipe, a small amount of moisture applied to the exterior is usually safer than trying to “wash” the charger.
– If something feels tacky, stop wiping with a wet cloth and switch to a “less is more” approach: a slightly damp swab on the affected exterior area only.
– Avoid strong solvents (like acetone) and harsh cleaners unless the manufacturer explicitly says they’re safe for the materials used on your charger: .
– Don’t attempt to pry off components or remove the rubber/metal top—if residue is trapped under trim, cleaning should stay external.
Here’s a practical way to decide what to do next:
| Situation | Do this | Skip this |
|---|---|---|
| Oily fingerprints / light grime | Dry wipe → lightly damp microfiber on exterior | Soaking the top or wiping the center pad repeatedly with moisture |
| Sticky residue on casing edge | Barely-damp cotton swab on exterior only; keep away from vents/ports | Acetone/strong solvents or “scrub until it’s gone” methods |
| Sticky feel near ports/vents | Dry lift first; only external spot-clean if manual allows | Letting liquid run toward openings |
If you do use a disinfecting chemical, follow documentation closely. For general surface disinfection, CDC guidance commonly references 70% isopropyl alcohol as a concentration used for effective disinfection of hard, non-porous surfaces. CDC (isopropyl alcohol concentration guidance for surface disinfection) The key word is “hard, non-porous”—wireless charger plastics and coatings are not guaranteed to behave the same way, so always confirm compatibility with your specific model.
Dry, reassemble, and do a quick check before handing it over
Let the charger air-dry fully before plugging it back in—then do a visual check of the center pad area. This is where you prevent “mystery problems” that can look like a failed sale.
– Let the charger air-dry fully before plugging it back in—don’t wipe with a wet towel and immediately reconnect power.
– Do a visual inspection: center pad area should be clean, with no wet marks, clumps of residue, or lint.
– If you can, test charging briefly with a known-good phone/case setup—especially if you previously had “sometimes it won’t charge” issues. (If you can’t test, describe the condition honestly to the buyer.)
From a practical listing perspective, the fastest credibility boost is honest condition language. If you noticed inconsistent charging before cleaning, say so (e.g., “charges reliably with light case removal” or “requires good alignment”). Cleaning can reduce friction and buildup, but it can’t fix a worn internal connection, damaged coil, or degraded controller.
What can go wrong (common mistakes and edge cases)
Cleaning can make a charger look better without actually improving charge reliability—so you want to avoid the mistakes that create new issues. Most problems come from moisture intrusion, wrong chemicals, or aggressive scrubbing that damages surfaces.
– Getting moisture into seams/ports: even small amounts of liquid can cause corrosion or weird behavior later.
– Using the wrong cleaner: some coatings and plastics can haze or degrade if solvents are used without confirmation.
– Over-scrubbing the charging surface: rough cleaning can leave scratches or spread residue that’s harder to remove.
– Ignoring cases and alignment: if charging was unreliable before cleaning, debris removal may help—but some chargers are sensitive to case thickness, ring mags, or misalignment.
– Warranty/brand restrictions: some brands specify specific cleaning methods (or forbid liquids). If your manual says otherwise, follow it.
Edge cases to watch for: chargers with visible vent grilles (especially on some slim stands), chargers with removable top covers, and units that show wear at the pad border. If you see bubbling, peeling coating, or exposed hardware, stop and default to wipe-only cleaning (outside and dry dust removal) because moisture risk becomes much higher.
Also remember: some “won’t charge” issues are physics, not dirt. A misfit case, a metal accessory, or a damaged cable connection can prevent charging even with a perfectly clean pad.
Verdict / tip: If you want the best balance of safety and results, stick to dry microfiber wiping plus cotton-swab dust removal, and use only minimal moisture when the outside is sticky. Skip cleaning with chemicals or liquids entirely if your charger has questionable seams, exposed wiring, or no clear manufacturer guidance—those cases are better suited to a “wipe-only” approach or a replacement. For sale listings, honest disclosure matters: note any cosmetic wear or prior charging issues rather than assuming cleaning fixes everything.
Quick checklist (scan/save)
| Step | Do this | Avoid |
|---|---|---|
| Power off | Unplug and cool first | Cleaning while warm/plugged in |
| Dry clean | Microfiber + soft brush on the surface | Scraping or digging into seams |
| Edges/vents | Dry cotton swab to lift lint | Forcing debris inward |
| Sticky spots | Tiny amount of damp microfiber/swab on exterior | Soaking, dripping, strong solvents |
| Dry fully | Air-dry until no wet marks remain | Replugging before dry |
| Quick check | Briefly test charging if possible | Assuming “looks clean” = “works” |
FAQ
– Can I use disinfectant wipes on a wireless charger?
Only if your charger’s documentation says the wipes’ ingredients/materials are safe for its finish and you won’t let liquid get into seams/ports. If you’re unsure, use dry wiping plus minimal moisture on the exterior.
– How do I clean the charging coil area safely?
Treat it like a “keep-it-dry” zone: remove dust with dry tools first, and avoid wet cleaning right on the center pad unless the manufacturer explicitly permits it.
– What if the charger still won’t charge after cleaning?
The issue may be alignment, a thick/metal-heavy case, worn hardware, or damaged internal components. Re-test with a different case/phone setup if possible, and consider replacement if it remains unreliable.
– Is it okay to rinse a wireless charger under water?
No—never soak or rinse unless the manufacturer explicitly states it’s water-cleanable. Most chargers are not designed for liquid cleaning.
Sources: manufacturer guidance
Sources: supporting factual references
– US EPA — PM2.5 is defined as particulate matter with aerodynamic diameter ≤ 2.5 micrometers.
– CDC — Guidance commonly references 70% isopropyl alcohol as an effective concentration for disinfecting many hard, non-porous surfaces.
– Wireless Power Consortium (Qi specification) — Qi transmitters operate over a frequency range typically cited as ~110–205 kHz.
A clean wireless charger improves resale confidence because it removes the two things buyers notice most: visible grime and unreliable charging behavior linked to dust and lint. If you stick to dry cleaning first, use moisture only on the exterior when absolutely necessary, and let the unit fully dry before testing, you’ll deliver a safer, more dependable device for the next owner—without risking damage to the charging interface.
Frequently Asked Questions
What’s the safest way to clean a wireless charger before selling it?
Unplug the charger and let it cool completely, then wipe the surface with a slightly damp microfiber cloth (avoid soaking the charger). For stubborn grime, use a small amount of isopropyl alcohol on the cloth—never pour liquid directly onto the device. Let it fully dry before testing, since moisture or residue can affect charging contact on the wireless charging coil area.
How do I clean the charging pad area to remove dust, lint, or oil residue?
Use a dry microfiber cloth first, then gently wipe the charging pad in small circles to lift dust and skin oils. If there’s residue, lightly dampen a corner of the cloth with isopropyl alcohol and wipe again, focusing on the center coil area. For lint in grooves or edges, use a soft anti-static brush or a clean cotton swab (sparingly) to avoid pushing debris deeper.
Can I use disinfectant wipes or soap on a wireless charging stand?
Disinfectant wipes can work only if they’re alcohol-based and you avoid getting liquid into seams, ports, or the charger’s underside. Soap and water are not recommended because they can leave film or seep into internal components, potentially degrading the wireless charging performance. If you use any cleaner, wipe with a lightly damp cloth afterward (if needed) and allow the charger to dry thoroughly.
Best practices for cleaning a Qi wireless charger without damaging the coating or ports?
Stick to microfiber cloths and alcohol-based cleaning methods because they’re effective and typically safe for many plastics and finishes. Avoid abrasive pads, harsh solvents, and metal tools that can scratch the charging surface or remove protective coatings. When cleaning around USB-C or power connectors, use minimal moisture and keep the ports dry to prevent corrosion.
Which parts of a wireless charger should I clean before giving it away to someone else?
Prioritize the top charging pad and any visible areas where oils and fingerprints build up, since they can affect contact and charging consistency. Also clean the exterior surfaces and edges, including the area around the indicator light, so the charger looks presentable to buyers. Finally, wipe the cable entry point and the cable handle (if included), but keep the cable connectors dry and free of residue.
📅 Last Updated: November 01, 2026 | Topic: How to Clean a Wireless Charger Before Selling or Giving It Away | Content verified for accuracy and freshness.
References
- How to clean your iPhone – Apple Support
- https://www.cdc.gov/coronavirus/2019-ncov/community/disinfecting-building-facility.html
- https://www.who.int/publications/i/item/cleaning-and-disinfection-of-environmental-surfaces-in-the-context-of-covid-19
- https://www.epa.gov/coronavirus/disinfecting-your-home
- Isopropyl alcohol
- isopropyl alcohol disinfection surface virus – Search Results – PubMed
- ethanol isopropanol efficacy coronavirus surface disinfection – Search Results – PubMed
- https://scholar.google.com/scholar?q=cleaning+disinfecting+electronics+isopropyl+alcohol Google Scholar
- https://scholar.google.com/scholar?q=virus+survival+on+surfaces+ethanol+isopropanol+disinfection Google Scholar
- https://scholar.google.com/scholar?q=best+practices+cleaning+consumer+electronics+before+reuse Google Scholar
