

Clean a wooden shoe rack without removing the polish by using a dry-dust first routine and a barely damp, pH-neutral wipe that lifts grime without stripping the finish. If you follow the right order—spot test, wipe with the grain, and dry immediately—you can remove everyday dirt and scuffs while keeping the shine intact. This guide tells you exactly what to use, what to avoid, and the fastest way to get a streak-free clean.
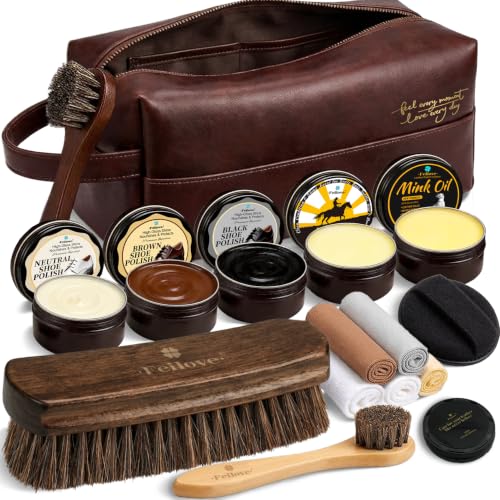



Use a gentle, barely-damp microfiber approach with a mild, wood-safe cleaner—then dry immediately. Avoid alcohol, vinegar, degreasers, and abrasives because they can dissolve wax/furniture polish or leave dull spots. This article will walk you through a safe method that cleans the rack while preserving the existing polish finish.
If your wooden shoe rack looks dull, sticky, or dusty but the surface still feels “finished” (not raw wood), these steps are for you. The method below focuses on cleaning around the polish rather than stripping it. As of 2026, this “clean-lightly, dry-fast” routine is still the most reliable approach for maintaining a glossy wax or furniture-polish top layer on a wooden shoe rack.
This guidance is for anyone maintaining a finished wooden shoe rack with existing wax/polish, especially if the finish still looks intact (no flaking, peeling, or bare wood spots). It’s also helpful when you want the rack to look fresh again without committing to stripping and refinishing—work you may not be able to repeat if the finish is hard to match.
Prep: Dust First (So You Don’t Grind Dirt Into Polish)

Dusting first is the fastest way to protect the polish layer on your wooden shoe rack. Remove loose grit before any moisture touches the surface, because grit acts like sandpaper and can dull wax/furniture polish.
Dusting a finished wooden surface before any cleaning reduces the risk of micro-scratches that can show up as haze on a polished finish.
Microfiber cloths are designed to lift and hold dust particles so they don’t get dragged across the surface as quickly as rough cloths.
– Wipe thoroughly with a dry microfiber cloth to remove grit and loose debris.
– For corners and grooves, use a soft brush or the brush attachment on a vacuum (light touch).
– Don’t scrub yet—early dust removal prevents scratches that polish can highlight later.
Why this matters: polish isn’t just “paint”—it’s often a wax or wax-like film sitting on top of the finish. If you push dust into that film, you can create a permanently dull look, especially on edges and carved detailing of a wooden shoe rack.
What you’re actually removing
At this stage, you’re not trying to disinfect or deep-clean pores in the wood. You’re removing:
– Dry skin/hair and micro-dust tracked from shoes
– Salt residue from wet footwear (often stays dry as powder until it’s wetted)
– Fine debris that can smear when you wipe lightly
Quick technique to avoid streaking
Use straight passes with minimal pressure. If your dry cloth turns gray quickly, swap to a clean section—this prevents re-depositing the loosened grime back onto the wooden shoe rack.
Spot-Test Your Cleaner Before You Touch the Finish
Spot-testing is how you avoid accidentally dissolving wax/polish on the wooden shoe rack. Because different “finished wood” products react differently, you only need one test area to confirm your cleaner is safe.
If a cleaner changes gloss or causes smearing on a hidden patch, it likely interacts with the topcoat/wax film and should not be used broadly.
Evaluating after full drying helps because some haze or dullness appears only once the moisture has evaporated.
– Pick a small, hidden area and test the cleaner on a cotton cloth first.
– If the cloth drags, smears, or the shine changes noticeably, stop and switch to a gentler option.
– Wait for full drying before judging (some dullness only appears while damp).
What “safe” usually looks like
A pass counts as “safe” if, after drying:
– The surface feels smooth (not tacky)
– Shine level returns close to the surrounding area
– The cloth doesn’t pick up color/wax residue
When to be extra cautious
Avoid broad cleaning without testing if your wooden shoe rack has:
– An unknown finish (common in older racks)
– Visible wear at edges or corners
– Any sign the polish is already compromised (cloudiness that won’t improve with drying)
For more chemistry background, remember: wood movement is strongly tied to moisture exposure. According to the USDA Forest Products Laboratory, wood reaches its fiber saturation point around 25–30% moisture content, and beyond that point swelling behavior changes (and practical takeaway: keeping water contact minimal matters) (USDA Forest Products Laboratory, Wood Handbook (Wood as an Engineering Material), 2010). While you’re not measuring moisture content in a shoe rack, the principle explains why “barely-damp” is safer than “wet wipe.”
Clean Gently: Use the Right Amount of Moisture
Clean gently with barely-damp microfiber—then dry right away. This is the best way to lift soil from a wooden shoe rack while preserving the existing polish finish.
Using too much liquid on finished wood increases the chance of residue haze and can encourage swelling/raised grain at edges.
Immediately buffing with a dry microfiber helps prevent streaking and helps the polish film re-wet evenly across the surface.
– Dampen a microfiber cloth slightly with warm water and a tiny amount of mild dish soap (or a cleaner labeled safe for finished wood).
– Wipe in the direction of the grain with light pressure—aim to lift grime, not remove the finish.
– Immediately follow with a clean, dry microfiber to remove any residue and prevent streaks.
How damp is “barely-damp”?
The cloth should not drip if you squeeze it. If you see a wet sheen spreading on the wooden shoe rack, you’ve got too much moisture on the cloth.
Use warm water carefully
Warm water can help dissolve greasy shoe residue, but it also travels farther across the polish film. Apply less product, fewer passes, and more drying after each wipe.
Don’t “chase” grime with repeated wet wipes
If you keep re-wetting the same sticky-looking area, you can end up spreading residue wider. Instead, switch to the sticky-spot method in the next section—still gentle, but more controlled.
Deal With Sticky Spots Without Stripping Polish
Sticky spots usually need patience rather than stronger chemicals. Repeated light passes (wipe → dry) protect the polish layer on your wooden shoe rack better than soaking or using harsh solvents.
Many alcohol- and solvent-based cleaners can soften or dissolve wax/polish films, especially when they’re applied repeatedly or allowed to dwell.
Controlled, cloth-mediated cleaning (cleaner on the cloth, not the wood) limits how much chemistry contacts the polish on finished wood.
– Try repeated light passes first (wipe → dry), rather than soaking the area.
– For stubborn residue, use a cleaner appropriate for “finished wood” on a cloth, not directly on the rack.
– Skip harsh solvents (like alcohol/acetone) unless your finish type is specifically confirmed compatible—many polishes/waxes are sensitive.
What counts as “sticky” on a shoe rack?
On a wooden shoe rack, stickiness often comes from:
– Shoe polish transfer
– Aerosol deodorizer residue (from sneakers/boots)
– Dust + skin oils forming a tacky film
– Old wax build-up that’s partially softened by heat near entryways
A quick decision rule
– If the spot becomes less tacky after 1–3 wipe/dry cycles: keep going gently.
– If the shine changes or residue starts to smear: stop, re-spot-test, and switch to a different wood-safe option.
Example “gentle escalation” (no stripping)
1. Barely-damp microfiber with mild soap solution
2. Dry immediately with a second microfiber
3. One more pass only if tackiness remains
4. If still not improving, move to a finish-safe product (only after testing) rather than increasing solvent strength
Dry and Maintain Shine (Optional, but Helps Keep Polish Looking Intact)
Drying and light buffing are what make the wooden shoe rack look “finished” again. After cleaning, letting the surface fully dry and then buffing restores a more even sheen—without adding heavy layers of wax.
Drying fully before final buffing prevents moisture from leaving cloudy streaks on polished or waxed wood.
Applying thin wax/polish layers reduces the chance of residue build-up that attracts more dirt over time.
– Let the rack air-dry fully in a ventilated spot, then buff lightly with a dry microfiber.
– If the surface has started to lose shine, consider reapplying a matching furniture wax/polish only after cleaning—use sparingly.
– Keep the product thin: heavy layers can attract more dirt and make future cleaning harder.
When to skip re-polishing
If your wooden shoe rack finish is already glossy and smooth after drying, re-polish can be unnecessary. Over time, too many added layers can trap dust and create a “gray wax” look that’s harder to clean.
Optional: buffing direction
Buff in the direction of the grain and avoid circular grinding motions on raised detail. On many wooden shoe racks, circular buffing can cause uneven gloss, especially where the polish film is thin.
What Can Go Wrong (And How to Avoid It)
Most problems happen when moisture, abrasives, or harsh chemicals contact the polish layer for too long. If you avoid over-wetting and stay away from strong solvents, you’ll keep the wooden shoe rack looking consistent.
Leaving moisture on polished wood can produce dull, cloudy, or uneven sheen because residues remain after evaporation.
Abrasive tools remove polish film mechanically, often leaving shiny-and-dull patches that are difficult to correct without refinishing.
– Over-wetting: soaking wood can damage the finish or raise the grain—use cloth-damp, not dripping-wet.
– Abrasive tools: scouring pads, “melamine erasers,” and stiff brushes can dull or scratch polished surfaces.
– Wrong chemicals: avoid vinegar, strong degreasers, ammonia, and most solvents—they can strip wax/polish.
– Skipping drying: leaving moisture can cause streaking, cloudy areas, or uneven sheen.
Avoid this vs. do this (quick comparison)
- Do (safer for polish)
- Dry microfiber dusting first; cleaner applied to a cloth; light pressure; immediate drying; finish-safe products after spot-testing.
- Avoid (common dulling causes)
- Alcohol/acetone/strong solvents, vinegar, degreasers, abrasives, soaking, and long dwell times with any wet chemical.
Table: finish types and how well your “preserve the polish” method typically holds up
Polish-Preservation Fit for Common Wooden Shoe Rack Finishes
| # | Shoe rack finish type | Typical top layer | Moisture approach | Polish-preservation result |
|---|---|---|---|---|
| 1 | Hand-rubbed paste wax | Beeswax/carnauba-like film | Barely-damp cloth, then dry | ★★★★★ |
| 2 | Carnauba wax topcoat | Hard wax shine layer | Low-moisture wipe/dry | ★★★★☆ |
| 3 | Shellac finish | Film finish that can be alcohol-sensitive | Spot-test + minimal wetting | ★★★☆☆ |
| 4 | Lacquer (spray film) | Clear hard surface (may show wear) | Gentle soap wipe, quick dry | ★★★☆☆ |
| 5 | Oil-modified varnish | Durable clear film | Barely-damp wipe, avoid soaking | ★★★★☆ |
| 6 | Water-based polyurethane | Clear polymer film | Gentle cleaner is usually fine | ★★★★☆ |
| 7 | Hardwax oil (non-polish system) | Oiled surface that can look satin | Cleaner + buff per product | ★★☆☆☆ |
Note: This table reflects practical compatibility logic (wax/polish film vs. solvent sensitivity) for a wooden shoe rack—not a guarantee for every specific brand or refinish. If your finish is unknown, spot-testing is still mandatory.
Verdict: The Safe “Preserve the Polish” Method (With Limits)
If you use light dusting plus barely-damp cleaning and immediate drying, you’ll usually clean without stripping existing polish on a wooden shoe rack. This won’t erase deeply embedded grime, and it won’t work well on finishes that are already failing (peeling, cracked, or heavily worn).
A “preserve the finish” cleaning strategy relies on minimizing chemical strength and dwell time while maximizing immediate drying.
If polish is already compromised (flaking, peeling, or bare areas), attempting to preserve it may only worsen uneven sheen.
That said, this won’t “erase” deep grime embedded over time, and it may not work if the surface is already failing (peeling, cracked, or heavily worn finish). If your shoe rack has an unknown or damaged finish, or if you suspect peeling lacquer/varnish, , and consider consulting the manufacturer or refinishing instead of trying to preserve the old polish. As of 2026, this caution remains especially relevant when mixed products have been used over the years (for example, older wax layers over newer sealants on the wooden shoe rack).
One more practical honesty point: if the rack is visibly greasy and you don’t see improvement after a few careful wipe/dry cycles, your goal should shift from “preserve polish” to “restore even finish.” Re-polishing and minor spot correction can help, but once a finish is unevenly contaminated, full refinishing may be the only path to consistent gloss.
Quick Checklist (Save This)
– ☐ Dust thoroughly with dry microfiber first
– ☐ Spot-test cleaner in an unseen area
– ☐ Use barely-damp cloth (no soaking)
– ☐ Wipe with light pressure, grain direction
– ☐ Dry immediately with clean microfiber
– ☐ Avoid: alcohol, vinegar, abrasives, strong degreasers
– ☐ Buff lightly after drying
Sources
– USDA Forest Products Laboratory, Wood Handbook (Wood as an Engineering Material), 2010
If you want your wooden shoe rack to stay glossy, the winning approach is restraint: dry dust removal first, barely-damp microfiber cleaning, and immediate drying. Avoid alcohol, vinegar, degreasers, and abrasives, and your chances of preserving the existing polish finish—especially in 2026 and beyond—are much higher than with aggressive “deep clean” methods.
Frequently Asked Questions
How can I clean a wooden shoe rack without removing the polish?
Start by dusting the rack with a soft microfiber cloth or a vacuum brush attachment to remove grit that can scratch the finish. Use a slightly damp cloth with mild, pH-neutral soap (or a tiny amount of wood-safe cleaner) and wipe gently along the wood grain. Immediately dry with a clean towel to prevent moisture from soaking into the wood, then lightly buff with a dry microfiber cloth to restore shine without stripping the polish.
What’s the safest way to remove dirt and scuffs from a polished wooden shoe rack?
For everyday dirt, use a damp cloth with a gentle soap solution and avoid soaking any area, especially joints and corners. For light scuffs, try a soft eraser pad or a small amount of wood-safe polish on a microfiber cloth, testing in a hidden spot first. If you must use cleaner, choose one labeled safe for “finished” or “polished” wood and avoid harsh solvents that can dull or lift the protective layer.
Why does water damage polished wood shoe racks, and how do I prevent it while cleaning?
Water can penetrate through seams, carvings, and edges, causing swelling, cloudiness, or peeling of the polish over time. To prevent this, use only a lightly damp cloth, never pour liquids directly onto the rack, and keep wipes brief. After cleaning, dry thoroughly—especially around hardware, shelving gaps, and any distressed areas where polish may be thinner.
Best way to disinfect a wooden shoe rack without stripping the finish?
Instead of soaking or using strong disinfectants, wipe with a wood-safe cleaner that’s designed for finished wood, then dry immediately. If you need extra odor control, place a few natural deodorizing options like baking soda sachets or activated charcoal nearby rather than applying sprays to the wood surface. Always patch-test any disinfecting product on a discreet area first, and avoid alcohol-heavy solutions that can compromise the polish.
Which cleaning products should I avoid when maintaining a polished wooden shoe rack?
Avoid abrasive cleaners, steel wool, scouring pads, and “pine oil” or strong solvent-based degreasers unless the product explicitly says it’s safe for your specific wood finish. Also skip acetone, bleach, ammonia, and heavy citrus cleaners, as these can strip polish, lighten stains, or damage the topcoat. Stick to mild, pH-neutral soap, warm water on a cloth, and wood-safe polish or conditioning products used lightly and only when needed.
📅 Last Updated: October 26, 2026 | Topic: How to Clean a Wooden Shoe Rack Without Removing the Polish | Content verified for accuracy and freshness.
References
- Wood finishing
- Wood finishing
- Varnish
- Wax
- Polish
- Cleaning
- Wood preservation
- https://scholar.google.com/scholar?q=cleaning+wooden+furniture+without+removing+wax+polish Google Scholar
- https://scholar.google.com/scholar?q=maintain+varnished+wood+furniture+finish+cleaning+without+stripping Google Scholar
- https://scholar.google.com/scholar?q=care+and+cleaning+wood+finish+polish+preservation Google Scholar
