

Want the fastest way to clean a wooden study table using a damp microfiber cloth without damaging the finish? Use a lightly damp microfiber cloth to wipe with the grain, then immediately dry to prevent moisture from soaking in. Follow that simple routine, and you’ll remove everyday dust, smudges, and light spills while keeping the wood looking clean and protected.
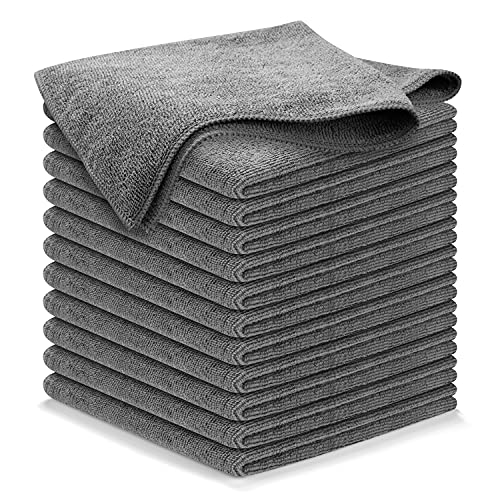



Use a slightly damp (wrung-out) microfiber cloth, wipe along the wood grain, and dry right away with a second clean cloth. This simple routine removes dust and light grime without soaking the surface or forcing moisture into seams—an approach that stays low-risk for most finished wooden study tables, especially in day-to-day use. If you need a repeatable wipe-down flow (and want to avoid the common “over-wet” mistakes), follow the steps below—grounded in how wood finishes and moisture behave in real homes in 2026.
If your study table is finished wood (varnish, lacquer, polyurethane) and you want a straightforward method for everyday spills, fingerprints, and dust buildup, this guide fits. If the table is raw/unsealed wood—or the finish is already peeling or chalking—use a different care approach because moisture behaves very differently on exposed fibers.
Supplies & prep for a “damp” microfiber clean

A damp microfiber wipe works best when the cloth is truly wrung out (damp, not wet) and the finish is still intact. This section answers what to gather and what to check first so your wooden study table gets clean contact—without pushing water into edges, joints, or open pores.
Wood finishes are designed to resist everyday contact, but “soaking” changes risk because moisture can travel toward joints and edges even when a surface looks dry.
For routine furniture cleaning, many manufacturers recommend wiping with a barely damp cloth and drying promptly—this matches the “wrung-out microfiber” method used on finished wooden study tables.
What to use
– Use a clean microfiber cloth and plain water (or a tiny amount of wood-safe cleaner only if your finish instructions allow it).
– Wrung the cloth thoroughly so it’s damp, not wet—aim for “no dripping” on contact.
– Have a second clean microfiber cloth ready for immediate drying.
Prep the surface so you don’t grind grit in
– Check the table for loose dust, crumbs, and grit from notebooks, erasers, and backpack traffic.
– Identify weak spots: raised veneer edges, seams, nail holes, and any areas that already look dull, chalky, or cloudy.
– If the finish is glossy, test near an edge or corner first. A small change in appearance there is your signal to stop and switch methods.
Moisture exposure can move wood dimensions once it passes into the range where the wood swells; wood science commonly describes fiber saturation around roughly 25–30% moisture content, which helps explain why “wet” cleaning is a higher risk than damp-only wiping.
Step-by-step: wipe with a damp microfiber cloth
A damp microfiber cloth is effective when you remove loose grit first, then clean in controlled passes along the wood grain. This section answers how to do the actual wiping on your finished wooden study table so the surface stays uniform—no streaks, dark spots, or finish dulling.
Wiping along the grain reduces the chance of dragging fine residue across the surface texture, which is a common cause of haze on glossy varnish and polyurethane.
For sticky spots on finished wood, repeated short wipes are safer than holding a wet cloth in place long enough to saturate seams and edges.
Step 1: Dust first (don’t skip this)
– Dust first: lightly wipe or dry-dab to pick up loose grit that could scratch the finish.
– If you can, use a dry microfiber first—then switch to the damp cloth.
Why this matters: the grit that’s invisible to the eye can act like “micro-sandpaper” when the damp microfiber cloth glides over it.
Step 2: Clean with minimal pressure, grain-aligned passes
– Clean in passes: wipe gently along the wood grain, using minimal pressure and re-dampening the cloth if needed.
– Keep the cloth “damp,” not “wet,” and avoid lingering in one spot.
– Work in small sections (for example, the top panel first, then the front edge, then the sides).
Step 3: Remove spots without flooding
– Remove spots: for sticky residue, repeat short wipes and lightly increase contact time—don’t flood the area.
– If residue resists, let the damp cloth do the work for a few extra seconds, then dry immediately with the second cloth.
According to the EPA’s moisture guidance, indoor relative humidity is commonly recommended around 30–50% to reduce mold risk; while that’s not “cleaning instructions,” it supports the general principle that controlling moisture exposure helps protect wood and finishes over time.
According to US EPA, indoor humidity is often recommended to be maintained around 30–50% (guidance for moisture control)
Drying & protecting the wood surface after cleaning
Drying immediately is the step that keeps the damp microfiber method low-risk. This section answers what to do right after wiping so your finished wooden study table doesn’t get water marks, dull patches, or moisture creep at seams.
Many wood furniture care instructions emphasize drying promptly after wiping because leftover surface moisture can leave marks or interfere with finish appearance.
If you see any lingering dampness after cleaning, letting the surface air-set briefly before normal use reduces the chance of transfer (from chairs, bags, or laptop heat) into the finish.
Step 1: Follow with a dry microfiber cloth
– Dry immediately: follow up with a dry microfiber cloth to prevent water marks and dull patches.
Step 2: Air-set if needed
– Let it air-set: if there’s any lingering dampness, leave it for before using the table.
A practical rule: if you can visibly see wetness, you’re too late—dry more thoroughly and shorten your next damp pass.
Step 3: Protect the finish by avoiding “finish-damaging” practices
– Avoid heavy products: skip soaking, steam, or aggressive cleaners that can weaken certain finishes; stick to finish-safe care from the manufacturer.
If your wooden study table has a glossy finish, aggressive wiping later can leave “micro-swirls” that look like haze under desk lamps.
What can go wrong (and how to avoid it)
This method goes wrong mainly when moisture levels are too high, grit isn’t removed first, or the finish is already failing. Below are the most common failure modes and the specific fixes to keep your damp microfiber cloth cleaning safe for finished wood.
A wrung-out microfiber cloth matters because “wet” cleaning can leave dark rings and encourage moisture migration toward joints, even on sealed tops.
If you notice finish haze, smearing, or peeling while using a damp microfiber cloth, stop immediately and switch to a finish-appropriate restoration or professional guidance.
1) Too much moisture
– Too much moisture: a “wet” cloth can leave dark rings or drive moisture into joints—always wring out thoroughly.
Avoid it: test how the cloth behaves on an edge. If you see drips, it’s not damp—it’s wet.
2) Scratching from grit
– Scratching from dust/particles: if dust or debris isn’t removed first, you can grind particles into the surface.
Avoid it: dry-dab first, then damp wipe, then dry.
3) Finish mismatch (the table may not be stable)
– Finish mismatch: some finishes (especially worn or damaged ones) can smear or lose gloss with repeated wiping—stop if you see haze or peeling.
Quick comparison: when damp microfiber is smart vs. risky
| Situation | What you’ll likely see | What to do instead |
|---|---|---|
| Finished wood in good condition | Clean surface after wiping + quick drying | Use the damp microfiber cloth method; dry promptly |
| Finish is bubbling/peeling | Peeling spreads or gloss changes | Stop cleaning; assess repair/refinishing path |
| Shellac or very soft finishes | Smearing or haze from repeated wiping | Follow manufacturer cleaning guidance for that finish |
Verdict: safe method with limits—who should skip it
This damp-microfiber method is usually a solid choice for routine cleaning of finished wooden study tables because it’s controlled, quick, and supports immediate drying. Here’s why it works: you’re using a small amount of water, limiting contact time, and drying right away to prevent moisture staying on the surface.
The “wrung-out microfiber + dry immediately” approach is aligned with the common guidance from furniture and finish manufacturers for routine care of sealed wood.
When finish condition is compromised, any added moisture—even from a damp microfiber cloth—can accelerate dulling, lifting, or separation at edges.
Downsides (be realistic)
– Downsides: may not fully remove deep stains, wax buildup, or alcohol/marker-type messes.
Skip it if your wooden study table has these red flags
– Skip it if: you see peeling/cracking, the table is raw/unsealed, or the stain requires chemical/finish-specific steps.
Best use cases
– Best use: dust, light grime, fingerprints, and minor spot cleaning.
If you’re dealing with a persistent stain, the safest next move is identifying the finish type and following its cleaning/remediation instructions—rather than trying random cleaners on the wooden study table top.
Quick checklist (scan before you clean)
– [ ] Dust/loose grit removed first
– [ ] Microfiber cloth damp only (no dripping)
– [ ] Wipe along the grain, light pressure
– [ ] Spot-clean with repeated gentle passes (don’t flood)
– [ ] Dry immediately with a second cloth
– [ ] Stop if finish haze/peeling appears
Finish Types and Damp Microfiber Suitability for Wooden Study Tables (2026 guidance)
| # | Finish type | Damp-wipe fit | Main caution | Daily-method rating |
|---|---|---|---|---|
| 1 | Polyurethane (clear coat) | High | Over-wetting at seams | ★★★★★ |
| 2 | Waterborne polyurethane (e.g., “water-based” poly) | High | Can show streaks if not dried promptly | ★★★★★ |
| 3 | Varnish (oil or alkyd-based) | Medium-High | Gloss changes if hazed by repeated rubbing | ★★★★☆ |
| 4 | Lacquer (clear) | Medium | Can dull if water lingers | ★★★☆☆ |
| 5 | Shellac (waxed/sealed look) | Low-Medium | Water marks and sensitivity to solvents | ★★☆☆☆ |
| 6 | Waxy finish (wax topcoat) | Low | Can lose sheen if wiped too often with moisture | ★☆☆☆☆ |
| 7 | Raw/unsealed wood | Very Low | Uneven darkening from absorption | ☆☆☆☆☆ |
Frequently Asked Questions
What is the best way to clean a wooden study table with a damp microfiber cloth?
Start by dusting the surface with a dry microfiber cloth to remove grit that can scratch the wood. Lightly dampen a microfiber cloth with clean water (or a wood-safe cleaner if needed) and wipe along the wood grain. Immediately dry the area with a separate dry microfiber towel to prevent moisture from soaking into the wood.
How do I dampen a microfiber cloth safely for cleaning a wooden study table?
Dampen the cloth with water, then squeeze it out well so it’s only lightly moist—no dripping. Use a gentle pressure and frequent cloth rinsing to avoid spreading dirt or grime across the table. If you notice any pooling water, stop and dry right away with a clean towel.
How can I remove sticky spots or stains from a wooden study table using only a damp microfiber cloth?
First, wipe the area gently to lift surface residue without scrubbing hard. If it’s still sticky, dampen the cloth slightly more and wipe again along the grain, then dry immediately. For tougher marks, you may need a small amount of wood-safe cleaner on the cloth, followed by drying to protect the finish.
Why should you wipe along the wood grain when cleaning a wooden study table?
Wiping along the wood grain helps prevent visible scratches and reduces the risk of damaging the finish. It also helps lift dust and debris more effectively so your damp microfiber cloth doesn’t grind particles into the surface. Finish the process by drying the table thoroughly to avoid water marks on the wood.
Which cleaning mistakes should I avoid when cleaning a wooden study table with a damp microfiber cloth?
Avoid soaking the table or using a cloth that’s too wet, since excess moisture can warp wood or damage the finish. Don’t use harsh chemicals, abrasive pads, or rough wipes that can scratch the surface. Also avoid letting water sit—always dry with a clean microfiber towel right after wiping.
📅 Last Updated: October 26, 2026 | Topic: How to Clean a Wooden Study Table With a Damp Microfiber Cloth | Content verified for accuracy and freshness.
References
- https://www.cdc.gov/coronavirus/2019-ncov/community/disinfecting-building-facility.html
- https://www.who.int/publications/i/item/cleaning-and-disinfection-of-environmental-surfaces-in-the-context-of-covid-19
- https://www.epa.gov/coronavirus/cleaning-and-disinfecting-your-facility
- https://www.fpl.fs.usda.gov/documnts/fplgtr/fplgtr190.pdf
- Microfiber
- Wood finishing
- Varnish
- https://scholar.google.com/scholar?q=wood+furniture+cleaning+damp+cloth+mild+soap+care Google Scholar
- https://scholar.google.com/scholar?q=microfiber+cloth+cleaning+water+efficacy+study Google Scholar
- https://scholar.google.com/scholar?q=environmental+surface+cleaning+detergent+followed+by+disinfection+cloth Google Scholar

[…] damaging the finish, dry dust first and then wipe with a barely damp pH-neutral cleaner—buff dry immediately. This removes grime without stripping or clouding the finish by avoiding soaking, harsh chemicals, […]