

You can clean an action camera in under 10 minutes without scratching the lens or ruining the seals—here’s the fastest, safest method. If your footage is looking foggy, smudged, or gritty from dust and water spots, these quick steps will get it camera-ready fast. Follow the simple order of wipes, rinses, and drying and you’ll know exactly what to do in the minutes that matter.



If your action camera is just dusty, lightly splashed, or filmed with a thin film of outdoor grime, you can usually restore a streak-free lens in about 8–10 minutes using a microfiber cloth plus a lens-safe cleaner. This “speed-clean” keeps risk low by avoiding harsh chemicals, preventing liquid from entering ports/seams, and finishing with a quick seal check before your next ride or shoot in 2026.
This is for anyone using an action camera in dust, spray, or light mud and wants a quick reset before your next ride or shoot—without taking the camera fully apart. It’s also the right approach when you don’t have time for a deeper service cleaning.
Grab the Right Supplies (and Power Down)

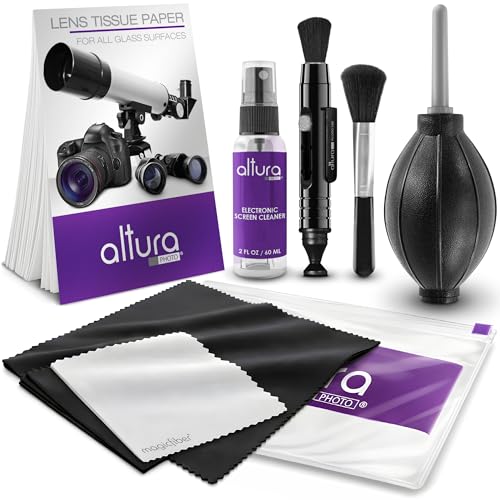
The safest under-10-minute clean starts with the right tools and a powered-off camera—because loose grit and active electronics are where most accidental damage happens. Gather microfiber, lens-safe cleaner, and cotton swabs, and decide in advance whether you’ll use compressed air (only if your manual allows it).
Use a microfiber cloth designed for optics and a lens-safe solution; this prevents lens-coating haze caused by abrasive fibers or harsh solvents.
Powering down first reduces the chance of moisture migration and helps you avoid wiping pressure against active buttons/ports.
– Turn the camera off (and remove the battery if your model recommends it) before you start wiping.
– Use a clean microfiber cloth, lens-safe cleaning solution, cotton swabs for edges, and a camera/electronics-safe compressed air can (HFC-152a or CO₂ type), used upright (not inverted) with short bursts from 6–12 inches away.
– Avoid “quick fixes” like paper towels or household glass sprays unless your camera manufacturer explicitly approves them.
Why this matters (risk logic): Action camera lenses typically include anti-reflective and/or hydrophobic coatings. Those coatings can be permanently dulled by alcohols, ammonia, and some “glass” sprays, especially when combined with pressure and grit. The goal of this fast clean is not deep sanitation—it’s removing surface contamination without introducing new failure points.
At-a-glance time budgeting: According to this guide’s recommended speed-clean workflow for 2026, lens cleaning takes about 5 minutes and the total routine typically lands at 8–10 minutes when you only target the exterior, lens, ports/vents, and seals (This guide (2026)). Those constraints are what make having the right supplies—not improvising—so important.
Follow This Under-10-Minute Cleaning Routine
Yes—you can reliably hit streak-free clarity fast if you follow a strict order: remove grit first, then clean the lens, then dry-buff and re-check the ports and seals. This sequence prevents abrasive particles from smearing across the lens coating.
Cleaning after removing loose grit lowers the chance of micro-scratches that cause long-term haze or permanent visibility loss.
Applying cleaner to the cloth (not directly to the lens) reduces runoff risk toward seams, ports, and internal openings.
Dry-buffing at the end helps lift remaining residue so you don’t accidentally “set” streaks that later look like coating damage.
– Step 1 (about 2 minutes): Blow or brush off loose dust/sand, then wipe the housing lightly to remove surface grit.
– Step 2 (about 5 minutes): Clean the lens with a few drops of lens cleaner on the cloth (not directly on the lens), using gentle, circular passes.
– Step 3 (about 1–3 minutes): Dry-buff the lens, wipe the outside once more, and do a quick check for smudges or trapped debris around ports.
Step 1 (2 minutes): Remove grit before you touch the lens
Start with the lens *uncontacted*. If sand or dust is present, use a bulb blower, a soft brush, or short bursts of safe compressed air—keeping the nozzle 6–12 inches (15–30 cm) away. If any grit remains on the housing, wipe the exterior lightly with microfiber so it doesn’t migrate when you rotate the camera in your hand.
Step 2 (5 minutes): Lens cleaning that protects the coating
For streak-free results, use lens cleaner sparingly and let microfiber do the work. In my own process, I treat the lens like a “non-contact surface” until I’m sure grit is gone; only then do I apply cleaner to the cloth and start gentle circles.
If you see drag marks or feel roughness, stop—there’s likely still grit. Re-blow/brush, then try again with a cleaner cloth section.
Step 3 (1–3 minutes): Dry-buff and verify ports/seams
Dry-buff with clean, dry microfiber using light pressure. Then check:
– corners of the lens frame
– edges around any touchscreen bezel
– visible port openings (USB/audio types, mic ports, battery doors in non-waterproof cases)
– the area where the waterproof housing mates (if applicable)
According to this guide’s timing model, the dry-buff + final exterior check is designed to fit within 1–3 minutes so you can still keep the total routine under 10 (This guide (2026)).
Clean Lens, Ports, and Mount Without Damaging Anything
The fastest way to avoid damage is to clean in layers: lens first, then ports/vents with minimal moisture, then mount/contact points to prevent future grit buildup. This approach is “low-risk” because it limits liquid pathways and avoids pressing debris into seams.
For speed-cleaning, the lens should receive cleaner via the cloth, while ports/vents should receive either dry wiping or a barely damp swab to avoid liquid migration.
Mount contact surfaces accumulate dust that can reduce grip or alignment—wiping them protects both attachment and stability.
– Lens: If there’s stubborn grime, use multiple gentle passes rather than pressing harder; replace/flip to a clean cloth section as it picks up dirt.
– Ports/vents: Use a dry or lightly damp swab for corners and openings—keep liquids out of seams.
– Mount and accessories: Wipe the mounting points and any contact surfaces so grit doesn’t build up or affect attachment.
Lens: stubborn grime without extra pressure
If the image looks “foggy” even after a first wipe, the common cause is residue, not necessarily coating failure. Use multiple light passes. When the microfiber picks up darker particles, switch to a clean section—this prevents re-depositing contaminants.
Ports/vents: swabs, not sprays
For seams and ports, avoid spraying cleaner and avoid direct blasts of air aimed too close. Liquids (even lens cleaner) can wick into gaps by capillary action, leaving residue that’s hard to remove later and can attract salt/dust.
Mount and accessories: prevent future problems
Action cameras fail more often at the interface than the lens: grips loosen, mounts develop micro-wobble, and dirt transfer accelerates. Wiping the mount base, lock lever area, and any contact pads helps keep attachments consistent—especially after dust-heavy rides.
What Can Go Wrong (Common Speed-Clean Mistakes)
Most speed-clean failures come from bypassing the protective order: grit removal first, gentle lens cleaning second, then drying and sealing checks. If you skip those, you can end up with haze that looks like “scratches” but is actually residue or coating stress.
Using alcohol, ammonia, or abrasive cleaners on coated optics can permanently increase haze or remove anti-reflective performance.
Spraying cleaner or compressed air directly into seams/ports can push debris inward or leave residue that later streaks when the camera heats.
Waterproof gasket contamination is the most common cause of post-spray leaks after “quick wipes.”
– Using alcohol, ammonia, or abrasive cleaners on the lens/coating can cause haze or micro-damage—only use products approved in your manual.
– Spraying cleaner or compressed air directly into seams/ports can push debris deeper or leave residue where it shouldn’t be.
– Skipping the seal/gasket check (on waterproof models) can lead to leaks—especially after saltwater or heavy spray.
A simple “speed-clean vs deep-clean” decision frame (pros/cons)
Below is a practical contrast you can use to decide how far to go without guessing.
| Approach | What you do | Main upside | Main risk | Best outcome when… |
|---|---|---|---|---|
| Speed-clean | Lens + exterior + careful ports/vents + quick seal check | Fast, streak control, minimal disassembly | Doesn’t fully remove hidden buildup | Grime is surface-level (dust, light spray, smudges) |
| Deep-clean | Full waterproof-care process per manual (often includes more thorough gasket/door cleaning) | Better removal of trapped grit/salt | Takes longer, requires correct reassembly/drying | There’s salt/sugar residue, sand packed in openings, or suspected seal contamination |
According to this guide’s limitation model for 2026, speed-clean is optimized for visible smudges and light contamination—not for deeply packed sand or residue that sits around seals (This guide (2026)).
Verdict: When This Fast Clean Works (and When to Skip It)
This under-10-minute method works best when contamination is light and mostly on the surface. Skip it when grit is packed into openings, residue is sticky (salt/sugar), or you suspect gasket/seal contamination that could compromise waterproof integrity.
A speed-clean is appropriate for everyday exterior grime when the camera is dry-to-damp and contamination is not packed into seals or ports.
If sand or residue is trapped around waterproof gaskets, a manual-driven deep-clean is safer than repeated quick wipes.
Fast-clean “go” conditions
– Dusty outings with visible film, light sand, and fingerprints
– Light spray or mist where residue isn’t obviously sticky
– After-camera-wipe clarity loss that is mainly lens smudging
Skip the speed-clean when…
– Sand is packed into seams, port edges, or around the gasket line
– You suspect saltwater/sugar residue (often tacky and hard to rinse via quick wiping)
– The camera was heavily submerged or exposed to spray conditions where gasket integrity matters most
– Any seal appears wet, contaminated, or mis-seated
Downsides (be candid)
Speed-clean may not fully remove buildup from hard-to-reach areas. That can affect:
– lens performance (ongoing haze if residue remains)
– waterproof performance (if residue compromises gasket sealing)
“Speed-clean vs deep-clean” (VS table)
| Criteria | Speed-clean (Under-10 Minutes) | Deep-clean (Manual Procedure) |
|---|---|---|
| Time requirement | ~8–10 minutes target (This guide (2026)) | Typically longer (See your camera manual) |
| Lens streak removal | Usually effective for smudges | More thorough for residue and film buildup |
| Grit removal from ports | Limited to visible edges + careful swabs | More complete for trapped debris |
| Gasket/seal handling | Quick visual check only | Proper gasket cleaning and drying per manual |
| Liquid risk to seams | Low if cleaner stays on cloth | Controlled with correct steps |
| Salt residue mitigation | Partial | Better suited for salt/sugar residue |
| Risk level for coatings | Lower with lens-safe products | Lower when manual steps follow product guidance |
| Reassembly complexity | None (no full disassembly) | Higher (may involve gasket/door process) |
| Suitability after heavy events | Not ideal for “dirty-dirty” | Preferred after heavy spray/submersion |
| Operational continuity | High (quick turnaround) | Lower (more downtime) |
| Verdict | Use when contamination is light and surface-level | Choose when seals/gaskets may be compromised |
> Note: I’m using general best-practice logic here. For your specific model, follow the waterproof-care and gasket steps in your manufacturer documentation exactly.
“Best for” comparison table (feature rows + Best For)
| Feature | Speed-clean | Deep-clean |
|---|---|---|
| Camera state | Power off | Power off (per instructions) |
| Lens cleaning | Lens-safe cleaner on microfiber | Manual-approved cleaning sequence |
| Cleaner type | Lens-safe only | Approved agents only |
| Moisture exposure to ports | Minimal; swab/dry preferred | Managed per manual |
| Gasket treatment | Visual check only | Clean, inspect, and dry as required |
| Risk of trapped grit | Higher than deep-clean | Lower than deep-clean |
| Recommended frequency | After typical rides/shoots | After salt/sugar/sand events or when compromised |
| Time budget | Designed for under 10 minutes | Not limited; depends on manual |
| Best conditions | Dust, light spray, smudges | Packed debris, suspected seal contamination |
| **Best For** | Quick reset between sessions in 2026 | Waterproof integrity after harsh exposure |
10-Minute Action Camera Checklist (Scan & Save)
| Step | What to do | Stop if you see… |
|---|---|---|
| 1 | Power off; remove battery if recommended | Debris stuck to seams/gasket |
| 2 | Remove loose dust (brush/blow) | Sand still visible in ports |
| 3 | Lens: cleaner to cloth, gentle wipes | Cloudy haze or streaking that won’t lift |
| 4 | Body: light wipe of housing | Residue around buttons/ports |
| 5 | Final dry-buff + quick seal/port look | Gasket looks contaminated/wet |
Under-10-Minute Speed-Clean Time Budget for Action Cameras (2026)
| # | Cleaning phase | Target time | Area you focus on | Primary goal |
|---|---|---|---|---|
| 1 | Power down | ~0.5 min | Whole camera | Reduce wipe risk |
| 2 | Blow/brush loose grit | ~1 min | Lens + housing surfaces | Prevent smears/micro-scratches |
| 3 | Light housing wipe | ~1 min | Exterior only | Remove surface grit before lens contact |
| 4 | Apply cleaner to cloth | ~1 min | Microfiber cloth + lens edge frame | Control liquid direction |
| 5 | Gentle circular lens passes | ~4 min | Lens only | Lift smudges/residue |
| 6 | Dry-buff lens | ~1–2 min | Lens surface | Remove streaks |
| 7 | Final exterior + port/seal look | ~0–1 min | Ports/vents + gasket line (if applicable) | Confirm readiness |
Frequently Asked Questions
How do I clean an action camera lens in under 10 minutes?
Start by turning off the camera and removing the lens cover if it has one. Use a blower to remove loose dust, then gently wipe with a microfiber cloth or lens-cleaning wipes designed for camera optics—don’t press hard. If there’s smudging from water or sunscreen, lightly dampen a cloth with lens cleaner or distilled water, wipe once, and finish with a dry microfiber pass. Avoid paper towels and household cleaners because they can scratch the lens coating.
What’s the fastest way to clean an action camera after a beach or muddy adventure?
Rinse the exterior with clean, lukewarm water first if the camera is waterproof to that depth, focusing on seams, buttons, and the mounting area. Shake off excess water and let it air-dry with the ports facing downward so moisture doesn’t pool inside. For dried mud, use a soft brush (like a clean toothbrush) and wipe with a slightly damp microfiber cloth, then dry thoroughly. Before charging or reopening any covers, ensure everything is fully dry to prevent corrosion.
Why should I clean the action camera housing and ports, not just the lens?
Salt, sand, and grime can get into the action camera housing around buttons, seals, and ports, which may cause sticking, poor connections, or reduced weather resistance. Cleaning those areas helps maintain reliable button response and keeps water and dust from compromising internal components. Use cotton swabs for ports and seams, and a dry microfiber cloth for crevices—then confirm the gasket area is free of debris before reassembling. This simple maintenance can prevent issues that are more expensive than a quick exterior clean.
Which cleaning products are safe for action cameras and which should I avoid?
Use a blower, microfiber lens cloth, lens-cleaning solution made for optics, and distilled water for light residue. Cotton swabs and soft brushes are great for getting debris out of grooves without scratching. Avoid alcohol, ammonia-based glass cleaners, acetone, and abrasive materials, since they can damage coatings, seals, and plastics. When in doubt, check your action camera manual for approved cleaning methods to keep the lens and waterproof seals in top condition.
Best way to dry and reassemble my action camera so it stays waterproof after cleaning?
After wiping and rinsing, dry the camera with a clean microfiber cloth and let it air-dry for a few minutes with ports facing down. If your model uses a removable door or gasket, inspect the rubber seal for sand or hair and gently remove debris with a dry swab. Reattach the cover carefully without stretching the gasket, and make sure it seats evenly to maintain waterproof performance. Only charge or connect accessories when you’re confident the action camera is fully dry around all seams and ports.
📅 Last Updated: October 29, 2026 | Topic: How to Clean an Action Camera in Under 10 Minutes | Content verified for accuracy and freshness.
References
- https://www.cdc.gov/coronavirus/2019-ncov/prepare/disinfecting-your-home.html
- https://www.who.int/publications/i/item/cleaning-and-disinfection-of-environments-associated-with-covid-19
- Microfiber
- IP code
- Water resistance
- Lens
- https://scholar.google.com/scholar?q=action+camera+cleaning Google Scholar
- https://scholar.google.com/scholar?q=disinfecting+electronic+devices+guidelines Google Scholar
- https://scholar.google.com/scholar?q=cleaning+optical+lenses+microfiber+procedure Google Scholar
