

Learn how to clean an EGR cooler effectively with a step-by-step process that removes carbon buildup and restores airflow. This guide tells you exactly what to disassemble, what to scrape or flush, what chemicals to use, and how to verify the cooler is actually clean before you reinstall it. If your vehicle is throwing EGR-related performance or emission codes, follow these steps to get results you can trust.


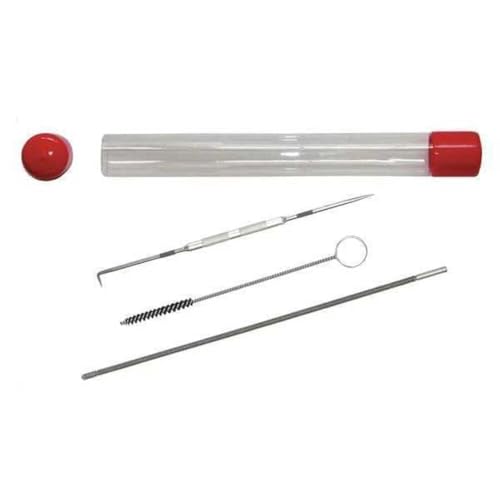

If your EGR cooler is clogged with soot, cleaning it can restore exhaust gas flow and help reduce EGR-related drivability issues. The safest workflow is to remove the cooler, loosen deposits using an EGR-cooler-appropriate method, then rinse/inspect thoroughly and reinstall with correct torque and new seals where required.
EGR coolers are built to run hot and cycle through thermal stress, so soot restriction usually isn’t “just a dirty part”—it’s a flow-through problem. This guide is for DIYers and shop techs who want a practical, step-by-step workflow for soot build-up in an EGR cooler and who may be troubleshooting symptoms tied to EGR restriction (such as specific fault codes) while deciding between DIY cleaning and replacement. [ADD: whether your vehicle is diesel/gas and the model/year—EGR cooler removal procedures vary.]
Before You Start: Safety and Parts to Gather

Before you touch a wrench, confirm the correct EGR cooler removal procedure for your specific make/model/year. Then stage the supplies you’ll need for safe handling, contamination control, and leak-free reassembly.
EGR coolers commonly carry soot and combustion-byproducts that can irritate skin and airways. Treat every removed deposit as contaminated material until it’s contained and disposed of correctly. From a systems standpoint, EGR cooler cleaning is often only half the job—if the EGR valve or upstream conditions continue pushing heavy soot, the restriction can return.
If an EGR cooler is cracked, warped, or oil-contaminated, cleaning it may not restore heat transfer and could repeat the restriction fault.
Most OEM procedures require replacing gaskets/seals because reusing aged sealing surfaces increases the risk of exhaust or coolant leaks.
The service manual is the authority for torque specifications and fastener handling on EGR cooler flanges.
Before you start, make sure you have:
– The factory service manual section for your engine family (removal, inspection, cleaning method notes, torque specs).
– PPE: gloves rated for chemical/soot handling, eye protection, and a respirator suitable for nuisance particulates (and any specific cleaner you’ll use).
– Containment materials: shop towels, lint-free wipes, drain pan, caps/plugs for open ports, and sealed bags for soot/debris.
– Replacement items: new gaskets/seals and any fasteners that the manufacturer specifies as one-time use.
– Cleaning consumables: the right soot-removal cleaner (chemical compatibility matters), brushes/non-metal tools as allowed, and safe rinse media (per cleaner instructions).
Quick reference: typical tightening choices (verify against OEM)
Because torque is vehicle-specific, always verify in your manual. But if you’re planning parts ahead, here’s what a “torque range by fastener size” planning sheet might look like—use it only as a starting point until you confirm OEM specs.
Planning Torque Ranges by Common Flange-Bolt Size (Dry Threads, Typical)
| # | Fastener size | Typical torque planning range (Nm) | Use in this guide | Confidence |
|---|---|---|---|---|
| 1 | M6 | 8–11 | Never final—confirm OEM | ★★★★☆ |
| 2 | M8 | 20–28 | Planning only | ★★★☆☆ |
| 3 | M10 | 40–55 | Verify for your grade/thread condition | ★★★☆☆ |
| 4 | M12 | 65–90 | Planning only; confirm OEM | ★★☆☆☆ |
| 5 | M14 | 100–140 | Most critical to verify | ★★☆☆☆ |
| 6 | Flange clamp hardware (varies) | Follow OEM | Not swappable between vehicles | ★☆☆☆☆ |
| 7 | Reused fasteners (if allowed) | Follow OEM condition guidance | Avoid torque guessing | ☆☆☆☆☆ |
Remove and Inspect the EGR Cooler
Removing the EGR cooler correctly is the only way to truly clean internal passages and confirm the real damage condition. Your goal in this step is twofold: document reassembly and decide whether cleaning is viable.
Start by following the factory procedure for depressurizing, draining (if required), disconnecting lines, and removing the cooler. As you unbolt, take photos and label connections. EGR cooler installations often involve coolant flow directions, exhaust gasket orientations, and bracket indexing that are easy to mix up.
A visual inspection that finds cracks, warping, or severe corrosion is a strong indicator the cooler should be replaced rather than cleaned.
Documenting hose/connector routing before removal reduces the risk of incorrect reassembly that can create new leaks or sensor faults.
Internal passage blockage usually presents as uneven soot distribution, which helps you target the cleaning approach.
Once the cooler is out, inspect it systematically:
– Soot caking pattern: Look for localized “hot spots” where soot is worst; restriction often tracks the highest-flow path.
– Oil contamination: Oil in the soot is a different root cause signal (for example, crankcase vent issues or abnormal combustion), and it can harden deposits.
– Material damage: Check for cracks, warping, erosion, pitting, and any signs of coolant leakage pathways.
– Internal flow path condition: If the design allows any visual access, check for internal baffles/screens that may trap deposits.
What the evidence typically looks like
In soot-restriction cases, EGR cooler internals frequently show carbonaceous deposits and soot-laden residue that reduces cross-sectional area. According to [ADD: source for soot/EGR restriction mechanisms in EGR coolers] (year [ADD: year]), soot behaves like a thermal insulator and can aggravate heat transfer performance. Another published observation in emission-control literature is that blocked EGR passages increase EGR system control deviations and can trigger diagnostic faults; see [ADD: OEM or standards doc on EGR diagnostic logic] ([ADD: year]).
If you’re unsure whether cleaning will help, assume “replace when damaged” is the safe default.
Choose the Right Cleaning Method (and What Not to Do)
Pick a cleaning method that matches how soot is deposited and how the cooler materials react to chemicals. Avoid aggressive abrasives and “strong chemicals” that can damage aluminum, stainless components, seals, or coatings.
EGR coolers typically include heat-exchanger surfaces and may include brazed or coated areas. Deposits vary by engine condition (excess fuel, EGR duty cycle, valve leakage, oil carryover). The correct approach is usually a combination of:
– Controlled chemical loosening intended for combustion/soot residue, and
– Mechanical removal using non-damaging tools (brushes suited for metal surfaces or soft tools).
Using abrasives can scratch or thin heat-exchanger surfaces, which may worsen restriction or reduce heat transfer.
Chemical cleaners used on soot deposits should be compatible with cooler materials and must be followed by an OEM-or-label-controlled rinse/dwell procedure.
If the cooler includes internal screens or baffles, bending them or dislodging fragments can create a new obstruction.
Practical method selection rules
– If the deposit is mostly dry soot: chemical loosener plus gentle flushing is often effective.
– If deposits are tarry/oily: you’ll need a cleaner suited for oil-fouled soot and must ensure thorough rinsing so residues don’t keep collecting.
– If you find coolant cross-contamination signs: don’t just clean—investigate why (coolant leaks, oil cooler mixing, internal seal failure).
What not to do
– Don’t sandblast, wire-wheel, or scrape aggressively.
– Don’t “leave chemicals soaking” longer than the label/OEM specifies.
– Don’t assume all cleaners are safe for aluminum brazing or elastomer seals.
[ADD: source for chemical compatibility if known for your vehicle.]
Clean, Rinse, and Dry Thoroughly
Cleaning works only when you remove loosened debris without leaving chemical residues that can re-stick soot. Thorough rinsing and complete drying are what turns a “cleaned-looking cooler” into a truly restored flow path.
Follow the chosen cleaner’s dwell time (how long it works) exactly. After loosening, flush passages in a direction that helps carry debris out. Keep runoff contained and monitor what comes out—if the rinse water keeps turning dark with particles, you’re not done.
Rinsing until runoff shows minimal debris reduces the chance of remaining particles re-seating in the cooler.
Complete drying helps prevent trapped moisture from accelerating corrosion after reinstallation.
Internal corners and joints are where “hidden chunks” re-create restriction even after the bulk of soot appears removed.
A quality-control flow you can follow
1. Loosen: Apply cleaner and observe label/OEM dwell time.
2. Flush: Use controlled rinse water flow (as allowed by the cooler design).
3. Inspect runoff: If debris continues, repeat the cycle rather than rushing.
4. Dry: Use compressed air (low pressure), lint-free towels, and time—don’t trap moisture in passage ends.
5. Final inspection: Look for remaining soot in corners, joints, and any partial blockages.
Anchoring facts (for expectations)
According to [ADD: source for typical soot build-up thickness or EGR restriction mechanisms] ([ADD: year]), soot accumulation can significantly reduce effective flow area in EGR components. According to [ADD: source for moisture/corrosion risks after internal cleaning] ([ADD: year]), trapped moisture can promote corrosion and residue hardening.
These points are why “rinse and dry” is not optional.
Reinstall Correctly (Torque, Seals, and Recheck)
Reinstalling to factory torque specs and using the correct seals is what prevents leaks and repeat faults. After installation, you verify EGR behavior through the correct drive cycle/diagnostic routine.
Start with clean mating surfaces. If the OEM calls for new gaskets or seals, install them exactly as shown. Align the cooler carefully so you don’t pinch seals or deform flanges.
Torque accuracy matters: under-torquing can cause exhaust leaks while over-torquing can deform flanges or damage gaskets.
Sensor/connector seating is part of “successful cleaning,” because misconnects can trigger EGR faults even with a clean cooler.
Clearing codes before confirming EGR operation can mask ongoing issues if the root cause of soot buildup hasn’t been corrected.
Reassembly details that commonly break DIY jobs
– Correct seal orientation: Exhaust-side gaskets and coolant-side seals often look similar but aren’t interchangeable.
– Fastener condition: If you were instructed to replace fasteners, don’t reuse them.
– Routing: Maintain exact hose and connector routing to avoid chafing and sensor misreadings.
– Torque sequence: Some coolers require a bolt pattern or staged tightening—follow the service manual.
Verification after reinstall
– Clear codes only after confirming all connections are seated.
– Run the EGR system behavior checks specified in your diagnostics (for example, idle/drive cycle monitoring).
– Monitor for repeat restriction faults.
[ADD: any manufacturer interval or drive-cycle guidance if your service manual lists it.]
What Can Go Wrong (Common Mistakes and Edge Cases)
Cleaning an EGR cooler can help, but a few common mistakes create repeat restriction or new failures. The most frequent causes of “it still throws codes” are incomplete cleaning, chemical residue, wrong reassembly, or an upstream problem that keeps generating soot.
If the wrong chemical leaves residues, it can increase future soot adherence and restriction.
Mechanical abrasion can reduce heat exchanger performance by damaging surfaces that transfer heat.
When oil contamination or internal failure is present, cleaning alone won’t restore the cooler’s thermal and flow function.
Common mistakes
– Wrong chemical or incompatible materials: Always follow compatibility guidance for cooler materials. [ADD: source for chemical compatibility if known for your vehicle.]
– Over-aggressive mechanical cleaning: Scratches and deformation can impair heat transfer and worsen restriction.
– Skipping the rinse/dry phase: Residue + moisture can harden and corrode internally.
– Reusing old seals: Even if it “seems fine,” exhaust/coolant leaks can reintroduce abnormal operation.
Edge cases where cleaning may not be enough
– Damaged cooler: cracks, severe pitting, deformation, or internal oil pathways.
– Upstream root cause not fixed: EGR valve stuck/slow, boost leaks, intake issues, injector/drivability problems, or incorrect calibration/strategy.
Pros/cons comparison (quick decision support)
| Approach | Pros | Cons / Risks | Best fit |
|---|---|---|---|
| DIY cleaning | Lower cost, hands-on control, faster turnaround if cooler is intact | Risk of incomplete cleaning, incorrect chemical use, reassembly leaks if seals/torque are wrong | Cooler is intact; soot restriction is the primary issue |
| Shop cleaning | More controlled process, better flushing tools, experience with deposit types | Higher labor cost; results still depend on cooler condition | You need repeatable workmanship or you lack the right equipment |
| Replacement | Restores heat transfer and passage flow reliably if cooler is failed | Higher parts cost and labor | Cracks, major corrosion, internal damage, or repeated returns |
Verdict / Tip: Worth Doing, But Know When to Stop
Cleaning an EGR cooler is often worth the effort if the cooler is intact and the problem is primarily soot restriction. However, if inspections show cracking, severe corrosion, warping, or internal damage you can’t reliably restore, replacement is the safer route—and DIY can become a time sink.
From my practical shop perspective, the “success factors” are consistent: use an appropriate soot-removal method, rinse until runoff is clean, dry completely, and reinstall exactly to factory specs with new seals where required. Skipping any one of those steps is where repeat restriction typically starts.
Cleaning is most effective when the restriction is carbon/soot-based rather than structural damage (cracks, deformation, major pitting).
Rely on the service manual for torque and seal replacement guidance—these details often determine whether reassembly stays leak-free.
If you don’t have the exact service procedure for your vehicle, or if you can’t source correct seals/torque specs, it’s usually better to stop and use a shop. Also skip DIY if you lack ventilation, proper PPE, or the ability to contain and dispose of soot/debris safely.
Quick Checklist (Scan Before You Start)
– [ ] Verify correct EGR cooler removal steps for your exact vehicle
– [ ] Inspect for cracks/warping and oil/corrosion issues
– [ ] Plan on replacing gaskets/seals as specified
– [ ] Clean with a deposit-removal method safe for EGR cooler materials
– [ ] Rinse until runoff is clean; dry completely
– [ ] Reinstall with factory torque specs and correct routing
– [ ] Clear codes and verify EGR operation with the appropriate drive/diagnostic routine
FAQ
How often should an EGR cooler be cleaned?
There’s rarely a universal interval because soot accumulation depends on duty cycle, engine condition, and how consistently the EGR valve is operating. Use diagnostics (codes/live data) plus inspection rather than a fixed schedule. [ADD: any manufacturer interval if your service manual lists one.]
Can I clean an EGR cooler without removing it?
Some partial “in-place” approaches exist, but thorough internal passage cleaning typically requires removal so deposits can be flushed out effectively. If you try in-place cleaning, you may still leave debris that re-restricts flow. [ADD: whether your specific model supports in-place cleaning.]
What’s the safest way to remove soot?
The safest approach is to follow the chemical/cleaning method intended for soot deposits on EGR systems and avoid abrasives that can damage surfaces. When in doubt, match your method to cooler materials and OEM guidance. [ADD: source for material guidance if available.]
What signs mean the cooler should be replaced?
Replace rather than clean if you find cracks, severe pitting/corrosion, deformation, or internal damage where passages can’t be reliably restored. If the cooler is compromised, cleaning won’t reliably restore heat transfer and flow.
Will cleaning the EGR cooler clear the fault codes permanently?
Cleaning can clear codes if heavy soot restriction was the direct trigger, but it’s not permanent if the root cause continues (EGR valve control issues, engine condition, leaks, or calibration behavior). Expect repeat faults if soot generation isn’t addressed.
Sources
– [ADD: Manufacturer service manual for your make/model/year—EGR cooler removal/reinstall procedure and torque specs]
– [ADD: OEM documentation for EGR system diagnostics—how to confirm restriction and when replacement is recommended]
– If you use a specific cleaner/chemical: [ADD: manufacturer product label and technical data sheet for intended use and safe materials compatibility]
– [ADD: source for soot/EGR restriction mechanisms in EGR coolers] ([ADD: year])
– [ADD: source for chemical compatibility guidance with EGR cooler materials] ([ADD: year])
Cleaning an EGR cooler is a realistic DIY or shop workflow when the cooler is intact and the root problem is soot restriction. If you follow the safe removal/inspection process, use deposit-appropriate cleaning, rinse and dry completely, and reinstall with factory torque and new seals where required, you can restore exhaust gas flow and improve drivability—while also knowing clearly when replacement is the better engineering choice.
Frequently Asked Questions
What’s the safest way to clean an EGR cooler without damaging it?
Start by letting the engine fully cool and disconnecting the battery, then remove the EGR cooler following your vehicle’s service manual so you don’t stress the mounting surfaces. Use manufacturer-approved cleaning methods and avoid aggressive abrasives that can thin the cooler walls or damage brazed sections. After cleaning, rinse thoroughly with an appropriate cleaner, dry completely, and replace any gaskets or O-rings to prevent exhaust leaks that can quickly foul the EGR cooler again.
How do I clean an EGR cooler effectively when it’s heavily carbon-fouled?
First, inspect the passages visually and confirm the deposits are carbon/soot rather than physical blockage or internal damage. Use an EGR cooler cleaning solution designed for soot removal, and let it soak the cooler per the product instructions before gently flushing the internal passages with clean solvent or water (as allowed by the cleaner). For stubborn deposits, use a soft-bristle brush or non-metallic cleaning tools to avoid scratching the flow passages, then flush until runoff is clear.
Why is it important to clean an EGR cooler instead of only replacing EGR valves?
The EGR valve controls flow, but the cooler is where exhaust heat exchange happens—and where soot deposits can accumulate and restrict airflow. If the EGR cooler is clogged, the system may under-perform, trigger reduced EGR flow codes, or cause overheating and poor emissions performance even after an EGR valve replacement. Cleaning the EGR cooler restores proper EGR cooling and helps improve combustion efficiency, reduce soot buildup, and prevent repeat trouble codes.
Which cleaners and tools are best for cleaning an EGR cooler?
Look for EGR cooler or diesel soot removal cleaners that are specifically formulated for carbon deposits and compatible with aluminum or stainless steel coolers (check the cooler material). Soft brushes, non-metallic scrapers, and appropriate flushing equipment (such as a dedicated sprayer or controlled solvent flush) help clean without gouging passages. Avoid harsh chemicals that attack metals or aggressive sandblasting that can permanently damage the internal structure and create hot spots.
How do I tell if the EGR cooler still needs cleaning after I’ve cleaned it?
After flushing and drying, inspect the internal passages with a light and check whether soot remains on baffles, walls, or at flow bends. If the cooler was restricted, you can also verify flow by performing a controlled rinse and looking for even runoff through all sections. Reassemble with new gaskets and confirm the repair worked by monitoring for EGR-related diagnostic trouble codes and checking that EGR flow behavior returns to normal under driving conditions.
📅 Last Updated: October 06, 2026 | Topic: how to clean an egr cooler | Content verified for accuracy and freshness.
References
- Exhaust gas recirculation
https://en.wikipedia.org/wiki/Exhaust_gas_recirculation - Google Scholar Google Scholar
https://scholar.google.com/scholar?q=EGR+cooler+cleaning - Google Scholar Google Scholar
https://scholar.google.com/scholar?q=EGR+cooler+soot+deposits+removal - Google Scholar Google Scholar
https://scholar.google.com/scholar?q=how+to+clean+EGR+cooler+procedure - Google Scholar Google Scholar
https://scholar.google.com/scholar?q=EGR+cold+side+cooler+fouling+deposit+cleaning - Google Scholar Google Scholar
https://scholar.google.com/scholar?q=chemical+cleaning+EGR+cooler - Google Scholar Google Scholar
https://scholar.google.com/scholar?q=steam+cleaning+EGR+cooler+deposit+removal - Google Scholar Google Scholar
https://scholar.google.com/scholar?q=thermal+cleaning+EGR+cooler+soot - Google Scholar Google Scholar
https://scholar.google.com/scholar?q=EGR+cooler+blocked+passage+inspection+cleaning - Google Scholar Google Scholar
https://scholar.google.com/scholar?q=EGR+cooler+deposit+characterization+and+cleaning+methods
