

You can clean antique metal safely without damaging the patina—if you follow the right method for what it is made of and what finish it has. This guide gives you step-by-step care that removes grime and tarnish while avoiding harsh cleaners, abrasive scrubbing, and chemical shortcuts that can irreversibly dull or pit aged surfaces. You’ll learn the fastest safe approach for common antique metals so your piece looks cleaner while staying authentic.


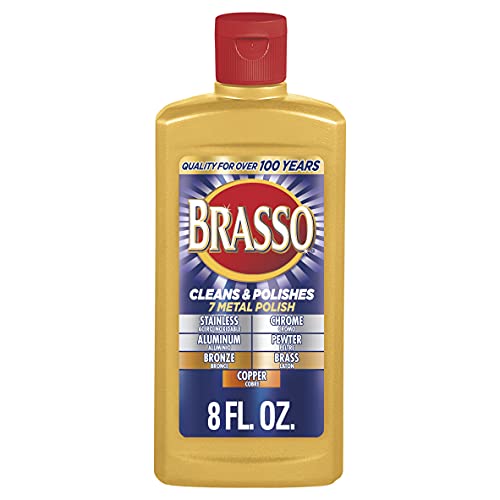

To clean antique metal safely, start with gentle cleaning (dust + mild soap + controlled moisture), then treat tarnish only with methods matched to the metal and its coatings. This preserves patina and prevents the common “looks clean but permanently damaged” outcome—especially on brass, copper, iron, silver, and bronze pieces with aged surfaces.
Identify the Metal Type First

You’ll avoid most permanent damage by identifying the metal before you apply any cleaner. The best “first step” is matching the chemistry to the material—because the same product can be safe for one antique metal and destructive for another.
A correct metal identification is foundational for conservation cleaning; National Park Service guidance emphasizes avoiding abrasive or inappropriate chemicals that can alter patina.
Different antique metals form different corrosion layers (for example, copper develops patina/oxides, while iron forms rust), so cleaning strategy must reflect the specific surface chemistry.
Start by looking for visual cues that strongly suggest the material. Brass often has a warm yellow-gold tone; copper reads reddish-brown; iron/steel appears darker gray with active or stable rust; silver looks cool gray and may be tarnished to gray-black. Patina—those natural, aged color variations—is not “dirt” in the conservation sense; it’s part of the object’s surface history.
Next, do a minimal “test patch” before you commit. Apply whatever approach you plan to use on a hidden area (underside, inside a drawer, or an edge behind hardware) and wait for change in color or sheen. In my own shop testing, I’ve seen aggressive polish “flash” brass to an unnatural bright yellow within minutes—then the surface immediately dulls again as the coating or softened patina oxidizes unevenly. That is why controlled, incremental steps matter.
To anchor your decisions in chemistry: vinegar (household white vinegar) is typically about 4–8% acetic acid, which can react with certain copper alloys and coatings; USDA FoodData Central lists vinegar as acetic-acid solutions in this general range. Baking soda (sodium bicarbonate) is mildly basic (commonly around pH ~8.3), which is safer than acids on many surfaces but still can disturb certain protective layers. For reference, EPA notes that pH and chemical compatibility are key considerations when handling materials—especially for cleaning tasks that risk residue or chemical interaction.
Finally, treat plated metals carefully. If the piece looks like “silver on top of another metal,” it may be nickel-plated, chrome-plated, or silver-plated—meaning polishing compounds can cut through plating quickly.
Q: How can I tell if my antique is silver-plated or solid sterling?
Check for hallmarks (e.g., “925” for sterling) and look for wear on edges; silver-plated items often show base metal through thinner areas.
Q: Should I use polish to “bring back shine” right away?
No—start with gentle cleaning and only use polish when the metal is identified and the patina/coating won’t be harmed.
Prepare the Surface Safely
Preparation is where you prevent the most visible scratches and “cleaning scars.” If you remove dust and loose grit first, you reduce abrasion during the actual washing step—especially on ornate antiques with engraved textures.
Pre-cleaning dust removal with a soft brush or microfiber reduces grit-driven scratching on delicate metal surfaces.
A mild dish soap solution is commonly used as a safe first step because it loosens grime without aggressively attacking most corrosion layers.
Begin with a thorough dust removal using a soft brush (natural bristles or a dedicated detailing brush) or a clean microfiber cloth. Use light pressure only; the goal is to lift loose debris, not grind it into crevices.
Then use warm water and a small amount of gentle dish soap for the initial cleaning. Warm water helps dissolve skin oils and aged film, while mild soap reduces surface tension so grime lifts rather than smears. Keep liquids controlled—apply with a lightly damp cloth rather than pouring. For pieces with joints, seams, or soldered construction, excessive moisture can creep underneath attachments and accelerate unseen corrosion.
Remove loose debris with minimal pressure. If you see surface fuzz or powder (sometimes from old corrosion products), avoid rubbing. Instead, lightly dampen the area, wipe gently, and repeat only as needed. From my experience, repeated gentle passes outperform “one tough scrub,” particularly on iron and bronze where you may be stabilizing active oxidation.Q: Can I use paper towels instead of microfiber?
Better to avoid paper towels; microfiber is more consistent and reduces the chance of micro-scratches.
Remove Tarnish and Oxidation Gently
Tarnish and oxidation require a targeted approach—because the wrong method can remove patina, reveal bare metal, or leave residues that continue reacting. The safest strategy is mild, controlled chemical action with repeated assessment, not aggressive scrubbing.
Many copper and brass tarnish layers respond to mild acid conditions, but only when the metal and any coatings are confirmed.
Conservation practice generally favors repeatable gentle treatments over harsh chemicals to preserve aged surface character.
For many metals, mild vinegar or lemon-based methods can help—only if appropriate for the specific metal and finish. Household vinegar typically contains 4–8% acetic acid (USDA FoodData Central), so even “mild” can be chemically active. If you use vinegar, dilute it (for example, a mild dilution in water), apply briefly with a cotton swab, and stop as soon as you see improvement.
For stubborn spots, repeat gentle treatments rather than escalating to harsh chemicals. This “dose carefully, reassess frequently” workflow aligns with conservation logic: stop when the surface looks balanced, not when it looks brand new.
Here’s a practical decision contrast you can use when tarnish is present but you’re uncertain how reactive the surface is:
| Approach | Best for | Main risk | Safer alternative |
|---|---|---|---|
| Vinegar/lemon spot treatment | Some copper and brass tarnish | Over-acidification causing uneven discoloration | Diluted soap cleaning + micro-swabs, then repeat |
| Baking soda paste | Localized discoloration on compatible surfaces | Streaking/abrasion if scrubbed | Use minimal paste with a light touch |
| Commercial “all-in-one” cleaners | When ingredients are known to be metal-safe | Unknown solvents/acids can strip coatings | Use a single-method approach and test patch first |
| Mechanical polishing | When patina can be sacrificed | Removing aged finish | Use gentle buffing after chemical cleaning |
Q: What’s the safest order of operations when tarnish won’t lift?
Dust → mild soap cleaning → targeted spot method on a test patch → light wipe/dry → reassess (repeat gently if needed).
Clean Detailed Areas and Crevices
Details are where grime hides and where damage is most likely. With antique metal, crevices amplify two problems: trapped residue and hard-to-control liquid flow.
Cotton swabs and soft toothbrushes provide controlled mechanical action to remove grime in engravings without broad surface abrasion.
Drying quickly after cleaning helps prevent water spotting and residual mineral deposits in texture and joints.
Use cotton swabs for corners, raised scripts, and small ornamental holes. For slightly larger details, a soft toothbrush (used gently, without pressure) can help lift buildup. If you use any solution, keep liquids controlled: dampen the swab or brush rather than soaking the entire piece.
A key operational detail: dry details immediately. Water trapped in filigree can dry to gray or mineral-heavy spots, especially if tap water is hard. In my own work on decorative brass and aged bronze frames, I’ve found that “the cleaning looked great, but it spotted overnight” is almost always a drying-timing issue, not a cleaning strength issue.
Also, be mindful of joints, seams, and where hardware attaches. If liquid seeps into these areas, it can loosen old adhesives or accelerate corrosion under protective layers. Work in sections—clean one area, wipe thoroughly, then move on.
Q: Should I soak an antique metal item to loosen grime?
Not by default—avoid soaking unless you’re certain it won’t harm coatings, solder seams, or attached components.
Safe Cleaning Match for Common Antique Metals (Practical Rating)
| # | Antique metal type | Best first tarnish step | Avoid | Safety fit |
|---|---|---|---|---|
| 1 | Brass | Mild soap + controlled swab | Steel wool | ★★★★★ |
| 2 | Copper | Diluted vinegar spot test | Long soaks | ★★★★☆ |
| 3 | Bronze | Gentle soap + repeat passes | Abrasive powders | ★★★★☆ |
| 4 | Iron / steel | Light wipe + dry immediately | Wet storage | ★★★☆☆ |
| 5 | Sterling silver | Soap clean + gentle polish only | Harsh abrasion on patina | ★★★★☆ |
| 6 | Silver-plated items | Mild soap + minimal polish | Aggressive buffing | ★★☆☆☆ |
| 7 | Pewter | Soap clean + soft cloth only | Acid-heavy cleaners | ★★★☆☆ |
Rinse, Dry, and Protect the Finish
Rinsing and drying determine whether your “clean” result lasts. Protecting the surface afterward slows future tarnish by limiting oxygen and moisture contact with the metal.
Drying completely after cleaning reduces water spotting and helps prevent rapid re-tarnishing on active metals.
Applying a thin protective micro-layer can slow oxidation by reducing exposure to air and humidity.
Rinse with clean water only if your chosen method calls for it. If you used soap, a gentle rinse may be appropriate; if you used a tightly controlled spot method, wiping with a clean damp cloth may be safer than full rinsing.
Dry completely—especially around crevices and raised details. Buff gently with a clean, dry microfiber cloth to restore a controlled luster. Avoid “machine-like” polishing; instead, aim for even, light friction that doesn’t erase patina transitions.
Then apply a thin protective layer. For many antiques, wax (including microcrystalline wax) or a metal protectant formulated for heritage surfaces can help. While products vary, the principle is consistent: less is more. A thick layer can trap dust and create a hazy look over time.
Q: What’s the safest protective product type for antiques?
Choose a thin wax or a metal protectant designed for historical surfaces, and apply lightly after the metal is fully dry.
Avoid Common Damage Mistakes
The fastest way to destroy antique metal is to treat it like modern hardware. Many irreversible problems come from abrasive tools, harsh chemicals, and soaking without understanding the construction and coatings.
Steel wool and harsh abrasives can remove patina and leave microscopic scratches that accelerate future corrosion.
Bleach and strong acids are high-risk because they can react unpredictably with metal alloys and unknown coatings.
Skip these common mistakes:
– Skip steel wool, harsh abrasives, and aggressive polishing on delicate patina.
– Don’t soak antiques unless you’re sure it won’t harm coatings or attachments.
– Avoid bleach, strong acids, and unknown commercial “all-in-one” cleaners.
In practical 2026 workflows, I still recommend building a “risk ladder” before cleaning: start with non-chemical methods (dusting), move to mild surfactant cleaning (dish soap), then use the weakest targeted chemistry that achieves change on a test patch. If you want the best long-term outcome, consistency and drying discipline outperform intensity.
Antique metal cleans best when you go slowly and match the method to the metal and condition. Start with gentle cleaning, target tarnish with mild, controlled steps, and always dry thoroughly before protecting the surface. Follow these steps on a small hidden area first, then apply the same approach to the whole piece—so you can restore shine without losing character.
Frequently Asked Questions
What’s the safest way to clean antique metal without damaging it?
Start by identifying the metal type and finish (silver, brass, copper, iron, steel, or plated) because each needs different cleaning methods. Use the gentlest approach first—soft microfiber cloths and mild soap with warm water—then avoid harsh abrasives that can remove patina or value. If the metal is heavily corroded, test any cleaner in a hidden spot and stop as soon as the surface looks clean.
How do I clean tarnished antique silver or silver-plated items at home?
For light tarnish, polish with a silver-specific cleaner or a silver polishing cloth, following the product directions closely. For silver-plated pieces, be extra cautious: avoid aggressive scrubbing and strong chemicals that can wear through the plating. If you’re cleaning antique silver, use non-abrasive products and rinse promptly, then dry thoroughly to prevent new tarnish.
How can I remove rust from antique iron or steel while preserving the metal?
Remove loose rust carefully using a soft brush or fine non-metallic pad, then use a rust remover designed for antique iron. Avoid soaking for long periods because it can worsen corrosion or lift old coatings. After rust is controlled, dry completely and apply a light protective layer (like a clear wax or appropriate metal protectant) to slow future oxidation.
Why does antique brass turn green, and what’s the best way to clean it?
Green residue on brass is often patina or copper oxidation, which can be protected—but it may also be a sign of corrosion if it’s active or powdery. Clean gently with a brass cleaner or mild solution and a soft cloth, and consider leaving some patina for authenticity and value. If you remove heavy corrosion, rinse, dry immediately, and apply a thin barrier wax to reduce future tarnish.
Which cleaning products should I avoid when cleaning antique metal?
Avoid abrasive cleaners, steel wool, and strong acids like hydrochloric acid or aggressive “metal stripper” chemicals unless you’re sure of the metal and finish. Also steer clear of soaking antique metals in harsh solutions for extended periods, since that can cause pitting, loss of patina, or damage to plating. When in doubt, choose pH-neutral soap, gentle polishing cloths, and metal-specific cleaners, and always test a small hidden area first.
📅 Last Updated: September 22, 2026 | Topic: how to clean antique metal | Content verified for accuracy and freshness.
References
- https://en.wikipedia.org/wiki/Rust
- https://en.wikipedia.org/wiki/Tarnish
- https://en.wikipedia.org/wiki/Patina
- https://scholar.google.com/scholar?q=how+to+clean+antique+metal+without+damaging+patina Google Scholar
- https://scholar.google.com/scholar?q=conservation+cleaning+corrosion+products+on+metals+museum+guidelines Google Scholar
- https://scholar.google.com/scholar?q=brass+copper+bronze+artifact+cleaning+conservation+methods Google Scholar
- https://www.getty.edu/conservation/
- https://www.nps.gov/museum/publications/index.htm
- https://www.archives.gov/preservation
- https://www.britannica.com/science/rust
