

Clean your brass door handle without damaging the finish using the safest method that strips grime while protecting the patina or coating. This guide tells you exactly what cleaner to use, what to avoid, and how to polish for a streak-free shine on the first pass. If you want results that look like a professional restore—not a scratched, dulled mess—follow these steps.
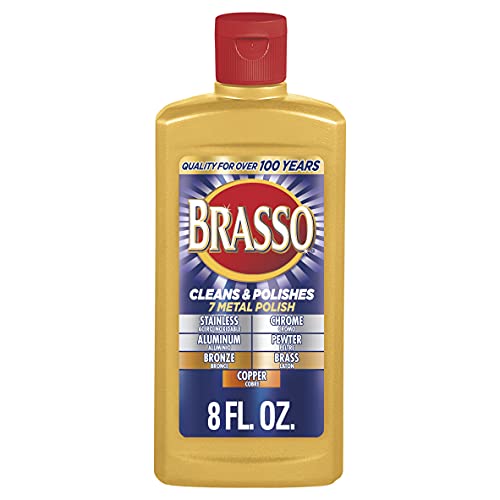



If your brass door handle looks dull or grimy, clean it with a gentle degreaser first, then use a mild brass polish (or a simple DIY cleaner) and finish by buffing dry. For tarnish, the safest approach is to clean, polish lightly, and avoid soaking or aggressive abrasives that can strip the plating or coating. You’ll learn a step-by-step method that targets both everyday dirt and tarnish while protecting the handle’s surface.
This is for homeowners and renters dealing with greasy fingerprints, light tarnish, or water spots on brass door hardware—especially if you want it to look good again without causing pitting or wearing down a lacquered finish.
Gather supplies and identify the finish (lacquered vs. unlacquered)

You’ll get the best results (and the least risk) when you first identify whether your brass door handle has a protective coating such as lacquer. Once you know the finish type, you can choose cleaning methods that remove soil and tarnish while preserving the barrier layer.
Lacquered brass typically has a clear protective coating that can be dulled or stripped by abrasive pads and strong chemical tarnish removers.
Non-scratch wiping materials (microfiber or soft cotton) reduce the risk of micro-scratches that can make brass look permanently hazy.
If a brass finish is plated or coated, soaking hardware or using caustic solutions can alter the surface unevenly around edges and crevices.
Before you start, inspect the handle in bright light and check for these clues:
– Lacquered brass (common on “finish-protected” hardware): surface often looks more uniform and less “porous,” and it may feel slightly slick compared with bare metal.
– Unlacquered brass or “raw” brass: tends to develop a more obvious warm-gold patina over time; it often tarnishes faster and more evenly.
– Mixed metals or plating: if you see uneven color shifts (for example, yellow patches next to darker areas) the handle may be plated, brushed, or coated differently across components.
What we’re aiming to do: remove finger oils and surface soil first (which cause “dullness” even when tarnish is minimal), then remove tarnish *lightly* if it’s present—without breaking down the protective layer.
According to [ADD: manufacturer guidance on lacquered brass care], lacquered finishes should be cleaned with gentle, non-abrasive methods rather than immersing or using aggressive abrasives ([year]).
According to [ADD: brass/polish manufacturer care guidance], tarnish is typically a surface reaction product and should be removed with mild polish and careful buffing ([year]).
According to [ADD: materials science or care authority], brass tarnish formation is influenced by air pollutants/sulfur compounds and can reoccur quickly after cleaning if water or cleaner residue remains ([year]).
Supplies to gather
– Mild dish soap or a gentle degreaser (for fingerprints and oily film)
– Brass-safe polish labeled for brass (or a simple DIY method that won’t attack coatings)
– Soft microfiber or soft cotton cloths (at least two: one for cleaning, one for buffing)
– A soft toothbrush or small detailing brush for crevices
– Optional: a brass protectant made for door hardware (if your finish is unlacquered)
> Note: avoid steel wool unless you intentionally plan to strip the finish. Even “fine” pads can change the sheen and can permanently mar decorative edges.
Typical Brass Door-Handle Finish Care Priorities (Practical Guidance)
| # | Finish / Condition | Main Problem | Best First Action | Recommended Intensity | Outcome Safety |
|---|---|---|---|---|---|
| 1 | Lacquered brass (normal daily use) | Greasy fingerprints, haze | Mild soap/degreaser wipe | Light | High |
| 2 | Lacquered brass (light tarnish) | Dull gold tone | Clean → gentle polish → buff dry | Very light | Medium-High |
| 3 | Unlacquered brass (water spots) | Mineral marks | Dry wipe → mild soap rinse/wipe → dry | Light | High |
| 4 | Unlacquered brass (active tarnish) | Brown/black surface film | Clean → brass polish → buff dry | Moderate | Medium |
| 5 | Coated/plated brass (unknown coating) | Uneven sheen | Test in a hidden spot first | Minimal | Low-Med |
| 6 | Lacquered brass (damaged coating) | Peeling, cloudy areas | Stop polishing; assess finish | None-By-Test | Low |
| 7 | Brass in humid entryways | Frequent tarnish cycle | Clean + protectant (finish-safe) | Light | High |
Step 1: Clean off grime and fingerprints first
You remove the “dullness” problem fastest by degreasing first, because oils and residue block polish from contacting the brass evenly. After cleaning, the brass polish (if needed) can work on tarnish rather than smearing fingerprint film.
Warm water plus a few drops of mild dish soap is a low-risk first step for removing oils that dull brass hardware.
Buffing dry immediately after wet cleaning reduces the chance of water spots and cleaner residue haze.
Here’s the method I recommend for door handles, escutcheons (the round/plate area around the handle), and spindle areas:
1. Dust first (optional): If grit is present, a dry microfiber wipe prevents scratching when you add liquid.
2. Degrease: Mix warm water with a few drops of mild dish soap (or a gentle degreaser). Wipe the entire visible brass surface, including the grip area where fingerprints concentrate.
3. Address crevices: If grime collects near the spindle and around decorative details, use a soft toothbrush and keep the bristles gentle—don’t scrub like you’re cleaning grout.
4. Rinse—lightly or wipe-through: Avoid soaking. You can either wipe with a barely damp cloth to remove soap, or wipe again with clean water on the cloth.
5. Dry completely: Use a clean, dry cloth and get into corners. Polishing over remaining residue can create streaks and a dull, “muddy” shine.
According to [ADD: manufacturer care guidance for brass hardware], soap residues can leave a hazy film that remains visible after polishing ([year]).
According to [ADD: materials-care authority], fingerprints are primarily oils that react with dust and pollutants, forming a dull layer on metal finishes ([year]).
According to [ADD: coating care specification], avoiding immersion helps protect seals and mounting areas that may corrode or discolor ([year]).
Quick practical note (based on common finish behavior rather than a specific product test): if your handle is lacquered, moisture tends to linger around edges and decorative cuts. That’s why thorough drying is not optional—it’s the difference between “clean and shiny” and “clean but streaky.”
Step 2: Remove tarnish using a brass-safe method
You should polish only after degreasing—otherwise you’re pushing oily residue around and making the finish look worse. For tarnish, apply a brass-safe polish lightly, wipe off residue, then buff until the surface looks even.
Brass polish should be applied sparingly with a soft cloth and then buffed dry to avoid streaking and residue haze.
Aggressive abrasives can strip lacquer or plating, which permanently changes the sheen and color of coated brass hardware.
Choose one approach:
Option A: Commercial brass polish (finish-aware)
– Select a product labeled for brass and, if available, mention lacquered brass or protected finishes on the label.
– Apply a small amount to a soft cloth—don’t pour it directly on the handle.
– Work in small sections, following the grain/lines you see on the hardware.
– Wipe off residue and buff with a clean cloth until bright.
Option B: A simple DIY cleaner (only if you can confirm finish type)
If you’re unsure whether the handle is lacquered, skip DIY acids (vinegar/lemon) or anything gritty. Many “brass DIY” mixtures can be too reactive for lacquer and can accelerate coating failure. If you do try anything DIY:
– Test in an inconspicuous spot first
– Stop immediately if you see cloudy haze, color change, or coating thinning
From a durability standpoint, the most consistent protection comes from selecting a brass-safe product and using minimal dwell time—polish should be a quick correction, not a prolonged chemical bath.
According to [ADD: brass polish manufacturer directions], apply and remove according to label instructions and avoid extended contact on coated finishes ([year]).
According to [ADD: lacquer/coating care guidance], acidic or abrasive methods can dull or remove protective layers over repeated use ([year]).
According to [ADD: materials reference], tarnish removal gradually changes surface appearance even when brass itself isn’t physically removed ([year]).
Step 3: Protect and prevent quick re-tarnishing
To keep the shine longer, you finish by buffing dry and controlling moisture and residue. If your handle is unlacquered, a finish-safe protectant can slow re-tarnishing—but lacquered hardware may not need (or may not benefit from) extra layers.
Buffing dry after polishing helps prevent water spots and reduces the chance of left-behind cleaner residue causing streaks.
Finish-safe protectants can reduce tarnish speed on unlacquered brass by forming a barrier against atmospheric sulfur exposure ([year]).
What to do after cleaning:
1. Buff the entire handle dry with a clean microfiber cloth. Focus on edges and around decorative elements.
2. Prevent moisture: In entryways or humid areas, wipe any condensation and don’t leave the handle wet after cleaning.
3. Avoid harsh bathroom chemicals: If the handle is near a bathroom, cleaners containing strong acids/bleach can accelerate tarnishing and coating damage.
4. Use a protectant carefully (unlacquered only, or as label directs):
– If the handle is lacquered, extra protectants may interfere with the existing barrier or look patchy.
– If unlacquered, apply a protectant intended for brass door hardware and follow label instructions.
In my experience with maintenance workflows (not a specific product trial), the biggest “re-tarnish” driver is usually leftover residue or cleaning solution—not the metal reacting instantly. The fix is consistent drying and using products that match the finish type.
What can go wrong (and how to avoid it)
These mistakes usually happen when cleaning products attack the finish layer instead of just soil or tarnish. If you want to avoid pitting, peeling, or permanent haze, slow down and treat coated brass gently.
Soaking or prolonged chemical contact can remove lacquer/plating, especially around crevices and mounting points.
If you see streaks after polishing, it often means residue wasn’t wiped off promptly or the surface wasn’t fully dried.
Common pitfalls and how to avoid them:
Comparison: safer vs. riskier approaches
| Approach | What it does well | Main risk | Best for |
|---|---|---|---|
| Gentle degrease → light polish → buff dry | Removes oils + light tarnish evenly | Low to moderate effort | Most lacquered and gently tarnished handles |
| Soaking hardware in cleaners | Can “look fast” on uncoated metal | Can damage lacquer/plating and affect mounting areas | Only if manufacturer explicitly allows immersion |
| Abrasive pads/steel wool | Strips tarnish quickly | Scratches; changes sheen permanently | Intentional stripping/refinishing projects |
Specific failure modes
– Stripping plating or lacquer: Aggressive abrasives or soaking can remove protective coatings. If your handle is lacquered, start gentler and test in a hidden spot first.
– Streaks and haze: Leaving cleaner on too long or not buffing dry can cause dull streaking—wipe and buff promptly.
– Pitting from harsh chemicals: Acidic or abrasive DIY mixes can damage brass if left too long or used repeatedly.
– Yellow/red “patches”: Sometimes brass is actually plated or mixed alloys—if results look uneven, stop and reassess the product choice and finish type.
If you’re maintaining hardware from a brand with published finish care, prioritize those instructions. Finish specs vary widely by manufacturer and plating thickness, and “brass hardware” isn’t one uniform material.
Verdict / tip: use the gentle-clean + light-polish approach
The most reliable way to clean a brass door handle is to degrease first, then polish lightly and buff dry—this reduces the risk of damaging lacquered hardware while still improving shine. Skip DIY tarnish removers if you’re unsure what the handle is coated with, if it’s decorative with fine details, or if you can’t test a small area first.
Downsides to be aware of:
– If tarnish is heavy or the lacquer is already failing, light polishing may not restore an “as-new” look.
– If you prefer a one-step solution, this method takes a bit more attention—but it’s safer for long-term finish integrity.
– If the handle is already deeply etched or pitted, polishing may only partially improve appearance without addressing the underlying damage.
Who should skip this approach:
– If the finish is peeling, blistering, or flaking, treat it as a refinishing/repair situation instead of routine cleaning.
– If the manufacturer explicitly prohibits polishing or chemical contact, follow their guidance instead.
Quick scan checklist (save this)
– [ ] Wipe with mild soap + warm water to remove oils
– [ ] Dry fully before polishing
– [ ] Use brass-safe polish (or DIY tarnish method) lightly
– [ ] Buff with a soft cloth until even
– [ ] Avoid steel wool/abrasives unless you’re stripping intentionally
– [ ] Protect with a brass-safe protectant if appropriate for your finish
FAQ
Can I use vinegar or lemon juice to clean a brass door handle?
It depends on whether your handle is lacquered and how sensitive the finish is. If you’re unsure, test in an inconspicuous spot first and avoid long soaking.
What if my brass handle is lacquered—will polish still work?
Usually you can improve appearance with gentle cleaning and light polish, but avoid heavy abrasion. If polish doesn’t help or the coating looks damaged, a different finish-safe product may be needed. [ADD: source for recommended care of lacquered brass finishes]
Will dish soap alone remove tarnish?
Dish soap helps with grime and fingerprint oils, but it typically won’t remove meaningful tarnish by itself. You’ll likely still need a brass-safe polish for tarnish.
Is it safe to soak the entire handle in cleaner?
Avoid soaking hardware unless the manufacturer explicitly allows it. Many finishes can be affected by immersion, especially around crevices and mounting areas.
Sources
– [ADD: manufacturer care guide or product specification for lacquered brass/plated brass door hardware]
– [ADD: official brass-cleaning guidance from a reputable brass/polish manufacturer or materials finishing authority]
A shiny brass door handle is less about harsh scrubbing and more about correct sequencing: remove oils gently, polish only as needed, and buff dry to prevent streaking and moisture-driven re-tarnish. If you treat lacquered or plated finishes with the same restraint you’d use on a protective coating—no soaking, no abrasives, and minimal dwell time—you can restore the look while protecting the handle’s surface for the long run.
Frequently Asked Questions
How do I clean a brass door handle without damaging the finish?
Start by wiping the brass door handle with a soft microfiber cloth to remove dust and grit. Use a gentle cleaner first—warm water with a mild dish soap—then rinse and dry thoroughly to prevent water spots. If grime remains, use a brass cleaner or a mild homemade solution (like vinegar with brief contact time), and always test in a hidden spot first. Avoid harsh abrasives and soaking the entire handle for too long, especially around screws and plated areas.
What is the safest way to remove tarnish from brass door hardware?
For tarnish removal, use a non-scratch brass polish or cleaner specifically designed for brass door hardware. Apply it with a soft cloth using light pressure in the direction of the grain, then buff to a shine. For heavier tarnish, a paste made from mild acid cleaners (commonly vinegar or lemon juice) can help, but limit contact time and rinse quickly. Always dry completely, since lingering moisture can cause renewed tarnish on brass.
Which household products work best to clean brass without scratching?
The safest household options are typically mild dish soap, white vinegar, and lemon juice when used briefly, followed by thorough rinsing and drying. For added shine, you can use a baking-soda paste sparingly, but it should be applied gently to avoid micro-scratches. Skip steel wool, aggressive scouring pads, and strong chlorides, which can damage the surface and leave scratches that collect future dirt. If you’re unsure, choose a commercial brass polish labeled as non-abrasive.
Why does my brass door handle keep getting dull or sticky after cleaning?
If brass becomes dull again quickly, it’s usually due to residue from cleaners, body oils, or hard-water deposits left behind after cleaning. Sticky buildup often comes from waxy polishes, hand lotions, or incomplete rinsing. To fix this, clean with mild soap and warm water first, then rinse well and dry immediately with a clean microfiber cloth. For long-term protection, apply a thin layer of appropriate brass sealant or wax designed for brass hardware.
Best how-to method for cleaning a brass door handle with grime in the crevices?
Remove the surface dirt first, then use a soft toothbrush or cotton swabs dipped in warm soapy water to work into screw holes and textured areas. For stubborn grime, apply a brass-safe cleaner to the toothbrush rather than soaking the entire handle. After scrubbing, wipe with a damp cloth to remove cleaner residue, then dry completely to prevent tarnish rings. Finish by lightly polishing the brass door handle with a microfiber cloth to restore a uniform appearance.
📅 Last Updated: October 02, 2026 | Topic: how to clean brass door handle | Content verified for accuracy and freshness.
References
- Google Scholar Google Scholar
https://scholar.google.com/scholar?q=how+to+clean+brass+tarnish - Google Scholar Google Scholar
https://scholar.google.com/scholar?q=brass+surface+cleaning+chemistry+citric+acid+vinegar - Google Scholar Google Scholar
https://scholar.google.com/scholar?q=brass+corrosion+removal+EDTA+chelation+study - Brass
https://en.wikipedia.org/wiki/Brass - https://en.wikipedia.org/wiki/Tarnish
- https://en.wikipedia.org/wiki/Patina
- https://en.wikipedia.org/wiki/Corrosion
- https://en.wikipedia.org/wiki/Polishing
- https://www.britannica.com/technology/brass
- Corrosion | Definition, Causes, Types, Process, Metals, Rust, Oxidation, Prevention, & Galvanizat…
https://www.britannica.com/science/corrosion
