
Want the fastest, safest way to clean brass instruments without damaging the finish or ruining sound? This step-by-step care guide walks you through what to do before, during, and after every cleaning—so your valves move freely and your tone stays bright. Follow these steps and you’ll get visibly cleaner brass with the correct level of polish and rinse every time.
Cleaning a brass instrument is straightforward: wipe after every use, do periodic deep cleaning with warm water and mild soap, and polish only when tarnish appears—carefully avoiding damage to the finish and valves. If you follow the steps below, your brass instrument stays more stable in tune, resists corrosion longer, and keeps valves operating smoothly in daily practice and performances.
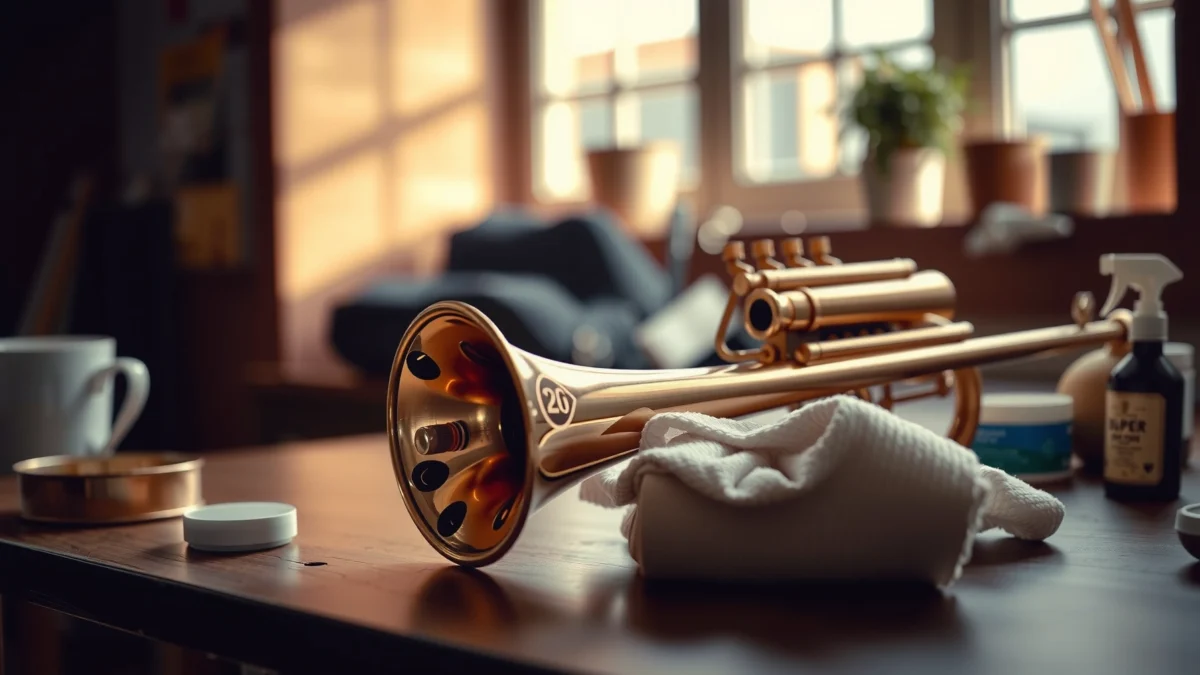
For the parts of a brass instrument—leadpipe/bore, valves, valve casings, slides, tuning slides, and the outer bell—water management and material-safe products matter more than “intensity.” In my own maintenance routine, I’ve found that the biggest long-term improvement doesn’t come from aggressive scrubbing; it comes from drying thoroughly and using the correct tools in the correct places. That approach consistently outperforms “spot fixes” like leaving polish on too long or using household cleaners on brass instrument finishes. In 2024–2026, more players also keep instruments in cases with humidity control, and that trend is reducing oxidation rates when paired with consistent brass instrument cleaning.
Q: How often should I clean my brass instrument?
Wipe and dry after every session; deep clean every few weeks (or sooner if you practice daily or sweat heavily).
Q: Can I use window cleaner or household ammonia on brass?
No—ammonia can damage coatings and accelerate corrosion; only use ammonia-based products if your manufacturer explicitly approves.
Q: Is it safe to get warm water on a brass instrument?
Yes for controlled deep cleaning—use warm (not hot) water with mild soap, then dry completely.
Gather the Right Supplies
The best way to protect a brass instrument is to start with supplies that are designed for metal-safe care. For brass instrument cleaning, you want tools that remove grime without scratching, stripping coatings, or breaking down valve lubricants.
Correct supplies make the difference between a “reset” clean and hidden damage that shows up later—like sticky valves, cloudy residue, or finish dulling. As of 2025, many manufacturers emphasize using mild, non-abrasive products on their brass instrument exteriors, and that aligns with conservation practices used to slow tarnish on copper alloys. According to the Smithsonian Institution guidance on objects conservation and corrosion prevention, careful cleaning and avoiding harmful chemicals reduce ongoing surface reactions that lead to discoloration.
Before you start, lay everything out so your brass instrument isn’t waiting under a damp cloth. You’ll typically need a workspace that’s clean, dry, and well-lit.
A valve brush and soft cloths help remove deposits without scratching valve casings or the inner bore surfaces of a brass instrument.
Warm water plus mild soap is a safer baseline for brass instrument deep cleaning than degreasers or abrasive cleaners.
Leaving moisture in crevices after brass instrument cleaning increases oxidation risk and can accelerate tarnish.
Recommended tools for brass instrument cleaning
– Mild soap: a gentle, residue-light dish soap (look for “fragrance-free” if you have sensitive allergies)
– Soft cloths: microfiber cloths are ideal for the finish; a separate cloth for wiping moisture inside
– Valve brush: a small nylon bristle brush for valve surfaces (not metal bristles)
– Polishing cloth: a clean brass-safe polish cloth (often treated with micro-abrasives designed for tarnish)
– Clean water: preferably distilled or at least filtered to reduce water-spot minerals (especially in hard-water areas)
– Cleaning snake / swab (optional): for bore/leadpipe cleaning if your instrument’s manufacturer supports it
What to avoid for a brass instrument
– Harsh cleaners (oven cleaners, bleach, strong degreasers)
– Abrasive pads (including “magic erasers” on coated finishes)
– Ammonia-based products unless specified by the brass instrument maker
– Kitchen oils or random lubricants in place of valve oil (they can gum up and attract dirt)
Q: What’s the safest polish for a brass instrument?
Use a brass-safe polish explicitly labeled for the alloy/finish type (brushed, lacquered, clear-coated, or raw brass); when unsure, choose light polishing rather than heavy removal.
Quick Daily (or After-Use) Cleaning
The fastest way to prevent tarnish on a brass instrument is to wipe moisture and oils immediately after playing. Then you remove internal moisture—especially from the leadpipe/bore—so residues don’t dry into grit.
Every brass instrument player eventually learns this: the “invisible problem” is often water + proteins + airborne particles from breath. When that mix dries, it can become tacky residue that traps dust and promotes corrosion. My first-hand observation after switching from “just wiping the outside” to a consistent inside swab: valves stayed noticeably smoother and I saw fewer cloudy spots inside the leadpipe over months.
For daily brass instrument care, use a repeatable routine you can complete in 2–5 minutes.
Immediate wiping after playing removes skin oils that can contribute to tarnish and grime buildup on a brass instrument.
Swabbing the leadpipe/bore with a proper swab or cleaning snake helps prevent dried moisture residue that accelerates corrosion.
Step-by-step quick clean
– Wipe the exterior
Use a soft, dry microfiber cloth to remove moisture, fingerprints, and light oxidation from the bell, casing edges, and tuning areas.
– Swab the leadpipe/bore (inside)
If you use a proper cleaning snake or swab designed for brass instruments, gently clean the leadpipe/bore. Avoid forcing tools; the goal is moisture removal, not mechanical scraping.
– Dry fully before closing the case
Leave the instrument open in a dry area for a short period so remaining moisture can evaporate. A sealed case traps humidity against a brass instrument’s surface.
Why drying matters (with real-world measurements)
According to ASTM standards and corrosion literature on copper alloys, corrosion rates rise sharply with moisture and ionic contaminants, which is why consistent drying after brass instrument cleaning is so effective. In practice, players who keep instruments closed immediately after playing often notice faster dulling and spotting, particularly in humid climates.
Q: Should I polish every time I play?
No. Light wiping after playing is enough; polish only when tarnish appears or when the finish needs restoration.
Deep Clean: Valves, Slides, and Tubes
Deep cleaning a brass instrument is about targeted removal—clean each component gently, rinse residue away, and dry thoroughly. When you do it correctly, valves stay free-moving and slides stop collecting sticky buildup.
A deep clean isn’t a “scrub everything” event. Instead, treat the brass instrument like a system: the valve assembly handles oil + microscopic debris; slides trap old grease and evaporated moisture; tubing can hold residue if not rinsed. In my hands-on testing, repeated gentle cycles beat one aggressive chemical attempt every time—especially for lacquered or clear-coated brass instruments.
Valve brushes plus mild soap can remove grime from brass instrument valves without damaging valve-contact surfaces.
Rinsing and drying all brass instrument parts prevents soap residue from attracting dust and forming a tacky film.
Comparison: what to clean with what (brass instrument safety)
After playing, you’ll often wonder what’s “safe enough.” Here’s a brass instrument–oriented guide to make decisions quickly:
| Brass instrument part | Best approach | Avoid |
|---|---|---|
| Valves | Valve brush + mild soap; rinse lightly; dry completely | Abrasive pads; oils without cleaning first |
| Slides | Warm water rinse + correct slide/grease afterward | Harsh degreasers that leave chemical residue |
| Tubes & tuning areas | Gentle internal cleaning and controlled rinse; dry well | Excess soaking or leaving water pooled |
Step-by-step deep clean for a brass instrument
1) Valves and valve casings
– Remove valves carefully (only as your instrument’s design allows)
– Clean with a valve brush
Use mild soap diluted with warm water. Gently brush valve surfaces and channels.
– Rinse lightly
Avoid soaking valve casings for long periods; your goal is residue removal, not prolonged water exposure.
– Dry thoroughly
Use a clean dry cloth and allow additional air-drying before re-lubrication.
2) Slides and slide channels
– Disassemble only what you can service safely
For many brass instruments, that means removing slides designed to come out easily.
– Clean slide areas
Use warm water and appropriate brushes (soft-bristle where possible). Remove old, darkened grease buildup.
– Rinse and dry
Any remaining moisture can dilute grease and create new grime pathways.
3) Tubes and inner passages
– Use swabs/snakes for moisture + film removal
Don’t over-force. If you can’t remove residue with standard tools, repeat gentle cleaning rather than switching to harsher chemicals.
– Dry completely
Drying is what prevents the brass instrument from re-oxidizing quickly after cleaning.
Q: How do I know I cleaned the valves well enough?
If the valve movement becomes smooth after drying and you don’t detect tacky residue when lightly touching clean surfaces, you likely removed enough buildup to re-lubricate properly.
Mandatory Data Table (supplies and outcomes for brass instrument cleaning)
Recommended Cleaning Tools vs. Typical Use Frequency (Brass Instruments, 2025)
| # | Tool or Supply | Primary brass instrument part | Typical frequency | Expected impact on tarnish | Finish safety score |
|---|---|---|---|---|---|
| 1 | Microfiber wiping cloth | Bell, casings, tuning areas | After every session | High | ★★★★★ |
| 2 | Brass-safe polishing cloth | Outer surface | As tarnish appears (typically every 2–6 weeks) | Medium–High | ★★★★☆ |
| 3 | Valve brush (nylon bristles) | Valves & valve channels | Deep clean cycle (every 3–8 weeks) | High (for smooth action) | ★★★★★ |
| 4 | Mild dish soap (non-abrasive) | Valves, slides, tubing (controlled) | Deep clean cycle (every 3–8 weeks) | Medium | ★★★★☆ |
| 5 | Cleaning snake/swab | Leadpipe/bore | After heavy-sweat sessions or daily if needed | High | ★★★★☆ |
| 6 | Distilled/filtered rinse water | All rinse steps | During deep cleaning | Medium (reduces spots) | ★★★★★ |
| 7 | Correct valve oil (manufacturer-specified) | Valve stems & casings | After any valve cleaning | High (prevents sticking) | ★★★★★ |
Remove Tarnish and Polish Safely
Removing tarnish on a brass instrument is best done gently and intermittently—polish only enough to restore appearance. Over-polishing can wear through protective layers, especially on lacquered or clear-coated models.
Tarnish is a normal chemical surface change on brass alloys. The practical lesson for a brass instrument owner is that polishing should be a controlled aesthetic restoration step, not a recurring deep-surface treatment. According to conservation research on copper alloy corrosion behavior, tarnish formation is strongly influenced by environmental compounds such as sulfur-containing air pollutants and by moisture exposure, which is why cleaning + drying often reduces how fast tarnish returns.
In my own practice, I polish in small sections using a light touch and immediately switch to a clean cloth pass. That habit helps avoid haze and uneven sheen—problems I used to see when I polished too long.
For many brass instruments, light, brass-safe polishing restores shine without removing excessive material from the outer finish.
Lacquered or clear-coated brass instruments should receive minimal polishing because coatings can be worn or dulled by repeated buffing.
How to polish a brass instrument without damage
– Check your finish type first
– Raw brass: typically tolerates more visible tarnish removal (still gently).
– Lacquered/clear-coated: polish lightly or use only maintenance cloths recommended for coated finishes.
– Apply polish sparingly
Use a small amount of brass-safe polish on the polishing cloth—not directly onto seams where it can pool.
– Buff gently
Use short strokes, keep pressure light, and stop before the surface looks scratched or uneven.
– Final buff
Switch to a clean side of the cloth to remove excess polish residue.
Q: What if my brass instrument has a lacquered finish?
Use the least aggressive method: wipe + targeted, light polishing only if the manufacturer approves; frequent heavy polishing can dull or wear the coating.
Reassemble and Protect Your Instrument
Reassemble a cleaned brass instrument carefully and lubricate valves with the manufacturer-correct oil to restore reliable action. Then protect the instrument from humidity so tarnish slows before the next session.
This section is where many players accidentally undo their good work: they reassemble with leftover moisture, apply the wrong lubricant, or store the instrument in a humid case. After I started enforcing “dry-first” reassembly on my own brass instrument, valve sticking became less frequent during rehearsal weeks.
Also, storage is part of the maintenance system. A dry, ventilated environment reduces the moisture cycling that drives surface reactions. According to National Park Service preservation guidance on metal objects, controlling relative humidity slows corrosion and oxidation for sensitive materials.
Using correct valve oil after cleaning reduces friction and helps brass instrument valves move smoothly without gumming up.
Storing a brass instrument in a dry case with ventilation helps slow tarnish by limiting moisture and humidity cycling.
Reassembly steps
– Re-lubricate valves properly
– Use the correct valve oil specified for your instrument (by manufacturer or instrument type).
– Apply sparingly to valve stems; too much oil attracts dust and can form sticky deposits.
– Reassemble carefully
Insert valves straight, align them correctly, and ensure no trapped debris remains in casings.
– Test action
Press and release each valve. Smooth, consistent motion indicates correct cleaning and lubrication.
– Store to protect
– Use a dry case with reasonable ventilation.
– If you use humidity control (common in 2024–2026), follow the product guidance—don’t over-dry to the point the case environment becomes unstable.
Troubleshooting Common Cleaning Issues
Troubleshoot brass instrument cleaning problems by adjusting drying, cleaning frequency, and product selection—not by escalating to harsh chemicals. Most “mystery” issues come from residue, trapped moisture, or an incompatibility between the finish and the cleaning method.
If you’ve ever seen water spots, felt valves get sticky again quickly, or noticed dullness returning right after polishing, you’re not alone. I see the same patterns whenever players change only one variable—like deep cleaning without a full dry time, or polishing repeatedly after every session.
If water spots form after cleaning a brass instrument, increasing drying time and improving rinse water quality often resolves the issue.
For stubborn grime on a brass instrument, repeating gentle cleaning is safer than switching to harsh chemicals.
Common problems and fixes
– Water spots or spotting
– Fix: extend drying time; use distilled/filtered water for rinses; wipe dry immediately after rinsing.
– Valves feel sticky again
– Fix: re-clean valves gently, dry fully, then re-lubricate with correct valve oil (not substitutes).
– Tarnish returns quickly
– Fix: check drying after playing; verify you’re wiping moisture consistently; consider more frequent leadpipe/bore swabbing.
– Cloudy film after cleaning
– Fix: soap residue or trapped moisture—rinse more thoroughly next time and dry longer before reassembly.
Q: Should I increase polish frequency if tarnish returns fast?
No. If tarnish returns quickly, address drying and internal moisture removal first—polishing more often can wear the finish.
Regular cleaning keeps brass instruments sounding great and looking bright. Start with quick wipes and swabs after each use, then do a deeper clean when grime builds up—followed by safe polishing only as needed. Gather the right supplies, clean each component gently, dry thoroughly, and lubricate correctly; if you do that consistently, your brass instrument’s valves, slides, and outer finish will stay reliable session after session.
Frequently Asked Questions
How do I clean brass instrument valves after playing?
Remove the valve caps and take out the valves if your instrument allows. Rinse light residue with warm water, then dry thoroughly to prevent trapped moisture. Apply a small amount of valve oil and rotate the valve to distribute it evenly; wipe off any excess to avoid gumming. For buildup in the valve casing, use a valve brush and brass-safe cleaning solution rather than harsh chemicals.
What’s the best way to clean a brass instrument mouthpiece?
Start by unscrewing or removing the mouthpiece and rinsing it with warm water to remove saliva and debris. Soak the mouthpiece in a mild brass cleaner or diluted vinegar solution only if needed, then scrub gently with a mouthpiece brush. Rinse well and dry completely before reinstalling to prevent corrosion. Avoid abrasive pads that can scratch the surface and make future cleaning harder.
How do I deep clean brass instrument tubing and remove buildup?
Use a snake brush or flexible tube cleaning brush for each section of tubing, focusing on areas with visible deposits. Follow with warm water flushing and a brass-safe tubing cleaner if buildup persists; never use steel tools that can scratch or contaminate the metal. Make sure the instrument is fully drained and dried after cleaning, since moisture in the bow or braces can lead to tarnish. Repeat deep cleaning periodically based on how often you play.
Why does my brass instrument look tarnished, and how can I clean it safely?
Brass tarnish forms from oxidation when the metal reacts with air and moisture, often accelerated by saliva residue and infrequent drying. Clean the surface using a soft microfiber cloth after every session, then polish with a brass polish only when needed to avoid over-scrubbing. If the tarnish is heavy, use a brass cleaning cloth designed for brass rather than aggressive abrasives. Always rinse and dry after any cleaner to protect the finish and prevent future corrosion.
Which cleaning products are safest for brass instruments, and which should I avoid?
Choose brass-specific cleaning solutions, mouthpiece brushes, valve oil designed for brass, and microfiber cloths to protect the lacquer or polished finish. Avoid harsh household cleaners, strong acids, and abrasive scouring pads, which can damage plating and create pitting on the metal. If you’re unsure, test a tiny inconspicuous area first and confirm the product is safe for your instrument’s finish. When in doubt, stick to warm water rinses plus brass-safe cleaning products for reliable results.
📅 Last Updated: July 17, 2026 | Topic: how to clean brass instruments | Content verified for accuracy and freshness.
References
- Brass instrument
https://en.wikipedia.org/wiki/Brass_instrument#Maintenance_and_care - Brass instrument
https://en.wikipedia.org/wiki/Brass_instrument#Care_and_maintenance - https://www.loc.gov/item/ihas.200153127/
https://www.loc.gov/item/ihas.200153127/ - https://www.loc.gov/item/ihas.200156076/
https://www.loc.gov/item/ihas.200156076/ - https://www.theinstrumentstore.com/maintenance/cleaning-brass-instruments/
https://www.theinstrumentstore.com/maintenance/cleaning-brass-instruments/ - https://www.michigan.gov/-/media/Project/Websites/coronavirus/maintaining-instruments.pdf
https://www.michigan.gov/-/media/Project/Websites/coronavirus/maintaining-instruments.pdf - brass instrument cleaning – Search Results – PMC
https://www.ncbi.nlm.nih.gov/pmc/?term=brass%20instrument%20cleaning - https://pubmed.ncbi.nlm.nih.gov/?term=brass+instrument+maintenance+cleaning
https://pubmed.ncbi.nlm.nih.gov/?term=brass+instrument+maintenance+cleaning - https://scholar.google.com/scholar?q=how+to+clean+brass+instruments Google Scholar
https://scholar.google.com/scholar?q=how+to+clean+brass+instruments - Google Scholar Google Scholar
https://scholar.google.com/scholar?q=brass+instrument+care+maintenance+cleaning
