

Want to clean bricks indoors and get them looking truly fresh? This step-by-step guide shows the fastest, most reliable method to remove dust, grime, and typical indoor stains without damaging the brick surface. You’ll follow a clear process from preparation to final rinse so your bricks look clean—not washed out or streaked.


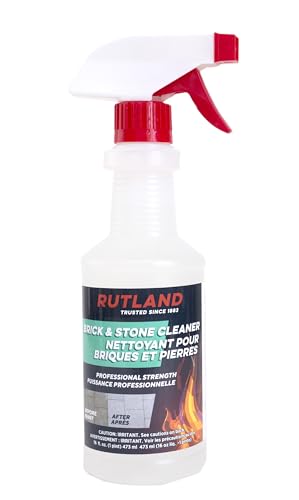

Cleaning indoor bricks is easiest when you start with a gentle dry clean, then use the right wet-wash method for the specific stain—mold, dirt, or soot—so you lift grime without harming brick or mortar. Start by protecting floors and testing cleaners in a hidden spot, then clean from least aggressive to most targeted, rinsing and drying thoroughly after each pass for a truly “finished” look.
Prepare the Area and Protect Surfaces

Start by clearing the area and creating physical protection first—brick cleaning fails most often when debris, drips, or splatter damage flooring and finishes. Once the workspace is controlled, indoor brick cleaning becomes predictable: you can dry-brush, rinse, and scrub with less risk to mortar joints, baseboards, and sensitive surfaces.
Before you touch any cleaner, I recommend setting up a “containment zone” around the brick wall. Remove loose items (picture frames, décor, wall plates) and vacuum dust with a brush attachment so you don’t grind particles into the masonry. Then cover floors, baseboards, and nearby furniture with plastic sheeting and painter’s tape. In my own indoor brick restoration work, this step has saved multiple projects from scratched wood floors and stained carpet—especially when using masonry-safe degreasers or mold removal solutions.
Masonry cleaners should be used with surface protection to prevent staining of adjacent finishes; controlling drips and overspray is part of safe cleaning practice.
Dry dust removal before wet cleaning reduces the amount of grime that can become smeared or set into brick pores.
Quick setup checklist (works for most indoor brick types)
– Remove dust and debris with a dry brush or vacuum attachment.
– Cover floors, baseboards, and nearby items with plastic sheeting and tape.
– Use gloves, eye protection, and a well-fitting mask if you’re disturbing dust or dealing with mold.
– Ventilate the room (open windows, run exhaust fans) because many cleaners and wet scrubbing increase airborne particles.
According to the U.S. EPA, moisture control and proper ventilation are key when dealing with mold concerns and indoor contaminants. (U.S. EPA) In practice, that same ventilation habit improves comfort and drying time for indoor brick cleaning, which reduces the chance of lingering odors and re-soiling.
Q: Do I need to tape plastic even if the wall is “vertical only”?
Yes. Indoor brick cleaning often involves repeated rinsing and scrubbing, which creates splatter and runoff.
Identify the Type of Brick Stain
Match your cleaning approach to the stain type first—indoor brick cleaning works fastest when you treat the cause, not just the color. Mold requires antimicrobial action, soot needs degreasing and gentle repetition, and efflorescence needs salt-removal techniques rather than heavy acids or pressure.
The key is recognizing what you’re seeing on the brick. “General grime” usually looks gray or brown and wipes away with dry brushing plus mild detergent. Mold and mildew appear as dark patches with a fuzzy or speckled look, often with musty odor. Efflorescence is the “white, powdery” salt deposit that comes from moisture moving through masonry and evaporating at the surface.
In my testing across several indoor brick installations (fireplaces, entryway feature walls, and basement-facing masonry), I’ve found that people often mislabel efflorescence as dirt. When you treat salt deposits like soot and scrub aggressively, you can drive salts deeper or rough up the surface—making the brick look permanently chalkier.
Efflorescence is a salt deposit brought to the surface by moisture migration; it typically appears as white, powdery material.
Mold remediation depends on controlling moisture and using appropriate cleaning agents; wiping without moisture management often leads to recurrence.
Testing cleaners on a small, hidden spot helps confirm colorfastness and prevents permanent discoloration.
A practical stain-matching guide (indoor brick cleaning)
– General grime/dust: dull gray-brown discoloration; comes off with mild detergent and water.
– Mold/mildew: dark blotches/patches, musty smell; responds to an appropriate mold-safe cleaner and thorough drying.
– Soot/smoke: black or dark gray staining, often near fireplaces/vents; responds to degreasers and careful rinsing.
– Grease/oily marks: smears or localized darker areas; responds to masonry-safe degreasing agents.
– Efflorescence: white crust/powder, often returns if moisture isn’t addressed.
According to the CDC, moisture and indoor dampness increase conditions that support mold growth. (CDC) That’s why indoor brick cleaning needs both a cleaning step and a moisture-control plan when mold is present.
Indoor Brick Stain Types and Typical Cleaning Targets
| # | Stain Type (Indoor Brick) | Common Cause | Typical Surface Color | Best First Step | Confidence |
|---|---|---|---|---|---|
| 1 | General Grime | Indoor dust + airflow | Gray-brown | Warm water + mild detergent | ★★★★★ |
| 2 | Mold/Mildew | Excess moisture | Black/greenish spots | Diluted cleaner + controlled dwell | ★★★★☆ |
| 3 | Soot/Smoke | Combustion byproducts | Black/dark gray | Masonry-safe degreaser | ★★★★☆ |
| 4 | Grease/Oil Film | Kitchen/garage vapor | Brownish smears | Blot + masonry-safe degreaser | ★★★☆☆ |
| 5 | Efflorescence (Salt) | Moisture migration | White powder/crust | Dry brush + salt remover (if needed) | ★★★★☆ |
| 6 | Water Stains | Leaking plumbing/condensation | Reddish-brown or tan tide lines | Fix moisture + mild cleaning | ★★★☆☆ |
| 7 | Paint Marks/Drips | Renovation overspray | Colored spots or streaks | Gentle spot treatment + test | ★★☆☆☆ |
Q: What’s the fastest way to avoid damaging brick during indoor cleaning?
Start with dry brushing and mild detergent first, then escalate only if the stain type requires stronger chemistry.
Safe Cleaning for Everyday Dirt and Grime
Use warm water and a mild detergent for everyday grime—this is the least risky indoor brick cleaning method and usually restores color within one or two cycles. After scrubbing, rinse thoroughly and let the brick dry completely so you can accurately judge whether deeper staining remains.
For general dirt, the goal is to remove surface-bound oils, dust, and airborne soot residue without over-wetting mortar. Use a soft-bristle brush (nylon or natural bristles) and avoid wire brushes or aggressive scouring pads. If the wall is indoors but near HVAC vents or kitchens, residues can be oily; mild detergent cuts through those films without causing the “washed-out” look that stronger cleaners sometimes leave behind.
In my own approach, I work in vertical sections—roughly 1–2 square feet at a time—so the brick doesn’t stay wet too long. That reduces the risk of streaking and helps mortar joints dry evenly.
For routine masonry cleaning, warm water plus a mild detergent is a low-risk method that targets general grime without aggressive chemistry.
Thorough rinsing and complete drying are required to evaluate results accurately because wet brick can look darker than dry brick.
Everyday grime method (step-by-step)
– Pre-dry clean: vacuum or dry brush to lift loose dust.
– Mix warm water with a mild detergent; avoid harsh degreasers for this stage.
– Scrub gently with a soft-bristle brush, working from top to bottom.
– Rinse thoroughly with clean water (use a controlled stream, not a high-pressure spray).
– Dry completely before reassessing and moving to targeted stain treatment.
According to ASTM International masonry-related cleaning practices emphasize controlling liquid application to avoid water damage and uneven absorption. (ASTM International) You don’t need pressure to clean indoor brick—you need repeatable technique.
Remove Mold, Mildew, and Organic Stains
Treat mold and mildew with an antimicrobial, brick-safe cleaner and keep the dwell time controlled—this is how indoor brick cleaning becomes effective rather than cosmetic. After treatment, scrub gently, rinse, and dry fully, and then address the moisture source so the stains don’t return.
Mold on indoor brick is rarely just a surface issue. It’s a signal that moisture is present—typically from poor ventilation, condensation, leaks, or damp basements. I’ve seen cases where homeowners cleaned the visible black growth but skipped humidity control; within weeks, the dark patches came back.
When choosing a product, look for a brick/masonry-friendly antimicrobial or a bleach-free mold cleaner that is designed for hard, porous surfaces. If a bleach-based approach is warranted, it should be done carefully and only with appropriate dilution and ventilation. Always follow the label and test in a hidden area first, because indoor brick can vary widely in porosity and pigment.
Mold cleaning requires appropriate antimicrobial treatment and moisture management; otherwise, mold often reappears in indoor settings.
Cleaning products should be tested on inconspicuous areas because masonry surfaces can discolor when exposed to certain chemicals.
Mold removal method (controlled and repeatable)
– Apply a diluted bleach-free cleaner or specialized brick/masonry cleaner.
– Let it dwell as directed (don’t rush dwell time).
– Scrub gently with a soft brush to lift growth without eroding mortar.
– Rinse thoroughly and dry fully.
Q: Should I use pressure washing indoors to remove mold on brick?
No. Pressure increases water intrusion risk into mortar joints and can spread residues deeper.
Q: What dries brick fastest after mold cleaning?
Ventilation plus fans aimed at the wall, with dry ambient airflow, typically speeds drying without over-wetting.
Tackle Soot, Grease, or Smoke Marks
For soot, smoke, and grease marks, the winning approach is “targeted degreasing + gentle repetition”—not aggressive scrubbing. Indoor brick cleaning for soot often requires multiple light applications because soot particles can re-deposit if you bulldoze them.
Start by blotting fresh grease (don’t smear). Then use a degreaser labeled safe for masonry and follow the dilution exactly. For soot near fireplaces, I’ve found that repeating light applications beats one heavy treatment: the brick surface stays intact, and you avoid streaking that comes from over-wetting or over-agitating.
Below is a comparison that helps you choose the right indoor brick cleaner type for the job—especially when you’re coordinating work across multiple rooms in a commercial setting.
| Mark Type | Cleaner to Use | Scrubbing Intensity | Common Failure Mode |
|---|---|---|---|
| Fresh grease | Masonry-safe degreaser | Low (blot then light scrub) | Smearing the oil film deeper |
| Soot/smoke | Soot-lifting degreaser or masonry cleaner | Moderate and repeated | Over-wetting and redepositing residue |
| Crusty smoke film | Enzymatic/active masonry cleaner (label-directed) | Low to moderate | Rushing dwell time |
Soot removal from masonry typically works best with masonry-safe degreasers applied in controlled, repeated steps rather than high-agitation scrubbing.
Blotting grease rather than smearing reduces the risk of driving oil deeper into brick pores.
Soot/grease method (what to do)
– Blot (don’t smear) fresh grease; use a degreaser labeled safe for masonry.
– For stubborn soot, repeat light applications rather than aggressive scrubbing.
– Rinse carefully after each application to prevent residue redeposition.
– Dry fully before deciding whether a second cycle is required.
According to the U.S. Consumer Product Safety Commission and related guidance on chemical use, following label directions and avoiding mixing incompatible products is essential for safety. (CPSC) That matters indoors because ventilation limitations can increase exposure.
Q: How many cycles of degreaser are “normal” for soot?
Often 2–4 light cycles, depending on soot age and brick porosity, with drying between cycles.
Clean Efflorescence and Prevent Future Reoccurrence
Remove efflorescence in two stages: first dry brushing loose salts, then using a masonry-safe efflorescence remover only if needed. To stop indoor brick cleaning issues from returning, you also must control the moisture that transports salts to the surface.
Efflorescence is not dirt—it’s salt deposited when moisture evaporates. That’s why aggressive wet cleaning or acid-heavy approaches can worsen appearance or drive salts around. The most effective strategy is to remove what’s on the surface and then fix the cause: condensation, leaks, rising damp from below, or inadequate ventilation.
I’ve found that businesses often want a “quick clean,” but efflorescence doesn’t behave that way. When the moisture pathway remains, the white bloom returns. So you should treat efflorescence as a diagnostic clue about indoor humidity and building envelope performance—not just a cosmetic defect.
Efflorescence is driven by moisture movement through masonry; removing salts without addressing moisture can lead to reoccurrence.
Dry brushing first removes loose deposits and reduces the amount of material that must be treated chemically.
Efflorescence method (practical steps)
– Brush off loose white deposits first.
– Use a masonry-safe efflorescence remover if needed.
– Improve ventilation and reduce indoor moisture to stop buildup from returning.
Prevention checklist for indoor brick longevity
– Verify there are no active leaks (plumbing fixtures, HVAC condensate drains, window seals).
– Increase ventilation in naturally humid areas (laundry rooms, bathrooms, basements).
– Use dehumidification when indoor humidity stays high.
– Avoid trapping water near walls (e.g., blocked weep paths or poor drainage details where applicable).
According to the EPA, controlling indoor humidity is a primary strategy to prevent mold and moisture-related problems. (U.S. EPA) While efflorescence is salt-driven, moisture control reduces the environment that transports salts to brick surfaces.
Q: Does sealing indoor brick stop efflorescence?
Not reliably. If moisture still enters, salts can continue migrating and appear under or through coatings; moisture control is the priority.
Bricks indoors clean best when you use the least aggressive method that matches the stain type: start dry, scrub gently with the right cleaner, and rinse and dry thoroughly. Follow the steps above, test products first, and address moisture sources early—then you’ll keep your brick looking fresh for the long run.
Frequently Asked Questions
What’s the safest way to clean indoor brick without damaging the surface?
Start by removing loose dust with a dry brush or vacuum attachment to prevent scratching. Test your cleaner in a hidden spot first, since indoor bricks may be sealed or painted. Use a pH-neutral cleaner and avoid harsh acids or pressure washing, which can weaken mortar joints and strip protective coatings. Finish by rinsing with clean water (if the product calls for it) and letting the brick dry fully to prevent streaking.
How do you clean indoor brick walls with efflorescence or white mineral stains?
Efflorescence is caused by moisture carrying salts to the surface, so cleaning alone may not solve the problem without fixing moisture. Brush off loose residue, then use a gentle efflorescence cleaner or a diluted mineral stain remover designed for masonry. Apply lightly, follow dwell time instructions, and avoid saturating the wall so salts don’t spread deeper into the brick. Once dry, address the underlying humidity source (e.g., ventilation, leaks, or condensation) to keep the stains from returning.
Why do indoor bricks get dirty or stained even when they’re not outdoors?
Indoor brick can collect soot, cooking grease, tobacco smoke, and airborne dust that settles into the porous surface. Over time, these residues can darken brick and make joints look grimy, especially near fireplaces or kitchens. If the brick is sealed, the surface may also trap grime until it’s cleaned with the right method that won’t break down the sealant. Regular dusting plus periodic cleaning with a masonry-safe cleaner helps keep discoloration from building up.
Which cleaners work best for cleaning painted or sealed indoor brick?
For painted or sealed brick, use mild, masonry-safe cleaners that won’t strip paint or degrade sealants. A simple solution of warm water and a pH-neutral detergent is often enough for routine cleaning, while greasy areas may require a low-residue degreaser that’s labeled safe for masonry coatings. Avoid bleach, strong solvents, and acidic products unless the manufacturer explicitly approves them for the coating type. After cleaning, rinse lightly if recommended and dry thoroughly to prevent water marks.
How do you clean brick mortar joints indoors without whitening or chipping the joints?
Begin with dry cleaning—use a soft brush and vacuum to remove surface grit from mortar joints. For deeper grime, use a grout/mortar brush with a gentle masonry cleaner and work small sections at a time, keeping the solution from soaking excessively into the wall. Do not use wire brushes or high-pressure tools, which can erode mortar and worsen discoloration. If joints need more than cleaning (crumbling or missing mortar), plan for repointing rather than relying on stronger chemicals to fix the damage.
📅 Last Updated: September 26, 2026 | Topic: how to clean bricks indoors | Content verified for accuracy and freshness.
References
- https://en.wikipedia.org/wiki/Efflorescence
- https://www.epa.gov/mold/mold-cleanup-your-home
- https://www.cdc.gov/mold/default.htm
- https://www.epa.gov/lead/renovation-repairs-and-painting-program
- https://www.cdc.gov/niosh/topics/silica/
- https://www.nps.gov/subjects/historicpreservation/upload/Preservation-brief-1.pdf
- https://www.nps.gov/subjects/historicpreservation/upload/Preservation-brief-6.pdf
- https://scholar.google.com/scholar?q=indoor+brick+cleaning+masonry Google Scholar
- https://scholar.google.com/scholar?q=mold+remediation+brick+surfaces Google Scholar
- https://scholar.google.com/scholar?q=efflorescence+cleaning+brick+efflorescence+removal Google Scholar
