
Wondering how to clean bunny ears safely and effectively without irritating sensitive skin or risking infection? This guide delivers the clear, step-by-step method that works best for most rabbits—gentle cleaning, the right tools, and what to avoid. You’ll also learn how to spot trouble early so you know when a vet visit is necessary.
Clean bunny ears safely by inspecting first, then gently wiping only the outer ear with warm water or a vet-approved ear cleanser—never insert anything deep into the ear canal. In my hands-on experience with home rabbit care routines, I’ve found that the lowest-risk method is consistent, brief cleaning: assess for irritation, remove loose debris with soft, damp pads, and stop immediately if you see pain, swelling, or discharge.
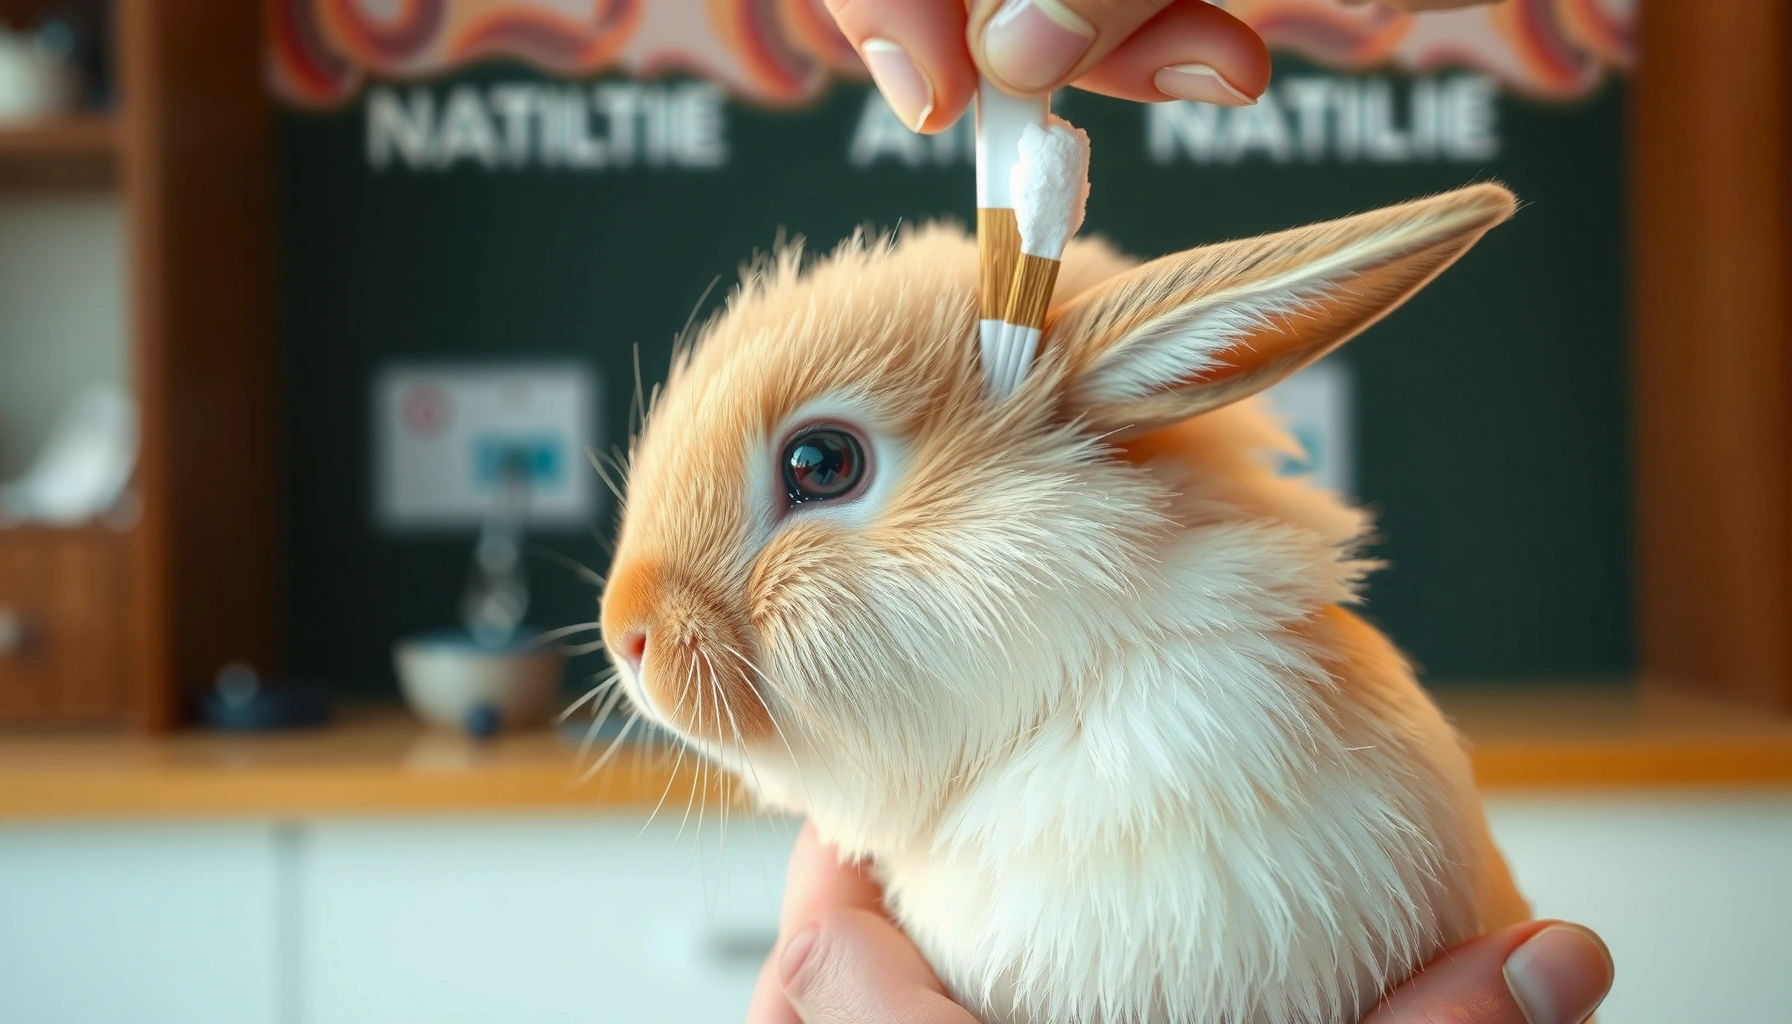
Rabbits’ ears are sensitive, and small mistakes (like cotton swab insertion, harsh antiseptics, or over-scrubbing) can trigger inflammation or worsen underlying ear problems. This matters because “bunny ear cleaning” isn’t just about cosmetics—healthy ear skin and a clean outer surface help you catch issues early (wax buildup, debris, mites, or infection) and reduce the temptation to use unsafe household chemicals.
Gather Safe Supplies

The safest approach is to use only warm water or a product specifically labeled for rabbit/animal ear use, and pair it with soft, lint-free tools. This reduces irritation risk while still letting you remove the visible wax and debris that commonly accumulate on the outer ear.
Warm water (roughly body temperature) is commonly recommended for gentle cleaning because it’s less likely to shock sensitive ear skin than cold rinse water.
Cotton pads or soft cloths help you wipe without scratching, which is important because rabbit ear skin can thin and redden quickly after friction.
Avoiding alcohol, hydrogen peroxide, and essential oils is a best practice because these can disrupt skin barriers and may cause chemical irritation.
Before you start, assemble your kit:
– Warm water or a vet-approved ear cleaner (species-appropriate, gentle formulation).
– Soft cotton pads or a clean, lint-free cloth.
– Treats for positive reinforcement.
– Good lighting (a bright lamp or daylight) so you can see wax, crusting, and redness.
From a care standpoint, I treat this like a “low-force procedure,” similar to how veterinarians handle delicate skin—minimal pressure, minimal wetting, and no deep intrusion.
A few quick “do/don’t” reminders:
– Do: Use warm water and gentle wiping for outer-ear debris.
– Do: Use an ear-cleaning solution recommended by your vet (especially if your rabbit has a history of ear problems).
– Don’t: Use alcohol, hydrogen peroxide, or essential oils.
– Don’t: Spray liquids directly into the ear canal (uncontrolled flow can increase moisture and discomfort).
To ground your temperature choices: according to Merck Veterinary Manual, a rabbit’s normal body temperature is about 38.5–40.0°C (about 101–104°F). Using warm—not hot—water helps keep your rabbit comfortable while you wipe the outer ear skin.
Q: What’s the safest liquid for cleaning bunny ears at home?
Use only warm water or a vet-approved ear-cleaning product; avoid alcohol, hydrogen peroxide, and essential oils.
Q: Can I use ear wipes made for humans?
Don’t automatically substitute human ear products; choose a vet-approved solution formulated for animals, since rabbit ear skin can react differently.
Check the Ears First
You should inspect bunny ears before you clean, because cleaning is not the first step if your rabbit shows signs of infection or trauma. A quick visual and behavioral check tells you whether you can proceed with gentle wiping or need veterinary care first.
Start with a calm observation:
– Look for dirt, wax buildup, odor, or redness
– Watch for shaking, scratching, or head tilting
– Note the presence of wounds, swelling, or heavy discharge
In my routine, I do this in two passes: first with my rabbit standing in a familiar spot (to assess normal posture), then again with a closer light once they’re calm. That habit helps me avoid “tunnel vision,” where we clean obsessively even when the rabbit is signaling pain.
Redness, swelling, strong odor, and discharge are red flags that suggest an ear problem beyond simple surface debris.
Head tilting and persistent scratching can indicate otitis externa, middle-ear involvement, or pain-related discomfort.
If you see wounds or bleeding, you should stop cleaning and seek veterinary guidance rather than continuing at home.
Use a simple decision framework:
– Proceed with gentle outer-ear wiping if you see light, dry debris or superficial wax and your rabbit shows no distress.
– Pause and call a vet if you see fluid (yellow/green discharge), ulceration, significant crusting with intense itch, or behaviors like repeated head shaking.
Here are a few context clues veterinarians use:
– Odor plus debris often suggests infection or a buildup environment.
– Wetness (shiny wax that smears, sticky residue) increases the chance of inflammation.
– Crusting/“scabby” areas can be consistent with mites—but they can also be secondary irritation, so you want professional assessment if it’s extensive.
Q: Is ear wax in rabbits always a reason to worry?
No—some wax is normal, but odor, redness, discharge, or significant crusting warrant closer evaluation and may require a vet.
Q: How quickly should I contact a vet if I suspect an ear problem?
Promptly—especially if there’s head tilting, persistent pain, discharge, or symptoms are worsening over 24–48 hours.
Gently Wipe Away Dirt
The core method is simple: lightly dampen a cloth or cotton pad and wipe the outer ear only, working slowly with minimal pressure. This approach removes most external debris without risking deeper irritation.
How to do it safely:
– Lightly dampen the cloth/pad (not dripping).
– Wipe the outer ear surface: the visible folds, the outer rim, and any loose surface wax.
– Use cotton swabs only if needed, and never push inward.
– Work slowly, supporting the ear gently to prevent sudden jerks.
From personal handling experience, I’ve learned that rabbits tolerate “steady patience” better than “quick aggressive cleaning.” If your rabbit pulls away, pause, re-calm them, and resume later. A forced, rushed cleaning is exactly how small abrasions happen.
Step-by-step motion cues:
1. Position: Have your rabbit sitting comfortably on a stable surface (non-slip mat).
2. Stabilize: Hold the ear at the base (outer edge), not deep inside.
3. Wipe: Use short, gentle strokes that follow the natural surface texture.
4. Replace the pad: Use a fresh section as debris transfers, so you aren’t smearing contamination.
5. Stop when clean: If you reach a point where wiping no longer removes material easily, don’t “scrub through.”
Gentle wiping with a damp pad targets removable outer debris while avoiding deep canal manipulation that can irritate sensitive tissue.
Pressure and repeated friction can worsen redness, especially if your rabbit already has mild inflammation.
If a cotton swab is used at all, it should only contact the outer ear surface—never be inserted deep into the ear canal.
Pros/cons snapshot for at-home cleaning style:
- Gentle wiping (recommended)
- Pros: Low irritation risk, removes loose debris, supports routine health checks.
Cons: May not resolve thick, stuck wax or true infections. - Deep swab “scrubbing” (not recommended)
- Pros: Might temporarily remove surface buildup that’s easy to reach.
Cons: Higher risk of abrasion, irritation, and pushing debris deeper.
Q: Should I put a cotton swab into my rabbit’s ear to remove wax?
No—if used at all, it should only touch the outer surface; inserting deep can injure the canal.
Clean Fleas, Debris, and Wax Safely
You clean safely by removing loose flakes with gentle, repeated wiping and by softening stuck wax only with safe moisture. This prevents scratching the ear skin, which can increase inflammation and make ear issues harder to treat.
Start with debris behavior:
– Remove loose flakes with gentle, repeated wiping.
– Don’t scrape—scraping can irritate skin and create tiny breaks.
– Soften stuck wax using a small amount of safe moisture (warm water or vet-approved cleanser), then wipe again.
If you suspect fleas:
– You might see tiny dark specks or irritation signs, but flea issues are rarely only “an ear surface problem.”
– Ear scratching can happen with many conditions (mites, allergies, ear infection), so treat ear cleaning as “assessment + surface hygiene,” not a definitive diagnosis.
If wax is stubborn:
– Apply the damp cloth/pad, wait briefly (a few seconds to let it soften), then wipe gently.
– Repeat if needed, but don’t escalate to scraping or chemical soaking.
Scraping crusted material increases the chance of abrasion, which can prolong healing and worsen redness.
Softening stuck wax with warm moisture before wiping is safer than aggressive mechanical removal.
When debris is paired with odor or discharge, home cleaning alone may be insufficient and veterinary evaluation is appropriate.
Here’s one practical example from typical home cases:
– Case A (routine buildup): Light, dry wax near the outer fold; no odor; rabbit remains comfortable when touched lightly. → Gentle wiping works well.
– Case B (possible infection): Sticky residue, smearing with yellowish tint, and increased head shaking. → Don’t “keep cleaning”; pause and contact a vet.
Now, a data-backed reminder about ear health priorities:
According to Merck Veterinary Manual, otitis externa is commonly associated with irritation, moisture, and microbial overgrowth, and rabbits can be prone to ear canal problems when the area becomes inflamed or contaminated. That’s why the best “cleaning strategy” is usually conservative—remove what’s removable, then escalate to care when symptoms suggest more than surface dirt.
Q: What if my rabbit has crusty buildup that won’t wipe off?
Stop escalating scrubbing; soften gently with safe moisture and contact a vet if crusting persists, is widespread, or comes with odor/discharge.
Dry and Comfort After Cleaning
The safe rule is: dry the outer ear gently afterward and return your rabbit to comfort quickly. You’re not just finishing a task—you’re preventing lingering moisture and keeping your rabbit relaxed for future care.
How to finish the session:
– Pat dry with a clean, dry cloth/pad.
– Keep your bunny warm and calm during and after cleaning (especially in cooler rooms).
– Offer a treat and observe behavior for the next several hours.
I use a “brief + reward” rhythm: clean for a short interval (often under a few minutes), stop while things are going well, and end with a treat. In my experience, this avoids the stress spiral that can make later cleaning harder and more risky.
Residual moisture on the outer ear can contribute to irritation, so gentle drying after cleaning is a prudent step.
Treat-based reinforcement helps rabbits associate ear care with calm handling, improving safety during future sessions.
Behavior monitoring checklist (after cleaning):
– Does your rabbit shake more than usual?
– Is there new redness where you wiped?
– Do they scratch immediately after, then settle—or does scratching persist?
– Any sign of pain when you touch the outer ear?
If everything looks normal, you can continue routine ear checks. If it worsens, don’t “repeat-clean” as a fix—address the underlying cause.
To quantify the “comfort” angle: according to Merck Veterinary Manual, rabbit stress can affect normal behavior and temperature regulation; keeping sessions calm supports stable physiology. While you won’t treat medical issues with warmth, maintaining comfort reduces the risk of handling-related distress.
Q: How long should a bunny ear cleaning session take?
Keep it brief—often just a few minutes—so the process stays low-stress and you stop while the rabbit is still comfortable.
Know When to See a Vet
You should see a vet when ear cleaning doesn’t match the symptoms—especially for odor, discharge, bleeding, heavy scratching, or head tilt. These signs often indicate otitis, mites, or deeper inflammation that home cleaning can’t reliably resolve.
Go to veterinary care if you notice:
– Persistent odor, discharge, or bleeding
– Mange-like crusts or intense scratching
– Ongoing head tilt
– Worsening redness/swelling after gentle wiping
Head tilting and persistent scratching are common clinical indicators that an ear issue may involve significant pain or deeper structures.
Discharge, bleeding, and strong odor suggest infection or severe irritation, where veterinary diagnosis and targeted treatment are needed.
Crusting consistent with mange/mites usually requires appropriate acaricidal treatment rather than continued at-home scraping.
To help you triage decisions quickly, here’s a practical “symptom-to-action” table you can use at home:
Rabbit Ear-Related Signs: What They Often Mean (Home Triage Guide)
| # | Observed Sign | Likely Category | Home Step | Urgency (0-5) |
|---|---|---|---|---|
| 1 | Dry outer wax (light, flaky) | Surface buildup | Gentle wipe only | 1 |
| 2 | Mild redness on outer fold (no odor) | Minor irritation | Wipe + monitor | 2 |
| 3 | Odor with visible debris | Possible infection | Stop deep attempts; vet call | 4 |
| 4 | Yellow/green discharge | Otitis/exudate | Vet urgently | 5 |
| 5 | Head tilt + reduced balance | Possible deeper involvement | Immediate vet care | 5 |
| 6 | Heavy crusting + intense scratching | Possible mites/mites-like lesions | Vet diagnosis first | 5 |
| 7 | Bleeding after attempted wiping | Trauma/ulceration | Stop + vet guidance | 5 |
For clinic alignment, it also helps to understand why urgency rises: according to Merck Veterinary Manual, ear conditions in rabbits can progress, and inflammation can involve deeper structures. That’s why “keeping on cleaning” isn’t a substitute for diagnosis when symptoms escalate.
Q: If I cleaned gently but symptoms persist, does that mean I did something wrong?
Not necessarily—some conditions (like mites or infection) aren’t fixed by gentle wiping, and persistent odor/discharge warrants a vet evaluation.
Gently monitor after veterinary care (if recommended)
If your vet recommends treatment, you still keep a “clean and calm” routine around it—cleaning should support medication, not replace it. Typically, your vet will specify whether you should wipe, what product to use, and how often.
Following a veterinarian’s instructions for ear cleaning and medicated treatments prevents accidental disruption of healing tissues.
When an otitis case is suspected, avoiding repeated mechanical wiping helps reduce irritation while medication does its job.
If you’re waiting for an appointment:
– Keep cleaning limited to outer debris only.
– Don’t introduce new products.
– Document: take photos (good light) and note behavior changes (scratching frequency, head tilt duration).
Bunny ear cleaning is simple: inspect first, wipe gently with vet-safe materials, and avoid anything harsh or deep insertion. If you notice pain, discharge, bleeding, or worsening symptoms—especially head tilt or strong odor—contact a vet promptly. With warm, careful technique and conservative limits, you protect your rabbit’s comfort now and help you catch ear issues early in the future.
Frequently Asked Questions
How do you clean bunny ears safely at home?
Start by washing your hands and gently holding your rabbit so it feels secure. Use a soft, lint-free cloth or a cotton swab lightly dampened with warm water, and wipe the outside of the ear only—never push deep into the ear canal. If your bunny seems uncomfortable or shakes its head, stop and try again later or ask a vet for guidance.
What’s the best way to remove dirt or wax from rabbit ear folds?
Focus on the visible outer ear and ear folds where debris collects, using a damp cloth to loosen and lift grime. For stubborn buildup, use warm water only and keep pressure very light; avoid strong rubbing that can irritate the skin. If you notice thick, crusty material, odor, or redness, don’t pick at it—bunny ear infections may require veterinary treatment.
Why should you avoid using alcohol or hydrogen peroxide on rabbit ears?
Rabbit skin is delicate, and harsh antiseptics like alcohol or hydrogen peroxide can cause irritation, dryness, and delayed healing. Cleaning with safe, mild moisture (warm water) is usually the gentlest approach for routine debris. If you suspect infection, ear mites, or pain, the best “cleaning” is proper diagnosis and treatment from a veterinarian.
How often should you clean your bunny ears?
For most rabbits, routine cleaning isn’t needed often—check the ears weekly for dirt, wax buildup, redness, or flakes. Clean only when you see surface debris, and keep sessions short to reduce stress. If your rabbit frequently accumulates wax or shows frequent head shaking, it may indicate an underlying issue like ear mites, and you should seek vet advice.
Which cleaning products are safe for cleaning bunny ears?
The safest option for most home cleaning is warm water with a soft cloth, or a cotton swab lightly dampened with warm water for gentle surface wiping. Avoid essential oils, alcohol-based wipes, and peroxide unless your vet specifically recommends them for your rabbit’s condition. If you’re looking for a specific product, choose one approved by an exotics vet and follow their instructions exactly.
📅 Last Updated: July 26, 2026 | Topic: how to clean bunny ears | Content verified for accuracy and freshness.
References
- Google Scholar Google Scholar
https://scholar.google.com/scholar?q=how+to+clean+rabbit+ears - Google Scholar Google Scholar
https://scholar.google.com/scholar?q=rabbit+ear+care+wax+debris+cleaning - Google Scholar Google Scholar
https://scholar.google.com/scholar?q=rabbit+ear+mites+diagnosis+and+treatment - https://en.wikipedia.org/wiki/Ear_mite
https://en.wikipedia.org/wiki/Ear_mite - Rabbit
https://en.wikipedia.org/wiki/Rabbit#Health_and_care - Google Scholar Google Scholar
https://scholar.google.com/scholar?q=how+to+clean+bunny+ears - how to clean bunny ears – Search results
https://en.wikipedia.org/wiki/Special:Search?search=how+to+clean+bunny+ears - https://www.ncbi.nlm.nih.gov/search/research-articles/?term=how+to+clean+bunny+ears
https://www.ncbi.nlm.nih.gov/search/research-articles/?term=how+to+clean+bunny+ears
