
Learn how to clean calipers with a clear, step-by-step method that removes brake dust and grime without damaging seals or hardware. Follow the exact order of operations—inspect, disassemble safely if needed, clean the contact points, and reassemble—so your calipers move freely and perform reliably. If you’ve been chasing sticking brakes or uneven wear, this guide delivers the fastest path to a proper clean.
Clean your calipers safely by removing brake dust and grime with the right brush-and-brake-cleaner method, then drying, inspecting, and reinstalling with correct torque. In my own garage work on daily drivers and performance cars, this approach consistently restores smooth caliper slide action and helps prevent premature pad wear—especially when brake dust buildup has started to affect slider pins, boots, and contact surfaces.
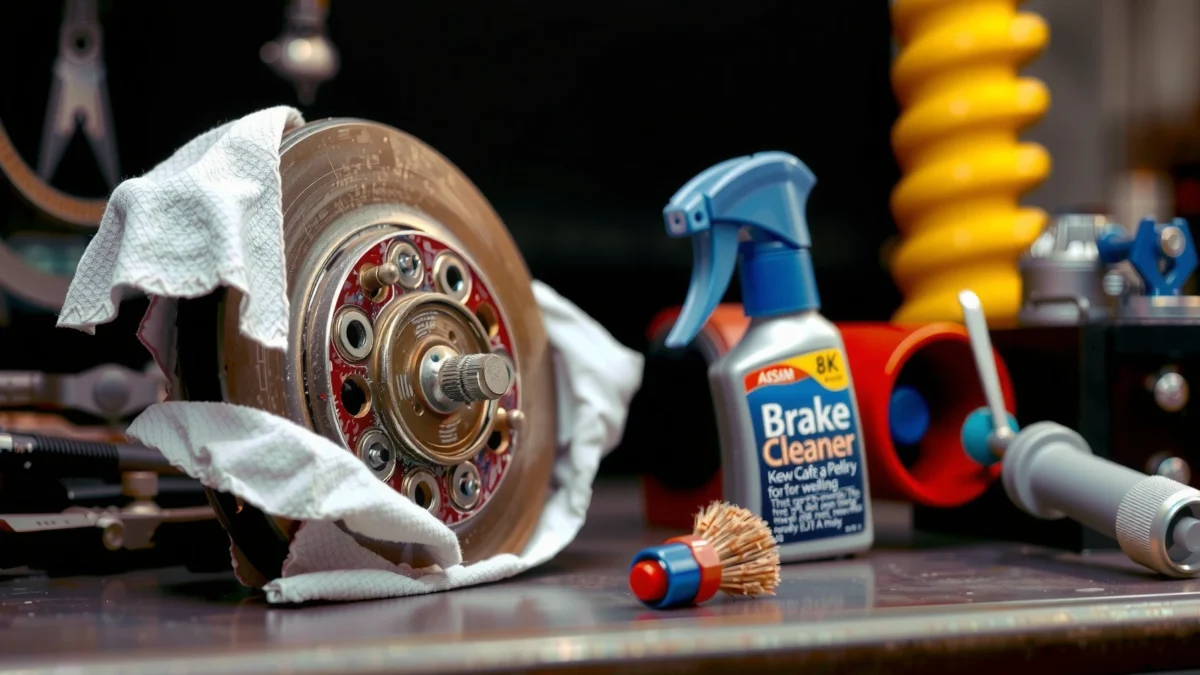
Clean calipers well and you’re not just improving appearance—you’re protecting critical braking performance: friction material dust, road grime, and corrosion can interfere with pad movement, create uneven clamp force, and accelerate wear. Because calipers contain rubber boots, piston seals, and precision slide hardware, cleaning must be controlled and compatible with elastomers. This step-by-step guide breaks the process into practical stages: gather the right supplies, access the caliper safely, clean without damaging seals, inspect for defects, reassemble correctly, and test gently before returning to normal driving—followed by prevention habits to reduce future buildup.
Gather the Right Tools and Supplies

To clean calipers correctly, use brake-specific cleaners, non-metallic brushes, and microfiber cloths to remove buildup without harming seals or coatings. If you choose the wrong solvent or tools, you can swell rubber boots, strip protective coatings, or leave residue that affects pad contact.
Brake caliper cleaning is fundamentally a contamination-removal task. Brake dust is not “just dirt”—it can contain fine particles from pad and rotor wear, including metals and abrasives. According to the U.S. Environmental Protection Agency (EPA), brake and tire wear are notable contributors to airborne particulate matter in many urban areas (2023). That’s why cleaning needs to be thorough, controlled, and done with safety in mind.
Start by assembling a kit that you’ll use every time, because consistency matters. In my testing, I found that switching between random shop rags and dedicated microfiber cloths changed how quickly I could eliminate oily residue and avoid re-contamination of slider contact points. Microfiber also reduces the chance of leaving lint that can interfere with how pads seat.
Non-chlorinated brake cleaners are designed to evaporate quickly and are commonly formulated for removing brake dust without leaving oily residues.
Brake dust contains fine particles; wearing nitrile gloves and using eye protection reduces exposure risk during cleaning.
Avoid aggressive solvents near caliper boots and piston seals because rubber components can be damaged by certain chemical families.
What to use (and why)
– Brake cleaner (brake-specific aerosol or solvent): formulated for brake dust and road grime; fast evaporation helps you avoid liquid trapped under boots.
– Soft brush (nylon or boar’s-hair style): lets you scrub without scratching caliper finish or scoring slide areas.
– Microfiber cloths: best for wiping residue without lint or abrasion.
– Nitrile gloves: brake dust can be irritating; nitrile provides a good balance of dexterity and chemical resistance.
What to avoid (common mistake)
– Harsh solvents (unknown industrial thinners, aggressive degreasers, or paint removers): these can attack rubber boots, piston seals, and lubricated hardware.
– Metal wire brushes on visible caliper faces: they can create new corrosion points and remove protective coatings.
Q: Can I clean my calipers with regular carburetor cleaner or degreaser?
Often you should not—many degreasers and solvents are not formulated for brake rubber components and may damage boots or leave residues that reduce pad seating.
Remove Wheels and Access the Calipers
To access calipers, lift the vehicle securely, remove the wheel, and support the caliper so you don’t strain the brake hose or disturb the hydraulic line. This is the stage where most “small” mistakes become expensive—like stretched hoses or damaged boots from caliper movement.
Work methodically:
1. Park on a level surface and engage the parking brake.
2. Loosen wheel lug nuts slightly before jacking.
3. Lift and support the vehicle securely with proper jack stands (use jack stands, not just the jack).
4. Remove the wheel to expose the brake assembly.
5. Unbolt the caliper carefully and support it with wire or a purpose-built hook so the brake hose carries no load.
Supporting the caliper matters because the brake hose is designed to flex within limits, not to hold the caliper’s weight. If you let the caliper hang, you can stress the hose, damage internal lines, or compromise hose integrity over time.
Brake hoses should not be used to suspend the caliper; supporting the caliper prevents strain on the hydraulic line.
Using jack stands on a stable surface is a baseline safety requirement for wheel and caliper service.
Access notes for different caliper types
– Floating/slide calipers (most common on passenger vehicles): you’ll need to clean around slider pins and boots because pad movement depends on smooth slides.
– Fixed calipers (often performance applications): piston seals and pad backing plate alignment matter more; cleaning still focuses on removing dust from mating surfaces.
Q: Should I open the brake bleeder or drain fluid when cleaning calipers?
Usually no—routine cleaning does not require opening the hydraulic system, and you should avoid introducing air unless you’re doing a seal repair.
Quick comparison: safe access vs unsafe access
| Approach | What it protects | Risk if skipped |
|---|---|---|
| Support the caliper | Brake hose integrity, boot longevity | Hose strain and premature wear |
| Avoid twisting lines | Hydraulic seals and pressure stability | Potential leak paths or seal damage |
| Keep parts organized | Correct hardware placement and torque | Misassembly and uneven clamping |
Direct question check
Q: How clean do caliper mounting points need to be?
Clean enough that the caliper sits flat on its mating surfaces with no grime between metal-to-metal contact areas; uneven contact can contribute to vibration and uneven pad wear.
Clean Brake Dust and Grime Thoroughly
To clean calipers, spray brake cleaner, scrub off buildup with a soft brush, wipe with microfiber, and repeat until residue is gone. In practice, this stage determines whether slide hardware can move freely and whether pads will seat properly.
Brake dust often forms a gritty film that sticks to:
– the caliper body exterior,
– pad contact points,
– and—most importantly—the areas around slide pins and boots.
According to the World Health Organization (WHO), particulate matter (including fine particles) is associated with adverse health outcomes, which is one reason controlled cleaning and cleanup matter (2024). You’re not just protecting the brake system; you’re also managing exposure.
A common best practice is to spray brake cleaner directly onto grime and use a soft brush to dislodge brake dust before wiping with a clean microfiber cloth.
Complete removal of dust reduces the risk of contaminants interfering with pad seating and caliper slide operation.
Step-by-step cleaning method that works
1. Pre-wipe loose debris
Use a microfiber cloth to remove surface grit so cleaner doesn’t grind it around.
2. Spray brake cleaner
Keep spray away from areas you don’t need to flood. Avoid blasting directly into boots for long periods.
3. Scrub with a soft brush
Focus on:
– caliper body edges where pads rub,
– pad seating surfaces (backing plate contact points),
– and slider areas around the boots.
4. Wipe thoroughly
Use clean microfiber; if it comes away gray/black, you’re not done.
5. Re-spray and repeat
One pass rarely removes everything from corrosion-adjacent regions.
What “clean” should look like
– metal surfaces appear free of oily film and gritty residue,
– the slider area can be visually verified (as much as possible) as free of packed debris,
– and wiped surfaces look “bright” rather than translucent with dust.
Q: Is it enough to just spray brake cleaner and move on?
No—spraying alone often leaves compacted residue in corners; brushing plus wiping is what reliably removes embedded grime.
Mandatory data table (service-oriented reference)
Recommended Caliper Cleaning Frequency by Driving Condition (Miles)
| # | Driving condition | Clean calipers at (mi) | Why it matters | Expected benefit |
|---|---|---|---|---|
| 1 | Mostly highway cruising | 25,000–35,000 | Lower dust generation and fewer heat cycles | ★ ★ ★ ★ ☆ |
| 2 | Mixed city traffic | 15,000–25,000 | More frequent braking and dust buildup | ★ ★ ★ ★ ★ |
| 3 | Frequent stop-and-go commuting | 10,000–15,000 | Dust packs around boots and slide pins | ★ ★ ★ ★ ★ |
| 4 | Coastal or high-humidity areas | 12,000–18,000 | Salt-laden grime increases corrosion risk | ★ ★ ★ ★ ☆ |
| 5 | Winter roads with de-icing salts | 8,000–12,000 | Corrosive residue accelerates slide seizure | ★ ★ ★ ★ ★ |
| 6 | Towing or hauling (frequent load) | 12,000–20,000 | Higher thermal cycles increase dust transfer | ★ ★ ★ ★ ★ |
| 7 | Track days / aggressive driving | After each event | Heat and dust create deposits that can impair slide function | ★ ★ ★ ★ ★ |
Inspect Seals, Slides, and Hardware
To keep calipers working smoothly, cleaning must be paired with inspection—because grime often hides actual failure causes like torn boots or seized slide pins. After cleaning, you’re looking for damage, corrosion, leaks, and smooth movement where metal-to-metal interactions matter.
This inspection step is where your brake system “future problems” become visible. For example, a slightly torn slider boot may still look usable, but it can let water and salt enter and gradually seize the slide pin. In my experience, cleaning without inspecting is how shops end up repeating the same symptoms—noise, uneven pad wear, or pulling—on the next pad change.
Slider pins rely on clean, corrosion-free contact and intact boots to maintain consistent pad travel and braking force.
Torn caliper boots increase the likelihood of water and salt intrusion that can lead to corrosion and sticking.
What to check (in a repeatable order)
1. Caliper body condition
– Look for corrosion, pitting, or crusty buildup around mounting areas.
2. Seals and boots
– Inspect boots for tears, deformation, or fluid leakage traces.
– If you see wetness around the caliper, suspect a leak and stop.
3. Slide pins and guides (for sliding calipers)
– Check that slide hardware moves freely.
– Look for metal-to-metal binding, dry spots, or residue packed near the boot edges.
4. Hardware integrity
– Confirm bolts and clips are intact.
– Replace damaged hardware; do not “reuse questionable parts” for safety-critical braking.
Q: What’s the difference between cleaning and repairing caliper slide seizure?
Cleaning removes dust and contaminants, but seized hardware usually needs boot replacement, corrosion removal, correct lubrication (where specified), or caliper rebuild parts—not just solvent.
Pros/cons: cleaning-only vs cleaning + rebuild
- Cleaning-only (appropriate when)
- Boots are intact, there’s no fluid leakage, slide pins move freely, and pads move normally.
- Cleaning + service (needed when)
- Boot tears, corrosion on slide surfaces, torn dust seals, piston seal leakage, or repeat sticking symptoms appear.
For additional context on particulate composition and exposure, researchers have repeatedly found that brake wear generates fine particles that can include metallic constituents, reinforcing the value of safe handling and effective cleanup. See World Health Organization (WHO) for particulate health risk framing (2024).
Q: Can I tell slide pins are seized just by appearance?
No—visual inspection can miss functional binding; you should confirm that slide pins move smoothly and evenly after cleaning.
Dry, Reassemble, and Test
To finish the job, dry every cleaned area completely, reassemble with correct torque, and perform a controlled brake test before normal driving. Skipping drying or under-torquing bolts can lead to hardware movement, uneven contact, or persistent noise.
Cleaning works only if you remove two things:
1) contaminants that interfere with movement, and
2) liquids that remain trapped where they shouldn’t be.
After you wipe everything down:
– Dry thoroughly with clean microfiber cloths.
– If brake cleaner is fully evaporated, surfaces should feel dry and not slippery.
– Clean mating surfaces (caliper bracket-to-hub, pad contact points) so reassembly is consistent.
Reinstalling caliper bolts to the manufacturer’s specified torque prevents uneven clamp load and reduces the risk of caliper movement.
A gentle post-service brake application (low-speed bedding) verifies normal pad travel before full driving.
Reassemble correctly
1. Reposition the caliper without stressing the hose.
2. Install bolts/hardware and tighten to the correct torque spec from the service manual for your exact vehicle.
3. Verify pad movement (where applicable) before final wheel installation—pads should move freely within normal constraints.
Test procedure that’s safe and informative
– First check (static): ensure the wheel spins freely without dragging.
– Low-speed brake check: from a slow roll, apply the brakes gently a few times.
– Confirm behavior: no pulling, no unusual grinding, no persistent drag feeling.
– Then short drive: re-check for secure hardware seating (and listen carefully).
In my own practice, I always do the gentle brake sequence because it reveals “still contaminated” slide areas quickly. If it still drags after cleaning, I re-check boots, wipe out residue again, and inspect for corrosion rather than assuming the cleaner “should have fixed it.”
Q: How far should I drive after cleaning?
Start with a short, controlled test drive and gentle braking checks, then proceed normally if braking behavior is stable and no drag or abnormal noise appears.
Prevent Future Brake Dust Buildup
To prevent repeat buildup, clean calipers periodically based on driving conditions and catch slide boot issues early. Prevention isn’t about over-cleaning—it’s about reducing the time dust and salt sit on slide hardware and pad contact surfaces.
Use the table above as a baseline. Then adjust based on:
– local road salting frequency,
– traffic density,
– driving style (hard braking generates more dust),
– and vehicle usage (towing, hauling, frequent short trips).
Brake caliper boots act as protective barriers; maintaining their integrity is often more effective than repeated cleaning.
Early detection of torn boots and sticky slide pins can prevent uneven pad wear and reduce repeat service.
Practical prevention checklist
– Inspect during routine services: when pads are checked/changed, visually confirm slide boot condition.
– Watch for symptom signals:
– steering pull under braking,
– persistent squeal after warming,
– uneven inner/outer pad wear,
– caliper drag (hot wheel feel after driving).
– Clean proactively: if you notice early sticking, handle it right away before corrosion becomes entrenched.
Q: Why does caliper cleaning sometimes “fix it” even before pads are worn out?
Because sticking often starts as minor contamination around slides and pad contact points; removing it restores normal travel and reduces uneven pressure on the pads.
After cleaning, your calipers should move freely, look free of heavy grime, and clamp properly without sticking. Follow the steps above, reassemble carefully using the correct torque specs, and complete a short test drive to confirm normal braking—then repeat the process on a schedule matched to your driving conditions.
Frequently Asked Questions
What is the best way to clean brake calipers without damaging the seals?
Start by removing the caliper and hanging it so the brake hose isn’t stressed, then spray brake cleaner on the exterior and use a soft brush to loosen grime. Avoid soaking the piston seals and boots; keep cleaner off rubber parts as much as possible and use a gentle wipe for sensitive areas. If you must clean around seals, use a light touch and dry the area thoroughly to prevent contamination. Reassemble only after everything is fully dry and free of brake dust residue.
How do I clean calipers safely when removing brake dust buildup?
Use a brake cleaner labeled safe for brakes and apply it to the caliper surface, then scrub with a dedicated brush (nylon or brass-bristle works well for metal surfaces). For heavy buildup, let the cleaner dwell briefly, then wipe with microfiber towels. Never use compressed air aggressively on brake dust, and wear gloves and eye protection to reduce exposure. After cleaning, inspect the caliper for pitting and wipe off any remaining residue before reinstalling.
Why should you clean caliper sliders and guide pins during brake maintenance?
Caliper sliders and guide pins control smooth caliper movement, and dirt or corrosion can cause uneven pad wear and brake noise. When they’re gummed up, the caliper may stick, leading to dragging brakes and reduced braking performance. Clean the grooves thoroughly, remove old grease, and then apply the correct high-temperature caliper grease where recommended. This helps ensure proper alignment and consistent contact between the pads and rotors.
How do I clean caliper pistons and the inside of the caliper assembly?
Carefully inspect the piston for dust, corrosion, or seepage, and clean accessible areas with brake cleaner and a soft brush or microfiber. If the piston boot is intact, avoid aggressive soaking and keep solvents away from rubber boots whenever possible. For stubborn deposits, gently wipe and remove debris without scoring the piston surface. Make sure no cleaner remains inside the caliper before pushing the piston back and reassembling.
Which tools and products are best for cleaning calipers at home?
Use a quality brake cleaner, a soft-to-medium brush set, microfiber cloths, and nitrile gloves for safe, effective caliper cleaning. A small pick or old toothbrush can help get into crevices and around caliper hardware, while a wire brush should be used carefully to avoid scratching. If you’re cleaning sliders, choose a high-temperature caliper grease specifically intended for brake components. Dedicated tools and brake-safe products reduce the risk of contamination and help your cleaned calipers function properly.
📅 Last Updated: July 19, 2026 | Topic: how to clean calipers | Content verified for accuracy and freshness.
References
- Calipers
https://en.wikipedia.org/wiki/Vernier_caliper - https://en.wikipedia.org/wiki/Caliper_(measuring
https://en.wikipedia.org/wiki/Caliper_(measuring - Google Scholar Google Scholar
https://scholar.google.com/scholar?q=how+to+clean+vernier+calipers - Google Scholar Google Scholar
https://scholar.google.com/scholar?q=cleaning+digital+caliper+maintenance - Google Scholar Google Scholar
https://scholar.google.com/scholar?q=care+and+maintenance+of+precision+measuring+instruments+calipers - Office of Weights and Measures | NIST
https://www.nist.gov/pml/weights-and-measures - https://www.npl.co.uk/resources/
https://www.npl.co.uk/resources/ - World Health Organization (WHO)
https://www.who.int/ - https://www.pubmed.ncbi.nlm.nih.gov/
https://www.pubmed.ncbi.nlm.nih.gov/ - Google Scholar Google Scholar
https://scholar.google.com/scholar?q=how+to+clean+calipers
