How to Clean Cedar Shingles Siding
To clean your cedar shingles siding, start by inspecting for damage and clearing the area of furniture. Gather a pressure washer, biodegradable wood cleaner, and a soft bristle brush. Adjust the pressure washer to 1,200-1,500 psi and test it on a small area. Clean from the top down using a gentle sweeping motion. Rinse thoroughly to remove all cleaning solution, then let the shingles air dry. There’s more effective techniques and tips that can keep your shingles looking their best.
Preparation For Cleaning
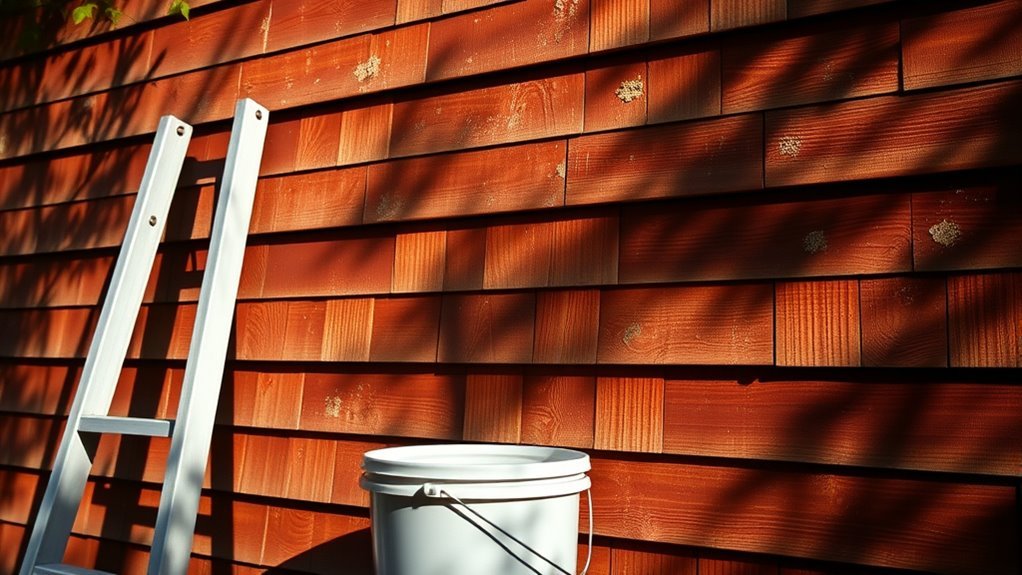
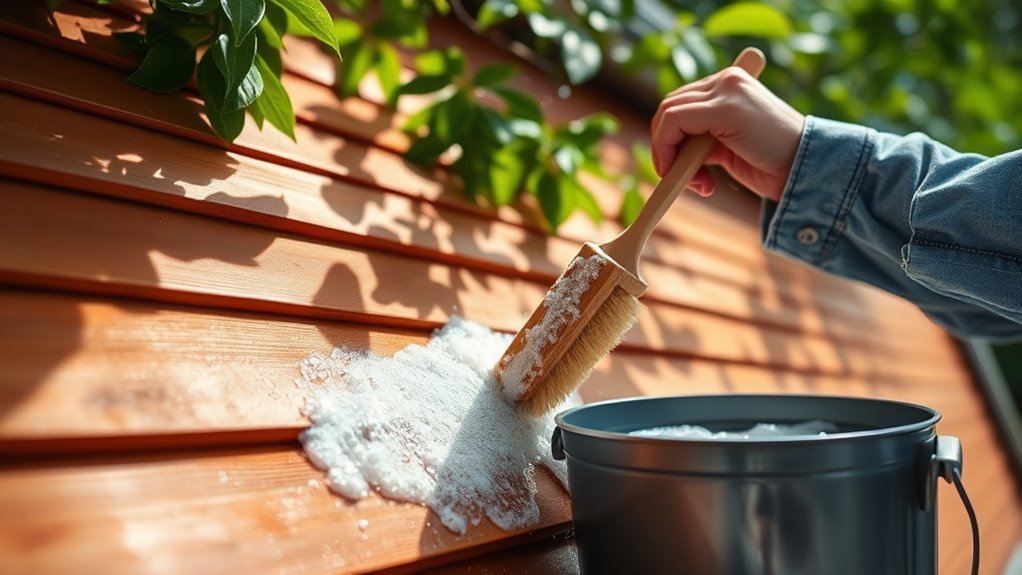
Before diving into the cleaning process, it’s essential to prepare properly to guarantee the best results for your cedar shingles siding. Start by inspecting the surface for any damage or loose shingles; addressing these issues first will make your cleaning more effective. Next, clear the area of furniture and plants, ensuring they’re protected from cleaning solutions. Consider using tarps or plastic sheets for surface protection. Choose the right cleaning techniques based on the level of dirt; you might opt for a gentle scrub or a more robust method, depending on what you find. Finally, gather necessary supplies, like brushes and buckets, to streamline your work. With careful preparation, you’ll set yourself up for a successful cleaning experience.
Tools and Chemical Required
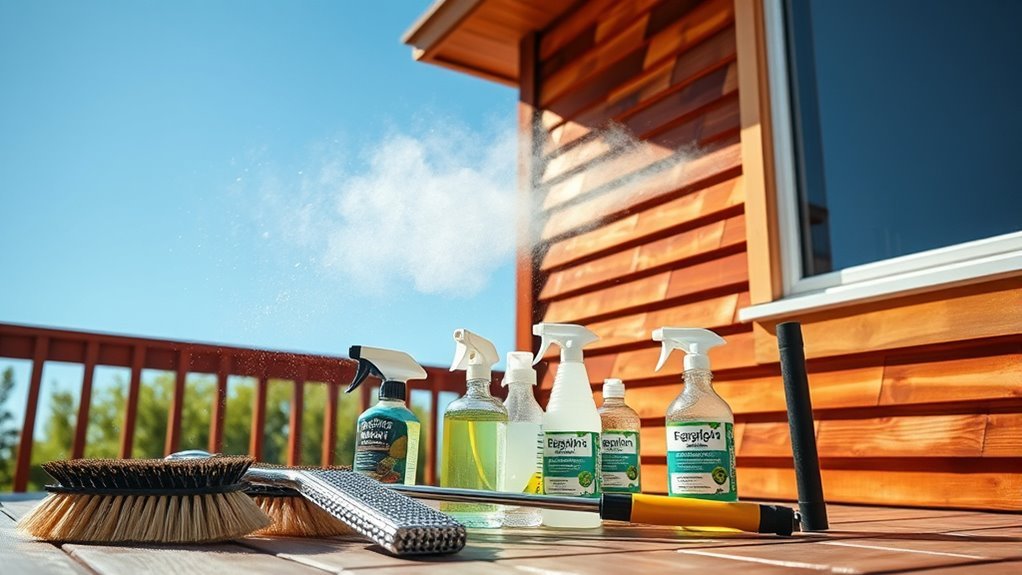
With your cedar shingles siding prepared for cleaning, it’s time to gather the right tools and chemicals to achieve the best results. You’ll need a pressure washer, which will help you efficiently remove dirt and grime. Additionally, selecting appropriate cleaning solutions is vital for maintaining the wood’s integrity. Here’s a simple table to guide you:
| Tool/Chemical | Purpose | Recommended Type |
|---|---|---|
| Pressure Washer | Cleaning dirt | Gas or electric |
| Bleach Solution | Mold and mildew | 50/50 bleach and water |
| Wood Cleaner | Deep cleaning | Biodegradable options |
| Soft Bristle Brush | Scrubbing | Non-metallic |
Gather these essentials, and you’re ready to start your cleaning process effectively! Using non-abrasive cleaners will help preserve the delicate surface of your cedar shingles while ensuring thorough cleaning.
How to Clean:
Step 1: Prepare Your Pressure Washer
- Begin by gathering all necessary equipment, including your pressure washer, eco-friendly cleaning solution specifically designed for wood surfaces, and appropriate safety gear (gloves, goggles, etc.).
- Fill the pressure washer with water, ensuring it is connected to a power source if needed.
- Attach the eco-friendly cleaning solution to the pressure washer, following the manufacturer’s instructions for dilution if required.
Step 2: Adjust Pressure Settings
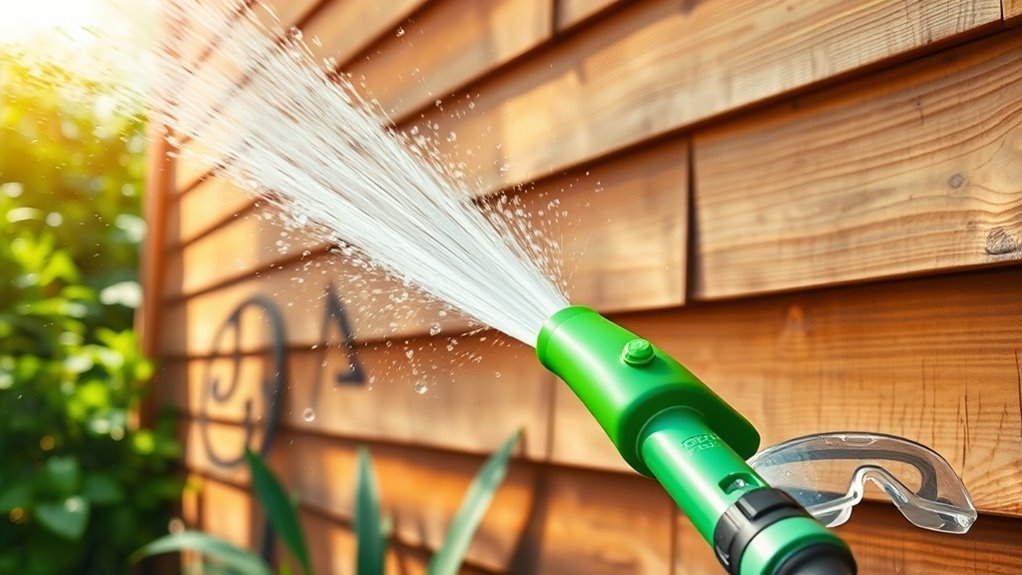
- Set the pressure of your washer to a range of 1,200 to 1,500 psi. This level is effective for cleaning without causing damage to the cedar shingles.
- Test the pressure on a small, inconspicuous area to ensure it is suitable for your specific shingles.
Step 3: Begin Cleaning from the Top
- Start the cleaning process at the top of the shingles and work your way down. This method prevents water from being forced underneath the shingles, which could lead to damage or mold growth.
- Hold the nozzle approximately 12 inches away from the surface to maintain a safe distance while effectively cleaning.
Step 4: Use a Sweeping Motion
- Employ a gentle sweeping motion with the nozzle as you move down the shingles. This technique helps lift dirt and debris without causing harm to the wood.
- Pay attention to areas that may have accumulated more grime or discoloration.
Step 5: Target Mold and Mildew
- Inspect the shingles for areas with visible mold or mildew. These spots may require additional attention.
- If necessary, perform a second pass on these areas using the same sweeping motion to ensure thorough cleaning.
Step 6: Rinse Thoroughly
- After cleaning, it is crucial to rinse the shingles thoroughly with clean water. This step will remove any lingering cleaning solution and debris.
- Continue rinsing from the top down to ensure all cleaning agents are washed away effectively.
Step 7: Inspect and Allow to Dry
- Once the rinsing is completed, inspect the shingles for any remaining dirt or spots that may need further attention.
- Allow the shingles to air dry completely before considering any additional treatments, such as sealing or staining, to protect the wood.
Step 8: Clean Up
- After the cleaning process, disconnect the pressure washer and clean any attachments.
- Store the equipment properly and dispose of any leftover cleaning solution according to local regulations to respect the environment.
Safety Consideration
Cleaning cedar shingles can be an effective way to maintain their appearance and longevity, but it’s important to prioritize safety throughout the process. Here are some key safety considerations to keep in mind:
Cleaning cedar shingles enhances their beauty and lifespan, but safety should always come first.
- Wear safety gear: This includes gloves, goggles, and a mask to protect against dust and chemicals.
- Handle chemicals with care: If you’re using cleaning solutions, read the labels and follow the instructions closely.
- Work in a ventilated area: Guarantee there’s good airflow to minimize inhalation of fumes from cleaning agents.
- Use ladders safely: If you’re working at heights, make sure your ladder is stable and someone is nearby to assist.
Frequently Asked Questions
How Often Should I Clean Cedar Shingles Siding?
You should clean your cedar shingles siding at least once a year to maintain their beauty and longevity. If you live in a humid area, consider doing it every six months. Following these frequency guidelines will help prevent mold and mildew buildup. Don’t forget to incorporate maintenance tips like using a gentle cleaner and a soft brush. Keeping your shingles clean not only enhances your home’s look but also allows you the freedom to enjoy it worry-free!
Can I Pressure Wash Cedar Shingles Safely?
Yes, you can pressure wash cedar shingles safely if you use the right pressure wash techniques. Keep the pressure low, ideally below 1500 PSI, to avoid damaging the wood. Use a fan tip nozzle and maintain a distance of at least 12 inches. Always follow cedar maintenance tips by rinsing thoroughly and letting the shingles dry completely afterward. This approach helps maintain the wood’s integrity while keeping your siding looking fresh and clean.
What Is the Best Season for Cleaning Cedar Shingles?
You might wonder when’s the best time to tackle your cedar shingles. Spring cleaning is ideal for seasonal maintenance, as the weather’s mild and encourages thorough work without the summer heat. Plus, it gives your shingles a fresh start after winter’s wear. By cleaning in spring, you can spot any damage early, ensuring your home stays protected. So, roll up your sleeves and embrace the freedom of a well-maintained exterior!
How Do I Prevent Mold on Cedar Shingles?
To prevent mold on cedar shingles, focus on moisture control. Guarantee proper drainage around your home and keep gutters clean to avoid water buildup. Trim back overhanging branches to maximize sunlight exposure, which helps keep shingles dry. Applying a mildew-resistant sealant can also provide mold prevention. Regularly inspect your shingles for signs of moisture or mold, addressing any issues promptly to maintain the integrity of your cedar siding and enjoy the freedom of a beautiful home.
Can I Paint Cedar Shingles After Cleaning?
Yes, you can paint cedar shingles after cleaning, but it’s crucial to use the right painting techniques for the best results. First, make certain the shingles are completely dry and free of debris. Consider using a primer designed for wood preservation to protect the cedar from moisture and UV damage. Using a high-quality exterior paint will enhance durability and maintain the shingles’ natural beauty, giving you that freedom to enjoy your home’s aesthetics.


