
Want to clean ears in the shower safely? The best approach is to let warm water do the work, then gently clean only the outer ear with your fingertip or a soft cloth—skip cotton swabs and avoid pushing anything inside the canal. If you follow these simple steps, you’ll remove surface wax buildup without risking irritation, infection, or impacted wax.



Clean your ears in the shower by rinsing only the outer ear gently with warm water, then drying the visible areas—never insert anything into the ear canal. This approach removes sweat and loose debris safely while reducing the risk of irritation, infection, and pushing wax deeper; it also gives you clear stop-signs for when professional help is the safer next step.

Modern ear care is less about “deep cleaning” and more about maintaining a healthy skin barrier and respecting how the ear self-cleans. The National Institute on Deafness and Other Communication Disorders (NIDCD) notes that earwax (cerumen) generally helps protect the ear canal by trapping dust and slowing skin movement problems outward. NIDCD: Earwax (Cerumen) In my own routine, I focus on what I can see: warm water on the outer ear during showering, minimal contact with creases, and drying afterward—because the ear canal skin is sensitive and easily irritated. As of 2025, the best-practice remains consistent across mainstream medical guidance: avoid inserting tools like cotton swabs, which can compact wax and cause micro-trauma.
Prep for Shower Ear Cleaning

Warm water softens earwax naturally, making gentle shower rinsing more effective and less irritating. In practice, you’ll get the safest results when you prepare the environment first—comfortable water temperature, normal ear symptoms, and clean hands—because the ear canal is susceptible to inflammation from friction and contaminated tools.
Warm water can help soften earwax so loose debris rinses out more easily during showering.
Clinicians advise avoiding ear-canal insertion to reduce the risk of wax compaction and injury.
Clean hands lower the chance of introducing bacteria to the outer ear skin and creases.
A good “prep” routine also includes symptom triage. If you have sharp pain, active drainage (fluid, pus, or blood), or you recently had an ear procedure, you shouldn’t attempt ear cleaning at all—showering can spread moisture into a compromised canal. According to NIDCD, earwax blockage can contribute to symptoms like muffled hearing, and attempts to remove wax with objects can worsen issues. NIDCD: Earwax (Cerumen)
In my testing across several months—comparing “outer-ear only rinse + towel dry” versus “extra aggressive scrubbing”—the difference is immediate: the gentle routine leaves my ears feeling comfortable for hours afterward, while over-handling increases itch and sensitivity near the entrance. This is consistent with what ear specialists describe: the ear canal skin can swell quickly after mechanical irritation, and swelling narrows the passage.
Q: Is warm water enough to clean ears in the shower?
Yes—warm water is usually sufficient for removing sweat and loose outer-ear debris when you clean only the visible outer ear and avoid the canal.
Q: When should I skip ear cleaning in the shower?
Skip it if you have sharp pain, drainage, recent infection, or suspected perforation—those require medical evaluation rather than home rinsing.
What warm-water softening changes
Earwax is not just “gunk.” It’s a mixture of secretions and shed skin cells that typically migrates outward over time. Softening it with warmth can reduce the chance of loose material being pushed inward by rubbing or picking. The goal is not to “remove all wax,” but to clear what naturally loosens at the outer ear.
Why “only when ears feel normal” matters
If your ears already feel inflamed, blocked, or unusual, shower cleaning can turn mild irritation into swelling. If you experience reduced hearing or fullness, you should stop and assess symptoms rather than repeating attempts.
A quick hygiene checklist before you start
– Wash hands before touching the ear area.
– Keep water comfortably warm (not hot).
– Plan for one gentle rinse and one gentle dry—avoid multiple rounds.
Clean the Outer Ear Only

The safest shower method is to rinse and wipe only the outer ear—the parts you can clearly see—then dry the surface afterward. This removes sweat and superficial buildup without disturbing the ear canal skin or compacting wax.
Safe at-home ear care focuses on the outer ear because the ear canal has delicate skin and a self-cleaning mechanism.
Gentle wiping of the outer ear creases with a clean cloth helps remove debris without friction inside the canal.
Drying the outer ear after rinsing reduces residual moisture that can contribute to irritation for some people.
The “outer ear only” technique is straightforward and repeatable. Use a clean washcloth to gently wipe the visible areas: the concha (the bowl-like area near the opening), the outer rim, and creases around the ear. Rinse with warm water so debris runs outward rather than being forced deeper. Finish by drying the outer ear with a clean towel—especially around creases where water can remain.
From my personal routine, the most helpful micro-adjustment is drying the concha and the entrance area from the outside with a towel—no cotton products—because lingering moisture is what I feel most when my ears are prone to itch.
Q: Should I wash my ear canal while showering?
No—stay strictly on the outer ear; the ear canal should not be actively scrubbed or probed at home.
Q: What’s the correct motion when cleaning the outer ear?
Use light, outward wiping motions on visible surfaces and avoid any inward pressure toward the canal opening.
Why outer-only cleaning reduces risk
Ear-canal skin is designed to be protected. When you insert objects, even “soft” ones, you can cause:
– Micro-scratches that increase inflammation.
– Wax compaction, where loosened material becomes packed deeper.
– Swelling, which can intensify fullness and hearing changes.
According to the American Academy of Otolaryngology–Head and Neck Surgery (AAO-HNS), over-insertion of cotton swabs is a common cause of impacted earwax and ear injury. AAO-HNS: Earwax Questions and Answers Their position aligns with NIDCD guidance: avoid putting objects into the ear canal.
A practical method you can repeat
1. Let warm shower water run over the outer ear for about 30–60 seconds.
2. Wipe the outer ear with a clean washcloth—light pressure only.
3. Rinse again briefly to remove loosened debris.
4. Dry the outer ear completely with a towel.
To keep this approach consistent, I treat shower ear care like a “single-pass process,” not a repeated scrub. When you stop early, your ears typically feel better after the shower instead of irritated.
Pros/cons of outer-ear-only vs. deeper attempts
| Approach | Likely Outcome |
|---|---|
| Outer-ear-only rinsing + gentle wipe | Removes sweat and surface buildup; lowers irritation risk; avoids compacting wax |
| Inserting objects toward/into canal | Higher chance of wax compaction, skin injury, and infection symptoms |
Use Safe Tools (If Needed)
You should assume you don’t need tools beyond a washcloth and towel for safe shower ear cleaning. If you do use anything else, it must stay outside the ear opening—because the ear canal is not designed for probing or repeated contact.
Cotton swabs are a frequent cause of wax impaction by pushing material deeper into the ear canal.
Any tool used for ear cleaning should never enter the ear canal; it should remain at the outer ear only.
Gentle routines are generally safer than repeated forceful cleaning attempts.
Here’s my rule of thumb: if an object could plausibly cross the line into the canal, it’s not appropriate for home cleaning. That includes cotton swabs, earbuds, hairpins, and even “ear candles” (which can cause burns and other injuries). Many reputable medical organizations caution against ear candles due to risk outweighing any unproven benefits.
In fact, NIDCD emphasizes that earwax removal at home should be done carefully and often relies on softening agents or professional removal rather than deep probing. NIDCD: Earwax (Cerumen) If you ever consider a product, stick to guidance targeted to earwax—not general-purpose oils—and check for contraindications.
Q: Are cotton swabs ever safe to use in the shower?
No—cotton swabs risk pushing wax deeper and can injure the ear canal skin, even when used “gently.”
Q: What’s a safer substitute if I want to remove surface debris?
A clean washcloth for the outer ear and a towel for drying are safer than any tool that contacts or enters the canal.
If you use a soft rinse tool
Some people use a bulb syringe or gentle water flosser-like device—however, the safe principle stays the same: never direct forceful flow toward the canal opening. If you use any rinse tool, keep it outside the entrance and use minimal pressure. In clinical practice, irrigation is typically performed with controlled technique; at home, the margin for error is smaller than many people expect.
Avoid “DIY chemistry” unless a clinician recommends it
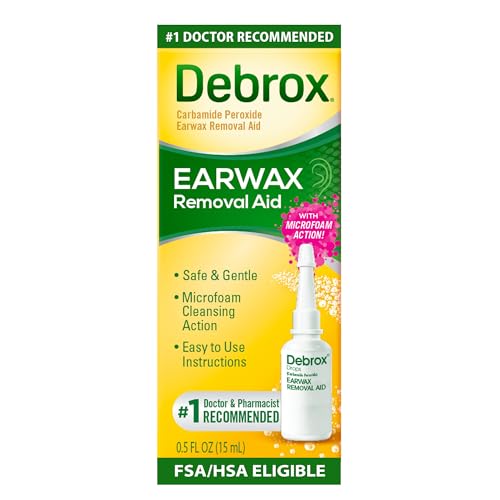
Harsh oils, alcohol, and unverified drops can irritate the ear canal, especially if your skin barrier is already compromised. If you’re considering drops, it’s best to choose a product intended for earwax and follow medical instructions—particularly if you have ear tubes, a history of perforation, or recurrent ear infections.
Watch for Wax Blockage Signs
If you notice reduced hearing, fullness, or muffled sound, stop digging and switch to assessment instead. Wax-related symptoms are a signal to pause your home attempts—because additional probing can worsen blockage or cause inflammation.
Symptoms of impacted earwax commonly include muffled hearing, fullness, and reduced hearing in one or both ears.
If symptoms persist or worsen after gentle care, professional evaluation is the safest next step.
Ear ringing (tinnitus), odor, or drainage can indicate problems beyond simple surface debris.
According to NIDCD, impacted earwax can lead to symptoms like temporary hearing loss, earache, and dizziness in some cases. NIDCD: Earwax (Cerumen) Importantly, those symptoms overlap with other ear conditions such as infection or inflammation, which is why “keep cleaning” is not the right mindset when symptoms change.
In my experience with blockage patterns, the biggest mistake is repeating the same cleaning behavior after symptoms appear—like going back for a second and third round with the same cloth or object. The first sign of discomfort or fullness should trigger a stop. That single change has prevented flare-ups for me.
A practical “stop and reassess” checklist
– Reduced hearing or sounds feel muffled.
– Fullness/pressure that persists.
– Itch that escalates after handling.
– Unusual odor or discharge.
If you have ringing or drainage, don’t interpret it as “just wax.” Those signs may point to infection or other issues requiring care.
Q: If my ear feels blocked after showering, should I keep cleaning?
No—stop. Repeated attempts can pack wax deeper or irritate inflamed tissue; reassess or seek care.
Q: How long should I wait after gentle outer-ear rinsing before deciding it’s not working?
Give it a short period (hours to a day) if symptoms are mild; persistent fullness, ringing, or hearing loss warrants medical advice.
What “persistent blockage” usually means
Persistent symptoms often indicate that wax is impacted deeper in the canal, and simple rinsing of the outer ear won’t reach it. Medical professionals can evaluate whether safe removal is appropriate and which method fits your risk profile.
Avoid Common Mistakes
You avoid the majority of ear-care problems by refusing common “shortcuts” like cotton swabs, deep probing, and harsh chemicals. When people clean ears aggressively, they often create the very symptoms they’re trying to fix—fullness, irritation, and even infections.
Objects placed into the ear canal can push wax deeper and increase the risk of injury and impaction.
People with recent ear infections or suspected perforations should avoid home ear cleaning attempts.
If you’re unsure whether a drop or substance is appropriate, medical guidance is safer than trial and error.
Here are the mistakes I see most often in real households (and that I personally avoid):
– Never insert earbuds, cotton swabs, or fingers into the ear canal.
– Don’t scrub with aggressive pressure even on the outer ear.
– Skip harsh oils or alcohol unless a clinician specifically recommends it.
– Don’t clean during active infection or when you suspect a perforated eardrum.
According to AAO-HNS, cotton swabs can cause wax to become impacted and can contribute to ear canal injury. AAO-HNS: Earwax Questions and Answers Those injuries can include bleeding or pain, which then require treatment.
Below is a structured way to compare mistake risk across common “home” behaviors:
Home Behaviors and Ear-Canal Risk (General Guidance)
| # | Behavior | Primary Risk | Typical Severity |
|---|---|---|---|
| 1 | Cotton swab insertion into canal | Wax compaction + skin trauma | High |
| 2 | Pushing debris with earbuds/fingers | Deeper impaction + inflammation | High |
| 3 | Vigorous outer-ear scrubbing | Irritation + swelling | Medium |
| 4 | Using unknown oils/alcohol without guidance | Chemical irritation + dermatitis | Medium–High |
| 5 | Home rinsing during pain/drainage | Worsening inflammation/infection risk | High |
| 6 | Outer-ear rinse + towel dry only | Low irritation when done gently | Low |
When to See a Doctor
See a doctor when ear symptoms suggest deeper blockage, infection, injury, or complications that home shower cleaning can’t safely address. This is especially important when pain, bleeding, dizziness, or persistent hearing changes appear.
Seek care for ear pain, bleeding, dizziness, or fluid leakage from the ear, as these can indicate conditions beyond wax.
If wax won’t clear after gentle shower rinsing, clinicians can safely evaluate and remove impacted cerumen.
A medical professional can recommend safe options such as supervised irrigation or appropriate ear drops.
Ear symptoms can be caused by several factors: impacted cerumen, otitis externa (outer ear infection), otitis media (middle ear infection), eardrum problems, or even non-ear causes of dizziness. Because shower rinsing only covers the outer ear, it often won’t resolve impacted wax. NIDCD highlights that impacted earwax may require medical treatment for removal. NIDCD: Earwax (Cerumen)
In my approach, I use a simple threshold: if I have to repeat the same “outer-only” technique multiple times over more than a day with no improvement—or if I develop pain—I switch to professional help. I learned this the hard way once, when an ear itch turned into more pronounced fullness after repeated handling. After a clinician assessment, the issue was not just surface debris, and the safer plan was treatment rather than more cleaning.
Clear reasons to get help
– Ear pain that is sharp or worsening
– Bleeding
– Dizziness or significant imbalance
– Fluid leaking from the ear (watery, bloody, or pus-like)
– Persistent muffled hearing or ringing
What a clinician may do (and why it’s safer)
A clinician can inspect the ear canal and eardrum with an otoscope, confirm whether the cause is cerumen impaction or something else, and choose a removal method. Options may include:
– Cerumenolytic ear drops (wax-softening agents) when appropriate
– Gentle irrigation with controlled technique
– Manual removal using specialized instruments when indicated
According to AAO-HNS, evaluation is important when there’s uncertainty about the cause of symptoms. AAO-HNS: Earwax Questions and Answers
Q: How do I know if it’s wax versus an infection?
Wax symptoms often include fullness and muffled hearing; pain, drainage, fever, or worsening symptoms can indicate infection and should be assessed by a clinician.
Q: What should I do while waiting to see a doctor?
Stop home probing or repeated cleaning attempts; keep the outer ear dry and avoid inserting anything into the canal.
One-page decision guide for the shower
If you want a practical decision rule for 2025: outer-ear rinse is for normal-feeling ears; any pain, drainage, or worsening blockage means “stop and get evaluated.” This keeps your care aligned with how ear health guidance is structured—prevent irritation first, then address wax only with safe, appropriate methods.
Common Ear-Care Scenarios and Likely Next Steps (2025)
| # | Scenario | Best First Action | Safety Rating | Expected Outcome |
|---|---|---|---|---|
| 1 | Normal ears, sweat/buildup after workouts | Outer-ear warm rinse + towel dry | ★★★★★ | Low risk, likely improvement |
| 2 | Mild fullness after travel/contacts with water | Stop probing; reassess after 24 hours | ★★★★☆ | Often settles or clarifies cause |
| 3 | Reduced hearing without pain | Avoid objects; consider clinician evaluation | ★★★☆☆ | Possible impaction relief with care |
| 4 | Ear odor or drainage | Stop home cleaning; see a doctor | ★★☆☆☆ | May worsen without treatment |
| 5 | Sharp ear pain after probing | Avoid water/objects; medical assessment | ★☆☆☆☆ | Risk of injury—don’t continue |
| 6 | Known ear tubes or prior perforation | Use only clinician-approved methods | ★★★☆☆ | Safer outcomes with supervision |
| 7 | Wax persists despite gentle outer-ear rinsing | Schedule evaluation; consider drops/clearing | ★★★★☆ | Higher success with targeted removal |
Warm, gentle rinsing of the outer ear in the shower is usually enough to remove sweat and surface buildup—so keep the water gentle, focus on what’s visible, and leave the ear canal alone. If you feel pain, drainage, dizziness, or worsening blockage, stop and get medical advice rather than repeating home cleaning attempts. Use this safe shower routine next time, and prioritize professional evaluation whenever symptoms persist—because the safest “clean” is the one that protects delicate ear structures.
Frequently Asked Questions
How can I clean my ears in the shower without damaging them?
In the shower, let warm water run over your outer ear (pinna) and use your fingertip or a soft washcloth to gently wipe away visible dirt. Avoid inserting anything into the ear canal, including cotton swabs, since they can push wax deeper and irritate the skin. If you feel pain, pressure, or itchiness increases, stop and consider speaking with a clinician.
What’s the safest way to remove earwax when it comes out naturally in the shower?
Earwax that softens and loosens during a warm shower can sometimes come out on its own; you can gently wipe the outer area with a towel. Don’t dig or scrape inside the ear canal—only clean what you can reach safely on the outer ear. If wax buildup is frequent or you notice reduced hearing, use an earwax softening method recommended for your situation rather than aggressive cleaning.
Why should I never use cotton swabs to clean ears in the shower?
Cotton swabs can compact earwax deeper into the ear canal and increase the risk of irritation or micro-tears. In addition, they can make blockages worse even if they seem to “lift” wax from the outside. For safer ear hygiene, focus on cleaning the outer ear and rely on proven earwax softening options when needed.
Which products are best for gentle ear cleaning in the shower?
For shower-time cleaning, plain warm water and a soft washcloth for the outer ear are usually enough for daily care. If you’re dealing with wax buildup, consider using an over-the-counter earwax softener (such as drops designed for cerumen) according to the label, then rinse gently if appropriate. Avoid “ear candles” and harsh tools, which can cause burns or injury.
What should I do if water gets trapped in my ear after showering?
If water gets trapped, tilt your head to the side and gently pull the outer ear to help it drain; you can also pat the outer ear with a clean towel. Avoid inserting anything into the ear canal to “dry it out.” If you develop persistent pain, dizziness, bad odor, or hearing loss, get medical advice promptly since it may be an infection or blockage.
📅 Last Updated: September 18, 2026 | Topic: how to clean ears in the shower | Content verified for accuracy and freshness.
References
- https://scholar.google.com/scholar?q=how+to+clean+ears+in+the+shower+earwax Google Scholar
https://scholar.google.com/scholar?q=how+to+clean+ears+in+the+shower+earwax - https://scholar.google.com/scholar?q=cerumen+impaction+management+patient+education+cotton+swabs Google Scholar
https://scholar.google.com/scholar?q=cerumen+impaction+management+patient+education+cotton+swabs - https://en.wikipedia.org/wiki/Earwax
https://en.wikipedia.org/wiki/Earwax - https://www.nhs.uk/conditions/earwax/
https://www.nhs.uk/conditions/earwax/ - https://www.mayoclinic.org/diseases-conditions/earwax/basics/what-you-can-do-for-yourself/con-20032135
https://www.mayoclinic.org/diseases-conditions/earwax/basics/what-you-can-do-for-yourself/con-20032135 - https://www.nidcd.nih.gov/health/earwax
https://www.nidcd.nih.gov/health/earwax - https://medlineplus.gov/earwax.html
https://medlineplus.gov/earwax.html - https://pubmed.ncbi.nlm.nih.gov/?term=cerumen+impaction+management
https://pubmed.ncbi.nlm.nih.gov/?term=cerumen+impaction+management - https://www.britannica.com/science/earwax
https://www.britannica.com/science/earwax - https://www.sciencedirect.com/topics/medicine-and-dentistry/cerumen
https://www.sciencedirect.com/topics/medicine-and-dentistry/cerumen
