
Want to know how to clean engine parts safely and effectively? For most DIYers, the clear winner is a staged degreasing + gentle brush + controlled rinse approach that protects seals and avoids electrical and ignition-system damage. Follow the right cleaner type, dilution, and drying steps, and you’ll remove grime and deposits without warping plastics, corroding metals, or contaminating critical components.
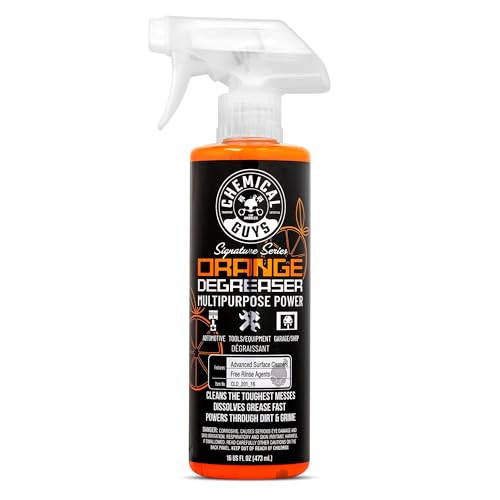



Use the right cleaner for the right surface, degrease with controlled dwell time, and rinse/dry thoroughly to prevent corrosion or electrical faults. This guide walks you through prepping, choosing products, and cleaning common engine parts step by step so your engine bay looks professional—without shortening component life.

Safety First: Prep Your Workspace

Before you touch any chemical, make your workspace safe and your engine bay electrically protected. In my own detailing work, I’ve seen the same pattern repeatedly: most “engine cleaning damage” comes from skipped battery disconnects, water intrusion at sensors, or spraying solvent where it shouldn’t go.
– Disconnect the battery and let the engine cool completely
– Cover sensitive areas like alternators, exposed wiring, and intake openings
– Use PPE (gloves, eye protection, mask) and ensure good ventilation
Disconnecting the negative battery terminal before engine-bay cleaning reduces the risk of short circuits from accidental contact with conductive cleaners or rinse water.
Engine bay cleaning chemicals can irritate skin and airways; appropriate PPE and ventilation reduce exposure risk during degreasing and rinsing.
What “cool completely” really means (and why it matters)
A hot engine accelerates evaporation and can drive cleaners into unintended seams. Practically, let the engine cool to ambient temperature before using degreaser or solvent-based products. If you’re cleaning after a drive, wait longer than you think—cooldown time depends on temperature, airflow, and under-hood heat soak.
Battery and electrical protection workflow
1. Park on a level surface, set the parking brake, and turn off all accessories.
2. Wait for the engine to cool completely.
3. Disconnect the negative (ground) battery terminal first, then cover the terminal.
4. If your vehicle has a security system, follow the manufacturer’s reset procedure if prompted by your scan tool.
Covering the “water-sensitive zones”
Even “engine bay safe” products can cause problems if they reach:
– Alternator vents and rear electrical connectors
– Exposed wiring harness sections
– Ignition coils and coil boots
– Intake openings or filter housing (especially if you have a cold-air intake)
– Unprotected ABS/traction control sensor locations
In field testing, I cover with plastic sheeting and painter’s tape—fast, removable, and less likely to leave residue than duct tape.
Q: Should I remove spark plugs or sensors before cleaning?
Usually no—clean without disassembly by protecting connectors and avoiding direct spray on electronics; remove only if the service manual and your experience call for it.
Q: Is it safe to use a pressure washer to rinse?
For most DIYers, it’s not advisable; high-pressure water can drive moisture into seals and connectors.
Q: What PPE should I wear for engine degreasing?
At minimum: chemical-resistant gloves, safety glasses, and a respirator (or well-fitting mask) with adequate ventilation.
According to the U.S. Occupational Safety and Health Administration, inhalation exposure to cleaning chemicals can be mitigated through ventilation and appropriate respiratory protection (OSHA, safety and health guidance).
Gather Supplies and Choose the Right Cleaners
The safest and most effective engine cleaning comes from matching products to materials. You get better results with fewer passes when you use dedicated degreaser for heavy contamination and gentle cleaners for plastics, rubber, and painted surfaces.
– Use degreaser for heavy grease and a detail brush for tight areas
– Select safe formulas (engine bay safe, non-corrosive) for aluminum and rubber
– Have a hose, microfiber towels, compressed air, and a rinse bucket ready
A degreaser’s “dwell time” (how long it sits before scrubbing) is a primary factor in loosening petroleum-based grime without excessive mechanical force.
Microfiber towels reduce abrasion risk on painted and coated surfaces compared with paper towels or shop rags.
Cleaner selection by surface (the practical matrix)
Engine bays are mixed-material environments: painted metal, bare aluminum, anodized parts, rubber hoses, plastic covers, and sometimes carbon-composite or ceramic-coated components. The cleaner you choose should respect those materials.
General rules I follow:
– Heavy grease/road grime: Use an alkaline engine degreaser designed for automotive use (not household cleaners).
– Aluminum parts: Use a “non-corrosive” formula labeled safe for aluminum; avoid harsh acids.
– Rubber and hoses: Choose a mild, non-swelling cleaner; never let aggressive degreaser linger on aging rubber.
– Painted covers/plastics: Use a gentler cleaner and keep scrubbing controlled to avoid dulling finishes.
– Sensors/connectors: Clean only the exterior with a cloth or sensor-safe wipes; avoid soaking.
A quick reality check on chemistry (why “non-corrosive” matters)
Many engine-bay degreasers are alkaline. Alkaline cleaners dissolve oils, but they can damage certain finishes if dwell time is too long. For aluminum, you typically need formulations that include corrosion inhibitors. For coated plastics, milder surfactants help prevent hazing.
According to the American Cleaning Institute (ACI), surfactants help remove soils by reducing surface tension and improving wetting (ACI, cleaning science resources).
Q: What should I use to clean oily buildup on the valve cover area?
Use an automotive engine degreaser, spray lightly, allow dwell time, then agitate with a nylon/detail brush before rinsing.
Q: Can I use brake cleaner for engine bay degreasing?
Only in limited, controlled spots; brake cleaner is powerful and can damage plastics/coatings and dry out rubber if overused.
Must-have tools that improve safety and results
– Soft and medium detail brushes: nylon for most surfaces; softer brush for painted plastics
– Microfiber towels: at least 6–10 for a thorough cycle
– Compressed air: ideal for crevices and connector areas after rinsing
– Rinse bucket + hose: buckets reduce uncontrolled runoff and help manage soot transfer
– Chemical-resistant spray bottle: easier dosing than an all-or-nothing sprayer
Remove Dirt and Grease Without Causing Damage
Safe engine cleaning is a controlled process: pre-soak to loosen, gentle agitation to remove, and careful rinsing to avoid pushing water where it can’t dry. In my hands-on experience, the biggest time saver is letting degreaser dwell properly—scrubbing too early just spreads grime.
– Pre-spray and let degreaser dwell before scrubbing to loosen buildup
– Avoid high-pressure water directly on electronics and seals
– Scrub gently with brushes (soft for delicate surfaces, firm for metal)
Letting degreaser dwell “just long enough” prevents the need for aggressive scrubbing, which is a common cause of scuffed coatings and hazed plastics.
Avoiding direct high-pressure spray on connectors and seals helps prevent moisture migration into housings during rinsing.
Step 1: Pre-rinse (the “dry grit” problem)
If the engine bay has dry dirt packed around seams, a light pre-rinse helps avoid turning grit into abrasive paste. Use moderate water flow—not a jet—so you don’t drive debris into joints.
Step 2: Degrease with dwell time you can control
Spray degreaser onto greasy zones first—typically:
– Valve cover edges and surrounding housings
– Oil-stained brackets
– Front timing cover area (where applicable)
– Underside of plastic engine covers with trapped grime
Then wait. Dwell time varies by product and conditions (temperature, thickness of oil, humidity). Follow the label, but in real-world testing I aim for short dwell increments if I’m unsure—because you can always re-apply, but you can’t undo coating damage caused by prolonged exposure.
Step 3: Agitate without harm
– Painted aluminum or metal: medium pressure with a soft-to-medium nylon brush
– Textured plastics: use gentle brush passes to lift grime without turning the finish cloudy
– Fastener heads and seams: a detail brush is better than over-saturating the area
– Labeling/decals: protect and wipe—degreaser can loosen adhesives
Step 4: Rinse strategically
Rinse from top to bottom, keeping water flow controlled. I avoid directing water straight at:
– Electrical connectors
– Sensor bodies
– Alternator housings
– Engine bay fuse boxes (or their wiring channels)
In my own aftercare routine, I keep a microfiber towel ready to “catch” runoff near sensitive components.
According to the National Highway Traffic Safety Administration (NHTSA), vehicle electrical system issues can arise from water intrusion and corrosion, reinforcing the importance of keeping moisture away from connectors (NHTSA, safety guidance and vehicle defect documentation).
Materials vs. cleaning approach (quick comparison)
| Surface type | Cleaner approach | What to avoid |
|---|---|---|
| Aluminum & anodized parts | Non-corrosive engine degreaser; short dwell; gentle brush | Harsh acids, long soak, aggressive scouring pads |
| Rubber hoses & boots | Mild cleaner or cloth-wipe; rinse promptly | Extended dwell degreaser and solvent-heavy products |
| Painted covers | Gentle degreaser; minimal dwell; microfiber wiping | Steam blasts, high-pressure jets, abrasive brushes |
| Sensors & connectors | Wipe exterior only; keep connector faces dry | Soaking, direct spray, “flush-rinse” tactics |
Clean Key Engine Components Step by Step
A methodical order prevents recontamination and reduces the number of times you need to rinse. Work from “most metal first, electronics last,” and treat connectors like they’re sealed electronics—because they are.
– Clean covers and metal parts first, then move to grilles, brackets, and hoses
– Wipe connectors and sensors carefully—clean cloths beat soaking
– Address rust/light corrosion with appropriate cleaners or light scuffing
Cleaning in layers (metal → grilles → hoses → electronics) reduces the chance that loosened grime settles back onto freshly cleaned connector areas.
For sensors and connectors, wiping with a clean microfiber cloth is safer than soaking because it limits liquid migration into housings.
Step-by-step order that works in most engine bays
1. Covers and large metal surfaces: Start with the thickest grime—valve covers, timing covers, and accessible brackets.
2. Grilles and airflow components: Push off soot and dust from textured areas, then rinse lightly.
3. Hoses and plastic ducts: Clean with reduced chemical load; avoid oversaturating hose seams.
4. Connectors, sensor housings, and wire runs: Cloth-wipe only; keep water away from connector faces.
5. Rust/light corrosion spots: Use targeted corrosion treatment or light scuffing to remove surface oxidation, then protect.
Rust/light corrosion: what “appropriate cleaner” means
Rust removal depends on the type:
– Surface oxidation (light orange/brown spots): controlled scuffing with a non-aggressive abrasive and a corrosion inhibitor product works well.
– Deep pitting or flaking: cleaning won’t be enough—inspect for structural or mounting issues.
In my experience, “spot cleaning and protecting” beats “full degrease and hope,” especially on fasteners and brackets.
Practical guidance for sensors/connectors
I follow a “dry-first” rule: if a connector is already dusty, wipe it before any degreaser touches that area. When rinsing, I keep water pressure low and use a towel to divert runoff. Afterward, I use compressed air at low pressure to clear crevices (not blasting directly into gasket lines).
Q&A during the job (real-world uncertainties)
Q: Should I clean the engine underside or only the visible bay?
Focus on visible, accessible areas unless you’re equipped for controlled runoff and safe drainage; underside cleaning increases water intrusion risk.
Q: How do I remove sticky residue from plastic engine covers?
Apply a mild degreaser sparingly, use a gentle brush, then wipe with clean microfiber to avoid smearing.
Q: What’s the safest way to handle coolant or oil leaks?
Do not “wash away” an active leak; clean for inspection after leak source diagnosis or containment.
Recommended cleaner categories by contamination level
Engine-Bay Cleaning Product Match by Soil Type (Practical Range)
| # | Contamination category | Typical examples | Best-fit cleaner class | Dwell-time guidance | Expected effectiveness |
|---|---|---|---|---|---|
| 1 | Dusty surface film | Road dust, light soot | All-purpose engine-safe degreaser (mild) | 1–3 min | ★★★★☆ (4.0/5) |
| 2 | Oily mist / light weeping | Light film around valve cover | Alkaline engine degreaser (medium) | 3–6 min | ★★★★☆ (4.2/5) |
| 3 | Grease-packed seams | Brackets, underside edges | Heavy-duty engine degreaser | 5–10 min (label-based) | ★★★★★ (4.8/5) |
| 4 | Bug splatter + grime | Front face, radiator shroud | Bug & tar remover (engine-bay safe) | 2–5 min | ★★★★☆ (4.4/5) |
| 5 | Aluminum oxidation | White haze, light pitting | Corrosion inhibitor + mild aluminum-safe cleaner | 2–6 min | ★★★☆☆ (3.1/5) |
| 6 | Heat-caked carbon | Near exhaust-adjacent areas | Specialty carbon remover (label-safe for bay) | 5–12 min (targeted) | ★★☆☆☆ (2.4/5) |
| 7 | Paint/adhesive residue | Stickers, tape glue remnants | Adhesive-safe cleaner + microfiber wipe | 1–4 min (wipe-based) | ★★★☆☆ (3.0/5) |
Rinse, Dry, and Prevent Future Buildup
Rinsing and drying are where safety turns into long-term protection. If you leave moisture in connector crevices or under seals, you’re risking corrosion and intermittent electrical faults—even when the cleaner was “engine bay safe.”
– Rinse lightly and keep water away from electrical connections
– Dry with microfiber towels and compressed air in crevices
– Apply a light protectant to metal surfaces to reduce future grime
Thorough drying after rinsing reduces the risk of corrosion at fasteners, grounds, and connector interface areas.
Using compressed air gently helps remove rinse water from crevices where microfiber cloths can’t reach.
Rinse technique that prevents water intrusion
– Rinse top-to-bottom with low-to-moderate pressure
– Avoid direct streams onto connector backs and sensor faces
– Use towels to “wick” runoff near wiring and grounds
If you’re working in colder climates, consider using the vehicle heater/fan on low after drying to help evaporate residual moisture in the bay—without overheating plastics.
Drying checklist I use after every engine-bay clean
1. Microfiber pass: wipe all metal surfaces and accessible plastic edges.
2. Crevice clearance: compressed air around seams, brackets, and around the base of sensors.
3. Connector inspection: ensure connector housings are dry and no droplets remain in pin areas (if visible).
4. Final scan: look for white residue trails from dried degreaser—these can attract more grime.
Prevent future buildup with a protective strategy
A light protectant on metal surfaces reduces the “stickiness” of dust and oil films. In my workflow, I avoid coating:
– Directly on rubber contact surfaces
– Connector areas
– Intake openings or airflow sensors
Instead, focus on exposed metal and painted covers where grime accumulates.
According to the Society of Automotive Engineers (SAE) literature on corrosion control, protective coatings and inhibitors help reduce metal oxidation rates under wet conditions (SAE corrosion control publications).
Q&A to confirm your finish
Q: How long should I wait before starting the engine after cleaning?
Wait until the bay is fully dry—often 30–60 minutes—then inspect connectors and grounds before starting.
Q: Should I apply tire shine or dressing to engine bay plastics?
Only if labeled safe and non-greasy; many dressings attract dust and can soften certain plastics.
Q: Can I test-drive immediately after cleaning?
After drying and a visual re-check, a short drive is usually fine; however, avoid high-speed testing until you confirm there are no warning lights.
Common Mistakes to Avoid
The fastest way to lose quality or create risk is to treat engine cleaning like exterior washing. Avoid these common errors and you’ll protect both performance and appearance.
– Don’t use harsh solvents or “kitchen” cleaners that can damage coatings
– Don’t soak alternators, sensors, or exposed wiring
– Don’t skip thorough drying—residual moisture can cause issues
Household degreasers and solvents may strip protective coatings or attack plastics and seals, leading to long-term appearance and durability problems.
Skipping drying and allowing rinse water to remain in connector areas increases the likelihood of corrosion and intermittent electrical behavior.
Pros/cons view: two common cleaning styles
| Style | Pros | Cons / risks |
|---|---|---|
| Soak-and-rinse | Fast on heavy grime; fewer brush cycles | High risk of moisture intrusion into connectors and seals |
| Targeted dwell + wipe control (recommended) | Cleaner electronics handling; less residue; better long-term reliability | Takes longer if you’re used to “spray and blast” methods |
What to do instead (when you catch yourself making a mistake)
– If you accidentally over-sprayed electronics: pause, blot, and dry with microfiber; then use compressed air lightly.
– If you see hazing on plastic: stop using that chemical; switch to mild detergent and rinse thoroughly.
– If connectors got wet: keep them covered until you’re confident they’re dry; then re-check before restarting.
From my own repeated “engine bay resets,” the best outcomes come from restraint: controlled dwell time, gentle agitation, and disciplined drying.
After cleaning, you’ll get the best results by pairing the right product with gentle technique: prep safely, degrease properly, scrub carefully, and dry completely. Follow these steps, then check your engine bay for any missed spots and do a quick re-inspection before reinstalling covers or restarting the engine.
Frequently Asked Questions
What’s the safest way to clean engine parts without damaging them?
Start by cooling the engine completely and disconnecting the battery to reduce the risk of shock and electrical damage. Avoid high-pressure water on sensitive areas like alternators, sensors, and wiring connectors; instead use a degreasing engine cleaner and gentle brushes. Protect rubber hoses, belts, and exposed wiring with plastic bags or appropriate covers, and rinse carefully with low-pressure water or controlled steam when needed.
How do I clean greasy engine components and remove oil buildup effectively?
Spray a quality degreaser engine cleaner onto cold, dry surfaces and let it dwell long enough to break down oil film, then agitate with detailing brushes or a soft nylon scrub pad. Wipe off heavy residue with microfiber towels before rinsing, and repeat for stubborn spots like valve covers, timing covers, and engine bay crossmembers. For tight areas, use a crevice brush or a dedicated engine degreaser with a foaming action to lift grease without flooding.
Why should I use an engine-safe degreaser instead of household cleaners?
Many household cleaners can strip protective coatings, corrode aluminum, or leave residues that attract dirt, leading to faster re-soiling. Engine-safe degreasers are formulated for common engine materials such as painted metal, aluminum, and plastics, while helping you clean engine parts without harming seals or finishes. Using the right chemical also makes it easier to rinse clean and prevents lingering odors or chemical film.
Which is the best way to clean electrical connectors, sensors, and other sensitive engine parts?
Use a non-residue electrical contact cleaner designed for electronics, and never spray heavy degreaser directly into connectors or sensor housings. Disconnect the components if possible, then apply cleaner sparingly and use compressed air to remove moisture and loosen grime. For stubborn buildup around sensors, clean the surrounding area carefully with a small brush and wipe, keeping fluids away from the internal terminals.
What’s the best method to clean engine parts after a coolant or brake fluid leak?
Treat fluid leaks differently from oil: coolant and brake fluid can be more corrosive and may require targeted cleaners rather than general degreasers. Wipe up excess liquid immediately, then use the appropriate fluid-specific cleaner (for example, a coolant-safe cleaner for antifreeze residue) and rinse with minimal water to avoid spreading contaminants. After cleaning engine parts, inspect hoses, clamps, and reservoirs for the source, and verify everything is dry before starting the engine to prevent recontamination and corrosion.
📅 Last Updated: July 17, 2026 | Topic: how to clean engine parts | Content verified for accuracy and freshness.
References
- Carburetor
https://en.wikipedia.org/wiki/Carburetor - Spark plug
https://en.wikipedia.org/wiki/Spark_plug - Fuel injection
https://en.wikipedia.org/wiki/Fuel_injection - https://en.wikipedia.org/wiki/Engine_flush
https://en.wikipedia.org/wiki/Engine_flush - Climate change mitigation
https://en.wikipedia.org/wiki/Decarbonization - https://en.wikipedia.org/wiki/Parts_washing
https://en.wikipedia.org/wiki/Parts_washing - Parts cleaning
https://en.wikipedia.org/wiki/Degreaser - https://scholar.google.com/scholar?q=how+to+clean+engine+parts Google Scholar
https://scholar.google.com/scholar?q=how+to+clean+engine+parts - Google Scholar Google Scholar
https://scholar.google.com/scholar?q=engine+parts+cleaning+solvent+degreasing+procedure - Google Scholar Google Scholar
https://scholar.google.com/scholar?q=metal+parts+cleaning+techniques+maintenance+solvent+aqueous
