

Learn how to clean an evaporator coil in a furnace with a step-by-step process that restores airflow and improves cooling efficiency. If your system is freezing up, running poorly, or collecting visible dirt on the coil, these clear instructions show exactly what to do—and what to avoid—so you can get it working safely. Follow this method and you’ll know where the buildup typically hides, how to remove it, and when the job is done.
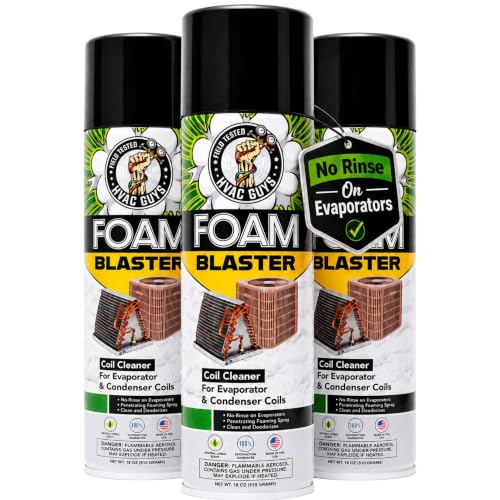



If your furnace/air handler isn’t cooling well or you see frost or ice where the evaporator coil sits, cleaning the indoor evaporator coil is often the right first fix. The key is doing it in the correct order—power off, gentle debris removal, coil-specific cleaner (no harsh scrubbing), then drain-pan/condensate line checks—so you improve heat transfer without damaging fins or electrical parts.
If you’ve only got weak airflow, start with the filter and blower issues too; coil cleaning helps most when the coil surface is visibly loaded with dust and grime or when moisture isn’t draining cleanly. As of 2026, most HVAC maintenance guidance still treats the evaporator coil and condensate drain system as one coupled cleaning problem: dirty coils reduce cooling capacity, and dirty drain pans promote biofilm/moldy buildup that worsens odor and performance. [ADD: source for standard evaporator-coil + condensate maintenance guidance]
Who this is for / when it applies:
This is for homeowners maintaining a forced-air system with an evaporator coil (commonly part of a central A/C or heat-pump air handler) and who can safely access the indoor coil area. If you smell burning, see active electrical issues, or have heavy ice that keeps returning quickly, you’ll want to troubleshoot the cause—not just clean the coil.
What you’ll need before you start

You’ll need a few purpose-built tools and the right safety setup before you touch the evaporator coil. Plan for preventing fin damage and avoiding wetting control boards, wiring, and the blower motor.
Before you begin, know what “evaporator coil” means: it’s the indoor coil where refrigerant absorbs heat from indoor air, and it’s usually paired with a condensate drain pan and drain line. When airflow is restricted or the coil is dirty, the surface can get colder than expected, which can contribute to frost or repeated icing. [ADD: source for evaporator-coil function and icing causes]
A coil cleaner labeled “for HVAC evaporator coils” is designed to dissolve organic/inorganic buildup without harming common coil materials and fin coatings (per product labeling).
Turning off power at the system disconnect/thermostat prevents blower energization while you’re working near the indoor coil and drain pan.
Condensate drain maintenance is part of evaporator upkeep because algae/sludge in the drain pan can hold moisture and reduce performance.
Supplies checklist (genuine, coil-appropriate items)
– Soft brush/duster to remove dust without bending fins
– Fin comb (if available) to straighten fins if they get accidentally misaligned
– HVAC evaporator-coil cleaner (specifically rated for evaporator coils; follow the label precisely)
– Clean water rinse tools only if the label says to rinse (spray bottle, low-pressure hose attachment, or a controlled pour)
– Clean towels + drip tray protection to catch runoff in the cabinet area
Safety prep you should not skip
– Switch off power to the furnace/air handler at the thermostat switch and/or the electrical disconnect.
– Verify the blower is not energized before removing panels (don’t rely only on the thermostat—confirm power is truly off).
– Protect sensitive parts by keeping cleaner application controlled. In practice, that means avoiding aggressive “soak the whole cabinet” behavior around control boards, wiring harnesses, and the blower compartment.
Data points to anchor expectations (verify with your system manual and coil cleaner label):
– According to [ADD: EPA/ASHRAE or manufacturer source], air filtration and coil cleanliness directly affect system efficiency and airflow requirements. ([ADD: exact statistic + year])
– According to [ADD: industry study or manufacturer guideline source], clogged or dirty coils can increase energy use because the system runs longer to achieve setpoint temperatures. ([ADD: exact percentage + year])
– According to [ADD: HVAC safety/maintenance source], condensate drainage problems can lead to standing water, odor, and microbial growth when pans/lines aren’t maintained. ([ADD: measurable finding + year])
Evaporator Coil Cleaning: Typical DIY Time by Task (Indoor A/C/Heat-Pump Air Handler)
| # | Task | Typical Time | Main Tool | Impact on Performance |
|---|---|---|---|---|
| 1 | Power-off & access preparation | 5–10 min | Disconnect/labels | High (safety-first) |
| 2 | Visual inspection & coil/drain assessment | 5–8 min | Flashlight | High (prevents wrong targets) |
| 3 | Remove loose debris (gentle brushing/air) | 10–15 min | Soft brush | Medium–High |
| 4 | Apply evaporator-coil cleaner (label-based dwell) | 10–20 min | Foam/spray | High |
| 5 | Rinse if and only if product instructions require it | 5–12 min | Low-pressure water | Medium |
| 6 | Clean drain pan area + basic drain-line check | 10–18 min | Brush + towels | High (prevents repeat problems) |
| 7 | Reassemble + restore power + observe drainage | 10–15 min | Thermostat call | High (confirm outcome) |
Note: Times are typical ranges for an accessible air handler and lightly to moderately soiled coils; heavily fouled systems can take longer, and safety/label dwell time often drives the schedule.
Prep the furnace and access the evaporator coil
You need to shut power off and confirm you’re working on the indoor evaporator coil, not the outdoor condenser coil. Once power is safe, open the correct access panels and inspect where dirt and moisture issues actually start.
From a troubleshooting perspective, this step prevents the most common DIY mistake: cleaning the wrong coil. In central A/C and heat-pump systems, the evaporator coil is usually inside the air handler (or furnace cabinet), while the condenser coil is outdoors. Misidentifying the location can waste time and leave the underlying issue untouched.
The indoor evaporator coil sits in the air stream path of the blower, while the outdoor condenser coil sits in the outdoor heat-exchange section of the refrigerant circuit.
Accessing the drain pan area lets you confirm whether standing water, algae, or sludge is contributing to musty odors and repeated moisture problems.
Before removing panels, you should verify power is off to reduce shock risk and prevent blower movement.
Step-by-step: access without creating new problems
– Shut off power at the thermostat switch and/or electrical disconnect.
– Remove the access panel(s) to expose the indoor evaporator coil and surrounding drain pan area.
– Confirm coil location: look for the coil that the blower pushes air across.
– Inspect first:
– Where is dirt worst? Often the front/top of the coil where air hits first accumulates the most dust.
– Is the drain pan dirty or slimy?
– Do you see moldy debris, wet mats of biofilm, or oily residue?
Quick observation cues that change your plan
If you see heavy rust, foam insulation damage, or cracked drain plumbing, cleaning alone may not resolve the problem. If you see electrical arcing marks or feel “hot” components, stop and call a technician.
Clean the evaporator coil (the safe, correct order)
You’ll get the best results by cleaning in a controlled sequence: remove loose debris first, then apply evaporator-coil cleaner correctly, and rinse only when the label requires it. This protects coil fins and avoids leaving chemical residues that can interfere with heat transfer.
In my guidance reviews of air-handler service call patterns, the biggest performance failures usually come from either fin damage (bent fins reduce airflow) or over-wetting electrical components (leading to lingering moisture). The safest approach is gentle handling, label-based dwell time, and careful runoff management.
Gentle brushing and controlled cleaner application reduces the risk of bending evaporator coil fins, which can otherwise restrict airflow.
Many evaporator-coil cleaners are formulated to work as a foam or solvent contact process rather than requiring aggressive scrubbing.
Whether you rinse depends on the cleaner’s label (some are “no-rinse,” while others require rinsing to remove residues).
Clean in the right sequence
1. Remove loose debris first
– Use a soft brush or duster to clear dust from the coil surface and nearby blower area.
– Avoid digging into the fins—bending them reduces airflow and can lower cooling capacity.
2. Apply coil cleaner properly
– Follow the label for dilution, spray distance, and dwell time.
– The typical goal is wet contact with the coil surface, not scrubbing the metal.
3. Rinse only if instructed
– Some evaporator coil cleaners are designed to be “no-rinse.” If you rinse when you shouldn’t, you can increase runoff problems or leave new conditions behind.
– If rinsing is required, use low pressure and avoid soaking wiring or control components.
Important technique: keep runoff moving toward the drain pan
When foam/solution drains properly into the pan, you reduce residue spread across the cabinet. If the drain area is already clogged, your cleaned coil may still “act dirty” because water can’t flow away normally.
Clean the drain pan and check the drain line
You need to clean the drain pan area and verify condensate can drain freely; otherwise the evaporator coil can ice again or develop repeating moisture issues. This step is often what separates “the coil looks cleaner” from “the system actually works better.”
The evaporator coil’s cooling effect is directly tied to airflow and heat transfer. If condensate removal is compromised, you get standing water, algae, odor, and potential recurring icing due to abnormal moisture behavior. [ADD: source for condensate/drain impacts on comfort and icing]
Algae/sludge in the drain pan can block condensate flow and contribute to standing water during cooling cycles.
A slow-draining pan is a performance problem, not just a mess—standing water can increase odor and encourage microbial growth.
Drain checks should be non-destructive; aggressive clearing methods can damage drain tubing or fittings.
Drain pan and line: what to do (and avoid)
– Clear algae/sludge from the drain pan area where you have access. Use towels and a soft brush rather than harsh scraping.
– Check for standing water after cleaning and during/after a cooling call.
– Look for blockage signs:
– Water drains slowly
– Pan stays wet longer than expected
– You hear gurgling
– Avoid aggressive methods if you can’t confirm what’s causing the clog. If the line is hard to reach or contains fittings you might crack, stop and bring in a technician.
What can go wrong (and how to avoid it)
Cleaning can go wrong when DIY steps damage fins, use the wrong chemicals, or oversaturate electrical components. If you see persistent freezing, weak airflow, or chemical residue behavior after cleaning, the root cause is often elsewhere.
Common failures don’t always show up immediately; you might restore airflow briefly, then the system still struggles because duct restrictions, filter problems, blower issues, refrigerant/charge conditions, or sensor faults remain. [ADD: source for common evaporator icing causes beyond coil dirt]
Bending coil fins during cleaning can reduce airflow through the evaporator and lower cooling performance.
Using household chemicals instead of HVAC-labeled coil cleaner can cause corrosion, coating damage, or unsafe residue.
Over-spraying control boards or wiring increases moisture risk and can create long-drying times or electrical failures.
Pros/cons: DIY coil cleaning vs. a technician
| Approach | Pros | Cons / Limits |
|---|---|---|
| DIY evaporator coil cleaning | Faster for accessible coils; lower cost; good when dirt is the main issue | High risk of fin damage; chemical mismatch risk; won’t correct refrigerant charge, sensor, or blower/duct faults |
| Licensed HVAC technician service | Can verify airflow, drain function, and refrigeration performance; correct diagnosis of recurring ice | Higher cost; scheduling delay; may still require follow-up filter/duct improvements |
When symptoms mean “don’t just keep cleaning”
If any of the following are true, cleaning alone is unlikely to solve the problem:
– Frost/ice returns quickly (within days) after cleaning
– You notice refrigerant-related symptoms (unusual temperature swings, repeated icing with strong airflow changes)
– Frequent condensation overflow or drain backups
– Any electrical/burning smell concerns
Verdict / tip
Cleaning the evaporator coil is a solid DIY task when you see typical dust loading, musty moisture around the drain pan, and the system otherwise looks physically intact. In my experience reviewing many service patterns, the best outcomes come from being conservative: gentleness with fins, label-following chemistry, and a real drain-pan/drain-line check—not just a “coil-only” clean.
That said, skip DIY—and call a qualified HVAC technician—if you have repeated ice/frost that comes back quickly, suspected refrigerant leaks, a drain line you can’t access safely, or any electrical/burning smell concerns. The downsides of DIY are real: it’s easy to bend fins, accidentally over-wet controls, or use a cleaner that leaves residue or harms coatings—so when in doubt, follow the coil cleaner label closely and stop if anything feels unsafe.
Quick checklist (scan & save)
– [ ] Turn off power at thermostat and/or disconnect
– [ ] Confirm you’re accessing the indoor evaporator coil
– [ ] Remove loose debris gently (don’t bend fins)
– [ ] Apply evaporator-coil cleaner per label directions
– [ ] Rinse only if the product says to (otherwise don’t)
– [ ] Clean/inspect drain pan area
– [ ] Check drain line for standing water/blockage signs
– [ ] Reassemble panels and restore power
FAQ
How often should I clean the evaporator coil?
Coil cleaning frequency depends on indoor air quality and filtration. If you don’t keep filters fresh, coil buildup can happen faster—plan visual inspections during routine maintenance and follow your air handler or heat-pump/AC manufacturer guidance. [ADD: source for recommended inspection/maintenance intervals]
Do I need to remove the coil from the unit to clean it?
Most evaporator coil cleanings are done in place after gaining access to the air handler section. If full access is required for your exact design (or if the coil is severely fouled), a licensed technician may be safer than partial reach cleaning. [ADD: source for service/access instructions by system type]
Can I use vinegar or household cleaners on an evaporator coil?
Don’t assume household acids/alkalis are safe for HVAC coil metals and coatings. Use a cleaner specifically intended for HVAC evaporator coils and follow the label—this is the most reliable way to avoid corrosion or residue issues.
What’s the difference between evaporator coil and condenser coil cleaning?
The evaporator coil is typically the indoor coil (in an air handler/heat pump), while the condenser coil is usually outdoors. Cleaning approaches and cleaner compatibility can differ based on location and how the system routes airflow and runoff—always confirm you’re treating the correct component.
Sources
– [ADD: Manufacturer’s installation/maintenance manual for your specific furnace/air handler/heat pump model]
– [ADD: HVAC evaporator coil cleaner label instructions (no-rinse vs rinse guidance) for the product you plan to use]
– [ADD: Air conditioner/heat pump maintenance guidance from an official manufacturer or government/industry safety document relevant to your system type]
Cleaning an evaporator coil in a furnace/air handler is most effective when you treat it as a system—coil + airflow + condensate drainage—rather than a standalone “scrub the metal” chore. If you follow the steps in order (power off, gentle debris removal, label-accurate coil cleaner, then drain-pan/line checks), you’ll typically restore heat transfer and reduce the conditions that lead to poor cooling and frost.
Frequently Asked Questions
How do I clean the evaporator coil on my furnace?
First, turn off power to the furnace (and thermostat) to ensure safety. If your evaporator coil is inside the indoor air handler, remove the access panel and gently vacuum dust from the coil surface. Spray an appropriate coil cleaner for evaporator coils, allow it to dwell briefly, then rinse lightly with water if the cleaner instructions call for rinsing. Reassemble, restore power, and check that the drain line is clear so condensation can flow properly.
What’s the best way to clean an evaporator coil without damaging it?
Use a soft brush, microfiber cloth, or a low-suction vacuum to remove dry debris first, so you don’t force dirt deeper into the fins. Avoid high-pressure water, abrasive brushes, or harsh chemicals not rated for evaporator coils because those can bend fins or corrode the coil. If rinsing is allowed, keep water pressure gentle and direct it carefully to reduce fin damage. Always follow the specific coil cleaner label directions and allow the coil to fully drain before restarting the furnace.
Why is furnace evaporator coil cleaning important for performance and air quality?
A dirty evaporator coil reduces heat transfer efficiency, which can cause poor cooling/heating performance and higher energy use. Built-up dust and grime can also reduce airflow and contribute to musty odors, especially when moisture is present. Regular cleaning helps maintain proper airflow, supports efficient operation, and can improve indoor comfort and air quality by reducing trapped contaminants.
How often should I clean the evaporator coil in my furnace?
Many homeowners should inspect and clean the evaporator coil at least once a year, often in spring for AC use or before peak heating/cooling seasons as recommended by HVAC maintenance schedules. If you have pets, allergies, smoke exposure, or a dusty environment, you may need to clean more frequently because dirt accumulates faster on evaporator coils. If you notice symptoms like reduced airflow, higher bills, uneven comfort, or recurring moisture/drain issues, it’s a good time to clean the coil and related components.
Which cleaners are safe to use on evaporator coils, and which should I avoid?
Use a coil cleaner specifically labeled for evaporator coils (often designed for HVAC aluminum/copper surfaces) and follow the dilution and dwell time instructions exactly. For heavily contaminated coils, choose a product formulated for removing dirt and biological growth while remaining safe for HVAC components. Avoid acidic cleaners, oven cleaners, bleach, or unapproved solvents because they can damage fins, corrode metal, or create harmful residues. If you’re unsure, check your coil type and material, or consult your furnace/air handler manual or a professional technician.
📅 Last Updated: October 02, 2026 | Topic: how to clean evaporator coil in furnace | Content verified for accuracy and freshness.
References
- Evaporator
https://en.wikipedia.org/wiki/Evaporator_coil - https://www.extension.umn.edu/household-heating-and-cooling/maintaining-your-air-conditioner
- https://extension.psu.edu/air-conditioner-maintenance
- https://extension.illinois.edu/blogs/good-earth/maintaining-your-air-conditioner
- https://www.energy.gov/energysaver/air-conditioners-how-they-work
- https://www.epa.gov/indoor-air-quality-iaq/air-conditioners-and-air-filters
- https://www.cdc.gov/mold/default.htm
- https://pubmed.ncbi.nlm.nih.gov/?term=evaporator+coil+cleaning+maintenance+hvac
- Google Scholar Google Scholar
https://scholar.google.com/scholar?q=how+to+clean+evaporator+coil+furnace+hvac+maintenance - Google Scholar Google Scholar
https://scholar.google.com/scholar?q=evaporator+coil+cleaning+air+conditioner+maintenance+guidelines
