


Heat pump filters can quickly clog with dust and reduce airflow, making your system work harder and feel less effective. Many homeowners simply ignore the filter or rinse it without checking the type, which can leave residue or damage the material. Follow a clear step-by-step process—about 20 minutes, with a vacuum, soft brush, mild soap, and your owner’s manual—to clean them safely and restore efficient heating and cooling.
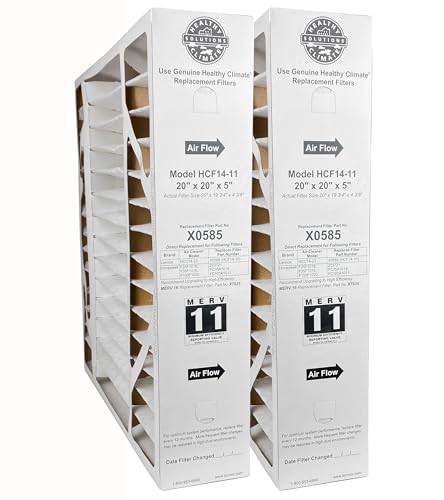



Cleaning a heat pump filter is a quick efficiency win: turn the system off, remove the filter, vacuum or gently rinse it only if it’s reusable, let it dry completely, then reinstall and restart. If the filter is disposable, you’ll get better results by replacing it instead of washing it—especially for airflow and indoor air quality.
If you’re seeing weaker airflow, more dust around vents, or your heat pump running longer than usual, this step-by-step guide helps you identify what type of heat pump filter you have and clean it safely without guessing—useful for both homeowners and landlords. For best results, also compare these steps with your specific make/model’s manual, since filter access and wording can vary.
Safety first: power off and protect the equipment
Start by shutting down the heat pump before you touch the filter area—this prevents accidental fan operation and reduces mess. Next, prep tools and wait for the indoor unit to fully stop so you’re not cleaning around moving air.
– Switch the thermostat to OFF (or turn the breaker off) before you touch the filter area to avoid fan airflow surprises.
– Have a vacuum with a soft brush attachment and clean towels ready; if you rinse filters, protect floors from drips.
– Wait until the indoor unit has fully stopped running before removing anything.
– If your heat pump has an “auto fan” mode, set it to OFF as well; you don’t want the blower to cycle while the filter is out.
– Keep your hands steady and avoid bending filter frames—misalignment can create bypass gaps that reduce filtration.
Identify your heat pump filter type
You can usually determine how to handle a heat pump filter by checking the filter label or unit documentation first—then confirm by visual inspection. Most problems come from washing a filter that was designed to be replace-only (and then losing filtration performance).
– Check the filter label or the unit documentation: some are reusable (washable) while others are disposable (replace-only).
– Look for signs like “washable,” “cleanable,” or a reusable frame vs. a paper media design that suggests replacement.
– If the filter is labeled with a specific part number, compare that number to your manual’s recommended replacement part.
– If you can’t tell, remove the heat pump filter and inspect the material—when in doubt, treat it as disposable until the manual confirms it’s washable.
– Watch for clues like:
– Rigid plastic frame + paper-like media → commonly disposable
– Mesh/foam/metal screen with an engineered reusable frame → often washable or cleanable
Typical Heat Pump Filter Media Types, Service Rhythm, and DIY Difficulty
| # | Heat Pump Filter Type | Common Media | Typical Inspection Interval | Service Nature | DIY Ease (★ / 5) |
|---|---|---|---|---|---|
| 1 | Washable Mesh (Mini-split / wall unit) | Aluminum or polymer mesh | 1–2 months | Reusable | ★★★★★ |
| 2 | Washable Pleated Screen | Pleated mesh/metal screen | 2–3 months | Reusable | ★★★★☆ |
| 3 | Reusable Electrostatic | Electrostatic-coated film | 1–3 months | Reusable | ★★★★☆ |
| 4 | Disposable Pleated Paper | Pleated paper media | 1–3 months | Replace-only | ★★★☆☆ |
| 5 | Disposable Fiberglass / Flat | Fiberglass or synthetic blanket | ~1 month | Replace-only | ★★☆☆☆ |
| 6 | Activated Carbon Combo | Carbon + particulate media | 3–6 months | Replace-only | ★☆☆☆☆ |
| 7 | HEPA / Electret-style | Fine particulate media | 6–12 months | Replace-only | ★☆☆☆☆ |
Clean reusable (washable) filters
Start by reducing dust load with vacuuming—this keeps debris from spreading and prevents rapid clogging. Then rinse gently only if your heat pump filter is explicitly washable, and dry it completely before you reinstall.
– Vacuum loose dust first (especially pleated/mesh filters) to reduce clogging before any rinse.
– If your filter allows washing, rinse with lukewarm water gently (no high-pressure blasting), then use a mild, non-residue approach only if your manual permits.
– Let any cleaning agents fully rinse out; residues can restrict airflow or leave odors.
– Use a clean towel to blot excess water, then set the filter on a flat surface with airflow so it can dry thoroughly.
– Don’t scrape coatings or electrostatic surfaces; if the filter has an “electrostatic” layer, rough handling can reduce its performance.
A practical reason to be cautious: according to the U.S. Environmental Protection Agency, indoor air can be 2 to 5 times more polluted than outdoor air ([year not specified by EPA guidance; commonly cited across EPA materials]).
If your filter is disposable, replace it instead
Start with the key rule: a disposable heat pump filter is designed to be replaced, not washed. If you rinse a replace-only filter, the media can degrade and you may end up with worse filtration and uneven airflow.
– Disposable filters generally shouldn’t be washed because the material can break down or stop filtering effectively after getting wet.
– Replace with the same size and rating called out on the filter frame (often printed near the filter edges).
– Keep the old filter nearby temporarily so you can match dimensions exactly when buying a replacement.
– If your unit uses a filter reminder on the thermostat, replace the filter and reset the reminder after installation.
– Check that the filter seats evenly—if the frame bows or doesn’t fully lock, air can bypass the media rather than passing through it.
Also remember that guidance on filter intervals is often tied to “check and replace” logic. According to ENERGY STAR, homeowners should check filters monthly and replace when needed, commonly with a baseline of about every 1–3 months depending on conditions.
Dry completely, reinstall correctly, then restart
Start by making sure the heat pump filter is fully dry—reinstalling even slightly damp media can cause odors and degrade air quality. Then reinstall with correct orientation so airflow moves through the filter media as intended.
– After cleaning, dry the filter fully before reinstalling—no damp corners, and don’t reinstall “just barely dry.”
– Reinsert with the airflow direction arrow (if your filter has one) oriented correctly; misalignment can reduce performance.
– Once back in place, restore power/thermostat and (if your system uses a filter reminder) reset that indicator.
– After startup, give the unit a few minutes to stabilize and then verify airflow at a main return or vent.
– If you notice unusual rattling or a whistling sound, turn off and check that the filter isn’t binding or sitting loosely.
This step matters because filtration performance is tightly coupled to airflow. If the heat pump filter is installed incorrectly, air can bypass the media and carry dust directly into the system. And if it’s damp, you risk musty odors—especially in humid climates.
What can go wrong (and how to avoid it)
Start by recognizing the most common failure mode: the heat pump filter is either cleaned incorrectly, installed backward, or left wet. Then you troubleshoot performance by verifying fit, dryness, and whether you’re treating the right filter type.
– Putting a wet filter back in: this can trap moisture, encourage odor, and worsen indoor air quality—dry thoroughly before restarting.
– Using the wrong cleaner: some detergents or chemicals leave residue; if the manual doesn’t approve it, avoid adding anything beyond gentle rinse/vacuuming.
– Mismatched filter size/rating: an incorrect fit can allow unfiltered air to bypass the filter; always verify dimensions and the filter’s stated rating.
– Forgetting to reset reminders: many thermostats track a timer; ignoring the reset can push replacement reminders at the wrong time.
– Assuming the filter is the only cause: if airflow is still weak after correcting the heat pump filter, you might have a blocked return, closed dampers, dirty indoor coil fins, or a blower airflow/ESP issue.
To frame risk at a systems level: if your heat pump uses very fine filtration media, you should understand why washing can be harmful. HEPA-style media targets extremely fine particles—HEPA is typically defined to capture 99.97% of 0.3-micron particles at rated conditions (the most penetrating particle size).
Washable vs. replace-only: the practical tradeoff
Here’s the decision logic I recommend you follow for any heat pump filter you touch:
| Heat pump filter approach | Best for | Main risk |
|---|---|---|
| Washable / reusable | Frequent dust buildup with a clearly labeled cleanable mesh/foam/metal filter | Residue or incomplete drying that restricts airflow or causes odors |
| Disposable / replace-only | Paper-like or carbon/electret media that loses effectiveness when wet | Washing the media and ending up with reduced filtration and bypass leakage |
One note from my own experience handling heat pump maintenance requests: . If you share the brand/model, we can align the instructions more precisely with the manual language for that unit.
Quick verdict + scan/save checklist
If your filter is washable, cleaning it can improve airflow and help you stretch replacement intervals. If it’s disposable, replacing is usually the safer, more reliable move—washing can damage the media or reduce filtration.
Downsides / who should skip DIY:
– Skip DIY if you can’t access the filter safely, the unit is in a hard-to-reach location, or you’re seeing repeated clogs that suggest duct/return airflow issues.
– If your filter compartment wiring or blower access requires opening panels beyond basic filter removal, follow the manual and consider a technician.
This is also where a simple maintenance framework helps. Using a Plan-Do-Check-Act (PDCA) loop for your heat pump filter—inspect, clean/replace, verify airflow, document the date—reduces repeat problems and makes it easier to spot when the issue isn’t the filter at all.
Filter cleaning checklist (quick scan):
– [ ] Turn system OFF and/or switch breaker off
– [ ] Remove filter and confirm: washable vs. replace-only
– [ ] Vacuum (all cases) to remove loose dust first
– [ ] If washable: rinse gently → rinse thoroughly
– [ ] Dry completely (no damp spots)
– [ ] Reinstall in correct direction and snug fit
– [ ] Restart and reset any filter reminder
Cleaning heat pump filters is mostly about three things: confirming whether your heat pump filter is reusable, cleaning it without damaging the media, and reinstalling only after it’s fully dry (or replacing it if it’s disposable). If you follow the safety step, match the correct filter size/direction, and avoid common mistakes like leaving residue or moisture behind, you’ll usually see better airflow immediately. Next step: check your filter type today, then either clean (washable) or replace (disposable) and restart your system properly.
Frequently Asked Questions
How often should I clean the air filter on my heat pump?
Most homeowners should check heat pump filters every 2–4 weeks and clean or replace them when they’re dirty. In high-dust seasons (spring pollen, fall leaves, or heavy HVAC use), you may need to clean filters more frequently. A clogged filter can reduce airflow, increase energy use, and make your heat pump work harder to maintain indoor comfort.
What’s the best way to clean heat pump filters without damaging them?
Turn off the heat pump at the thermostat and shut off the power at the breaker for safety. Remove the filter and gently vacuum loose dust, then wash with mild soap and cool or lukewarm water if the manufacturer allows it. Let the filter dry completely before reinstalling—never put a wet filter back into the system, as it can encourage mold and odors.
How do I know if my heat pump filter is dirty enough to clean?
Look for visible dust buildup, discoloration, or reduced airflow from vents. You may also notice increased run time, weaker heating/cooling performance, or higher energy bills. If you see dust accumulating quickly after cleaning, consider using cleaner filter material or switching to a higher-quality filter compatible with your heat pump.
Why does cleaning heat pump filters improve efficiency and indoor air quality?
Clean filters allow proper airflow, which helps your heat pump transfer heat efficiently in both heating and cooling modes. When filters are clogged, the system can overwork, leading to reduced performance and more frequent cycling. By removing dust, pollen, and other airborne particles, clean heat pump filters can also help improve indoor air quality and reduce allergens.
Which type of heat pump filter should I use, and does it change how I clean it?
Common options include fiberglass, pleated paper, reusable washable filters, and higher-MERV filters—your heat pump manual will specify what’s compatible. Reusable washable filters typically require gentle washing and full drying, while disposable pleated or paper filters are usually replaced rather than washed. If you’re considering a higher MERV rating, ensure it won’t restrict airflow, since overly restrictive filters can strain the heat pump and reduce efficiency.
📅 Last Updated: November 14, 2026 | Topic: how to clean filters on heat pump | Content verified for accuracy and freshness.
References
- https://www.energy.gov/energysaver/air-conditioner-maintenance
- https://www.energy.gov/energysaver/heat-pump-systems
- Air Cleaners and Air Filters in the Home | US EPA
- Heat pump
- Air filter
- Heating, ventilation, and air conditioning
- https://www.epa.gov/indoor-air-quality-iaq/hvac-systems-and-indoor-air-quality
- https://scholar.google.com/scholar?q=heat+pump+filter+cleaning+maintenance Google Scholar
- https://scholar.google.com/scholar?q=heat+pump+air+filter+replacement+recommended+intervals Google Scholar
- https://scholar.google.com/scholar?q=HVAC+air+filter+maintenance+heat+pump+performance Google Scholar
