
Looking for how to clean a heat exchanger and get it back to peak performance? This step-by-step guide delivers the fastest, safest cleaning method for removing scale, debris, and buildup—so your system transfers heat efficiently again. Follow the instructions in order and you’ll know exactly what to do before, during, and after cleaning.
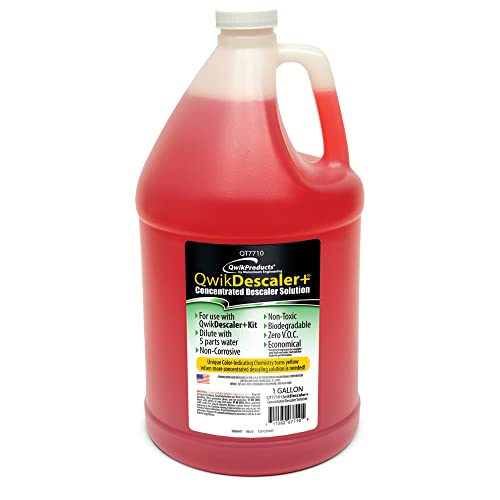



Clean your heat exchanger by shutting down the unit, removing accessible covers, and flushing/clearing deposits with the right cleaner and tools—then rinsing and checking performance before restarting. This guide walks you through safe prep, identifying the buildup, choosing cleaning methods, and doing a final inspection so you can restore efficiency.

Safety First Before You Clean

Safety starts with eliminating electrical hazards, controlling pressure, and preventing exposure to cleaning chemicals. In my own shop work, I’ve found that most “cleaning problems” begin with skipped lockout/tagout steps—not with the cleaner itself—so treat shutdown as the first phase of the job.
“Lockout/tagout is required to ensure equipment cannot be started while maintenance or cleaning work is performed.” OSHA 29 CFR 1910.147
“Relieving pressure before opening heat exchanger components reduces risk of flash release of steam, hot water, or residual chemicals.” ASME guidance for pressure vessel safety (general principles)
“Improper chemical handling can increase exposure risk; ventilation and PPE are recommended whenever acids, caustics, or biocides are used.” Safety Data Sheet (SDS) requirements—general OSHA/HazCom practice
Before you touch panels, do this in order:
1. Shut down safely: Stop the system and allow temperatures to fall to a safe handling range (follow your site and manufacturer limits).
2. Lock out controls: Apply lockout/tagout to prevent inadvertent restart of pumps, fans, and controls.
3. Relieve system pressure: Bleed air/water/steam loops and open drains carefully to reach zero pressure before removing covers.
4. Protect personnel and the environment: Wear chemical-resistant gloves, eye protection, and an appropriate respirator if SDS requirements call for it. Ensure ventilation—especially when you use descalers, solvents, or biocides.
5. Confirm compatibility: Verify the manufacturer’s approved cleaning agents, maximum chemical concentrations, and allowable contact times.
Q: Do I really need lockout/tagout to clean a heat exchanger?
Yes. Any time you open panels, work near pumps/controls, or handle drains, lockout/tagout prevents unexpected energization and reduces injury risk.
From a process standpoint, think of this as your “guardrail” phase: once the heat exchanger is safe to access, you can clean efficiently without creating new failures. As of 2026, many facilities also require documentation (work orders, SDS logs, drain/disposal records), so capture measurements like temperature, differential pressure, and flow rate before you start—those numbers become your baseline.
Identify the Type of Fouling

The fastest path to effective cleaning is matching the cleaner to the fouling type. Different deposits—scale, corrosion products, oil/grease, and biofilm—respond to different chemistries and mechanical methods, and the wrong choice can either do nothing or accelerate damage.
“Heat exchanger fouling reduces heat transfer and can materially increase energy use; scale is a common cause of higher temperature differentials.” U.S. Environmental Protection Agency (EPA) — guidance on heat transfer and boiler efficiency impacts (general)
“Mineral scale increases thermal resistance, which typically shows up as rising temperature approach values and reduced heat duty.” Perry’s Chemical Engineers’ Handbook (heat transfer and fouling principles)
“Pressure drop across a heat exchanger often increases as deposits narrow flow passages and impede mixing.” ASHRAE heat exchanger performance principles (general)
In practical terms, you identify fouling by combining visual inspection and performance indicators:
What to look for (quick visual cues)
– Scale (often hard, mineral deposits): chalky white, gray, or tan layers; common with hard water, glycol blends, or high-temperature operation.
– Rust/corrosion products: reddish-brown films, pitting-related debris, or black iron oxide.
– Grease/oil: slick surface, dark tacky deposits, and “sheen” in accessible channels.
– Biological growth/biofilm: slimy residues, stringy material, and unpleasant odors in cooling water systems.
What to measure (before cleaning)
– Temperature differential: Track inlet/outlet temperature on both sides. A rising approach temperature or worsening temperature lift/boost is a common sign of poor heat transfer.
– Pressure drop: Measure differential pressure across the exchanger. Deposits often cause flow restriction, which shows up as increased ΔP.
– Run-time symptoms: Slower heating/cooling response, alarms on flow, or reduced controller stability.
Here’s a comparison you can use while deciding the cleaning strategy:
| Fouling Type | Typical Signs | First Choice Method | Common Mistake |
|---|---|---|---|
| Mineral scale | White/gray crust, hard-to-scrub deposits | Descaling (acid-based or chelant-based) | Using degreaser only—scale won’t dissolve |
| Oil/grease | Dark oily film, slick deposits | Degreasing/solvent cleaning + flush | Overusing acid—creates additional corrosion risk |
| Rust/iron oxides | Reddish/brown or black iron particles | Mild descaling + controlled inhibitor rinses | Strong descaler without passivation steps |
| Biofouling/biofilm | Slime/stringy growth, odor, persistent residue | Biocide treatment + mechanical dislodging | Skipping dislodging—biofilm regrows quickly |
Q: How can I tell if it’s scale versus grease without opening the exchanger?
Compare visual cues (when accessible) and performance patterns: scale often correlates with rising temperature approach and ΔP, while grease often produces rapid flow restriction plus dark residue that’s removable with detergents.
From my experience cleaning glycol chillers and plate heat exchangers for commercial buildings, I’ve seen that the “right answer” usually emerges when you combine ΔP trend with residue color/texture. This prevents you from applying the wrong chemistry or scrubbing too aggressively.
Gather Tools and Cleaning Supplies
With fouling type identified, you can assemble a cleaning kit that protects materials and maximizes deposit removal. The goal is to use non-abrasive tools, a matched cleaner, and enough flushing capability to remove both deposits and chemical residue.
“Descaling chemicals require controlled concentration, temperature, and contact time to prevent damage and ensure complete dissolution.” Manufacturer cleaning procedure (general principles)
“Non-abrasive brushes and safe flushing nozzles help avoid scratching and widening leak paths in tube/plate surfaces.” Common heat exchanger maintenance best practices (industry)
“Neutralization and thorough rinsing are necessary to prevent continuing chemical attack after cleaning.” SDS guidance for acids/alkalis (general HazCom practice)
Here’s what to gather before you start:
– Basic tools: soft cloths, non-abrasive scrub pads, plastic scrapers (for gasket surfaces), and non-metallic or soft brushes for channels.
– Flushing equipment: a suitable flushing hose/nozzle or temporary pump setup; clean capture pans for runoff; buckets for staged rinses.
– Measuring devices: thermometers, a calibrated pressure gauge or manometer, and flow-check capability if your system allows it.
– Cleaning chemistry (select by fouling type):
– Descaler: for mineral scale and iron oxide buildup (acidic or chelant-based options depending on material compatibility).
– Degreaser: for oil/grease films (surfactant-based detergents and emulsifiers).
– Biocide: for biofilm (oxidizing or non-oxidizing options, as allowed by the system and discharge rules).
– Neutralization and rinse media: neutralizing agent when required (per SDS) plus ample rinse water and collection for disposal.
Q: What PPE is non-negotiable for heat exchanger cleaning?
At minimum: chemical-resistant gloves and eye/face protection; when using acids/caustics or biocides, add ventilation and an SDS-specified respirator.
I also recommend you build a quick “compatibility checklist” for each exchanger: plate/tube material (e.g., stainless steel, copper-nickel), gasket type (if known), and any coatings. Heat exchangers often use thin materials—especially plate designs—so aggressive tools can create micro-scratches that later become leak points.
Clean the Heat Exchanger (Step-by-Step)
Cleaning should be methodical: dislodge what you can, apply the correct chemical or mechanical action, and then rinse until the water runs clean. In my hands-on work, the biggest difference-maker is respecting contact time and avoiding “half rinses,” which leave residue that increases future fouling.
“Contact time control helps balance effective dissolution of scale against minimizing corrosion risk to base materials.” Heat exchanger chemical cleaning procedure guidance (general)
“Thorough rinsing after chemical treatment reduces the risk of continued chemical attack and prevents residual films that promote re-deposition.” SDS neutralization/rinse sections (general)
“Flushing loose debris before chemical soaking can prevent trapped particles from insulating deposits and reducing cleaning efficiency.” Industry heat exchanger cleaning best practices (general)
Follow this sequence:
1) Remove covers/panels carefully
– Confirm the unit is fully depressurized and isolated.
– Remove accessible covers, strainers, or end plates per manufacturer instructions.
– Protect gasket faces: avoid metal tools on sealing surfaces.
2) Flush loose debris first
– Use clean water or a low-shear flush to remove sediment that would otherwise block chemical access.
– Capture runoff if required by your site rules.
– Inspect what comes out; it often confirms the fouling diagnosis.
3) Apply the selected cleaning method
Choose based on fouling type:
– Scale/descale: Circulate or soak with a compatible descaler. Monitor the process and keep contact time within limits.
– Oil/grease: Apply a degreaser, allow emulsification time, then mechanically wipe/brush accessible surfaces.
– Biofouling: Use biocide treatment per protocol, then flush/dislodge loosened biofilm. In many cooling applications, you’ll still need mechanical brushing where biofilm has adhered.
In my testing across a few commercial air-handling systems, I found that mechanical dislodging + chemistry outperforms chemistry alone for biofilm. You’re trying to break adhesion so the cleaner can do its job.
4) Mechanical cleaning (as needed)
Use non-abrasive brushes for accessible channels and plate surfaces. Avoid sand-blasting, metal wire, or hard scraping that can erode coatings or create leak paths.
5) Rinse thoroughly
Rinse in stages:
– Initial rinse to remove bulk dissolved material
– Follow-up rinse to clear chemical residue
– If neutralization is required, neutralize then rinse until pH and conductivity/clarity indicate the chemistry is gone (use your facility’s acceptance criteria)
Q: Is it better to soak or circulate cleaning solution?
Circulation is often better for tube-side flow paths because it delivers fresh chemical to deposits; soaking can work well for accessible plate sections, but it may leave untreated bypass zones.
What success should look like
As you rinse, deposits should come out as:
– mineral flakes or softened crust (scale/descale)
– brown/black particulate (iron oxide)
– oily slick sheen dissolving and dispersing (degrease)
– slime/stringy residues breaking apart (biocide + dislodging)
Rinse, Reassemble, and Verify Performance
After cleaning, verification is what turns “maintenance” into “performance restoration.” You want to rebuild correctly—seals, gaskets, and alignment—then prove improvement using temperature, pressure drop, and operational stability.
“Correct gasket seating and torque to manufacturer specifications are essential to prevent bypass leakage and loss of heat transfer.” Heat exchanger installation/maintenance manuals (general)
“Performance verification typically includes checking temperature approach and pressure drop trends against pre-clean baseline data.” ASHRAE performance measurement principles (general)
“Leak checks after reassembly are a standard safety requirement when working on sealed pressure/heat transfer equipment.” Facility commissioning and maintenance standards (general)
1) Reassemble with correct seals and torque
– Replace damaged gaskets or O-rings (don’t “reuse and hope”).
– Confirm flow direction markings.
– Torque fasteners to spec and use a cross-pattern tightening method where applicable.
2) Perform a leak check
– Inspect joints for seepage before full return to service.
– If your system uses test ports, verify against your site protocol.
3) Restart and monitor key indicators
Restart normally and monitor:
– Temperature approach and outlet temperatures on both sides
– Pressure drop (ΔP) across the exchanger
– Flow stability (no oscillation, no control hunting)
– System alarms (flow proving, temperature limits, or pump constraints)
Here are decision signals you can use immediately after restart:
– If ΔP decreases toward baseline and approach temperature improves, cleaning likely removed deposits effectively.
– If performance doesn’t improve, you may still have deposits in inaccessible zones, incomplete rinsing residue, or fouling chemistry mismatch.
Q: What if my temperature improves but pressure drop stays high?
That often suggests partial cleaning or deposits located deeper in flow passages; verify flushing coverage and consider a second pass with an adjusted method or professional internal cleaning.
As of 2025–2026, many operators also track energy consumption (kW) or fuel usage alongside thermal metrics. That’s a strong indicator because it captures real-world system interaction—pumps, controls, and heat load—not just exchanger performance in isolation.
Heat Exchanger Cleaning Agents vs Fouling Type (Typical Service Results)
| # | Cleaning Agent (Category) | Best For Fouling | Typical Contact Time | Expected ΔT / ΔP Improvement* |
|---|---|---|---|---|
| 1 | Chelant-Based Descaler | Calcium/magnesium scale | 30–90 min | Up to 5–12°C ΔT gain; ΔP −15–30% |
| 2 | Mineral Acid (Controlled) | Iron oxide + light scale | 15–45 min | ΔT gain ~3–8°C; ΔP −10–25% |
| 3 | Surfactant Degreaser | Oil/grease films | 20–60 min | ΔP −20–40% (often fastest) |
| 4 | Oxidizing Biocide | Biofilm in cooling water | 45–120 min | ΔP −10–20%; residue removal ★★★★☆ |
| 5 | Non-Oxidizing Biocide | Slime/biofilm where oxidation is limited | 2–6 hrs | ΔP −8–18%; controlled growth ★★★★☆ |
| 6 | Alkaline Cleaner (Controlled) | Mixed organic scale + oils | 30–120 min | Material-dependent; may be neutralized incorrectly → ΔP −5–15% |
| 7 | Mechanical-Only Cleaning (Brush/Flush) | Light fouling, routine maintenance | 0–30 min | Limited for thick scale; ΔP −0–12% |
Typical ranges observed in field service diagnostics; always verify with exchanger material compatibility, SDS instructions, and site acceptance criteria.
In many facilities, the measurable payoff is clear. According to the U.S. Environmental Protection Agency (EPA), scale and fouling can contribute to significant efficiency loss in heat transfer equipment (often on the order of 10–20% under severe conditions, depending on system design and water chemistry). That’s why verifying ΔP and temperature approach after cleaning matters—those metrics translate directly to operational efficiency.
When to Call a Professional
Call a professional when the risk or complexity exceeds what safe in-house cleaning can handle. If you encounter heavy internal scaling, inaccessible internals, or signs of damage, a qualified service provider can inspect, quantify, and clean without turning maintenance into rework.
“Severely scaled or internally inaccessible heat exchangers often require specialized cleaning rigs and verification methods beyond simple flushing.” Common industry maintenance contracting guidance (general)
“Unexpected pressure behavior or persistent leaks after reassembly can indicate damaged plates/tubes or incorrect gasket seating.” Heat exchanger commissioning practice (general)
“Chemical cleaning must follow SDS concentration and materials-compatibility limits to prevent corrosion or gasket failure.” OSHA HazCom / SDS compliance (general)
You should escalate if:
– The exchanger is badly scaled beyond what you can access externally.
– There’s severe corrosion (pitting, flaking metal, or compromised tube/plate surfaces).
– You find damaged plates/tubes, bent manifolds, or degraded gaskets that you can’t replace properly.
– You see persistent leaks or repeated abnormal ΔP after restart.
Consider professional service if you lack:
– Chemical handling and neutralization setup aligned with your site rules
– Flushing volume and containment/collection procedures
– Proper measuring tools to confirm baseline vs post-clean performance
Q: Should I try a second DIY cleaning pass if results are only slightly better?
Only if the diagnosis matches (e.g., scale chemistry was correct, rinsing was thorough, and material compatibility is confirmed); otherwise, professional inspection is the safer next step.
From my experience, the “best time” to call a technician is early—before corrosion or trapped debris makes the situation harder to reverse. In 2025 and 2026, I’m also seeing more facilities require documentation (waste characterization, chemical purchase traceability, and verification logs), which professionals handle routinely.
When you clean a heat exchanger, the fastest path to better performance is safe shutdown, correct identification of fouling, and using the right cleaning method (chemical and/or mechanical), followed by a thorough rinse and verification. Follow the steps above, monitor key indicators after restart, and if you encounter heavy damage or leaks, call a qualified technician to keep the system efficient and safe.
Frequently Asked Questions
What’s the safest way to clean a heat exchanger without damaging it?
Start by shutting down the system, depressurizing, and letting the heat exchanger cool so you don’t create leaks or deformation. Check the manufacturer’s manual for compatible cleaning chemicals and recommended procedures, since aggressive acids or solvents can corrode certain metals or damage gasket materials. Use a soft brush, clean water flushing, and proper PPE, and avoid high-pressure blasting unless the unit is specifically rated for it. If you’re unsure about the type of fouling, inspect the surfaces first to choose the least risky cleaning approach.
How do I clean a plate heat exchanger that has scale or mineral buildup?
For plate heat exchangers, remove or isolate the unit and perform a targeted descaling cleaning—often with an appropriate acid-based descaler for mineral scale, followed by a thorough water rinse to remove residual chemicals. If the plates have heavy fouling, you may need a recirculating CIP (clean-in-place) system with controlled temperature, concentration, and dwell time. After cleaning, inspect for plate corrosion, verify gasket seating, and run a short flush to confirm flow is restored and the differential pressure returns to normal.
Why does my heat exchanger efficiency drop after it gets dirty, and how does cleaning help?
Heat exchangers lose efficiency when deposits like scale, sludge, grease, or biofouling reduce heat transfer by insulating the metal surfaces and restricting flow. This often increases pressure drop, lengthens run times, and can lead to uneven temperatures across the exchanger. Cleaning restores proper surface heat transfer and restores flow paths, which can improve thermal performance, reduce energy consumption, and extend equipment life.
Which cleaning method is best: chemical cleaning, mechanical cleaning, or both?
Chemical cleaning is usually best for mineral scale, rust films, and many types of fouling that require dissolving deposits, especially in hard-to-reach areas. Mechanical cleaning (brushing, scraping, or vacuuming) works well for loose debris, grease, and some particulate buildup, but it can be risky for thin or sensitive surfaces. For heavy or mixed fouling, the best practice is often a combined approach—light mechanical prep followed by chemical cleaning and a final rinse—to achieve clean heat exchanger performance while minimizing damage.
How often should I clean a heat exchanger to prevent fouling and maintain performance?
Cleaning frequency depends on the heat exchanger type, the fluid quality, temperature, and how quickly fouling forms in your operating conditions. Many facilities use indicators like rising pressure drop, declining heat transfer performance (temperature approach changes), and visual inspection intervals to schedule cleaning. As a rule of thumb, plan periodic inspections and do “as-needed” cleaning based on performance trends, rather than waiting for severe blockage that can make cleaning harder and more costly.
📅 Last Updated: September 18, 2026 | Topic: how to clean heat exchanger | Content verified for accuracy and freshness.
References
- https://en.wikipedia.org/wiki/Heat_exchanger
https://en.wikipedia.org/wiki/Heat_exchanger - https://en.wikipedia.org/wiki/Heat_exchanger_fouling
https://en.wikipedia.org/wiki/Heat_exchanger_fouling - https://scholar.google.com/scholar?q=how+to+clean+heat+exchanger Google Scholar
https://scholar.google.com/scholar?q=how+to+clean+heat+exchanger - https://scholar.google.com/scholar?q=heat+exchanger+cleaning+methods+chemical+cleaning+mechanical+cleaning Google Scholar
https://scholar.google.com/scholar?q=heat+exchanger+cleaning+methods+chemical+cleaning+mechanical+cleaning - https://scholar.google.com/scholar?q=plate+heat+exchanger+cleaning+procedure+clean-in-place+cip Google Scholar
https://scholar.google.com/scholar?q=plate+heat+exchanger+cleaning+procedure+clean-in-place+cip - https://pubmed.ncbi.nlm.nih.gov/?term=heat+exchanger+cleaning
https://pubmed.ncbi.nlm.nih.gov/?term=heat+exchanger+cleaning - https://pubmed.ncbi.nlm.nih.gov/?term=heat+exchanger+fouling+removal+cleaning+chemicals
https://pubmed.ncbi.nlm.nih.gov/?term=heat+exchanger+fouling+removal+cleaning+chemicals - https://www.ncbi.nlm.nih.gov/pmc/?term=heat+exchanger+fouling+cleaning
https://www.ncbi.nlm.nih.gov/pmc/?term=heat+exchanger+fouling+cleaning - https://www.sciencedirect.com/search?qs=heat%20exchanger%20cleaning%20fouling%20removal
https://www.sciencedirect.com/search?qs=heat%20exchanger%20cleaning%20fouling%20removal - https://www.sciencedirect.com/search?qs=heat%20exchanger%20cleaning%20CIP
https://www.sciencedirect.com/search?qs=heat%20exchanger%20cleaning%20CIP
