

If you want to know how to clean a herb grinder for fresh, smooth grinding, follow this step-by-step method for the best results without damaging the teeth. This guide walks you through disassembling the grinder, choosing the right cleaning approach for the material, and removing resin buildup fast. By the end, your grinder will turn effortlessly again and grind more evenly with less residue.


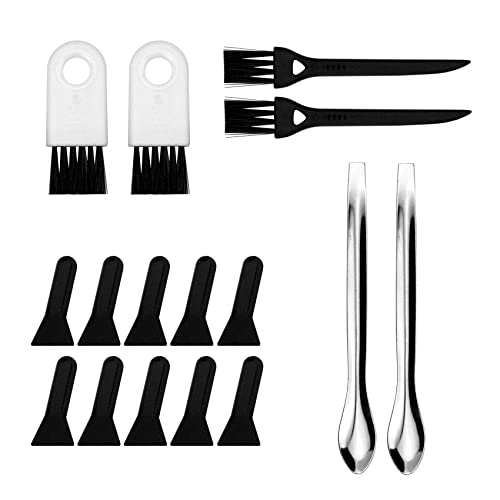

Cleaning a herb grinder is easiest when you disassemble it and remove stuck residue first, then soak metal parts in a safe solvent and scrub until smooth. For most grinders, a simple alcohol soak (followed by a full dry) gets oils and gunk out without damaging the finish. In this guide, you’ll learn the best method for different grinder materials and what to avoid so it doesn’t grind poorly afterward.
This article focuses on practical, material-aware cleaning—because the “right” cleaner for stainless steel can be a bad idea for anodized aluminum, coated parts, or anything with plastic. You’ll follow a repeatable routine designed to restore smooth teeth, free movement, and consistent screen performance without leaving sticky residue behind—an issue that’s especially common with frequent grinding.
Who this is for / when it applies:

This is for anyone who notices sticky buildup, bitter residue on the teeth, or a grinder that feels rough or gets harder to turn. It’s most useful if your grinder has removable sections (common for 2–4 piece designs) and you want a practical routine for regular cleaning—without risking damage to coatings or threads.
A stuck grinder often feels “rough” because plant oils polymerize on teeth and screen mesh, increasing friction over time.
Disassembling first prevents loosened residue from falling back into threads, bearings, or the grinding interface.
If your grinder includes bearings or electronics, you should avoid soaking and instead use wipe-and-brush cleaning followed by complete drying.
[ADD: mention whether your grinder includes bearings/electronics, if known]
Gather what you need (and know your grinder material)
You’ll get the smoothest results when you match your cleaning approach to your grinder’s materials and finish. Before you start, identify whether your grinder is stainless steel, anodized aluminum, ceramic-coated, or includes plastic/non-metal parts—because solvents and soaking tolerances vary.
First, gather the basics:
– A soft brush (toothbrush-style) for teeth, screen edges, and lid rims
– Microfiber cloth for wiping and final polish
– Cotton swabs for threads, corners, and underside contact points
– A safe solvent like isopropyl alcohol (IPA) for metal parts
– A non-lint surface to stage parts while they dry
Then assess risk points:
– If your grinder has bearings (some designs use bushings/axles), avoid deep soaking around the axle area.
– If your grinder has electronics (rare for grinders, but some “smart” dispensers exist), avoid solvents and water near electronics entirely and stick to manufacturer guidance.
NIST data lists isopropyl alcohol (2-propanol) boiling point at about 82.6 °C, which helps it evaporate more quickly than heavier solvents.Based on NIST Chemistry WebBook: isopropyl alcohol boiling point data ([ADD: exact NIST page/citation link])
According to NIST, ethanol (ethyl alcohol) boils at about 78.37 °C, and acetone boils at about 56.05 °C—differences that affect drying behavior and finish exposure.Based on NIST Chemistry WebBook boiling point data ([ADD: exact NIST page/citation link])
Solvent Options for Grinder Cleaning: Boiling Point (Drying Behavior)
| # | Solvent (common use) | Typical boiling point | Finish/mesh risk | Practical clean fit |
|---|---|---|---|---|
| 1 | Isopropyl alcohol (IPA) ~70% | ~82.6 °C | Low (metal), avoid plastics | ★★★★★ |
| 2 | Isopropyl alcohol (IPA) ~91% | ~82.6 °C | Low (metal), faster evaporation | ★★★★★ |
| 3 | Isopropyl alcohol (IPA) ~99% | ~82.6 °C | Medium (more aggressive), avoid uncertain coatings | ★★★★☆ |
| 4 | Ethanol (ethyl alcohol) | ~78.37 °C | Low–Medium (metal), check coating compatibility | ★★★★☆ |
| 5 | Acetone (spot cleaning) | ~56.05 °C | High (can attack finishes/plastics) | ★★☆☆☆ |
| 6 | n-Propanol (less common) | ~97.2 °C | Medium (slower drying) | ★★★☆☆ |
| 7 | Denatured alcohol (ethanol blends) | Depends on blend | Medium (unknown additives) | ★★★☆☆ |
Disassemble and remove loose herb residue first
You’ll prevent re-contamination and make the deep-clean work better by disassembling first and removing loose residue. Start with a fully separated grinder so oils and plant particles don’t get forced into threads during brushing.
Here’s the step-by-step flow:
– Take the grinder apart completely (top lid, grinding section, collecting chamber, and any screens/plates between).
– Tap out loose herb residue over a trash bin or container—don’t rely on the brush to do everything.
– Brush dry first: use the soft brush to remove loose material from teeth, the screen, and the inside wall of each section.
– Use a cotton swab to lift residue from tight spaces—especially the teeth roots and underside surfaces where oils collect.
If buildup is stubborn:
– Do a brief solvent wipe with IPA on metal surfaces to soften sticky residue.
– Only move to deeper soaking once you’ve removed what will come out through dry brushing—this reduces how long you need the solvent to work.
Dry brushing first lowers the amount of suspended plant matter that can redeposit during solvent cleaning.
Cotton swabs are effective for threads because they reach narrow crevices without deforming screens.
Brief pre-wiping with alcohol helps dissolve plant oils before you scrub, reducing friction on metal teeth.
Deep-clean method for metal grinders (soak + scrub)
You typically get the smoothest results on metal grinders by soaking metal parts in isopropyl alcohol and then scrubbing until the surface feels uniform. The key is to exclude non-metal pieces and to dry fully afterward.
Use this approach:
– Soak only metal parts in isopropyl alcohol until residue loosens.
– Scrub with the soft brush, focusing on:
– Tooth faces and tooth valleys
– Screen edges (don’t bend the mesh)
– Underside surfaces where oils settle
– Cotton swabs around threads: run a swab along the thread grooves rather than wiping across the entire exterior.
– Rely on evaporation for most finishes: if your grinder’s finish or manufacturer guidance doesn’t require rinsing, a thorough alcohol evaporation + drying step is usually enough.
Rinsing guidance (material-dependent):
– If you’re cleaning plain stainless steel and you used IPA, rinsing is usually optional—but confirm with the grinder manufacturer if your finish is specialized.
– If your grinder is anodized aluminum or has a coating you can’t identify, avoid rinsing unless the manufacturer specifically recommends it (some coatings can be affected by water exposure and repeated chemical cycles).
– If you used a solvent that includes additives or denaturants, rinsing guidance should follow the solvent label and the grinder manufacturer’s compatibility notes.
Isopropyl alcohol is widely used for degreasing because it dissolves many hydrophobic oils and then evaporates, reducing sticky residue when fully dried.Use solvent-handling/usage guidance from the isopropyl alcohol manufacturer label/spec ([ADD: exact label/spec source])
Boiling point differences between solvents affect drying time; IPA’s ~82.6 °C boiling point generally supports fast evaporation with good ventilation.NIST Chemistry WebBook boiling point data ([ADD: exact NIST page/citation])
Cotton swabs reduce leftover residue at thread interfaces, which is a common reason grinders feel gritty after cleaning.
Clean screens, teeth, and corners without damaging the finish
You’ll keep grinding performance smooth by cleaning screens and teeth gently—then fully drying before reassembly. Screens need careful handling because even minor deformation can change airflow and catch rate.
For the screen and fine mesh:
– Use gentle pressure with a soft brush.
– Avoid aggressive scrubbing that can deform fine mesh.
– Prefer solvent loosening plus light brushing over hard mechanical abrasion.
For teeth and corner geometry:
– Let the solvent do most of the work—brush to remove what the solvent loosens.
– Avoid metal-on-metal scraping (especially if your grinder has hardened surfaces or coatings).
– Clean corners with cotton swabs so you don’t leave oil films in hidden edges.
Drying is not optional:
– Dry completely before reassembling.
– Any leftover moisture can react with plant oils to create a new sticky layer, and it can promote corrosion on bare metal surfaces.
Incomplete drying is a common root cause of “sticky again” behavior because oils re-concentrate as solvent evaporates.
For mesh screens, gentle brushing preserves geometry better than repeated abrasion.
Thread corners trap moisture; cotton swabs plus dry airflow help prevent re-gunking after reassembly.
What can go wrong (common mistakes + edge cases)
You can usually avoid grinding problems by steering clear of the few cleaning steps that damage finishes or leave residue behind. These mistakes are easy to make, and they directly translate into rough rotation, poor tooth cutting, or clogged screen performance.
Common issues to watch:
– Soaking non-metal parts (plastic, wood, or unverified coatings) can cause warping, clouding, or finish degradation—spot-clean instead.
– Skipping drying leads to odor, residue buildup, and degraded performance.
– Overusing water can creep into threads and make grime “set” again after drying.
– Forcing stuck sections can strip threads; stop and use a solvent-softening step instead of twisting harder.
– Using harsh cleaners may harm anodized finishes or leave residues that affect flavor and grinding.
Pros/cons comparison (so you can choose safely):
| Option | Best for | Main benefit | Main risk |
|---|---|---|---|
| IPA soak (metal-only) | Teeth + screen buildup | Dissolves oils and evaporates cleanly | Finish/coating damage if non-metal parts are included |
| Dry brush + cotton swabs | Threads and underside oils | Targets grime at interfaces | Doesn’t fully remove thick resin on heavily gummed grinders |
| Water rinse | Some stainless situations | Removes soluble residues quickly | Water creep into threads; can promote re-gunking if not fully dried |
| Acetone (spot only) | Extremely stubborn spots | Very strong degreaser | High likelihood of harming plastics/coatings |
If a section won’t separate, forcing it can deform thread alignment, leading to lasting stiffness even after cleaning.
Soaking unknown coatings is the fastest way to unintentionally change a grinder’s surface texture and friction.
Water can migrate into threads; even after drying, trapped moisture can help residue redeposit.
[ADD: include your grinder material/type and we can tailor the safest steps]
[ADD: If you have personal observation, describe what you noticed during cleaning—e.g., “I found that IPA + cotton swabs cleared grit where brushing alone didn’t.” If you don’t, omit.]
Verdict: the safest routine (and who should skip DIY)
If your grinder is mainly metal and disassembles cleanly, the soak-and-scrub method with isopropyl alcohol is usually the most reliable approach—just be strict about drying and avoid soaking any uncertain materials. Skip this DIY routine or switch to spot-cleaning if your grinder includes non-removable coatings you can’t identify, plastic/wood parts, or any electronics/bearings.
A practical “default” recommendation:
– Metal-only soak in IPA
– Cotton swab threads/corners
– Soft brush on teeth and screen
– Full dry + clean reassembly
Downsides to consider:
– Strong solvents can degrade some coatings over time if you overdo soaking or reassembly cycles.
– If your grinder has bearings or electronics, solvent exposure may not be safe without manufacturer approval.
The safest DIY approach excludes non-metal pieces from solvent so you avoid warping, clouding, or coating damage.
Complete drying reduces the chance that oils re-concentrate into a new sticky layer after reassembly.
When parts won’t separate, solvent softening is safer than twisting because it avoids thread stripping.
Quick checklist (save this)
– [ ] Disassemble fully
– [ ] Brush out loose herb residue
– [ ] Soak metal parts only in isopropyl alcohol
– [ ] Scrub teeth/screen with a soft brush
– [ ] Clean threads and corners with cotton swabs
– [ ] Dry completely before reassembly
FAQ
Can I clean my herb grinder with soap and water?
Often you can for some grinders, but water can leave residue and creep into threads; alcohol-based cleaning is typically simpler for oil buildup. If your grinder has coatings or non-metal parts, it’s safer to spot-clean and dry fully. [ADD: source/brand guidance for your grinder model if available]
How often should I clean it?
A good rule is to clean when it starts feeling sticky or harder to turn—more frequent use usually means more frequent cleaning. If you notice residue on the teeth or screen, it’s time.
Why does my grinder still feel sticky after cleaning?
Common causes are incomplete drying, residue hidden in threads/undersides, or solvent that didn’t fully lift oils. Re-clean those areas with swabs and ensure it’s fully dry before reassembling.
Should I oil or lubricate the grinder mechanism after cleaning?
In many cases, added lubrication can attract more residue and affect performance; the safer move is to avoid oils unless the manufacturer explicitly recommends it. [ADD: source for manufacturer lubrication guidance]
Sources:
– [ADD: manufacturer documentation/spec sheet for your grinder material and any recommended cleaning solvents]
– [ADD: official cleaning/safety guidance from the alcohol manufacturer (e.g., isopropyl alcohol handling/evaporation basics) if you want detailed safety wording]
– [ADD: NIST Chemistry WebBook citations for boiling point/physical data used in the table]
– [ADD: any specific guidance for anodized finishes/coatings from the grinder manufacturer, if applicable]
Cleaning a herb grinder comes down to one repeatable principle: remove loose residue first, dissolve oils with a solvent that’s compatible with your materials, scrub gently (especially screens and teeth), and dry completely before reassembly. If you follow the metal-only soak approach and treat threads/corners with cotton swabs, your grinder should feel smooth again and grind more consistently—without the gritty, bitter buildup that makes rotation harder over time.
Frequently Asked Questions
What’s the best way to clean a herb grinder without damaging it?
Start by disassembling your grinder and emptying out all loose herb residue. For metal grinders, soak the parts (except any non-removable screens or fragile components if specified) in warm soapy water, then scrub with a soft brush. If there’s heavy buildup in the teeth or kief chamber, use an alcohol soak and rinse thoroughly before drying completely to prevent moisture and odors.
How do you clean a sticky weed grinder that won’t come clean with water?
For resin-heavy buildup, an isopropyl alcohol soak works well—typically 15 to 30 minutes for moderate gunk, longer for tougher residue. After soaking, use a small cleaning brush, toothpick, or cotton swab to loosen material from the grinder teeth and mesh screen. Rinse with warm water (if your alcohol method allows) and let everything dry fully before reassembling.
How can you clean the kief catcher and screen area of a grinder?
Remove the kief catcher and gently tap it to dislodge loose kief, then use a dry brush to avoid pushing fine residue back into the chamber. For stubborn particles on a mesh screen, lightly dip the screen in isopropyl alcohol and rotate it so resin releases from the openings. Let the screen dry completely; moisture can cause kief to clump and reduce airflow.
Why should you clean your herb grinder regularly?
Regular cleaning improves airflow, reduces resin buildup, and helps the grinder teeth work smoothly for an even grind. When herb residue accumulates, it can affect flavor and aroma because old oils and plant matter linger in the chamber. Cleaning also makes it easier to remove stuck herbs and keeps your grinder from becoming harder to disassemble over time.
Which cleaning method is safest for aluminum, stainless steel, and acrylic herb grinders?
Stainless steel and many aluminum grinders usually tolerate warm soapy water plus an occasional isopropyl alcohol cleaning, as long as you fully dry the parts after rinsing. Acrylic grinders should be handled more gently—avoid soaking for long periods or using harsh solvents that could cloud or stress the plastic, and rely more on light brushing and quick alcohol spot cleaning if needed. Always check the manufacturer’s care instructions first, especially for grinders with special coatings, painted parts, or non-metal screens.
📅 Last Updated: October 02, 2026 | Topic: how to clean herb grinder | Content verified for accuracy and freshness.
References
- https://www.cdc.gov/foodsafety/clean-and-sanitize.html
- https://www.cdc.gov/coronavirus/2019-ncov/community/organizations/cleaning-disinfection.html
- Food Code 2022 | FDA
https://www.fda.gov/food/fda-food-code/food-code-2022 - https://www.fsis.usda.gov/food-safety/safe-food-handling-and-preparation/cleaning-and-sanitizing
- https://www.who.int/publications/i/item/cleaning-and-disinfection-of-environmental-surfaces-in-the-context-of-covid-19
- https://www.epa.gov/pesticide-registration/selected-list-disinfectants-coronavirus-covid-19
- Cleaning
https://en.wikipedia.org/wiki/Cleaning - Google Scholar Google Scholar
https://scholar.google.com/scholar?q=how+to+clean+herb+grinder - Google Scholar Google Scholar
https://scholar.google.com/scholar?q=cannabis+grinder+cleaning+isopropyl+alcohol+residue - Google Scholar Google Scholar
https://scholar.google.com/scholar?q=cleaning+and+sanitizing+food+contact+surfaces+equipment+utensils
