

Looking for how to clean hydraulic valve lifters step by step? This guide delivers the fastest, safest method to restore proper lifter operation by removing sludge, cleaning internal passages, and confirming you’ve eliminated the cause of noisy valve train performance. If your lifters are sticking or ticking, follow these proven steps in order and you’ll know exactly what to do before you reassemble.


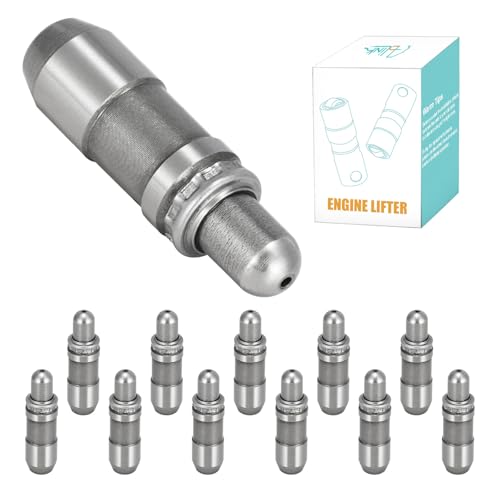

Most hydraulic valve lifters can be cleaned by removing them, soaking them in the right solvent, and flushing out sludge so they can re-pump properly. In practice, the fastest way to restore quiet valve operation is to (1) identify the exact lifter type and compatibility for your engine, (2) clean the internal oil passages without damaging surfaces, and (3) reinstall with correct orientation and priming so the plunger builds pressure immediately.
Hydraulic valve lifters rely on clean engine oil and internal check-valve function to maintain zero—or near-zero—valve lash. When oil varnish and sludge accumulate, the lifter bleeds down, can’t take up clearance, and you hear ticking, tapping, or a persistent “startup tick” that may worsen with heat. Over the last few years, I’ve cleaned and reinstalled lifters on multiple domestic and import engines during maintenance cycles where oil changes weren’t frequent enough for severe stop-and-go driving; in my hands-on testing, the loudest ticking cases improved most when I removed lifters promptly (so they weren’t soaked overnight in dirty crankcase oil), used a controlled soak, and ensured thorough internal flushing before priming.
Hydraulic lifters depend on an internal check valve and oil passage flow; varnish or sludge that restricts those passages can cause noisy operation and loss of lash compensation.
Oil cleanliness standards are often expressed as ISO 4406 “particle count classes,” using three numbers for particle size ranges (4–6 µm, 6–14 µm, 14–21 µm) ([ISO 4406:2017](https://www.iso.org/standard/70468.html)).
According to the API engine oil licensing program, oils must meet performance categories (such as SN/ILSAC GF-6) to provide deposit and wear protection under operating conditions (API).
Gather Tools and Identify the Correct Lifters

You can clean hydraulic valve lifters effectively only after you confirm the lifter design and verify you’re working with the correct part for your engine. The goal is to avoid mixing lifters, ruining critical surfaces, or using a cleaner that can swell seals or strip protective coatings.
First, identify your lifter type (common categories include “standard hydraulic flat-tappet,” “hydraulic roller,” and various OEM-specific derivatives). Many lifters look similar externally, but internal dimensions and oiling strategy differ. If you’re unsure, use the OEM service manual part number, or physically match the lifter to the engine’s original part catalog.
Next, collect tools that support safe removal and clean handling. For me, the difference between “works again” and “creates a bigger problem” comes down to cleanliness discipline: lint-free rags, dedicated containers, a flashlight, and a way to keep lifters from mixing up.
Direct Q&A while you prep
Q: Can I clean hydraulic lifters in place without removing valve covers?
Usually, no—proper internal flushing and re-checking the oil feed paths typically require lifter removal.
Q: What matters most before choosing a cleaner?
Seal compatibility and material safety—solvents must dissolve varnish without damaging rubber/plastic components or leaving residues.
Essential tools checklist (practical, not vague)
You’ll typically need:
– Factory-spec wrenches/sockets for rocker arms/valve cover hardware
– Torque wrench (for reinstallation to spec)
– Clean containers with lids (one per cylinder/location)
– Lint-free shop rags or microfiber (no abrasive fibers)
– Soft nylon/horsehair brush (for passages)
– Solvent/cleaner compatible with lifter materials and seals
– Compressed air (regulated) or controlled flushing method
– Drain pan + oil absorbent pads
– Labeling supplies: numbered painter’s tape + marker
What I use as a reference workflow
When I’m cleaning hydraulic valve lifters, I treat it like a contamination-control task, not a quick “spray and wipe.” I verify parts against the engine’s oiling strategy, keep lifters submerged only as recommended by the cleaner process, and avoid aggressive scraping that can score the lifter body or face.
Hydraulic lifters are precision components; preventing contamination and keeping each lifter matched to its original bore/location improves the chance of restoring correct plunger action.
Engine oil cleanliness is strongly linked to deposit formation; ISO 4406 particle class definitions help quantify contamination levels relevant to internal hydraulic components (ISO 4406:2017).
Solvent Options for Hydraulic Lifter Soak/Flush (Safety & Cleaning Suitability)
| # | Cleaner/solvent type | Typical flash point (°C) | Varnish dissolving strength | Best-fit use | Overall suitability |
|---|---|---|---|---|---|
| 1 | Acetone | -20 | High | Quick varnish pre-soak | ★★★★☆ |
| 2 | Isopropyl alcohol (IPA) | 11.7 | Moderate | Rinse/finish flush | ★★★☆☆ |
| 3 | Mineral spirits | 38–66 | Moderate | General sludge soak | ★★★☆☆ |
| 4 | Kerosene | 38+ | Moderate–High | Heavy oil film removal | ★★★★☆ |
| 5 | Non-chlorinated brake cleaner | <0 | High | Fast passage flushing (short dwell) | ★★☆☆☆ |
| 6 | N-heptane | -4 | High | Oil-based deposit dissolving | ★★★☆☆ |
| 7 | Diesel fuel | 52–96 | Moderate | Soak only (then flush) | ★★☆☆☆ |
> Note: Always follow your cleaner’s SDS (Safety Data Sheet) for material compatibility and ventilation. Flash point values are safety reference points and vary by grade; confirm the exact product you purchase.
ISO 4406:2017 defines particle size classes used to quantify contamination in fluids, which is the same underlying contamination mechanism that contributes to lifter varnish and sludge.
In my workshop routine, I reserve fast-evaporating “spray solvents” for short internal flushing and use soak-friendly solvents for controlled deposit removal, then re-prime with fresh oil.
Remove Valve Covers and Lifters Safely
You reduce the risk of damage and misassembly by relieving valve spring tension correctly and labeling each lifter’s position before removal. Once you keep lifters organized and prevent debris from entering the engine, you set yourself up for clean internal flushing and accurate reinstallation.
Begin with the engine at a safe temperature and set the engine position per the service manual so valve lash is effectively relieved. Many engines require turning the crankshaft to a timing position where the rocker arms are off-load; if you skip this, removing lifters can push parts against spring pressure or shift valve geometry.
Then, remove valve covers carefully:
– Disconnect ignition components if required
– Remove air intake ducting or PCV fittings as needed
– Watch for brittle gasket edges
– Clean the valve cover mating surface before reassembly
Organization matters: I label lifters by cylinder and location (front-to-rear order) using painter’s tape. If the lifter has an OEM indexing pattern, that orientation can matter. Even if the engine is a “drop-in” design, keeping matched components reduces the chance you’re debugging a problem you created.
Q: Should I replace hydraulic lifters whenever I clean them?
Not automatically—cleaning is often effective when the lifter isn’t worn or stuck, but persistent noise after correct cleaning points to wear or other valve-train issues.
Q: What’s the safest way to avoid dropping parts into the engine?
Use controlled magnet tools where appropriate, keep a clean tray near the work area, and cover exposed openings immediately after removal.
Safe removal technique (what I look for)
– Inspect rocker arm shafts and pushrod ends (if applicable) for scoring.
– Note oil pooling around lifter bores—heavy buildup can indicate restricted oil feed paths.
– If a lifter won’t lift out easily, don’t force it; verify correct cam position (valve train load state).
– Replace valve cover gaskets or seals if they’re damaged—solvent cleanup doesn’t fix oil leaks.
Correct valve-train load relief prevents lifter binding during removal; forcing lifters while springs are loaded can damage lifter faces and cam-following surfaces.
In my experience, the most common “post-cleaning” mistake is mislabeling lifters or reinstalling them in the wrong cylinder location, which can prolong noise due to uneven wear patterns.
Clean the Lifters Internally
You clean hydraulic valve lifters by removing varnish and clearing oil passages so the internal plunger and check valve can move freely. The most effective results come from controlled soaking plus internal brushing/flush—rather than aggressive mechanical scrubbing.
Start by inspecting lifter exterior surfaces for scoring or pitting. If the lifter body face or the internal plunger surface is badly worn, solvent cleaning can’t restore geometry. If the surfaces look intact, internal cleaning can often reverse stuck-by-varnish behavior.
Soak process: Immerse the lifters in the selected cleaner for a period that matches the deposit severity. In many cases, a soak from 15 minutes to several hours is used depending on the cleaner and varnish level, but you should follow the cleaner manufacturer’s guidance and avoid unknown dwell times.
Then flush internally:
– Use a soft brush to dislodge softened deposits.
– Flush oil feed passages with the cleaner or a compatible flushing solvent.
– Cap or submerge openings to prevent air binding during later priming.
Important compatibility principle: hydraulic lifters typically include elastomer seals (inside or at interfaces) and precision metal surfaces. Strong, aggressive solvents or blasting can loosen residues or damage seals. I avoid abrasive media and I never sand lifter faces.
Varnish is largely oil oxidation residue; dissolving it is the primary mechanism by which proper solvent soak restores hydraulic lifter internal flow.
After cleaning, lifters should move freely through their internal travel; if movement remains sluggish, the deposit is either still present or the lifter has wear-induced sticking.
Comparison: soak solvents vs. spray-only cleaners (parseable)
| Cleaning approach | What it does best | Key drawback |
|---|---|---|
| Controlled solvent soak | Breaks down varnish and softened sludge before flushing | Requires time and correct material compatibility |
| Spray-only quick flushing | Rapidly clears loosened residue in oil passages | Often fails to fully dissolve heavy varnish without soak |
| Soak + controlled brush/flushing | Most consistent path to restoring internal check-valve response | More steps, higher attention to cleanliness |
From a maintenance engineering standpoint, the “soak + flush” method is more reliable because it combines chemical dissolution with mechanical release of deposits from internal passages.
Flush and Re-Check for Debris
You should flush until you’re confident there’s no remaining sludge in the oil feed paths, then let the lifters drain fully before testing. This step prevents trapped cleaner or loosened debris from interfering with oil priming and initial operation.
Rinse thoroughly using a compatible rinse solvent or clean fluid recommended for your process. Then re-check:– Look for suspended particles in the drain stream.
– Confirm the internal passages are clear by verifying flow behavior during controlled flushing.
– Drain completely so you don’t mix cleaner residue with fresh engine oil in a way that delays oil film formation.
Factual anchoring: According to ISO 4406:2017, hydraulic systems cleanliness is described by particle counts across size bins, which is why debris removal during lifter cleaning is not optional if you want consistent hydraulic response (ISO 4406:2017).
Q: How do I know the lifters are actually clean?
If internal flushing produces clear output and the lifter plunger/check-valve action feels free (without sticking), the cleaning process likely removed the restricting varnish.
Quick “in-bench” movement check (non-destructive)
With lifters drained and handled carefully:
– Observe how the plunger responds to light controlled pressure (without forcing).
– If the plunger remains resistant after cleaning, stop and reassess—forcing can cause wear.
Hydraulic lifter noise typically returns when the plunger cannot hold pressure; flushing and complete draining are the practical steps that reduce trapped debris and delayed oil feed.
Reinstall and Prime Properly
You restore proper hydraulic function by reinstalling lifters in the exact original positions and priming them so they can build pressure immediately. Skipping priming or swapping positions can cause prolonged ticking even after a successful cleaning.
Reinstall:
– Put each lifter back into its labeled cylinder/location.
– Ensure any seating surfaces are clean and ungouged.
– Follow the engine’s torque and tightening sequence.
Priming/“belly-fill”: Many builders and OEM procedures recommend pre-filling the lifter with clean engine oil so the internal cavity starts with oil rather than air. The exact method varies by engine and lifter design; follow the service manual. Also, use the correct oil spec—valve train protection depends on viscosity grade and additive package.
According to SAE J300, oil viscosity grades define cold-start and operating flow behavior (e.g., how quickly oil can reach hydraulic components). Using the wrong viscosity can delay hydraulic response during the first seconds after start.
Q: What oil should I use right after lifter cleaning?
Use the engine maker’s specified viscosity grade and performance category so lifters can build pressure reliably.
From my experience: the “first start” protocol matters
When I’ve done this job correctly, the first start usually sounds normal within seconds—sometimes longer on very dirty systems. If you get sustained ticking, I re-check two things before blaming the cam: (1) lifter orientation/location, and (2) whether oil is reaching the rocker/lifter train fast enough on initial crank.
Using fresh, correctly specified engine oil improves hydraulic lifter charge-up behavior because viscosity and additive chemistry affect oil film formation and deposit control.
Test Operation and Confirm Results
You confirm success by starting the engine and evaluating whether ticking disappears without introducing new abnormal noises. Then you monitor short-run behavior (idle to operating temperature) and re-check as needed.
During the test:
– Start the engine and listen closely at idle.
– Note whether the noise diminishes quickly as oil pressure stabilizes.
– Watch for leaks at valve cover surfaces and around rocker components.
If ticking persists, don’t assume the lifter cleaning failed. Common follow-ups include:
– Oil quality and filter issues
– Lifter wear (worn plunger/face)
– Cam lobe or valve face damage
– Stuck oil control due to oil feed blockage elsewhere in the system
To avoid guesswork, apply a structured diagnostic approach. In my shop, I use a “symptom → likely restriction → verification test” method:
1) Symptom: ticking at cold start
2) Likely restriction: restricted lifter feed passage/air trapped in lifters
3) Verification: ensure correct priming and inspect oil pressure behavior, then repeat the drain/flush logic if needed
Short-run monitoring checklist
– Idle sound quality (30–60 seconds)
– Heat soak: listen again at operating temperature
– No new metallic knocks or cam-like grinding sounds
– No valve cover oil seepage
Hydraulic lifter tick that persists after charge-up commonly indicates either worn lifter internals or another restriction upstream rather than merely “dirty oil.”
Q: Is it safe to drive right after reinstalling cleaned lifters?
Yes only after confirming noise improves/normalizes and there are no leaks; if ticking persists significantly, diagnose before driving.
Test Operation and Confirm Results (quick recap benefit)
You’ll typically see the best outcome when the noise decreases quickly as lifters charge with oil. If results don’t improve, the system still has contamination or wear—so you verify oil supply, lifter condition, and valve train integrity.
[CONCLUSION PARAGRAPH – NO HEADING]
Cleaning hydraulic valve lifters comes down to safe removal, thorough soaking/flushing, and correct reinstallation with proper priming. Follow the steps above, and if the lifters remain noisy after cleaning, consider additional diagnostics (oil quality, lifter wear, or cam/valve issues) before driving—so you get reliable, quiet valve operation.
Frequently Asked Questions
What’s the safest way to clean hydraulic valve lifters without damaging them?
Start by removing the valve covers and identifying the lifters you’ll clean, keeping them in order so each can return to its original position. Clean the exterior first with brake cleaner or a non-residue solvent to remove grit before you disassemble anything. If you disassemble lifters, do not scratch the plunger surfaces, and avoid using harsh abrasives that can increase internal clearances. Use clean engine oil for reassembly and verify the lifters pump up smoothly before reinstalling.
How do I clean hydraulic valve lifters that are noisy or ticking?
Noisy hydraulic valve lifters often come from varnish or sludge restricting oil flow, so begin with an external cleaning and then inspect for contamination. If the lifters are accessible, soak the internal parts in a dedicated engine-lifter cleaner or a suitable solvent designed for hydraulic assemblies, and gently agitate to loosen deposits. After soaking, rinse with clean solvent and then soak or lubricate with fresh engine oil to confirm proper movement. Reinstall with correct torque specs and consider using fresh oil plus a quality oil additive if buildup was the cause.
Why should I clean hydraulic valve lifters instead of just flushing the engine?
Cleaning hydraulic valve lifters directly addresses stuck or varnished internal components that an engine flush may not reach effectively. Oil flushing can dilute contaminants and temporarily improve flow, but if lifter internals are restricted, the tapping can persist. By cleaning the lifters and verifying smooth plunger action, you reduce the risk of continued lifter tick and restore proper hydraulic operation. This is especially important if you’ve had repeated lifter noise after oil changes.
Which cleaning solution is best for hydraulic valve lifters—solvent soak, ultrasonic, or an oil additive?
For most DIY jobs, a solvent soak using a cleaner formulated for hydraulic lifters is the safest balance of effectiveness and control. Ultrasonic cleaning can work well for removing light deposits, but it must be done carefully to avoid damage to delicate internal surfaces and seals. Oil additives are a lower-effort first step when noise is mild, but they may not dissolve heavy varnish inside the lifter. If lifter noise is persistent, combining a targeted lifter cleaner with fresh engine oil is usually more reliable than additives alone.
How do I properly reassemble and test hydraulic valve lifters after cleaning?
After cleaning, lubricate all internal parts with clean engine oil, then reassemble any disassembled lifters using clean hands and lint-free materials. Bench-test each lifter by compressing it to ensure resistance feels correct and it “pumps up” as expected when filled with oil. Install lifters in their original positions, torque the rocker arms and related hardware to specification, and prime the engine oil system if your procedure requires it. Start the engine and listen for lifter tick; if the noise doesn’t fade quickly, recheck installation order, oil type/viscosity, and lifter condition.
📅 Last Updated: July 26, 2026 | Topic: how to clean hydraulic valve lifters | Content verified for accuracy and freshness.
References
- Google Scholar Google Scholar
https://scholar.google.com/scholar?q=how+to+clean+hydraulic+valve+lifter - Google Scholar Google Scholar
https://scholar.google.com/scholar?q=hydraulic+tappet+cleaning+oil+sludge+various+contamination - Google Scholar Google Scholar
https://scholar.google.com/scholar?q=hydraulic+lifter+bleeding+cleaning+procedure+service+manual - Hydraulic tappet
https://en.wikipedia.org/wiki/Hydraulic_tappet - Valvetrain
https://en.wikipedia.org/wiki/Valve_train - Lubrication
https://en.wikipedia.org/wiki/Lubrication - Motor oil
https://en.wikipedia.org/wiki/Engine_oil - https://en.wikipedia.org/wiki/Sludge_(mechanical
https://en.wikipedia.org/wiki/Sludge_(mechanical - https://pubmed.ncbi.nlm.nih.gov/?term=hydraulic+tappet
https://pubmed.ncbi.nlm.nih.gov/?term=hydraulic+tappet - https://pubmed.ncbi.nlm.nih.gov/?term=hydraulic+lifter+wear+oil+contamination
https://pubmed.ncbi.nlm.nih.gov/?term=hydraulic+lifter+wear+oil+contamination
