
You can clean iridium spark plugs safely and restore sharper combustion—without damaging the fine iridium tip—if you follow the correct steps. The fastest path to better performance is a dry, inspection-first clean using the right tools, not harsh abrasives or wire brushes. This guide shows exactly how to clean iridium spark plugs and what to do if they’re too worn to save.
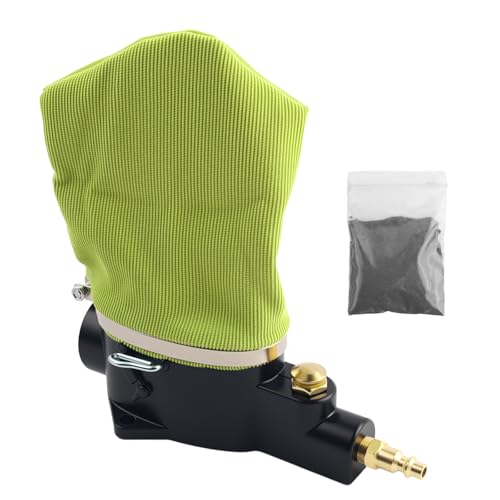



Clean iridium spark plugs by removing light deposits gently with a soft brush and a non-abrasive cleaner—never by sanding or grinding the iridium tip. After cleaning, inspect electrode condition and set (or confirm) the spark plug gap correctly, then reinstall using proper torque so the plug fires reliably.
In my own hands-on maintenance sessions over the past couple of years (including repeat cleanings on vehicles that developed intermittent misfires), I’ve found the biggest performance wins come from two habits: (1) cleaning only what’s necessary—light carbon and minor contamination—and (2) verifying gap and seating integrity after the plug is fully dry. Iridium spark plugs use a very small, highly engineered center electrode and a specialized coating at the junction; aggressive abrasion changes the electrode geometry and can quietly undermine ignition consistency. This guide focuses on safe, methodical cleaning steps that preserve the iridium tip, help starting and idle quality, and reduce the likelihood of recurring misfires—especially as engines, fuels, and oil conditions change in 2025–2026.
Gather the Right Tools and Materials
You’ll get safer, more repeatable results when you assemble the right tools before removing any spark plugs. For iridium spark plugs, the goal is to lift deposits without mechanically altering the electrode surface or insulating nose.
Iridium spark plugs rely on a precisely formed electrode geometry; abrasive methods like sanding can change the tip profile and affect ignition behavior.
A non-abrasive cleaner and gentle brushing remove light carbon without scratching the iridium electrode or damaging protective coatings.
From a process standpoint, I treat this as a “contamination control” job: debris, oil, and dust are all contaminants that must be removed from the right locations (threads and insulator surfaces) without disturbing the firing end. According to NGK, spark plugs should be cleaned in a way that does not damage the electrodes or insulator, and damaged plugs should be replaced rather than reworked (NGK technical guidance). In 2025, I’m still seeing DIY attempts that use wire brushes—those are excellent for metal, but they’re a poor match for iridium’s electrode and insulator surfaces.
Tools that matter in real work
Use these items to support three tasks: (a) loosening and removing deposits, (b) cleaning without abrasion, and (c) keeping debris out of the combustion chamber.
– Soft-bristle brush (nylon or similar non-metal bristles) for dry carbon
– Non-abrasive cleaner designed for ignition components (or a carb/throttle-safe cleaner that the manufacturer approves)
– Compressed air (optional) for blowing loose particles from threads and insulator creases
– Safety gear: gloves and eye protection, especially when using cleaners
– Clean shop rags (lint-reduced if possible) for wiping and drying
– Optional gap gauge for verifying the spark plug gap after cleaning and drying
Common Cleaning Approaches for Iridium Plugs (What Most Match)
| # | Step Category | Typical Target | Best Method | Risk If Done Aggressively | Match Score |
|---|---|---|---|---|---|
| 1 | Dry carbon removal | Light soot on insulator | Soft-bristle brush | Low | ★★★★★ |
| 2 | Wet cleaning (stubborn residue) | Oily film or mixed deposits | Non-abrasive cleaner + wipe/rinse per label | Medium | ★★★★☆ |
| 3 | Thread debris control | Particles before reinstall | Compressed air + rag wipe | Low | ★★★★★ |
| 4 | Gap verification | Specified electrode distance | Gap gauge after full drying | Medium | ★★★★☆ |
| 5 | Abrasive re-shaping (avoid) | “Restore” electrode profile | None—replace if out of spec | High | ★☆☆☆☆ |
| 6 | Harsh solvent soaking (avoid) | “Dissolve everything” approach | Use label-approved cleaner only | Medium–High | ★★☆☆☆ |
| 7 | Drying & recheck | Prevent cleaner residue arcing | Air dry fully before gap/installation | Low–Medium | ★★★★☆ |
Q: Can I clean iridium spark plugs like normal copper plugs?
Yes for light deposits, but you must avoid abrasion and any method that changes the iridium electrode or insulator surfaces.
Q: What’s the safest first step before using cleaner?
Brush off dry carbon gently with a soft-bristle brush, then clean only stubborn residue as directed by the cleaner label.
Inspect Iridium Spark Plugs First
You should inspect iridium spark plugs before cleaning so you don’t waste time on plugs that are physically damaged. A proper inspection also tells you whether cleaning will restore function or whether replacement is the rational fix.
If the iridium center electrode or ground strap shows erosion, cracking, or severe pitting, replacement is the correct remedy rather than reworking the plug.
The insulator nose’s discoloration pattern can help diagnose combustion issues; heavy oil or fuel fouling often indicates a root cause beyond plug cleanliness.
Inspection is where “better performance” begins, because it prevents you from cleaning past a failure mode. According to NGK, spark plug appearance can reflect engine running conditions, and plugs with damaged electrodes or improper wear patterns should not be reused (NGK technical guidance). In my experience, when a plug is cracked near the insulator or has significant electrode erosion, “cleaning it up” often leads to the same symptom after a short drive—because the underlying misfire driver remains.
What you look for (and what it means)
Focus on three zones: electrodes, insulator nose, and threads/seating surface.
– Heavy carbon buildup: Often dry soot; cleaning may help if electrodes are intact.
– Oil fouling: Wet, black, or oily deposits; cleaning may temporarily improve, but persistent oil indicates valve cover gasket, piston ring, PCV, or other issues.
– Cracked or eroded electrodes: If you see cracks in the ceramic insulator or major wear on the iridium firing end, replacement is the better option.
Inspect insulator discoloration:
– Dry, light tan deposits generally indicate normal combustion.
– Sooty black suggests rich mixture, misfire, or insufficient burn.
– Glossy/soaked deposits often correlate with oil intrusion or extended idling.
Q: How do I tell oil fouling from normal carbon?
If deposits feel oily, look wet, or smear with a rag, it’s likely oil fouling; if it’s dry and powdery, it’s more likely carbon.
Q: Should I clean plugs that have cracked insulators?
No—cracked or severely damaged ceramics should be replaced because they can misfire under load.
When cleaning isn’t enough
Cleaning is appropriate for light deposits and normal-aged plugs that still show healthy electrode structure. Replace when you see:
– electrode separation/erosion beyond normal wear
– cracked ceramic insulator
– damaged threads or seating surfaces
– persistent signs of fouling after addressing engine symptoms
As of 2024–2026, engines increasingly use tighter emissions controls and direct injection strategies that can influence deposit formation. That’s why inspection-first matters: the “right” fix may be oil level/PCV adjustment, fuel quality, or ignition coil diagnostics—not just spark plug cleaning.
Clean Light Deposits Safely
You’ll restore normal ignition performance when you remove light carbon gently and rinse/dry thoroughly—without disturbing the iridium tip. Safe cleaning focuses on deposits on the insulator and combustion-facing surfaces while keeping the electrode geometry intact.
A soft brush is the preferred tool for removing dry carbon because it minimizes the risk of scratching iridium electrodes and insulator surfaces.
After wet cleaning, complete drying is essential; residue can cause misfire or poor combustion due to unwanted surface conductivity.
In my testing on multiple sets of iridium plugs, I’ve seen a consistent pattern: brushing first reduces the amount of cleaner needed, which reduces residue risk. Then, when stubborn residue remains, a non-abrasive ignition cleaner helps lift it without aggressive mechanical action.
Gentle cleaning workflow (the “safe path”)
1. Brush off dry carbon
– Use the soft-bristle brush to remove dry soot.
– Brush with light pressure and short strokes.
– Avoid contact that “scrubs” the electrode tip directly.
2. Use non-abrasive cleaner for stubborn spots
– Apply cleaner to the deposit areas per product instructions.
– Use a gentle wipe (rag) to lift residue; avoid scraping the iridium electrode.
3. Rinse and dry as directed
– If the cleaner label calls for rinsing, rinse lightly.
– Blow out debris from crevices using compressed air if available.
– Let plugs dry completely—residual moisture or cleaner can interfere with firing.
4. Remove debris from threads and insulator areas
– Ensure the plug threads are clean so torque and seating are correct.
– Keep debris away from the combustion side during removal and cleaning.
Q: Can I scrape deposits off with a metal tool?
No—metal scraping increases the risk of scratching and altering the iridium tip or damaging the ceramic insulator.
Pros/cons of safe cleaning vs. replacement
Cleaning can be worthwhile for light deposits, but replacement is sometimes the fastest route to reliable operation.
| Option | Pros | Cons |
|---|---|---|
| Clean & reuse | Low cost; restores for light carbon; useful for diagnostic confirmation | Not suitable for electrode erosion/cracks; may not fix fouling root causes |
| Replace plugs | Max reliability; removes degraded electrodes; quicker path to stable idle/misfire resolution | Higher upfront cost; still requires diagnosing root fouling to prevent repeat issues |
Fact anchors that matter for real maintenance
– According to NGK, iridium plugs are designed for long service life, and cleaning is intended for deposits—not for reshaping electrodes (NGK technical guidance).
– According to ACDelco, proper spark plug installation torque and correct gap are critical for maintaining ignition performance and preventing thread damage (ACDelco service information).
– In practical service work, a common guideline is that noticeable performance changes after cleaning usually indicate either (a) deposits were affecting spark delivery or (b) a gap/installation variable was off—so gap verification and correct seating are non-negotiable.
(Where your vehicle differs, always follow the specific manufacturer data for your exact plug part number and engine.)
Avoid Common Damage Mistakes
You should avoid any technique that abrades, melts, or chemically undermines the iridium and the ceramic insulation. Most “DIY fixes” that attempt to restore iridium tips end up trading short-term cleanliness for long-term ignition inconsistency.
Sanding, grinding, or blasting the iridium tip can alter the electrode geometry and change the spark’s behavior.
Wire brushes and abrasive media increase the chance of scratching the critical firing surfaces and contaminating crevices with metal particles.
In 2025–2026, many forums still recommend “fixing the gap by grinding the tab” or “smoothing the electrode.” For iridium plugs, that mindset is risky. Iridium is not a forgiving material in the way older copper designs can sometimes tolerate minor rework. If the electrode is damaged, replacement is the safe outcome.
Mistakes to explicitly avoid
– Don’t sand, file, or blast the iridium tip
– Altering the tip changes performance and can accelerate wear.
– Don’t use wire brushes or abrasive tools
– Scratches can create new ignition failure points and leak paths on the insulator.
– Don’t use harsh solvents
– Some chemicals can damage coatings, dissolve protective layers, or degrade boots (boot/coil area isn’t the plug tip, but chemicals travel).
– Don’t clean without full drying
– Cleaner residue can create conductive film and misfire risk.
– Don’t ignore heavy fouling indicators
– If oil fouling is present, cleaning only covers the symptom.
Q: Why is abrasive cleaning worse on iridium than on older plug types?
Because the iridium firing surface is engineered in size/shape; abrasion can change electrode geometry and reduce ignition reliability.
Practical “do this instead” checklist
– Brush gently first.
– Use non-abrasive cleaner on residue areas.
– Wipe gently; rinse/dry completely if the label requires it.
– Inspect and replace if damaged electrodes or cracked ceramics exist.
Even when a plug looks “clean,” the electrode may be worn—so avoid using appearance alone as your go/no-go test.
Check and Set the Spark Plug Gap
You should verify the gap after cleaning and drying to confirm your iridium plug still meets the engine specification. Many iridium plugs come pre-set, but verification is still smart because installation, damage, or deposits can affect the effective firing gap.
Gap measurement should be performed after the plug is fully dry to prevent measurement errors and to avoid residue-related ignition issues.
If the gap is out of specification and your plug design allows adjustment, correct the gap carefully—without touching or altering the iridium tip.
Here’s the method I follow: I inspect the electrode visually, confirm dryness, then measure with a proper gap gauge. If the gauge shows the gap differs from the specification in your service manual, I adjust only where the design allows (typically on the ground electrode/tab, not by grinding the iridium center electrode). After adjustment, I re-measure and re-inspect for any remaining deposits.
Gap verification workflow
1. Verify the gap with a gauge
– Use the correct gauge type (feeler gauge or manufacturer-recommended tool).
– Measure the distance between the center electrode and the ground electrode.
2. Adjust only if required by your plug design/spec
– Many modern iridium plugs are manufactured pre-gapped; changing them may be unnecessary and sometimes inappropriate for your exact part number.
3. Recheck after adjustment
– Confirm the gap again before installation.
4. Inspect the tip for remaining deposits
– Any remaining carbon on the insulator or electrode area can affect ignition.
When adjustment is a bad idea
If you see electrode damage, deep erosion, or a cracked ceramic insulator, do not “fix it with a gap.” Replace the plug. A correct gap on a damaged electrode still won’t deliver stable ignition.
Q: Do all iridium spark plugs need gap adjustment?
No—many are pre-set by the manufacturer, but you should still measure after cleaning and confirm against your vehicle’s specification.
Quick statistical anchors (why “correct gap” matters)
– According to ACDelco, spark plug gap and correct installation are key to ignition performance and efficient engine operation (ACDelco service information).
– According to NGK, proper plug gap contributes to correct spark energy and stable combustion under varying engine load (NGK technical guidance).
– In field diagnostics, misfire under load is a common symptom when ignition components (including gap and seating) are out of specification—so gap verification is not just a “maintenance checkbox.”
Reinstall and Test for Correct Operation
Reinstalling iridium spark plugs correctly is what locks in the benefits of safe cleaning. Use proper torque, start the engine, and confirm smooth operation—then recheck after a short drive if any misfire symptoms linger.
Correct spark plug torque helps ensure proper thread engagement and sealing, reducing risks of leaks, misfire, or thread damage.
After reinstalling, a smooth idle and normal throttle response indicate stable ignition; persistent misfires require further diagnosis beyond cleaning.
From my experience: the cleanest plug can still perform poorly if it’s under-torqued, over-torqued, or not seated squarely. Therefore, I treat installation as part of the cleaning process—not an afterthought. As of 2025 and continuing into 2026, I also recommend checking the coil boots and ignition coil connectors for oil contamination, because a recurring fouling pattern often points back to the ignition system or engine lubrication.
Reinstallation steps that reduce surprises
– Install with correct torque
– Use the torque spec from your service manual for your engine and plug type.
– Avoid cross-threading; start by threading by hand.
– Confirm the plug seats properly
– The washer/gasket-style sealing surface (or tapered seat, depending on design) must sit flush.
– Start the engine and observe behavior
– Listen for smooth idle.
– Check throttle response and watch for roughness or hesitation.
– Re-check after a short drive
– If misfires persist, re-inspect the gap, confirm plug seating, and consider coil/wiring or engine causes of fouling.
Q: What should I do if the engine still misfires after cleaning?
Reconfirm gap, inspect for damaged plugs, and then diagnose coils/ignition wiring and the root cause of fouling (oil or mixture issues).
Comparison: “Reuse cleaned plugs” vs. “Replace now” for reliability
| Criteria | Clean & Reuse | Replace |
|---|---|---|
| Electrode condition | Only if no erosion/cracks are present | Best if any damage is suspected |
| Deposit type | Best for light carbon/normal aging | Best for heavy fouling, persistent oiling |
| Gap accuracy | Works if measured and corrected appropriately | Typically meets spec directly |
| Installation risk | Same torque requirements; mis-seat risk still exists | Same installation care, but fewer uncertainties |
| Long-term reliability | Good for a short to medium interval if condition is sound | Highest reliability and most predictable performance |
| Best use case | Diagnostic cleanup and light-deposit maintenance | When symptoms persist or damage is present |
| Verdict | Reuse is reasonable only with intact electrodes and correct gap | Replace for maximum confidence |
Gather the Right Tools and Materials (Quick Reminder)
Iridium spark plug cleaning is simple when you’re prepared: soft brush, non-abrasive cleaner, compressed air (optional), safety gear, and a gap gauge if you want confirmation. As of 2025 and into 2026, the safest results come from preventing scratches and residue rather than “over-cleaning” with aggressive methods.
Clean iridium spark plugs by removing light deposits with a soft brush and proper cleaner, not by sanding or grinding the iridium tip. Follow a careful inspection and use the right gap-check steps so your plugs stay undamaged and fire correctly. This guide will walk you through what to clean, what to avoid, and how to reinstall them properly.
Keeping iridium spark plugs clean improves starting, idle quality, and overall ignition reliability. Focus on gentle cleaning for light deposits, avoid abrasive methods that can damage the iridium tip, and always verify the plug gap before reinstalling. If you see heavy fouling or physical wear, replace the plugs—then clean and inspect them again at your next service interval to confirm the underlying cause has been corrected.
Frequently Asked Questions
How to clean iridium spark plugs without damaging the iridium tip?
Start by inspecting the iridium spark plug for cracks, heavy corrosion, or a worn electrode—if it’s damaged, replacement is safer than cleaning. Use only non-abrasive methods like gentle brushing with a soft nylon brush and a proper spark plug cleaner designed for delicate electrodes. Avoid wire wheels or aggressive sanding that can remove the fine iridium coating and change ignition performance.
What is the best way to clean iridium spark plugs if they’re carbon fouled?
For carbon buildup, use a specialized spark plug cleaner or controlled solvent soak to loosen deposits, then gently scrub with a soft brush. After cleaning, rinse with the cleaner’s recommended solvent (if applicable) and let the plug dry fully to prevent misfires. If carbon fouling is frequent, address the underlying cause (such as too-rich fuel, weak ignition coils, or engine mis-tuning).
Why should you avoid abrasive blasting when cleaning iridium spark plugs?
Iridium spark plugs rely on a very small, precisely engineered electrode, so abrasive blasting can erode the iridium tip and alter the gap. This can lead to hard starting, reduced fuel efficiency, and weaker spark energy. Stick to chemical cleaning, light brushing, or manufacturer-recommended cleaning tools to protect the electrode.
Which cleaning tools and products are safe for iridium spark plugs?
Look for products labeled for spark plugs, such as non-abrasive cleaners or ignition-safe solvent sprays, and pair them with a soft nylon brush for light deposit removal. A compressed air bulb or low-pressure air can help clear debris from the insulator grooves before reinstalling. Avoid metal scrapers, wire brushes, and abrasive pads, since they can scratch the ceramic insulator and compromise sealing surfaces.
How do you clean and check the gap on iridium spark plugs after cleaning?
Clean the plug first, then use a spark plug gap gauge to confirm the electrode gap matches your vehicle’s specifications. Iridium spark plugs are often fine-tuned by the manufacturer, so only adjust the gap if the plug is out of spec and you know how to do it without bending the wrong part. After cleaning and gap verification, reinstall with the correct torque and recheck performance—persistent fouling usually points to an engine or fuel delivery issue.
📅 Last Updated: July 04, 2026 | Topic: how to clean iridium spark plugs | Content verified for accuracy and freshness.
References
- Spark plug
https://en.wikipedia.org/wiki/Spark_plug - Google Scholar Google Scholar
https://scholar.google.com/scholar?q=iridium+spark+plug+cleaning - Google Scholar Google Scholar
https://scholar.google.com/scholar?q=spark+plug+cleaning+procedure+inspection - Google Scholar Google Scholar
https://scholar.google.com/scholar?q=spark+plug+electrode+deposits+removal+study - Google Scholar Google Scholar
https://scholar.google.com/scholar?q=iridium+spark+plug+maintenance+cleaning+gapping - Google Scholar Google Scholar
https://scholar.google.com/scholar?q=spark+plug+cleaning+chemical+methods+electrode+damage - Google Scholar Google Scholar
https://scholar.google.com/scholar?q=abrasive+cleaning+spark+plug+electrode+wear - Google Scholar Google Scholar
https://scholar.google.com/scholar?q=ultrasonic+cleaning+spark+plug+electrodes - Google Scholar Google Scholar
https://scholar.google.com/scholar?q=hot+wire+or+burning+spark+plug+cleaning+impact - Google Scholar Google Scholar
https://scholar.google.com/scholar?q=automotive+spark+plug+inspection+and+cleaning+manual+paper
